Hello friends! I hope you’re having a wonderful December and finding time to do some fun festive things. I’ve been busy decorating and getting ready for Christmas, but I thought I would take a quick break and pop in and share my Candy Store using the gorgeous new Tim Holtz Christmas idea-ology. You can catch the launch replay and makes over on Tim’s blog.
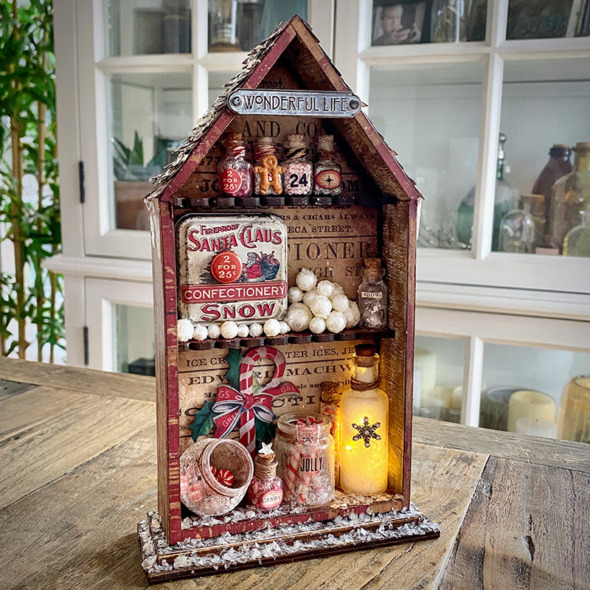
I love candy cane everything and my obsession runs deep (think pumpkins)! I was very excited to see this years Christmas idea-ology release with candy cane stripes appearing in the backdrops, ephemera and the amazing confectionery! This was the starting point for my candy store. So grab a big cup of hot cocoa and a candy cane and let’s get into some of the details…
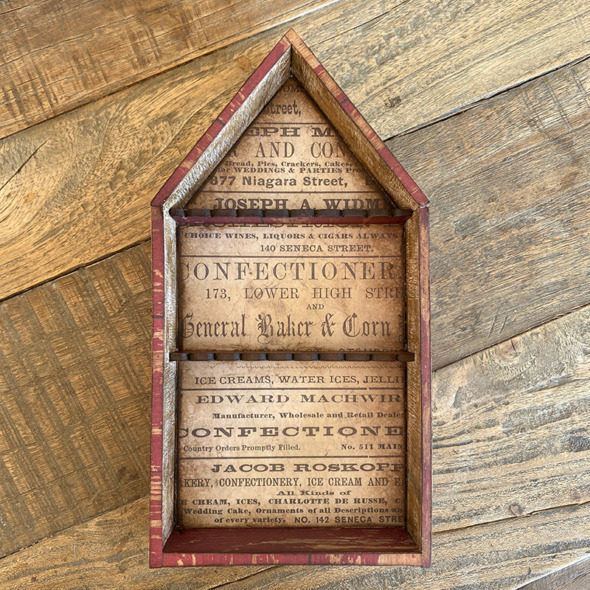
I covered an idea-0logy vignette shrine with papers from the Christmas backdrops set. I love the size of the backdrop papers and the Christmas selection is simply delicious, you may want to pick up 2 packs, one to use and one to stroke! Just saying!!
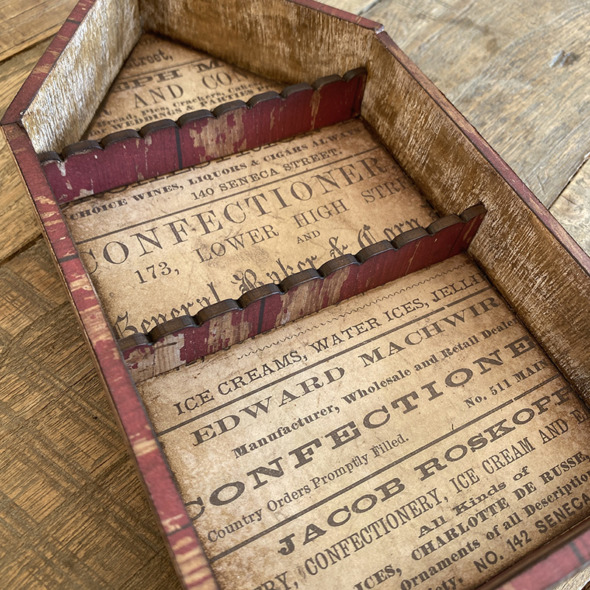
I created a couple of shelves for my vignette shrine using etcetera thickboard scalloped trims and the matching trims thinlits dies. The trims die set allows me to die cut trims that perfectly cover the thickboard pieces, game changer for me as I used to cut them by hand. Use distress collage medium to glue into place.
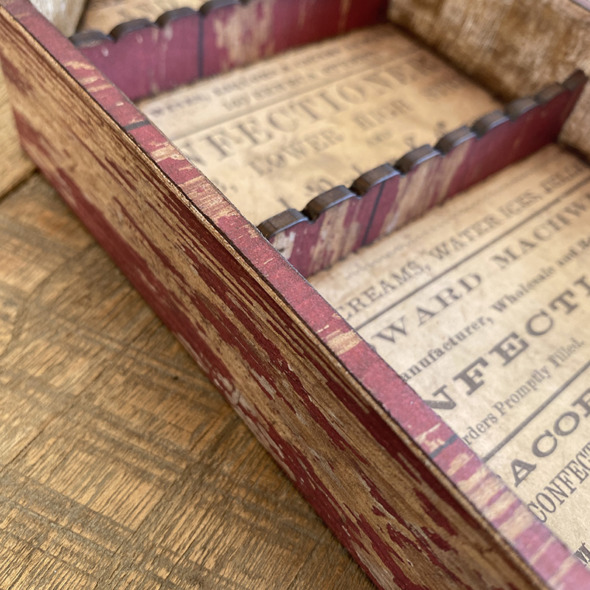
I covered the side of the vignette shrine in matching paper from the Christmas backdrops pack. I love how weathered the paper looks. YUM!
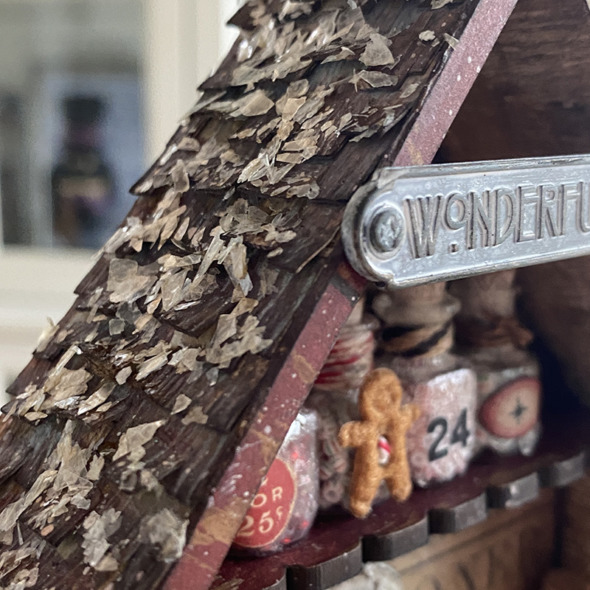
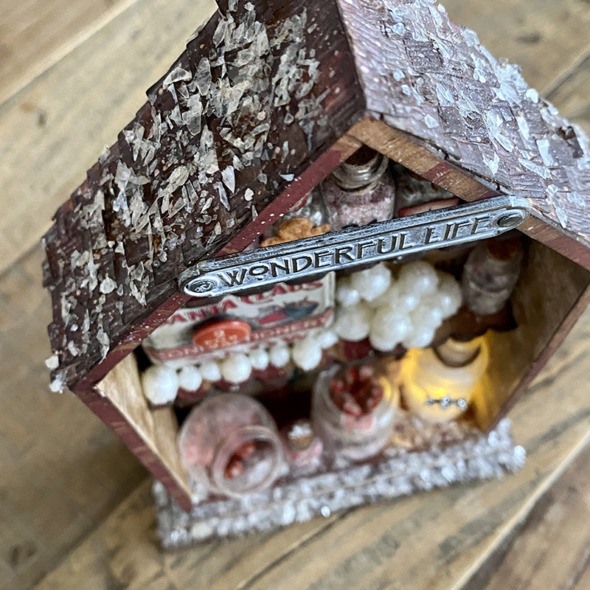
I covered the roof by die cutting roof panels with a die from the village collection thinlits die set from idea-ology kraft stock and embossing with the lumber 3D folder. Glue into place with distress collage medium and cover with distress mica.
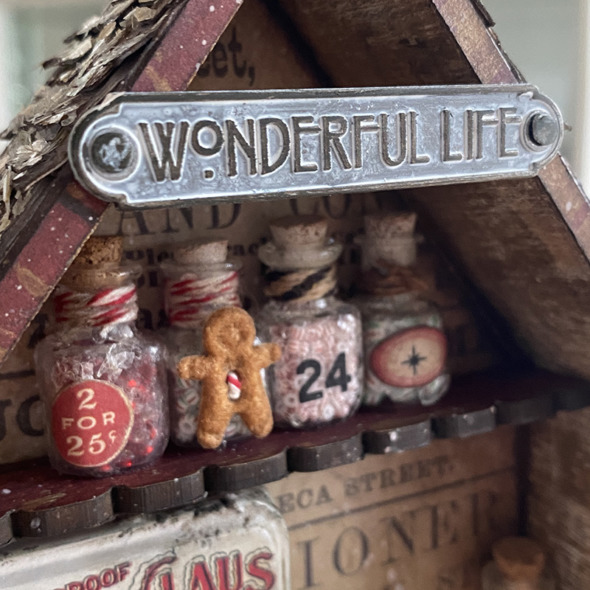
It truly is a wonderful life and I love this word plaque from the Christmas set which I added to the vignette shrine by hammering in 2 of the stakes from the vignette hardware set. I added a little picket fence distress crayon to the word plaque.
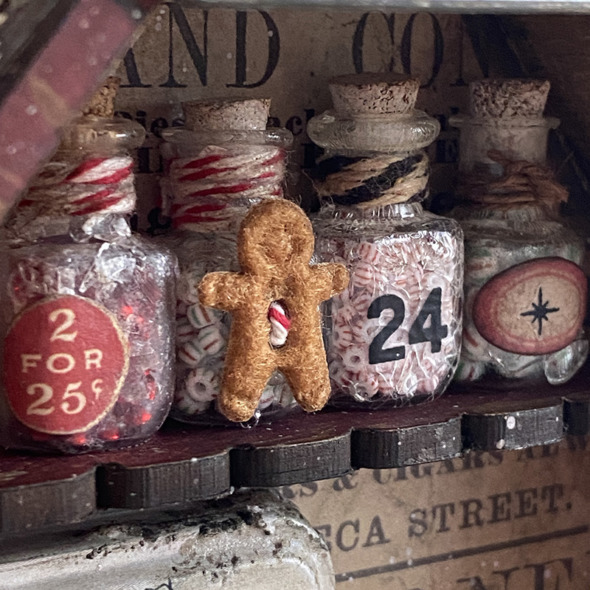
For the top shelf I added some of the idea-ology tiny vials which I crackled. I have a how to on a previous post, see here (I skipped the alcohol ink step). I added idea-ology ephemera and remnant rubs to the bottles and painted the bottle corks with a picket fence distress paint wash for a wintry twist. I filled the bottles with seed beads, added a little twine and a gingerbread piece, all from my stash.
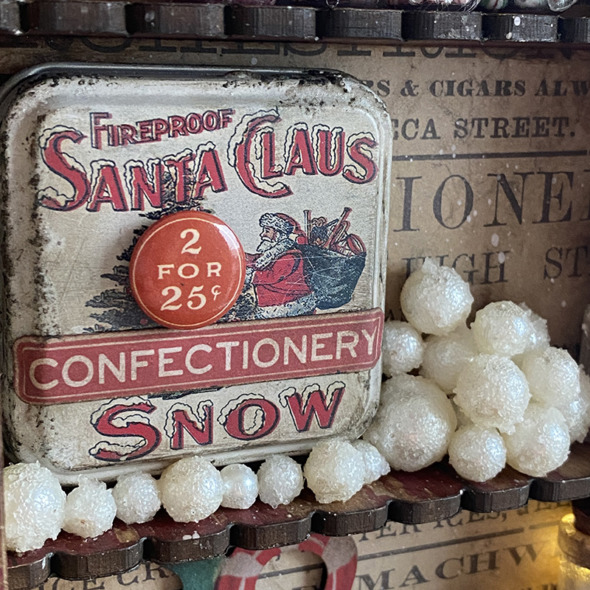
I added a Christmas tin top and baubles to the middle shelf. To the tin top I added a piece of Christmas mini flair and a piece of ephemera.
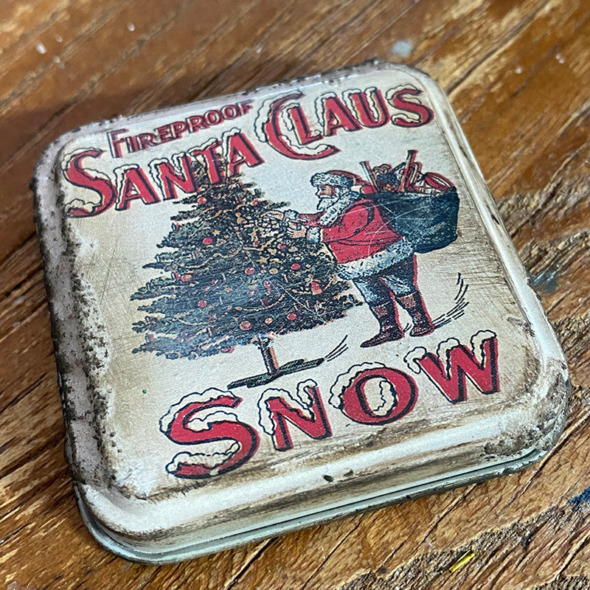
To grunge up the idea-ology Christmas tin top, I scratched and added a little translucent distress grit-paste and once dry, rubbed in distress crayon which highlights the scratches.
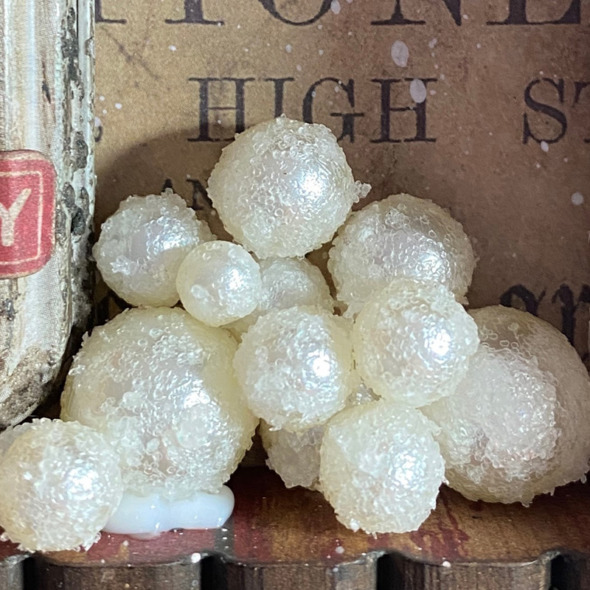
I rolled idea-ology baubles in the distress snowfall grit-paste from the distress holiday texture set and glued together in a stack with distress collage medium.
TIP: Make sure your inky fingers are clean to prevent ink transfer.
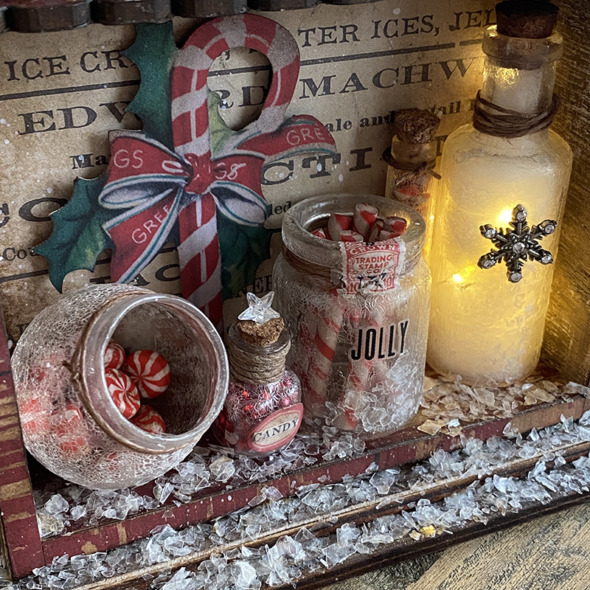
For the lower shelf I really went to candy cane town and added a candy cane from the ephemera set using adhesive foam to mount it onto the back of the shrine, ready to add the bottles in front of it.
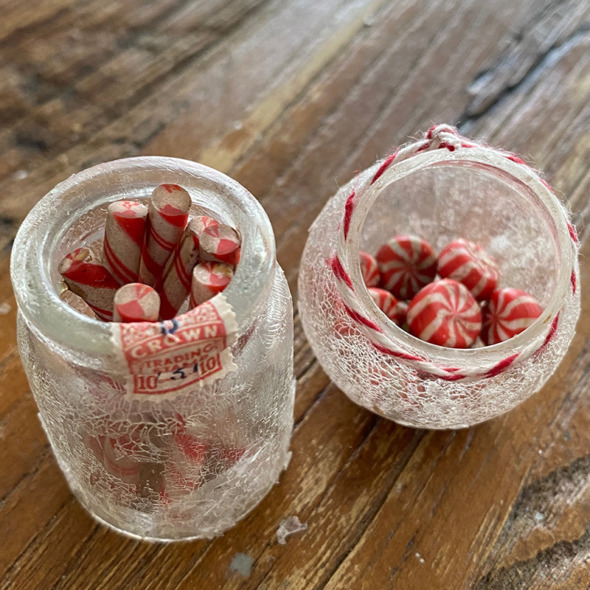
I crackled a bottle from the idea-ology corked vials set and used the glass dome from the idea-ology snowglobe, turned upside down to create a candy bowl. I added a sticker from the christmas sticker book which I burnished onto the glass using distress collage medium. I added candy cane twine that I saved from some Christmas gifts last year and finally added the gorgeous new idea-ology christmas confections. I grunged them up with distress crayon and glued them into place with distress collage medium.
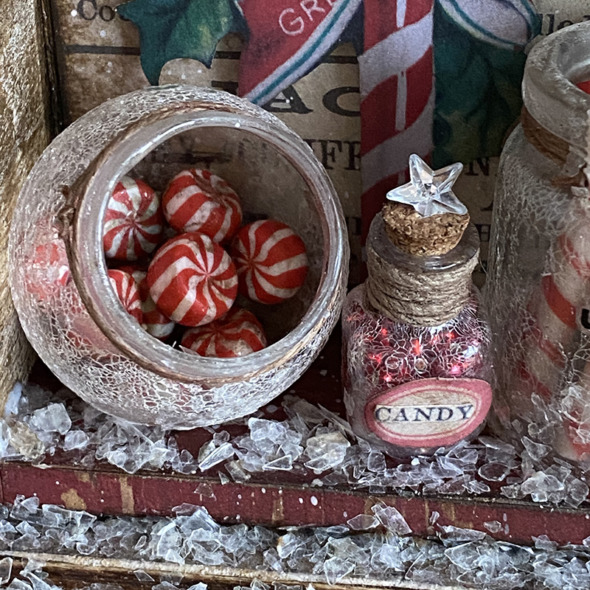
I used one of the vial labels from the new idea-ology snippets ephemera set which I completely swooned over! I LOVE labels! I added some red seed beads I had in my stash to the bottle and cut a sticker with candy down to size and added on top of the label. Finally I pushed a star from the idea-ology mirrored stars set into the cork and covered everything with distress mica, held in place with a little brush of distress collage medium first.
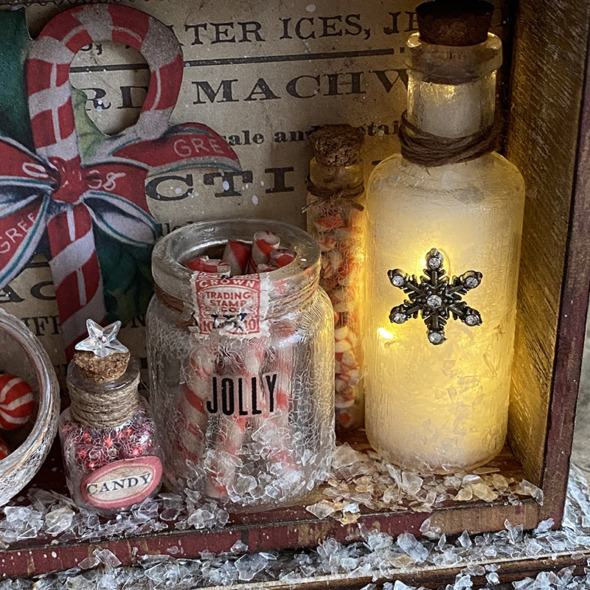
Everything is better with lights… so I covered a bottle in distress collage medium and once dry, distress crackle paint. I filled the bottle with tiny lights and then used the end of a paintbrush to push stuffing filler into the bottle to diffuse the lights. This was an idea I got from Tim last year when he did that awesome crystal ball, see Tim’s Blog for details. I didn’t use anything to wrap my tiny lights around like Tim did, I simply thread them through a hole I made in the back of the vignette shrine and up into the bottle. I attached the battery pack to the back of the shrine and the wire is hidden behind he back of the bottle. I cut the loop off the snowflake with wire cutters and glued it onto the front. I love this light diffusing idea, thanks Tim!
I’m going to carry on decorating for Christmas. This year I’m making my own garlands and trying to get the kind of lights I want for them is proving rather tricky, but I’m persevering because it’s all about that perfect twinkle! 😉
Thanks for stopping by.
Zoe
…
affiliate links used at no cost to you


Love your candy shop!!! Love all the detail and of course LOVE the candy!! I love my sweets. Great work Zoe!
Awesome!! Thanks for the details – making a fee for Christmas gifts
A jaw-droppingly brilliant tiny candy store – just perfect in every detail, from the backing paper to the crackled jars and the icy roof. Simply wonderful.
Alison x
A true Candy Cane Lane…love all the little details you added in…the devil is in the details they say…really makes a difference. Hope you find the light strands you are looking for….Merry Christmas.
WOW! What great ideas and I love candy to.
Thank you for sharing.
Rhonda
What a candy store! Would love to get lost in it to find all the goodies. This just might have to make my post-Christmas list to make. thanks as always for sharing.
I love how you did this. Absolutely stunning. I have been buying TH beautiful things for years. I think it is time I started using them in assemblage. Just beautiful.
So awesome! All those Christmas goodies! Great job, Zoe, love all your makes.
Ok, this is my absolute favorite! Fantastic walk though and the tiny vials of candy are just the best! Delicious make my friend!
I adore every detail in your candy cane shop. A few of my favorites are the diffused lighted bottle and the red wood grain paper covering the shrine. I picked up 3 packs of the Christmas Backdrops so now I will have 2 to use;) Merry Christmas, Zoe. Your THA group brings so much joy and inspiration to my life.
Thanks for sharing the details in this make. Love love it!
Stunning and soooo yummy Zoe.
Looking at all those awesome vials and the little gingerbread man on your top shelve, so fabulous!
Thank you so much for sharing, stay safe and have a wonderful weekend.
Oh my goodness! What a yummy store! It makes me want to step inside and choose a candy to eat! I love all the detail you put into your work. Sometimes I try to do it but I can never get it all the right. Merry Christmas to you and yours!
Amazing!!!!! Now I want candy!!!! lol
Lovely and creative! I look at this and it makes me happy!