Hello friends. Have you seen the new Paper Village thinlits dies? I am totally in love with them!! I made this sample for the Tim Holtz facebook LIVE Sizzix chapter 4 release. If you missed the LIVE you can catch up on all the fun over on Tim’s blog.
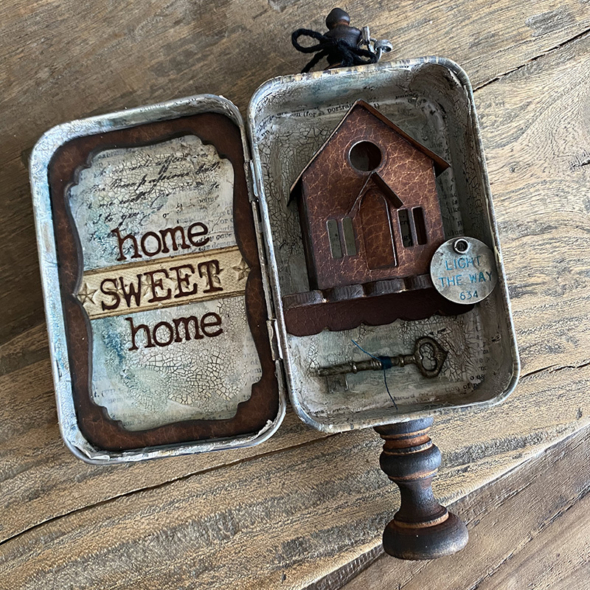
With many of us staying safe at home this year, home really is sweet. I created a gift tin as an idea for a new home gift using the new Paper Village thinlits dies (664741) and the yummy new distress cracked leather cardstock.
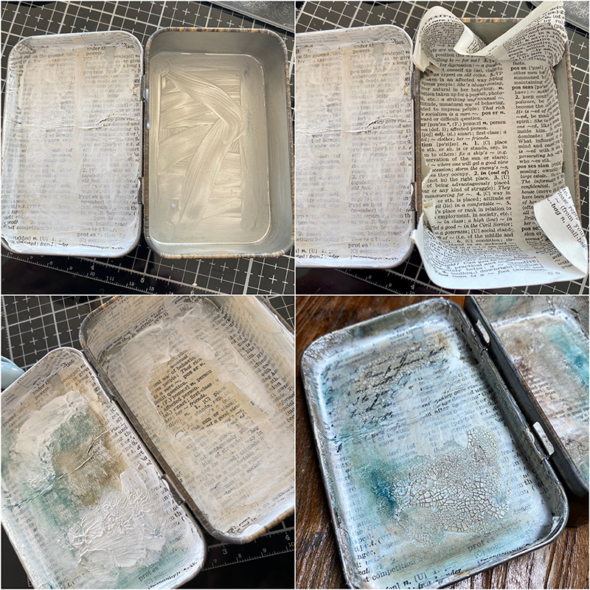
– Coat the inside of an idea-ology trinket tin with a thin layer of distress collage medium.
– I tucked dictionary pages into the tin.
– Once dry I trimmed the edges and added gesso to parts of the dictionary page using my finger.
– Allowing to dry between layers, I added distress texture crackle paste and once it had dried and cracked, rubbed distress crayon in with my finger.
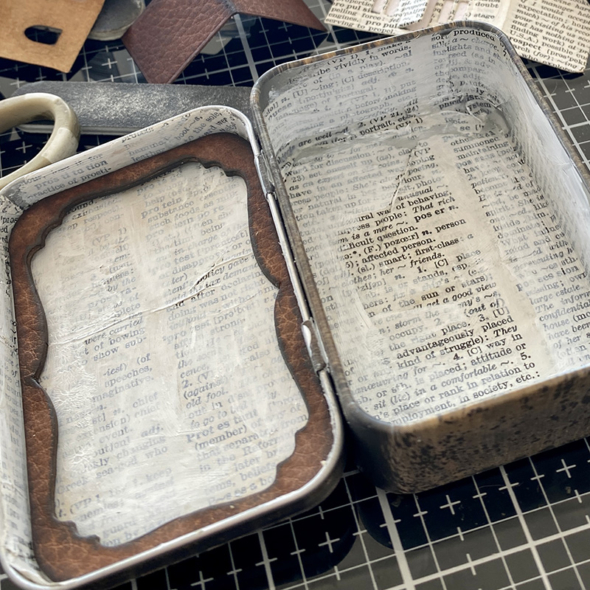
I die cut a frame using the Trinket Frames Bigz die (664186) from the distress cracked leather cardstock with vintage photo distress ink blended in. I also die cut a piece of chipboard which I mounted under the cracked leather to give the die cut some height. I blended some ground espresso distress ink into the edges and glued it into the lid of the trinket tin. This die is so cool and made to fit both sides of the tin.
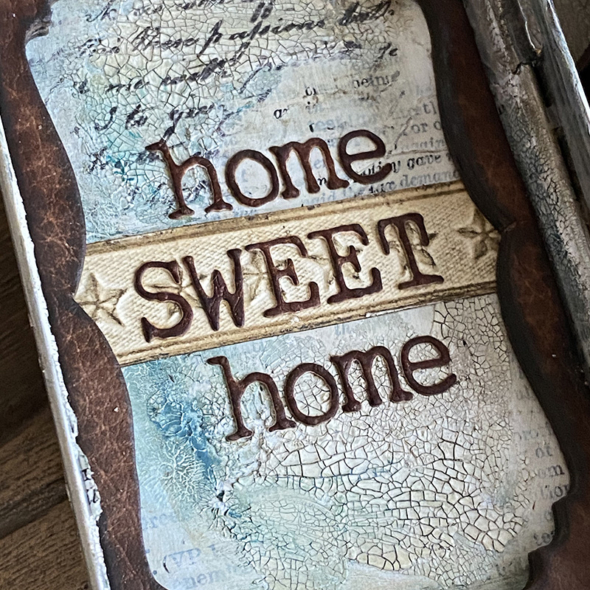
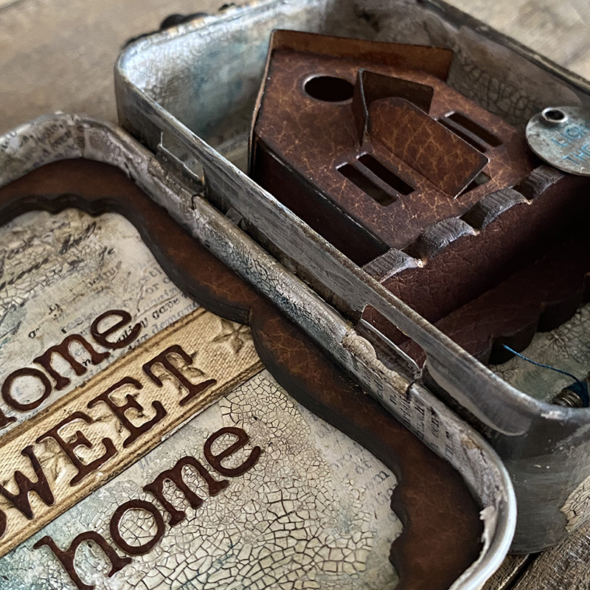
Using the Alphanumeric Tiny Type Upper (664406) and Lower (664407) thinlits dies, I die cut the distress cracked leather cardstock and added “home sweet home.” The strip of stars was created using the Star Trim impresslits folder (663297).
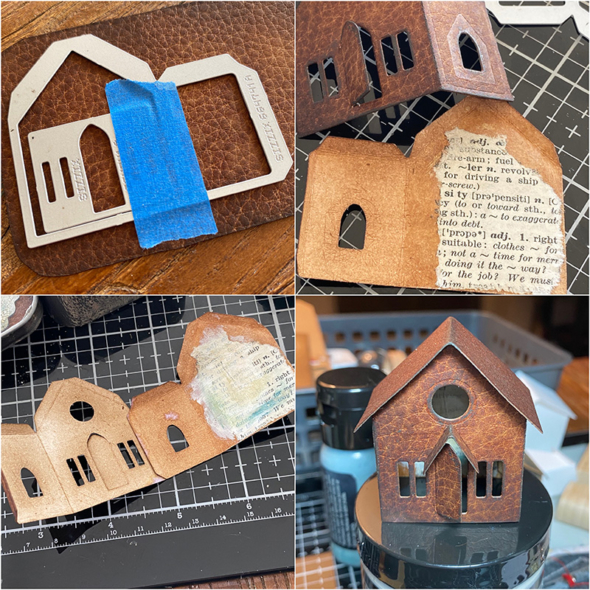
– To create the house I die cut distress cracked leather cardstock, using painters tape to hold the windows in place as I ran the die cuts through my sidekick.
– I blended vintage photo distress ink to both sides of the die cut house and added a piece of dictionary page to the back wall of the house as this will be seen through the windows and door.
– Using scor-tape to attach the front and back pieces of the house.
– Adding the roof using distress collage medium. I made sure the roof sits forward and is flush with the back of the house so it will sit against the back of the tin.
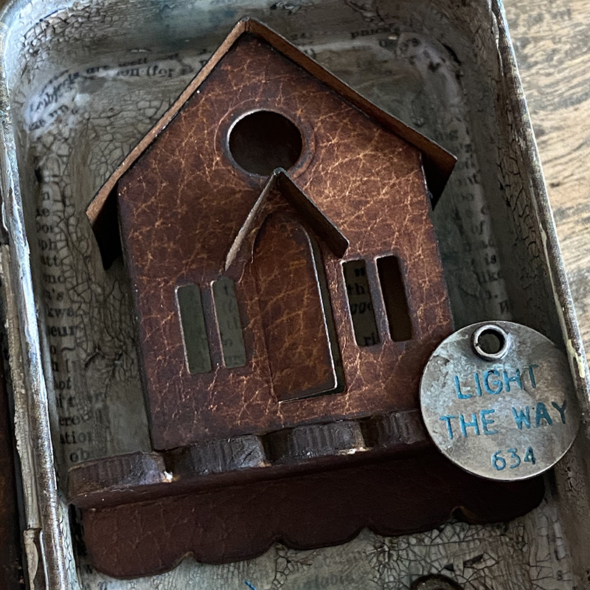
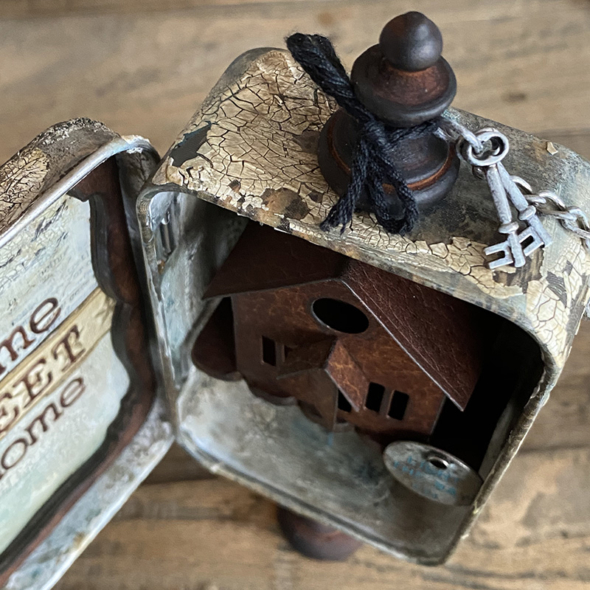
Using the etcetera thickboard scalloped trim, I created a shelf for the house to sit on. I covered this with distress cracked leather cardstock, can you tell I LOVE this cardstock? I found the perfect idea-ology thought token that made me think of a porch light being left on to light the way home.
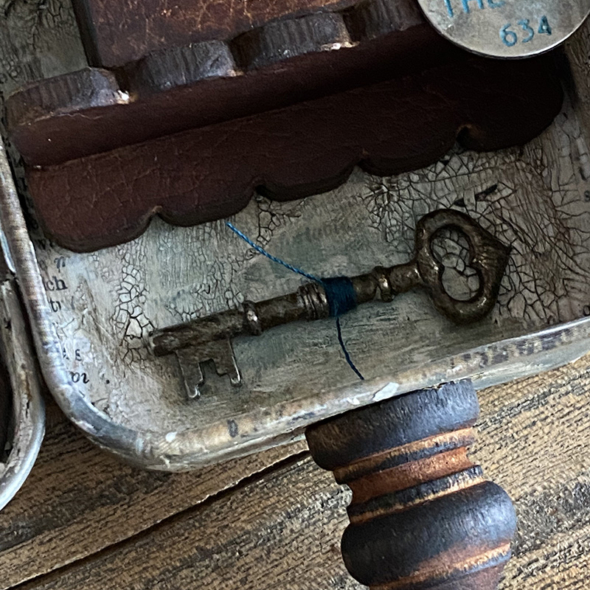
I added a key from the idea-ology keys adornments, with thread wrapped around it. If you were buying a new home or moving in with someone you could add a real key instead to make it more personal.
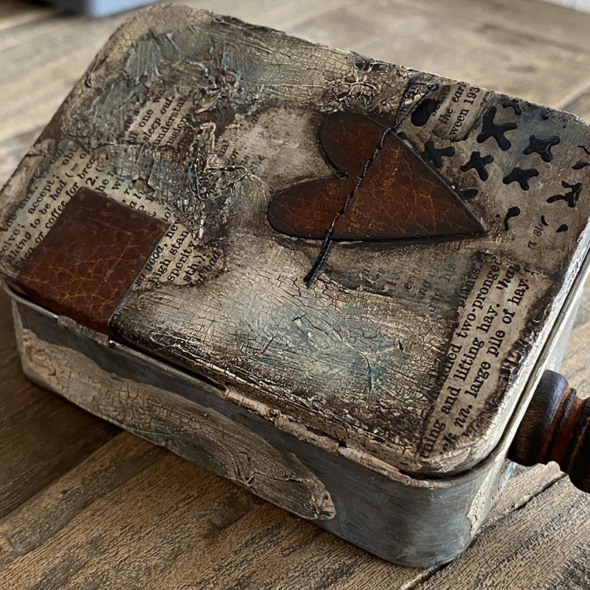
The outside of the tin was grunged up using scraps of dictionary paper, cracked leather cardstock and gesso, distress crackle texture paste and distress crayons. To stop the crackle texture paste from flaking off the shiny trinket tin, I covered with a layer of distress vintage collage medium. I love the brown tint it gave the gesso and texture paste.
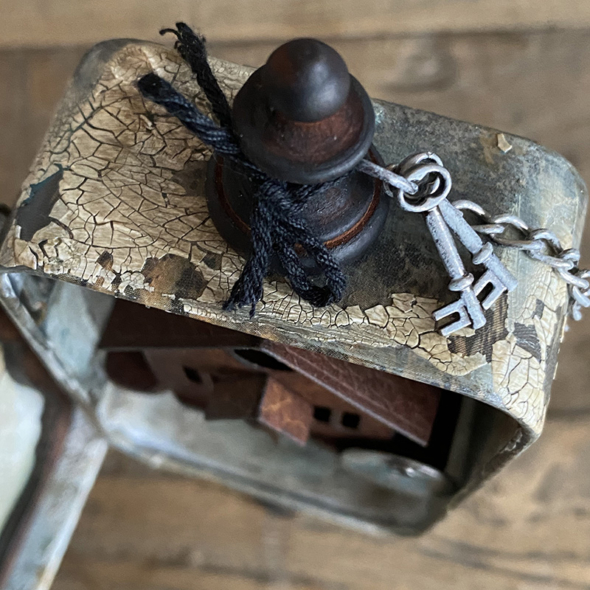
I dyed an idea-ology finial with vintage photo and ground espresso distress ink and sanded back. I added chain and an o ring from the idea-0l0gy swivel clasps, removing the clasp and adding tiny keys from the keys adornments set. All of which I covered with picket fence distress paint. I added a piece of black thread from the halloween trimmings pack.
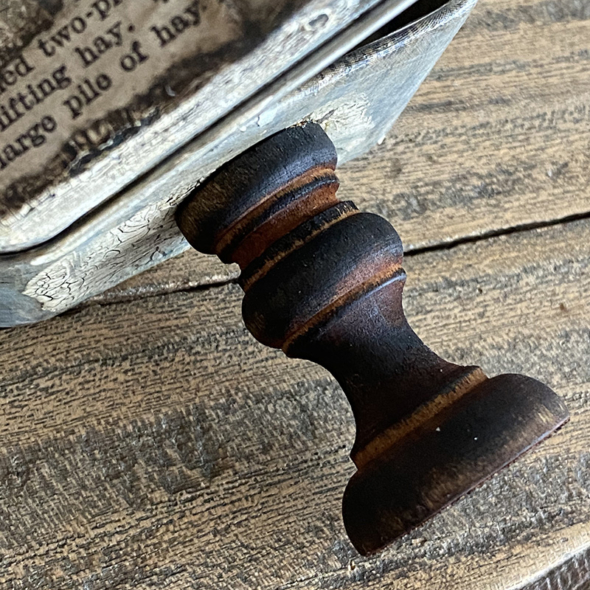
I added an idea-ology finial to the base of the trinket tin using distress collage medium. The trick is to stick it and walk away. The glue shrinks as it dries and creates a really good bond, but you gotta walk away and not come back 10 times to see if you can just move it! LOL
Thanks for stopping by, I hope you found this useful and it’s inspired you to make something. You could easily add tiny lights through the back of the tin and with a little holly and some mica or glitter it would make a cute Christmas piece.
Zoe


Just love it! That cracked leather cardstock is just amazing. Such a cute make Zoe. Thanks for taking the time to share. I haven’t purchased the paper village yet but I feel I need to have it in my stash! xx
Thank you Zoe for sharing. I have ordered my tiny houses and it feels like it was a year ago….I just love houses and villages and can’t wait to get my hands on them. I have a collection of little ceramic houses and now I can have paper ones too.
That aged crackled tin is the perfect setting for your adorable leathery house – gorgeous project.
Alison x
Love this Zoe. Love the sentiment behind the make. I just got my Tiny House die. This has inspired me to make something with them. I struggle covering up the Trinket tins as I love them as they are 🥴
Zoe! I love this! Inside and out, every detail is as interesting and lovely as the next! Perfect idea…just perfect!!! 👏🏻👏🏻👏🏻👏🏻
Thanks for sharing. Detail is exceptional, love the cracked leather cardstock.
Your tin is absolutely gorgeous Zoe. I cannot wait for my tiny houses to arrive now, I love using Tim’s little tins too. The dictionary page creates a wonderful background and I love the added keys. Your ‘grunging’, as always, is perfect. xx
Gorgeous project! Inspiring to see your process, thank you.
Sadly have been unable to find the house die here in New Zealand, or online! Must be so very popular!
this is just the most adorable grungy little house and what a wonderful momento to treasure for new home owners, hugs kath xxx
This has so many of my favorite things!! Trinket tins, tiny houses and yummy, grungy, crackle goodness! Thank you for sharing your amazing talent with us!
What a beautiful, grungy project! The combination of crackle and the leather paper are just perfect together! So many details added as well! Definitely one of my favorites!!!
And if I might add….you packed it perfectly for the trip across the pond MFS!! 🤎
Something tells me we got Paper Village in our future! 😂😂😂
In such a house I want to life … thank you for the tutorial. So I can learn how to do it. I will try my luck and be so happy to see what you have done.
LOVE the use of the Leather look paper…so awesome. It makes me want to touch it.
Hello from sunny New Zealand! Thank you for the great instructions for these cute little villages. I’ve been looking for some good instructions, and finally found them on your blog. Many thanks!
Sunshine. ihearttostamp.blogspot.com