Hello friends! Yesterday I posted The Lab and today I’m back to share how I made the voltage die cut from that project.
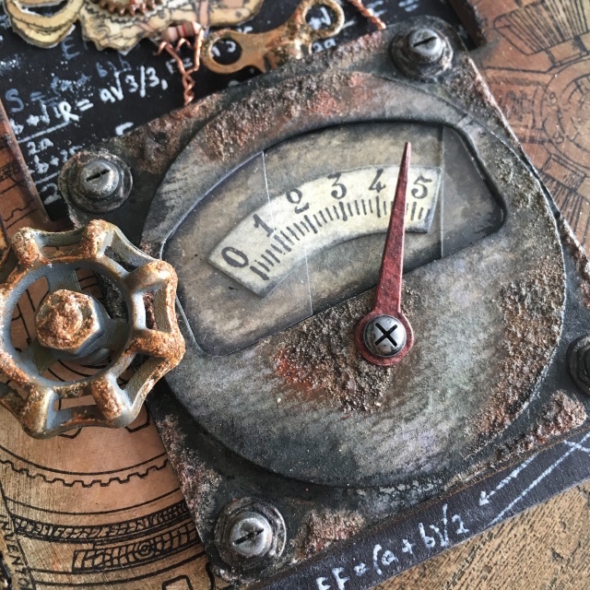
This was hands down my favourite die from the Tim Holtz chapter 1 release.
Here’s how I made it…
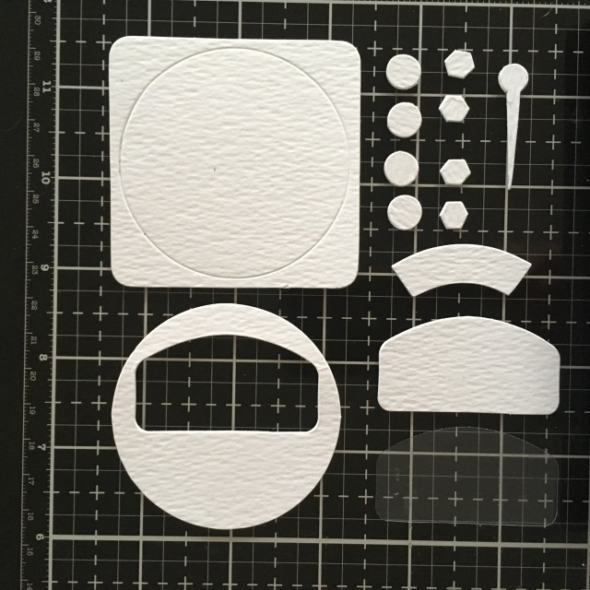
Die cut distress watercolor cardstock with the voltage bigz die. Cut a second screen piece (above pic: bottom right) out of acetate to create a cracked screen later.
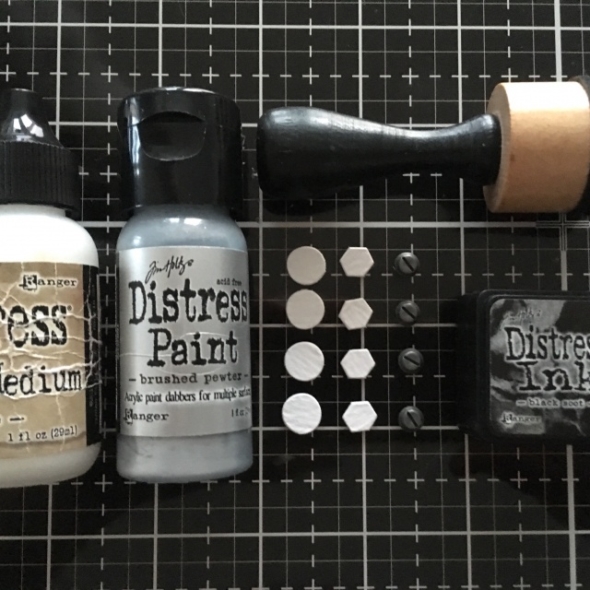
To create the bolts, cover the die cuts and idea-ology hardware heads with a layer of brushed pewter distress paint and set aside to dry. Glue into place with distress collage medium and pounce black soot distress ink over the top with a blending tool. I swiped a layer of distress collage medium over the top with my finger to give them an oiled machinery look.
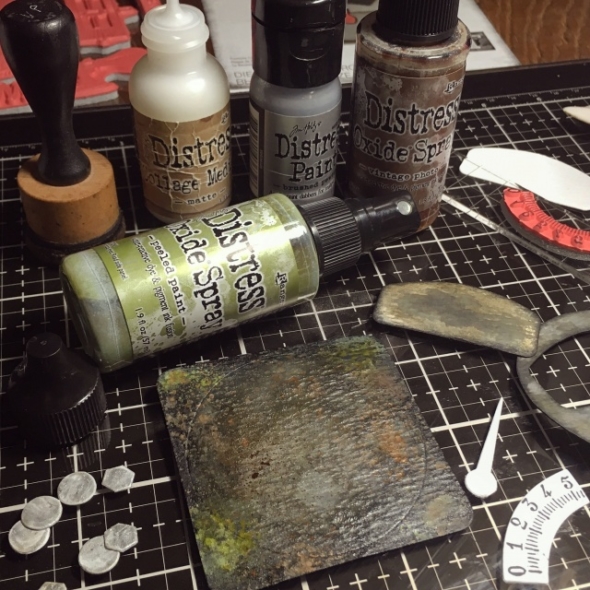
The other die pieces I dragged through a black soot and pumice stone distress ink wash. I blended in antique linen distress ink to brighten the edges a little. The large background piece I covered with a layer of distress collage medium and then sprayed peeled paint and vintage photo distress oxide sprays in targeted sprays.
Using a stamp from the professor (CMS373) stamp set, I created the dial (above pic: bottom right). Pretty cool right?! Just when we thought we couldn’t love the professor stamp set more!
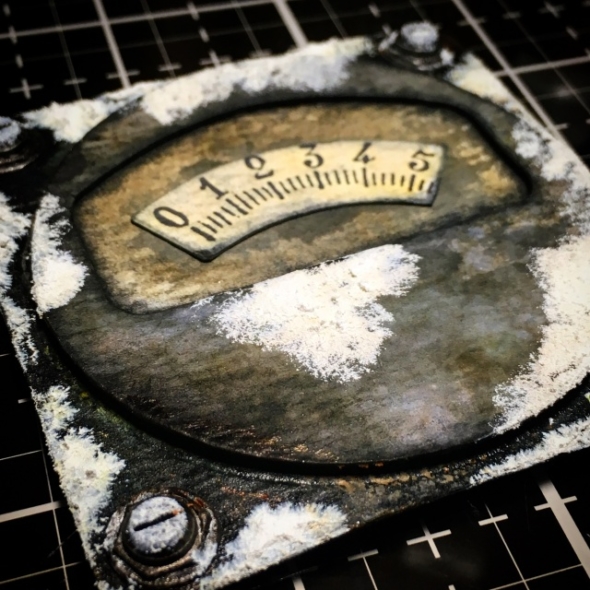
I assembled the die using distress collage medium and adding the hardware head bolts from earlier. The circle die cut I mounted with foam to raise slightly. I added distress grit-paste randomly with my finger and set aside to dry.
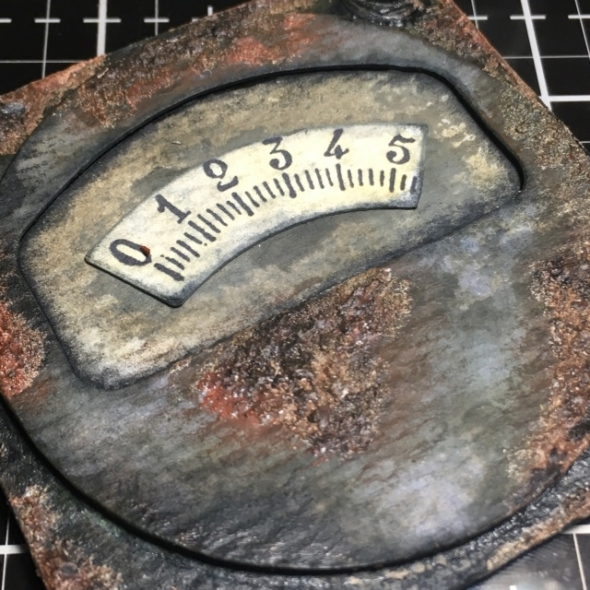
Once the grit-paste was dry I blended in distress crayons with my finger and then wiped a little distress collage medium over the top to give that oiled machine look again.
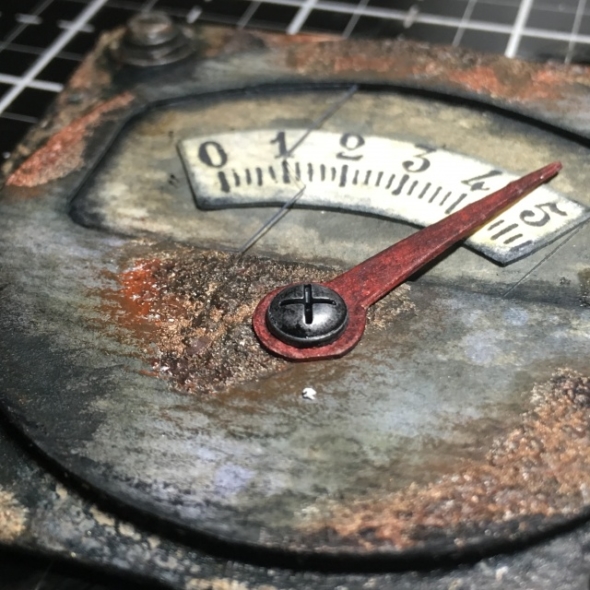
Finally I added the meter needle which I covered with fired brick distress ink and added a hardware head to. The extra acetate piece was cut in half with a zig zag to look like broken glass. I adhered the acetate with a tiny dot of distress collage medium.
This die is one of the easier to assemble and you could easily make this in under an hour, including drying time for the distress grit-paste.
Thanks for stopping by, let me know if you have any questions.


This is seriously my favorite part of this piece, and when I say that, I’m already gaga over the whole piece! Your craftsmanship is truly incredible Zoe. This looks like it is straight out of the Industrial Age! You are so awesome to share your secrets with us. Thank you! xx
This die is one of my faves too and I love what you did with it.
Hugs, Lisa
Love this piece, beautiful work.
LOVE the addition of the grit paste and crayons! You nailed that rusty look so perfectly! LOVE this project!
It is hard to believe that you made that from cardstock!! Your talents are incredible Zoe. Amazing pieces you have been creating with this Halloween vibe. Love it.
Ok, I’m gonna stick this to my forehead, because I’m gaga over your rusted gauge, and I was trying to figure out how you did it from your last post. I’m sooooo happy you shared your secret recipe here, dearie! Ok, got to get back to work, but you can be sure I will be giving this a whirl! I guess I ‘need’ another die! Thanks, Zoe!
Wowser. Love this gauge and your talented mind. Keep inspiring!
Your rusting is SUPERB Zoe and I love your little trick for giving the appearance of oiled machinery – so clever! Brilliant! xx
This is brilliant! Thank you for sharing.
Greetings from Germany
Martina