‘Tim Holtz’ Category

  1. Costumes and Millinery

    1st September, 2022 by iGirlZoe

    igirlzoe: tim holtz stampers anonymous exquisite stamp crest stencil sizzix masquerade

    Hello Friends, I hope you’re having a great week! Did you see the awesome Tim Holtz Halloween Stamp launch on Saturday? Oh my pumpkins it was so much fun and the maker inspiration was incredible! Tim did an awesome demo using the moon masks and mica sprays and watch to the end to see Mario’s costume! Replay and maker inspiration over on Tim’s blog.

    igirlzoe: tim holtz stampers anonymous exquisite stamp crest stencil sizzix masquerade
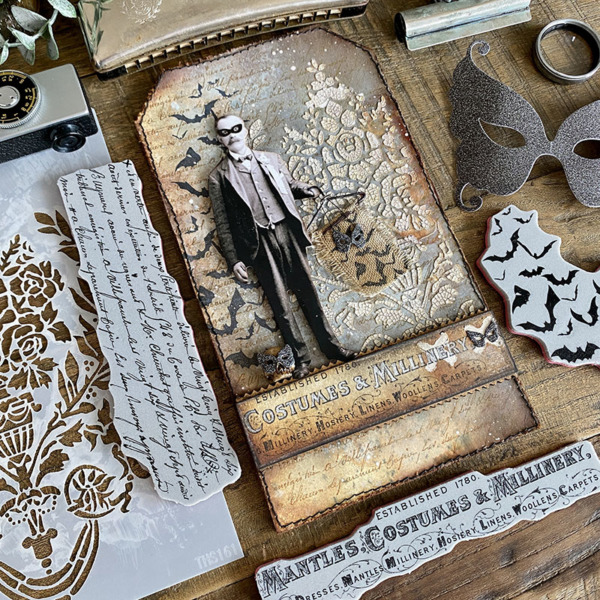
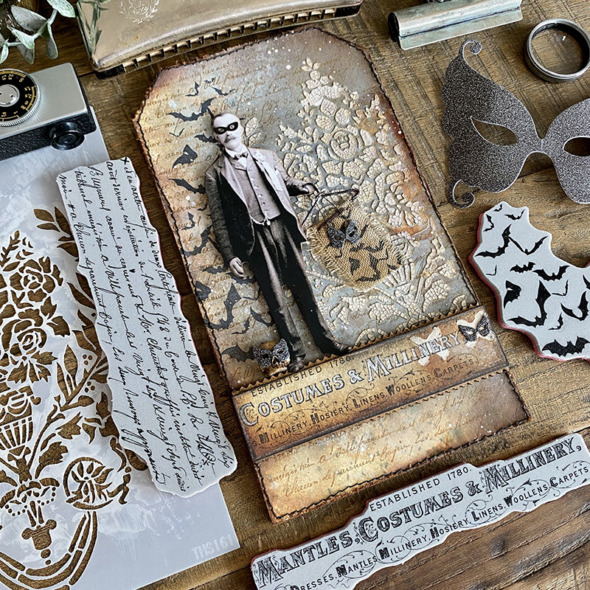
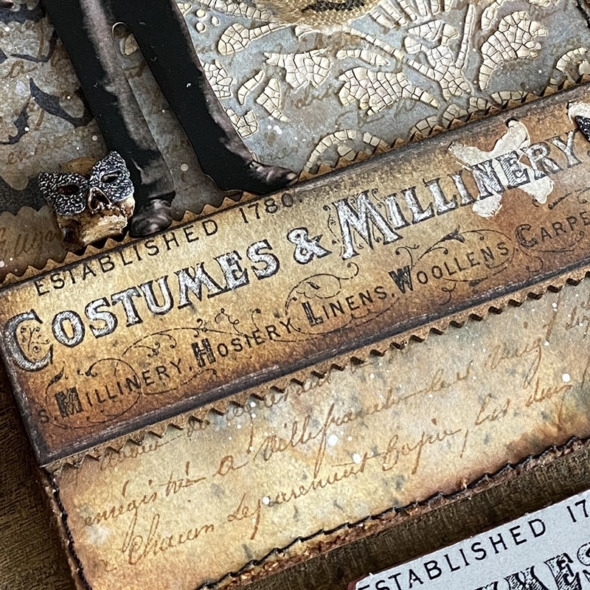
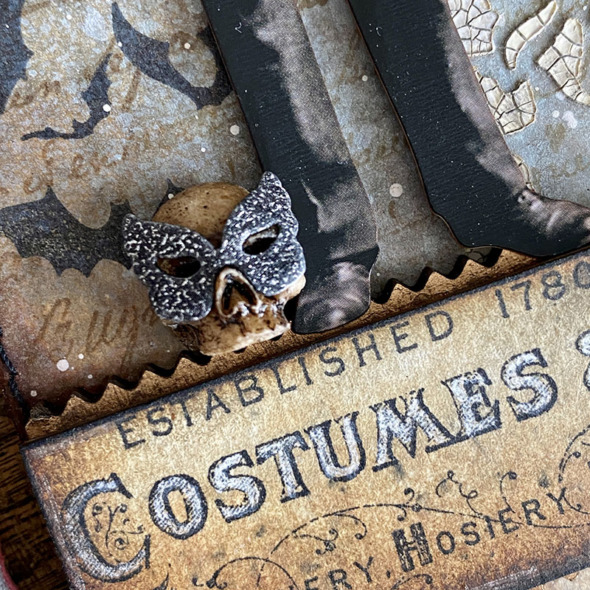
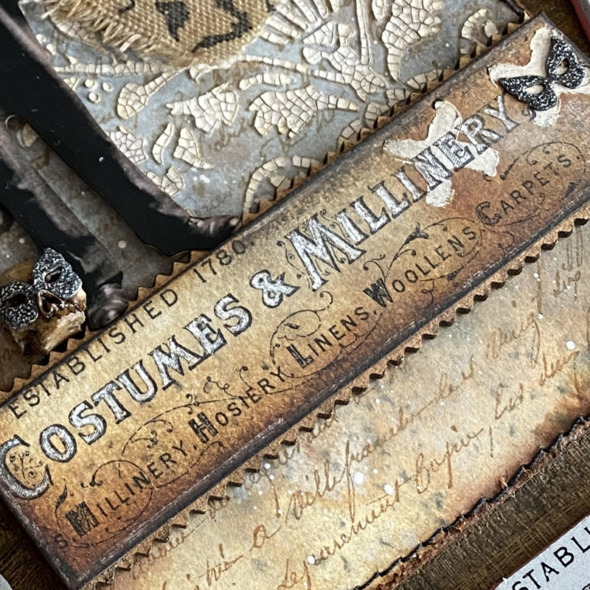
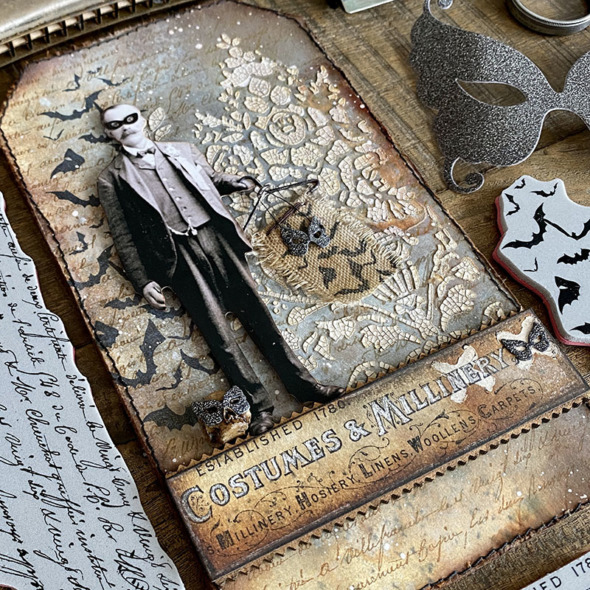
    Speaking of costumes… I loved one of the stamps so much that I created one of my makes around it. The “Costumes and Millinery” signage stamp from the aptly named Exquisite CMS453 stamp set was where I began…

    igirlzoe: tim holtz stampers anonymous exquisite stamp crest stencil sizzix masquerade
    I stamped onto the smooth side of a piece of distress watercolor cardstock with black soot archival ink and blended in gathered twigs distress ink. I used a white posca pen to highlight the center of the letters. I didn’t stamp a second time over the top as I like the look of the pen slightly bleeding over the black in. You could leave the stamp on your stamp platform and stamp a second time over the top.

    igirlzoe: tim holtz stampers anonymous exquisite stamp crest stencil sizzix masquerade
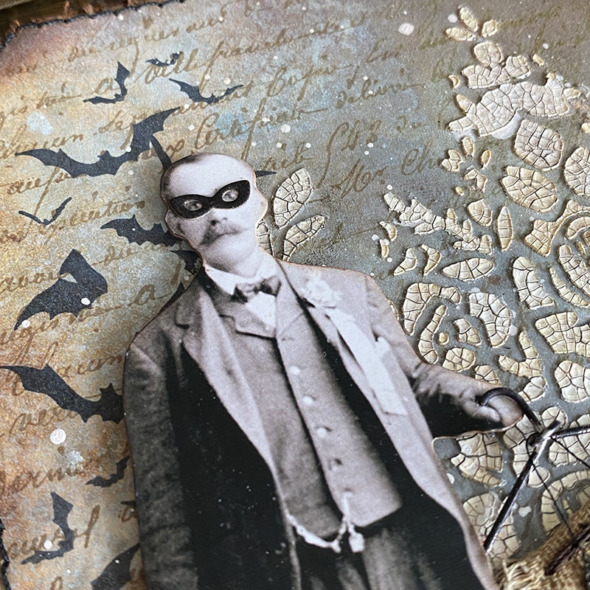
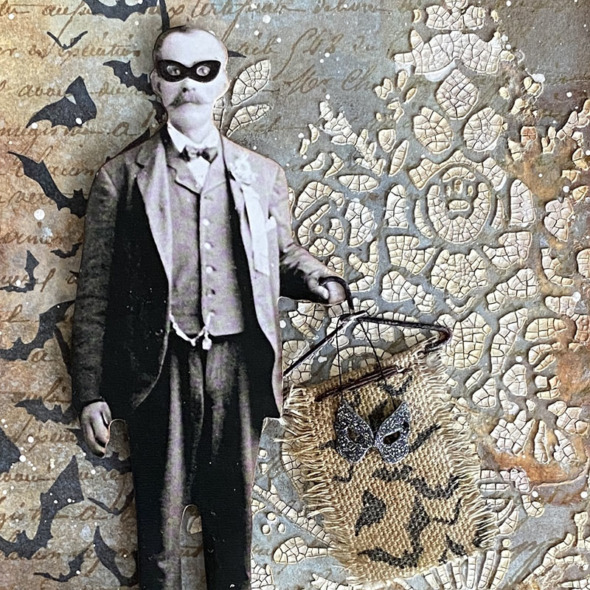
    I needed to find myself a Milliner and this gentleman from the new Halloween paper dolls pack with his mask from the new curiosities sticker book was the perfect fit. Something about that mustache says “get your costumes here!” 😉

    For the background I cut a piece of distress mixed media heavystock the same size of an etcetera thickboard mini tag. Sprayed with distress sprays and mica sprays from the new Halloween Mica sets. I stamped some of the background stamps from Exquisite CMS453 stamp set in vintage photo and ground espresso distress archival ink. Adding the larger bat stamp from the Unraveled CMS452 stamp set.

    igirlzoe: tim holtz stampers anonymous exquisite stamp crest stencil sizzix masquerade
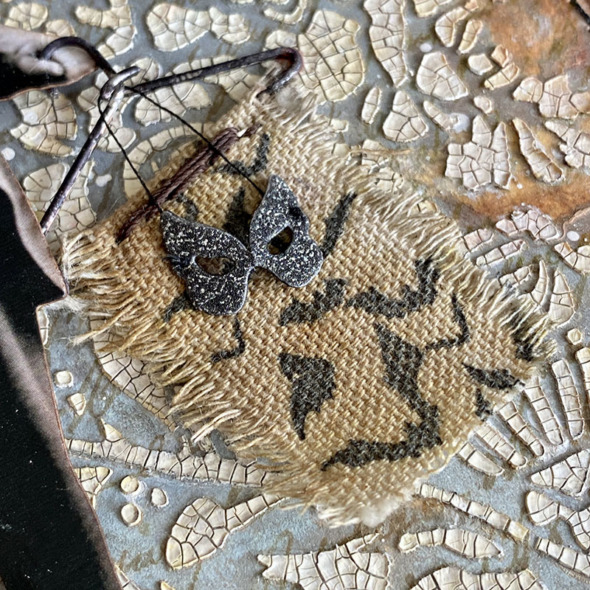
    I was instantly smitten with the new Crest stencil and applied distress opaque crackle paste with a palette knife through the stencil onto the background. I added a little rusty hinge oxide ink between the stenciled paste and walnut stain distress crayon. I stitched the edges of my background with my sewing machine and then glued it to the etcetera tag with distress collage medium.

    igirlzoe: tim holtz stampers anonymous exquisite stamp crest stencil sizzix masquerade
    I used a very retired (I’m sorry) idea-ology hanger clip! I removed the inside clippy bit with my dremel and added white gesso and alcohol ink. I carefully made a hole in the paper dolls hand to slide the hanger through. I have 13 left, unlucky for some… but lucky for me. If you haven’t hoarded some of the idea-ology hanger clips, you could use a wire jig, which is a metal or plastic base with holes in and comes with pegs that you place into the holes to create the shape and then you pull your wire around it. Heavy gauge wire would work best for this.

    I used the smaller bat stamp from The Scarecrow CMS451 stamp set to stamp onto a piece of linen fabric with black soot distress archival ink. I used sticky grid to hold the fabric in place on my stamp platform and stamped several times. The fabric will absorb some of the ink initially so keep stamping until you have a bold image.

    The mask was cut from the (retired) Masquerade thinlits die set from idea-ology halloween deco sheet. I pierced a hole into each side with a pokey tool (retractable craft pick), added black thread and strung it from the hanger.

    igirlzoe: tim holtz stampers anonymous exquisite stamp crest stencil sizzix masquerade
    While I had my dremel out… I removed the back of smaller skull from previous idea-ology halloween release years. I have quite the collection. Read out of context, that sounded terrifying! LOL

    I used the new idea-ology halloween deco sheets and cut another mask to fit from the (retired) Masquerade thinlits die set. Again, sorry if my use of retired items causes frustration, hopefully you have something in your stash you can use.

    igirlzoe: tim holtz stampers anonymous exquisite stamp crest stencil sizzix masquerade
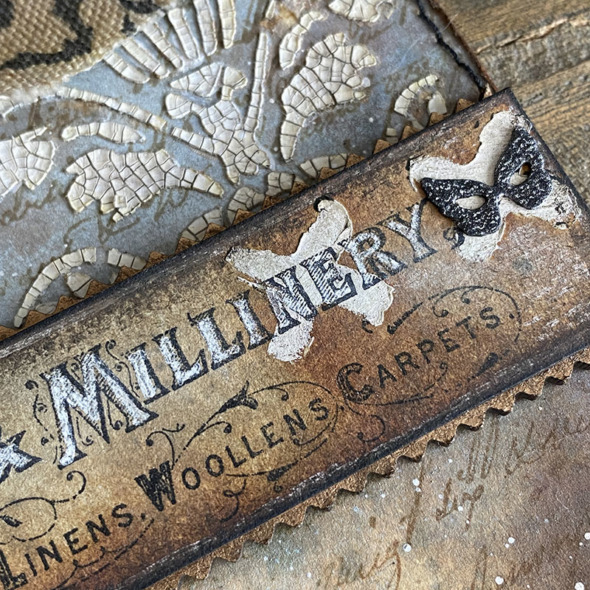
    I used the Markings stencil to add a couple of X’s using white gesso. I added another mask cut from the halloween deco sheets to the end of the sign.

    igirlzoe: tim holtz stampers anonymous exquisite stamp crest stencil sizzix masquerade
    I mounted the signage onto 2 Etcetera pinked trims glued together in the middle at the straight edge so the pinked edges peek out at the top and bottom of the sign. I covered the pinked edges with distress foundry wax. I wasn’t kidding about it being all about this signage stamp! I also used the background script stamped with vintage photo distress archival ink. I will use these background stamps all year so I’m very happy to have them in my collection.

    igirlzoe: tim holtz stampers anonymous exquisite stamp crest stencil sizzix masquerade
    I cut one larger mask from the black halloween deco sheet with the (it’s still retired) Masquerade thinlits die set for staging. I love how all of Tim’s brands mix and match together.

    Thanks for stopping by and let me know if you have any questions.
    Zoe

    …
    affiliate links used at no cost to you


  2. Otisville

    16th August, 2022 by iGirlZoe

    igirlzoe: tim holtz sizzix otis colorize cityscape bold text decorative trims

    Hello friends. I’m back today sharing something I made for the Tim Holtz Sizzix Halloween LIVE launch. I love this years Halloween die and folder release. I’m sure I say that each year, but this year is no exception! Make sure you check out the replay and the maker inspiration over on Tim’s blog.

    igirlzoe: tim holtz sizzix otis colorize cityscape bold text decorative trims
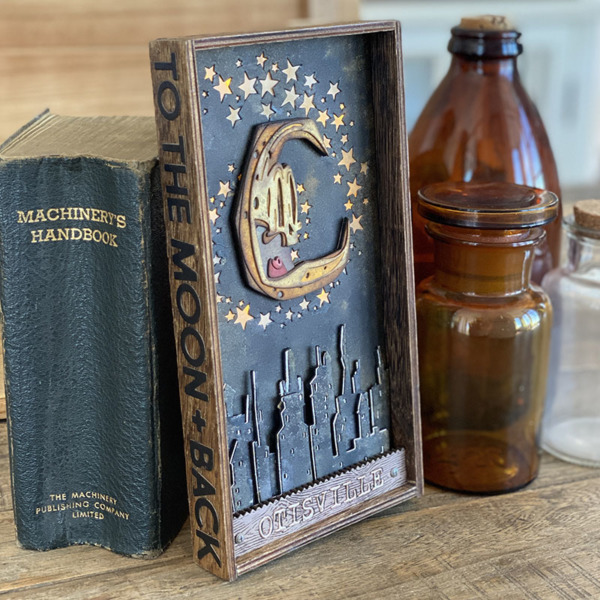
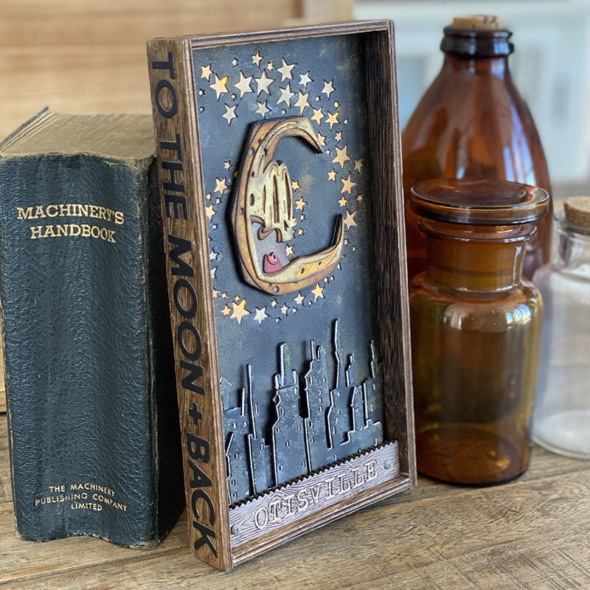
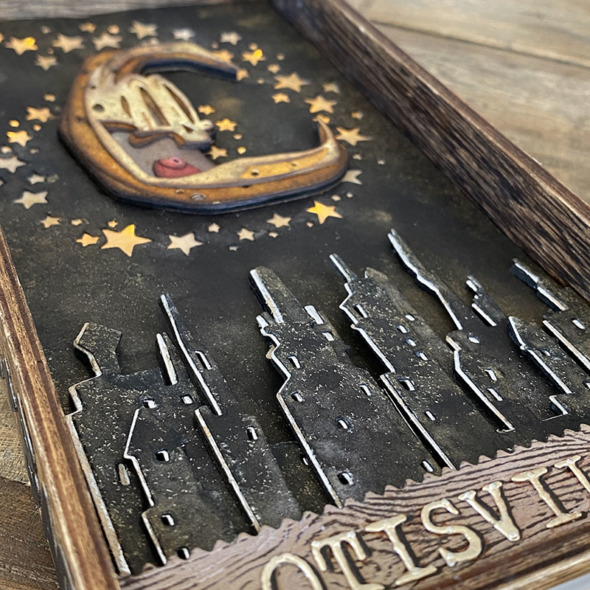
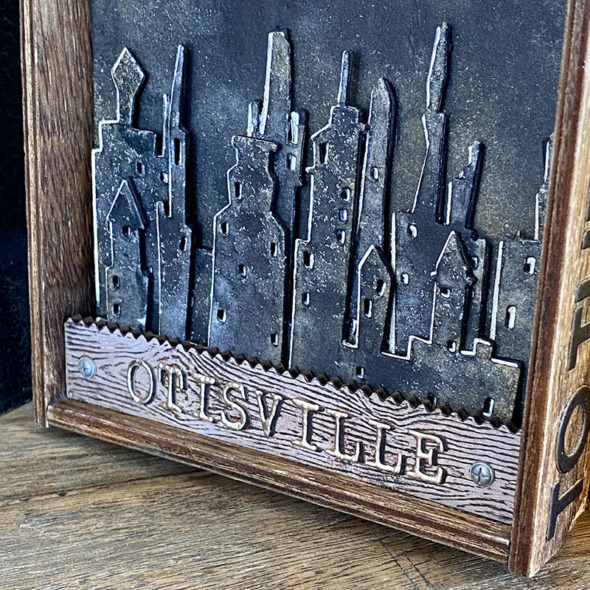
    Welcome to Otisville, population NONE! This creepy abandoned city was inspired by the AMAZING new Otis, Colorize die from the crazy brilliant mind of Tim Holtz! It’s not often that I imagine a project from start to finish before making it, but this was one! Otis had to have his own ville, of course he did. Let’s get into some of the details…

    igirlzoe: tim holtz sizzix otis colorize cityscape bold text decorative trims
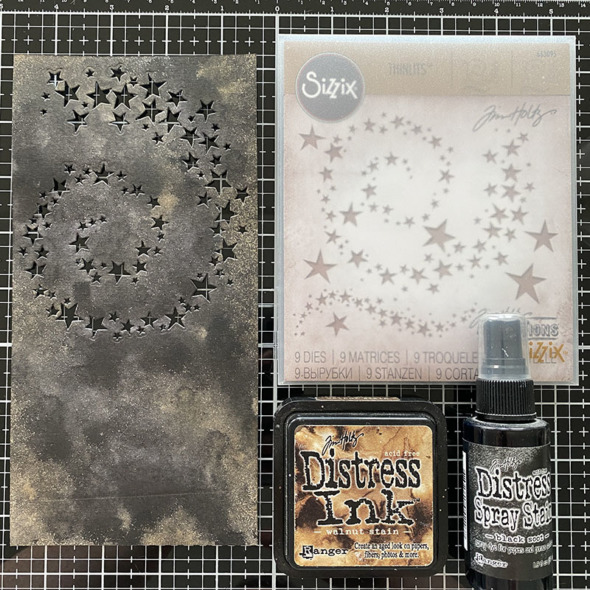
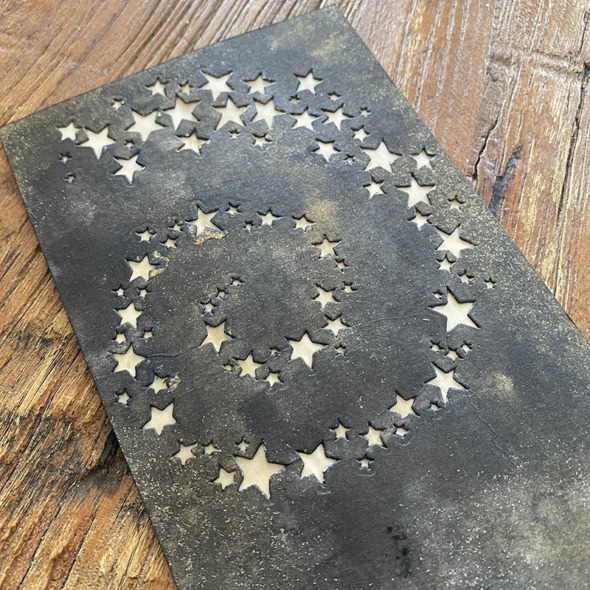
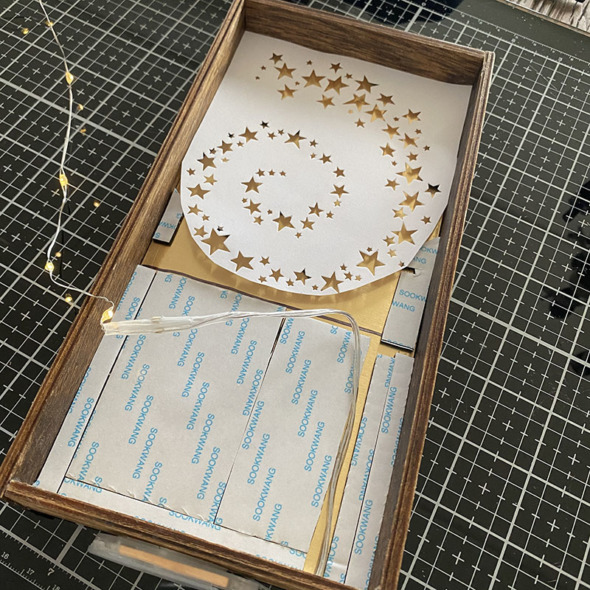
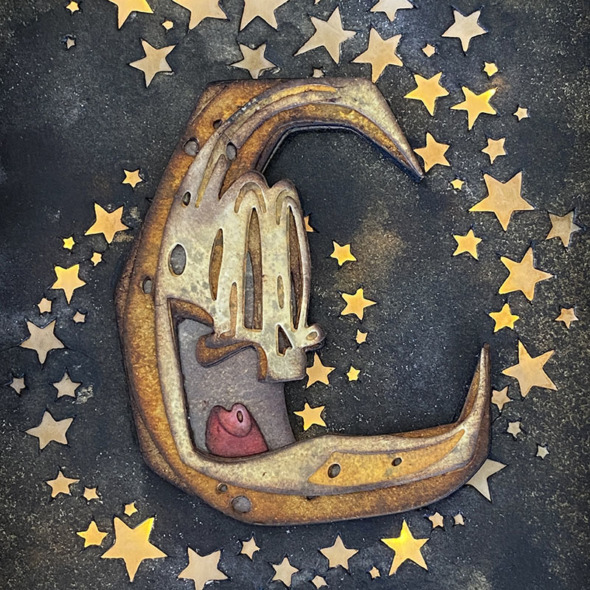
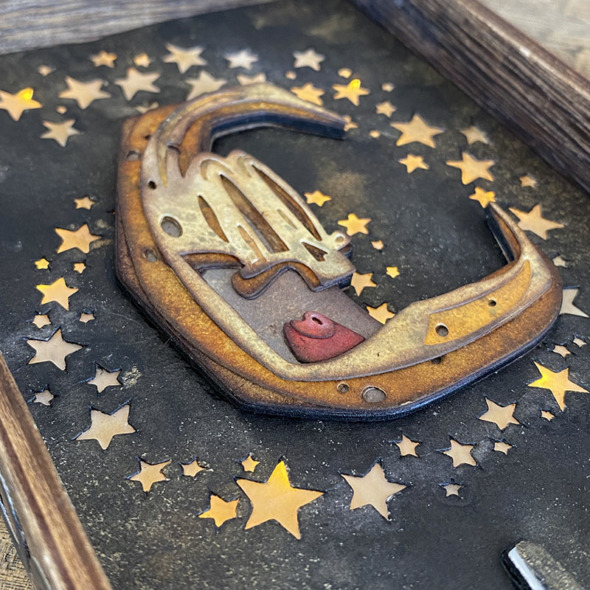
    I cut a piece of distress watercolor cardstock to fit the inside of an idea-ology vignette tray and die cut with the swirling stars thinlits dies. I sprayed with black soot distress spray and once dry, blended in walnut stain distress ink.

    I also cut a sheet from copy paper making sure it lined up with the first sheet. This is to be used later for light placement.

    igirlzoe: tim holtz sizzix otis colorize cityscape bold text decorative trims
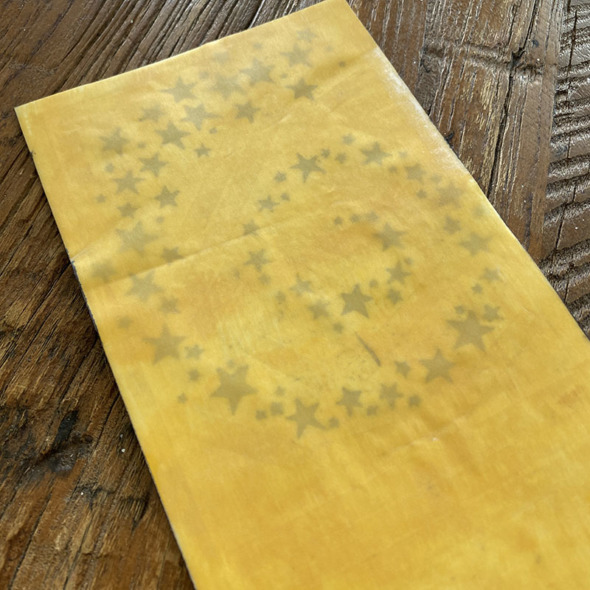
    I covered a piece of vellum with fossilized amber distress paint and adhered to the back of the watercolor distress background.

    igirlzoe: tim holtz sizzix otis colorize cityscape bold text decorative trims
    Ready to add to the vignette tray and be backlit by tiny lights later.

    igirlzoe: tim holtz sizzix otis colorize cityscape bold text decorative trims
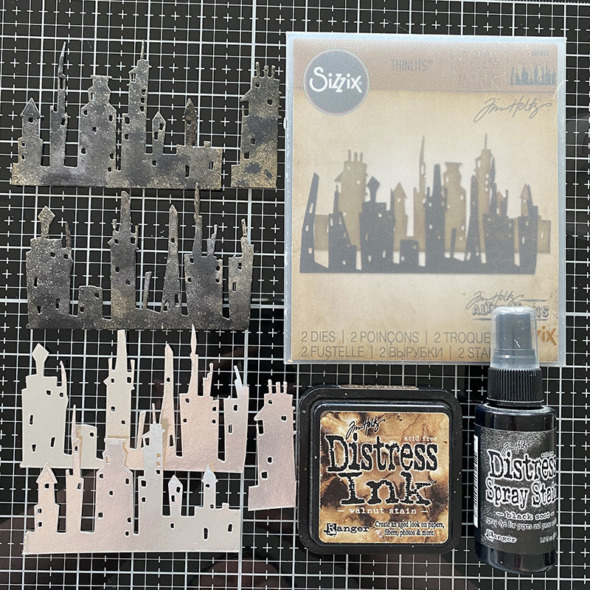
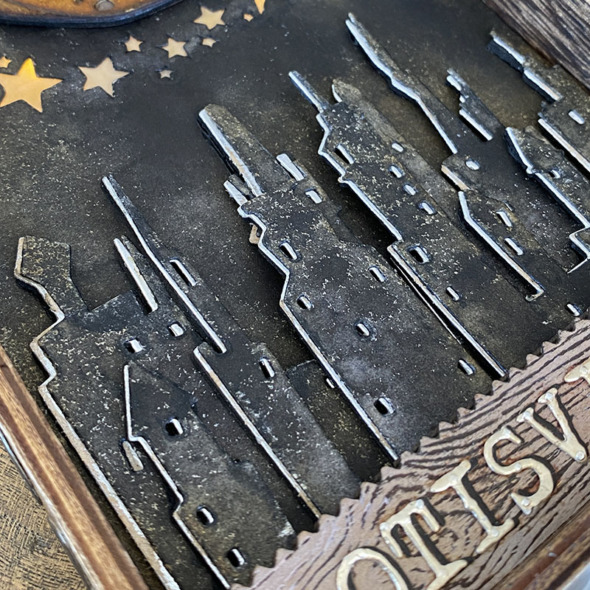
    Die cut cityscape buildings from distress watercolor cardstock, sprayed with black soot distress spray and once dry, blended in walnut stain ink.

    igirlzoe: tim holtz sizzix otis colorize cityscape bold text decorative trims
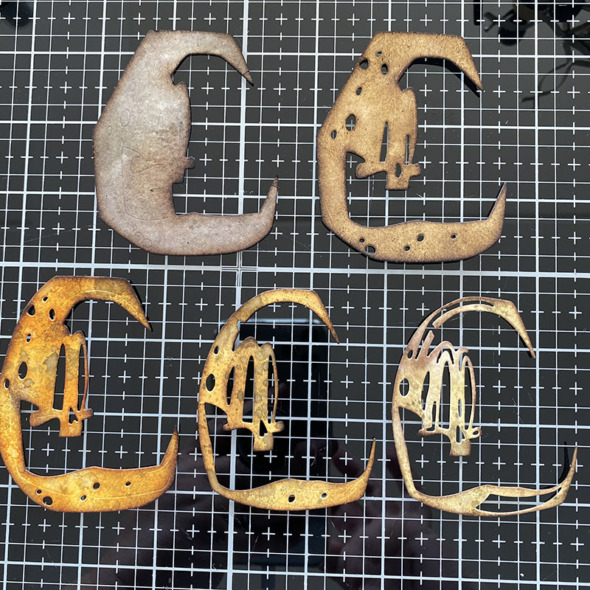
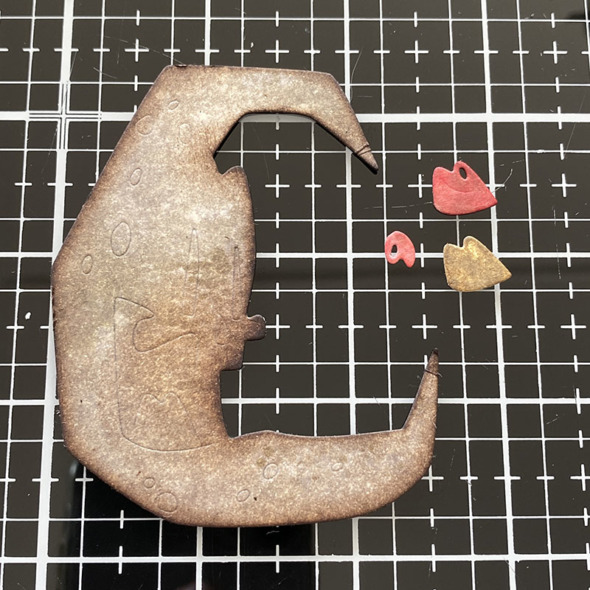
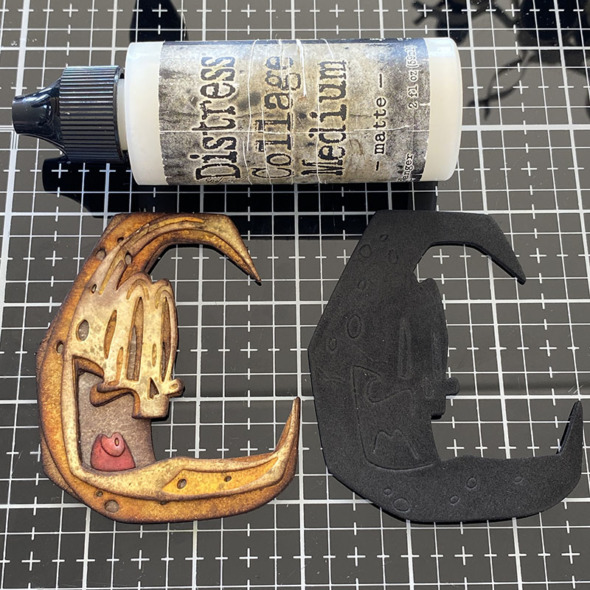
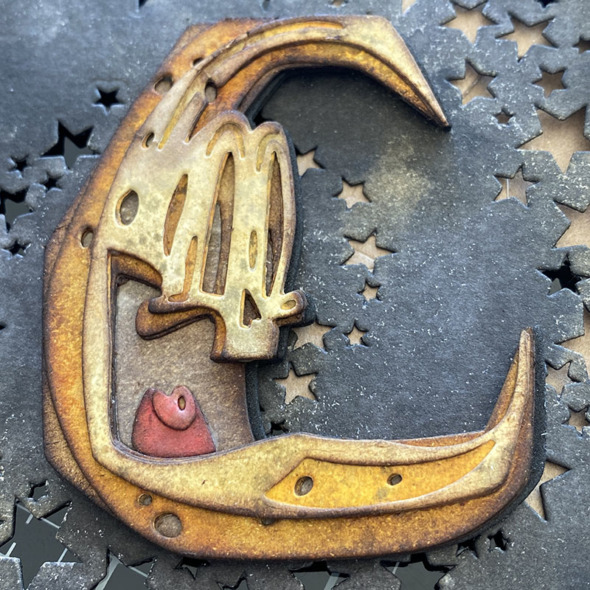
    I die cut Otis from distress watercolor cardstock and covered with frayed burlap distress spray. I blended in different distress inks for each layer and once dry, assembled.

    igirlzoe: tim holtz sizzix otis colorize cityscape bold text decorative trims
    You can see from the base piece the embossed detail that shows you where to place the next layer. Colorize really is easy peasy now.

    igirlzoe: tim holtz sizzix otis colorize cityscape bold text decorative trims
    I die cut the base a second time from fun foam to give Otis a little lift from the background.

    igirlzoe: tim holtz sizzix otis colorize cityscape bold text decorative trims
    I LOVE him grunged up!

    igirlzoe: tim holtz sizzix otis colorize cityscape bold text decorative trims
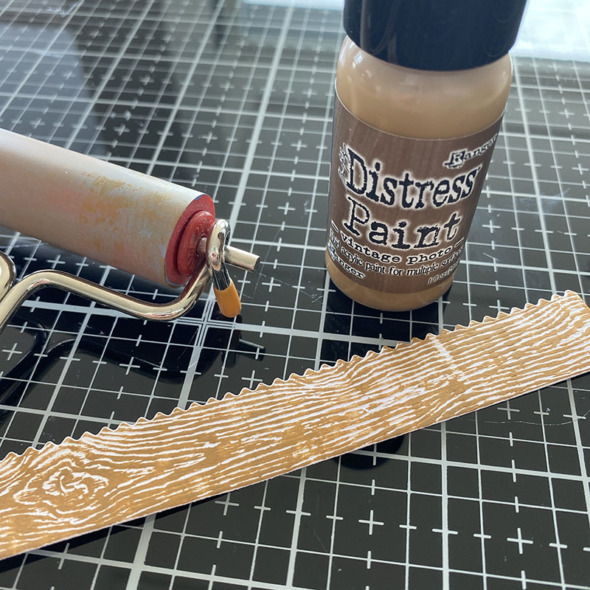
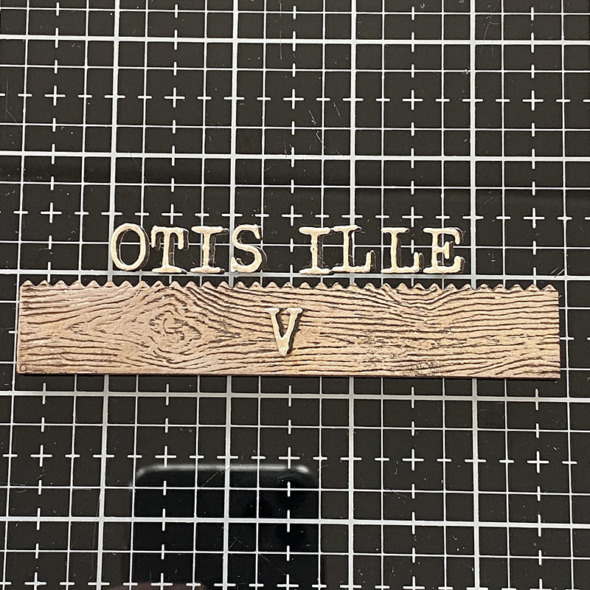
    I cut a piece of woodgrain cardstock using the decorative trims thinlits die and brayered on vintage photo distress paint and once dry, glued it onto an etcetera trim.

    igirlzoe: tim holtz sizzix otis colorize cityscape bold text decorative trims
    I die cut alphanumeric tiny type upper thinlits from idea-ology metallic kraftstock and black kraftstock and layered, offsetting slightly.

    BEGINNER TIP: I measure the trim, find the middle and then glue the middle letter. I continue to add letters working outwards from either side.

    igirlzoe: tim holtz sizzix otis colorize cityscape bold text decorative trims
    I used a piece of copy paper (cut at the same time as the background), as a template to see where the tiny lights should go and where to place my adhesive foam.

    igirlzoe: tim holtz sizzix otis colorize cityscape bold text decorative trims
    I added a piece of idea-ology metallic kraftstock to the back of the vignette tray. I do this because everything sticks better to the cardstock than the wood and the metallic surface better reflects the tiny lights.

    igirlzoe: tim holtz sizzix otis colorize cityscape bold text decorative trims
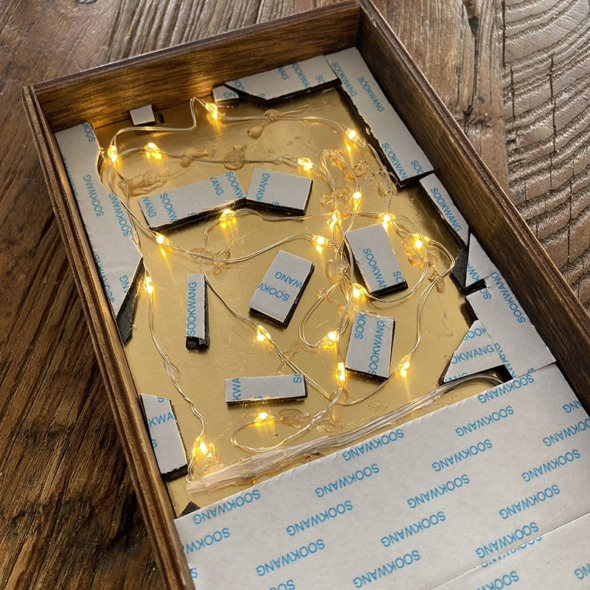
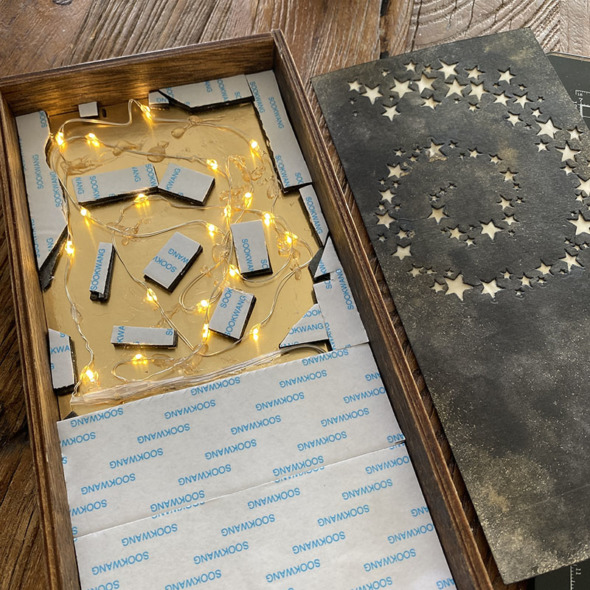
    Once the tiny lights and foam is in place, I removed the backing sheet and pushed the background into place.

    igirlzoe: tim holtz sizzix otis colorize cityscape bold text decorative trims
    Everything is better with lights!

    igirlzoe: tim holtz sizzix otis colorize cityscape bold text decorative trims
    I added the assembled Otis to the center of the swirling stars

    BEGINNER TIP: Work with the lights on so you can better see where they are and when using hot glue, DO NOT get it on the actual light bulb as it can short the lights.

    igirlzoe: tim holtz sizzix otis colorize cityscape bold text decorative trims
    Next I added the cityscape buildings in 2 rows slightly offset and mounted onto idea-ology metallic kraftstock.

    igirlzoe: tim holtz sizzix otis colorize cityscape bold text decorative trims
    I added the trim in front of the base of the cityscape, adding a couple of idea-ology hardware heads.

    igirlzoe: tim holtz sizzix otis colorize cityscape bold text decorative trims
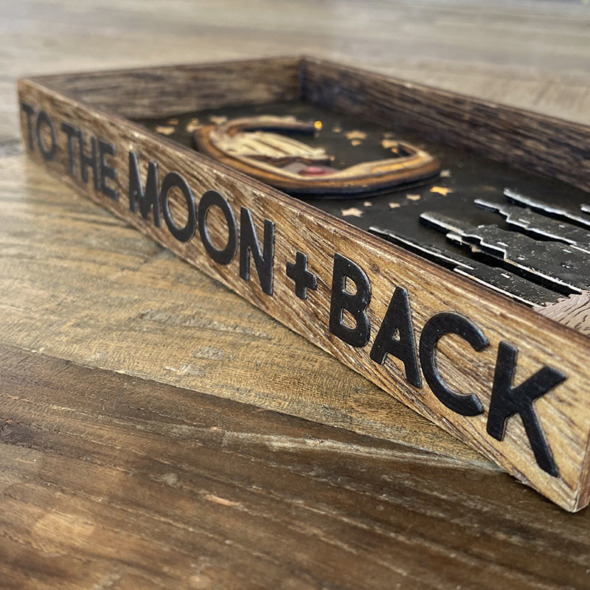
    I used the bold text 2 thinlits dies, cut from idea-ology black kraftstock to add “To The Moon + Back” on both sides of the vignette tray. I painted over the top with a layer of distress collage medium.

    igirlzoe: tim holtz sizzix otis colorize cityscape bold text decorative trims
    igirlzoe: tim holtz sizzix otis colorize cityscape bold text decorative trims
    Thanks for stopping by and let me know if you have any questions.
    Zoe

    …
    affiliate links used at no cost to you


  3. Jack Sparrows Crypt

    15th August, 2022 by iGirlZoe

    igirlzoe: tim holtz distress crypt paste ranger ink sizzix skulls 3D folder

    Hello friends. Hope you’re doing well. Did you catch the LIVE launch of the Tim Holtz Seasonal Distress products? You can watch the replay and Tim’s amazing demos over on his blog. Please note these products are seasonal, so if you want them and it’s in your budget, I recommend you don’t wait, especially not for the Crypt-Paste with me and Tami B stocking up like it’s the grit-paste apocalypse.

    igirlzoe: tim holtz distress crypt paste ranger ink sizzix skulls 3D folder
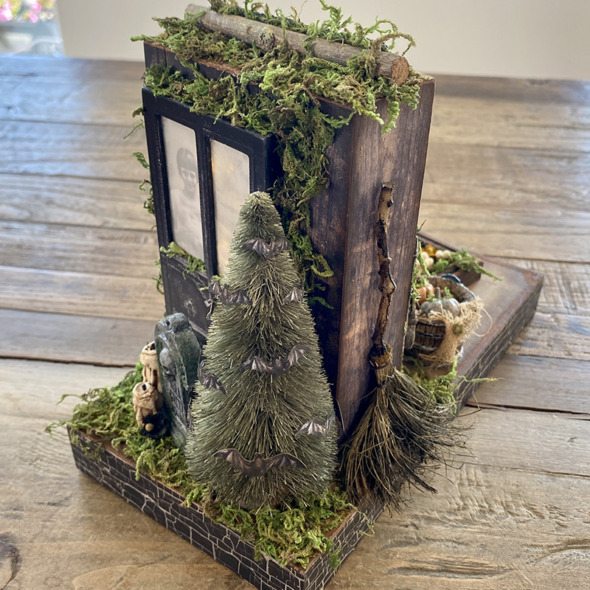
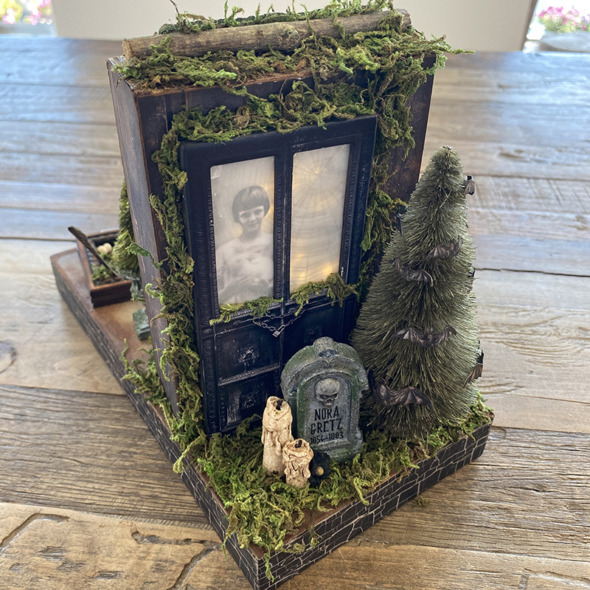
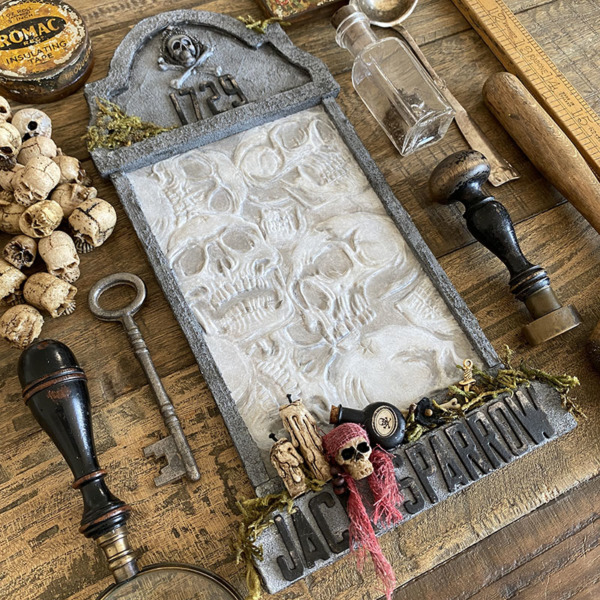
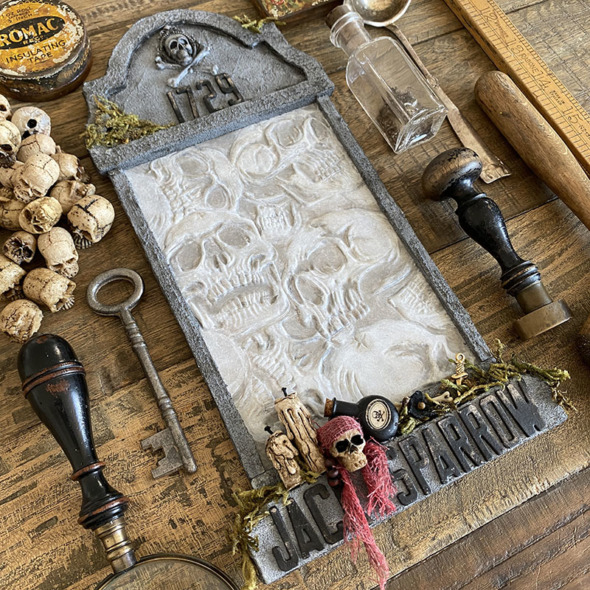
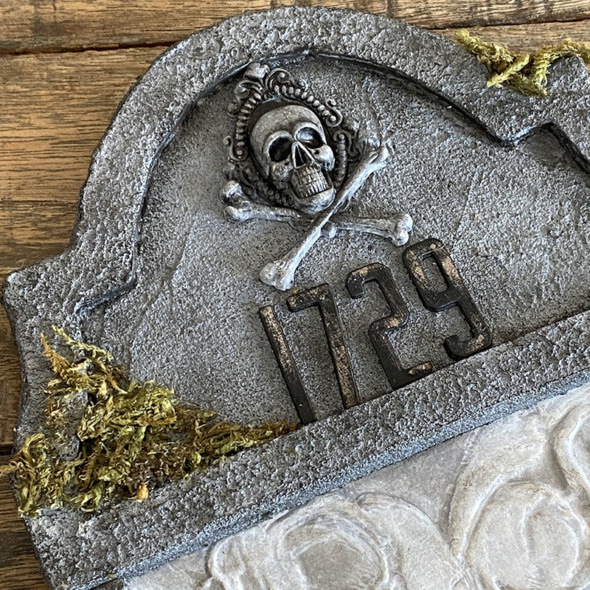
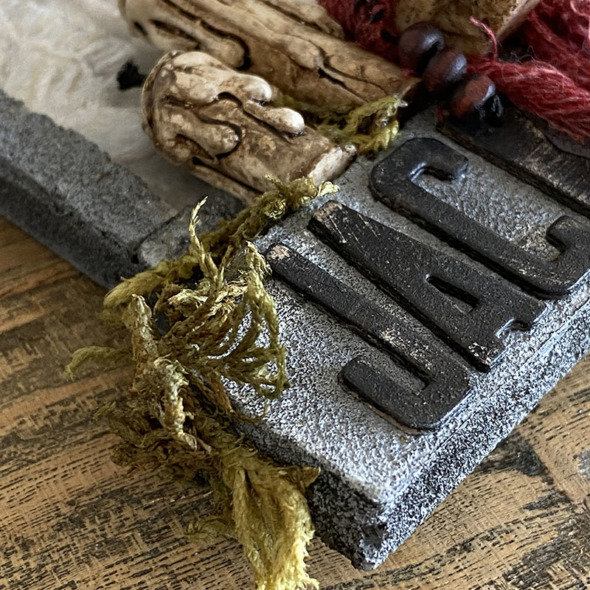
    I was delighted to see “Crypt-Paste” back in a bigger pot, the single serve pots were not enough for this grit-paste loving girl! The crypt-paste is bittier and grittier and it spreads like butta and as I had the bigger pot I decided to go to town with it and create a Tombstone fit for a pirate!

    igirlzoe: tim holtz distress crypt paste ranger ink sizzix skulls 3D folder
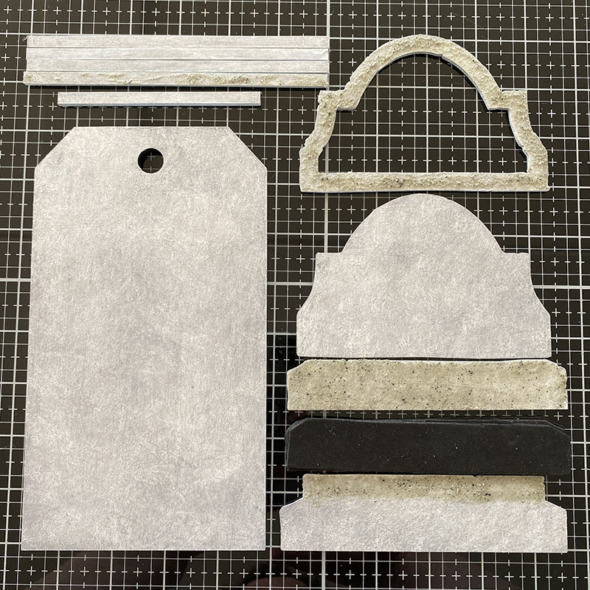
    I took an etcetera mini tombstone overlay and trims from the etcetera bat web trims set and covered the pieces with a white gesso wash. Once dry, I added crypt-paste to the parts of the tombstone that would show.

    igirlzoe: tim holtz distress crypt paste ranger ink sizzix skulls 3D folder
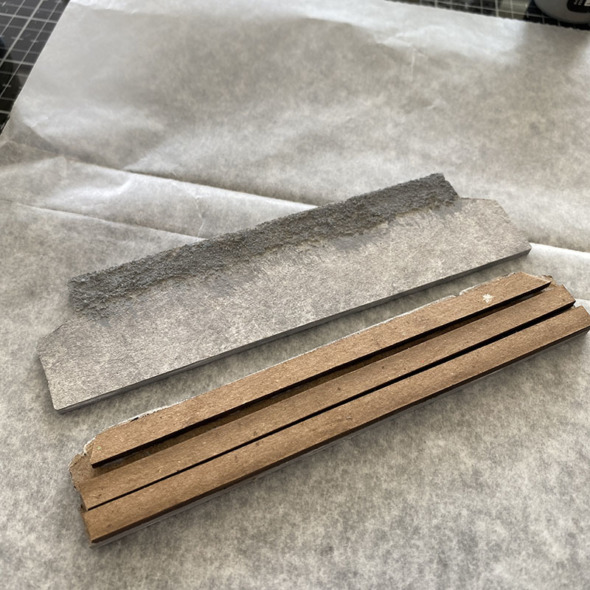
    Using more of the trims from the bat web trims set, mount onto the back of the base of the tombstone to create a shelf to sit idea-ology pieces on later. I covered the crypt paste with hickory smoke distress paint. I love that the translucency of the crypt-paste means you don’t get white showing through and it really is grittier.

    igirlzoe: tim holtz distress crypt paste ranger ink sizzix skulls 3D folder
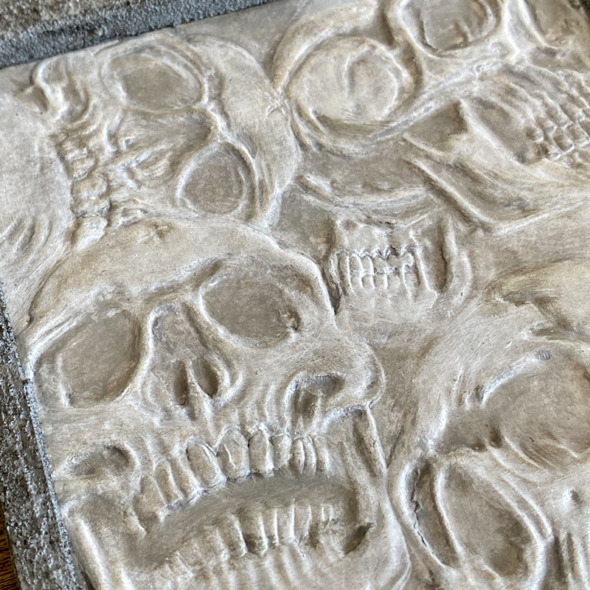
    The new Skulls 3D folder is nothing short of amazing. You don’t fully appreciate the depth and detail of the 3D until you have it in your hands and can’t quite believe one pass in a folder gives you THIS!! Make sure you check out Tim’s YouTube replay to see what he did with this folder and the black woodgrain surface! WOW!

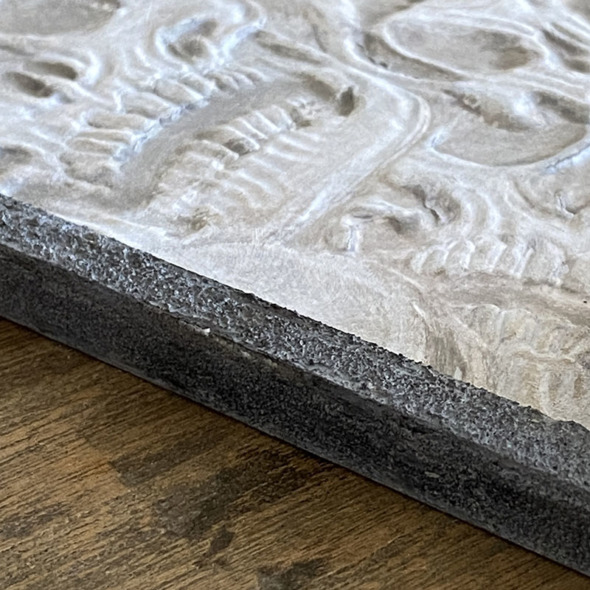
    I covered a piece of distress watercolor cardstock with a hickory smoke distress paint wash and set aside to dry. I embossed with the Skulls 3D folder then dry brushed white gesso onto the raised parts.

    igirlzoe: tim holtz distress crypt paste ranger ink sizzix skulls 3D folder
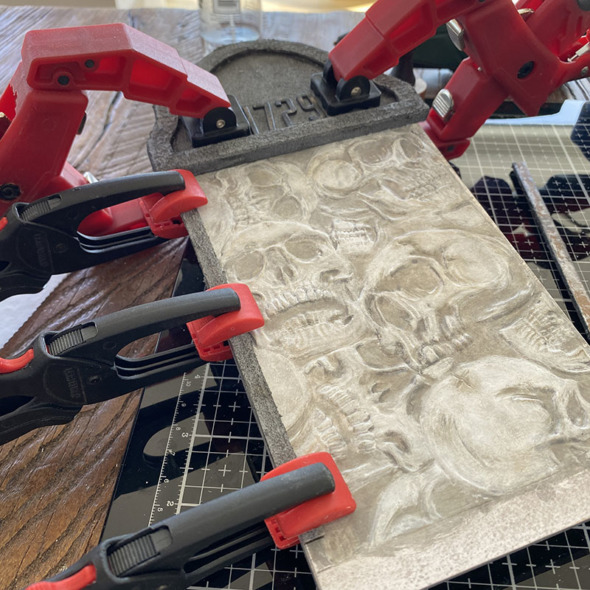
    I adhered the 3D skulls background to the tag part of the tombstone overlay and added the tombstone top. To create a side to the tombstone, I mounted 2 trims from the bat web trims set on top of each other to match the height of the top and bottom of the tombtone overlay, trimmed to size and added to the side. I used distress collage medium to glue and lots of clamps to hold in place while it dried!

    igirlzoe: tim holtz distress crypt paste ranger ink sizzix skulls 3D folder
    Using the new Theory alphanumeric thinlits dies, I added “1729” the year that Captain Jack Sparrow met his untimely death.

    igirlzoe: tim holtz distress crypt paste ranger ink sizzix skulls 3D folder
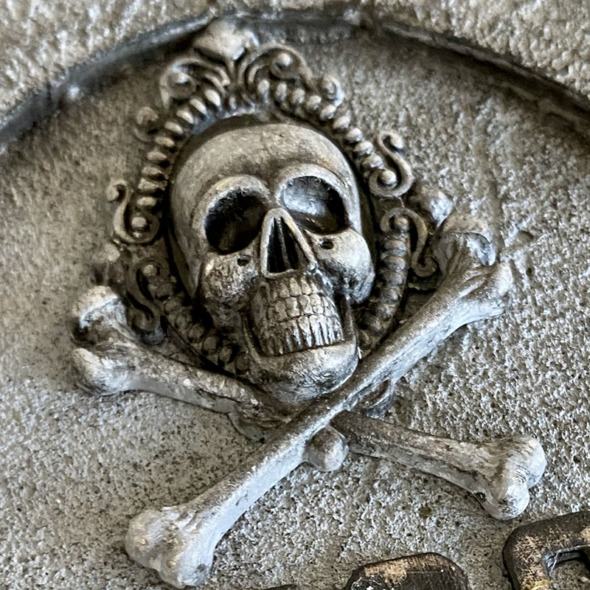
    Using an older piece of halloween idea-ology I hoarded I covered with gesso and wiped away the excess. Once dry I dry brushed black soot distress paint over the top and wiped with a cloth so the black sits in the recessed areas.

    igirlzoe: tim holtz distress crypt paste ranger ink sizzix skulls 3D folder
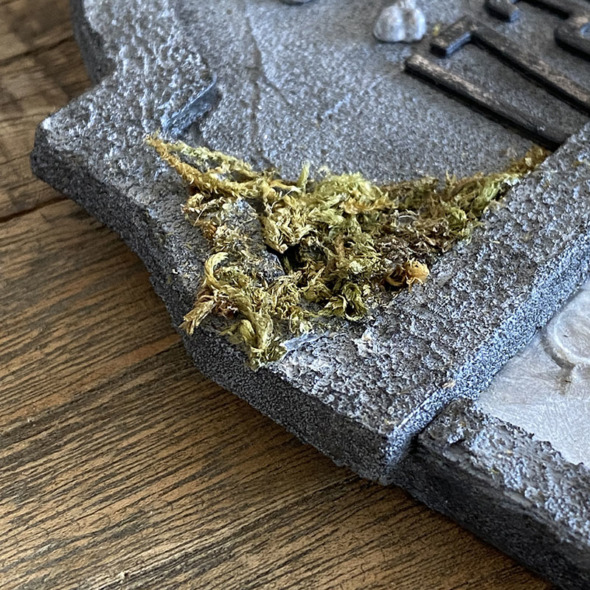
    I added some moss that I bought from a craft store. You will sometimes find this kind of moss in the model railway section. I painted on a layer of distress collage medium, pressed moss into it and allowed to air dry.

    igirlzoe: tim holtz distress crypt paste ranger ink sizzix skulls 3D folder
    I used a palette knife to spread Crypt-Paste along the edge of the trims to hide the seam and match the rest of the tombstone. Once dry, I covered with hickory smoke distress paint and later dry brushed with black soot distress paint.

    igirlzoe: tim holtz distress crypt paste ranger ink sizzix skulls 3D folder
    Using the Theory alphanumeric thinlits dies again, I cut “Jack Sparrow” from idea-ology black kraft stock several times and layered to give the letters some depth. I lightly sanded small areas and added along the base of the tombstone.

    igirlzoe: tim holtz distress crypt paste ranger ink sizzix skulls 3D folder
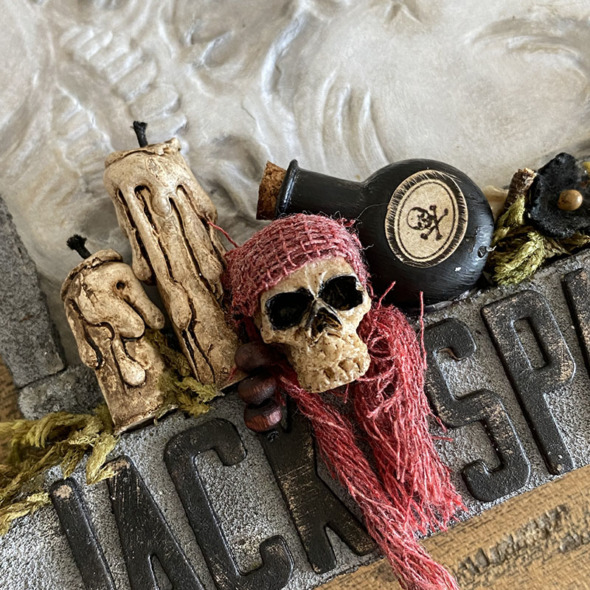
    I was able to place idea-ology items along the shelf I created by adding etcetera trims to the back of the tombstone overlay. I covered a bottle from the idea-ology tiny vials with a layer of distress collage medium and once dry, a layer of black soot distress paint. Adding an idea-ology label and skull and cross bones remnant rub. I used mummy cloth colored with distress ink for Jack’s bandana and sewed some beads into the side to imitate Jack’s beaded dreadlock. You can just about see them on the left hand side of the skull.

    Thanks for stopping by and let me know if you have any questions.

    Zoe

    …
    affiliate links used at no cost to you


  4. Specimen Box – Contents

    15th July, 2022 by iGirlZoe

    igirlzoe: tim holtz sizzix chapter 3

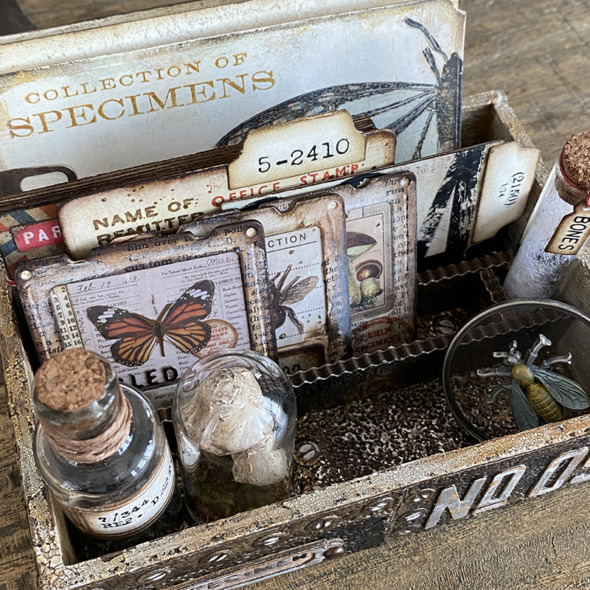
    Happy Friday friends. Today I’m sharing the contents of the specimen box I made for the Tim Holtz Chapter 3 LIVE launch which I shared in a separate post. You can see the LIVE launch replay and maker inspiration over on Tim’s blog.

    igirlzoe: tim holtz sizzix chapter 3
    The specimen set was certainly my favorite and I do love them all and have to have them all, but the file folder and the specimen slide stole my heart. I’ve been so excited at the thought of a social media world flooded with specimen slides and file folders and I’m waiting on pins for your dies to arrive and see what you make. For today, I’m going to share some details of the contents of my specimen box…

    igirlzoe: tim holtz sizzix chapter 3
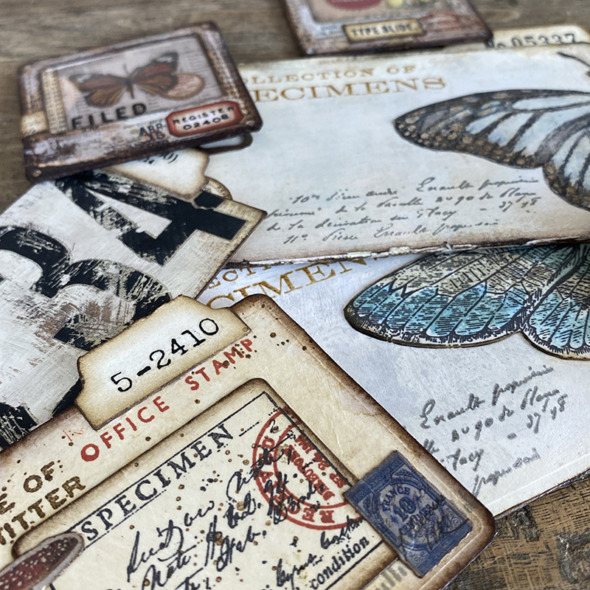
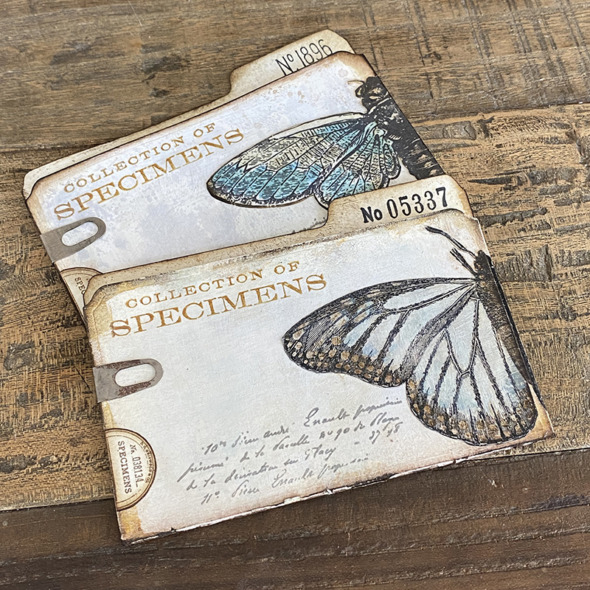
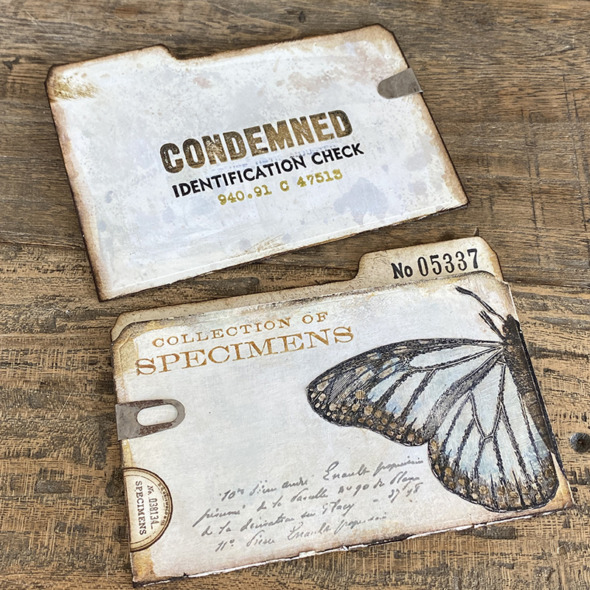
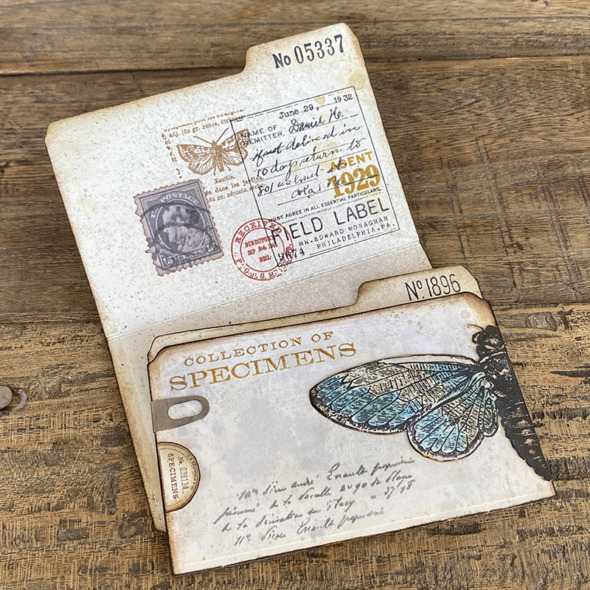
    I die cut file folders from the specimen set from distress mixed media heavystock. Painted with a light layer of white gesso mixed with a little water. I brayered a watered down layer of speckled egg distress paint over the top and stamped using distress archival ink and stamps. Here I used insects from the specimen stamp set and added index clips to hold the folders closed.

    igirlzoe: tim holtz sizzix chapter 3
    I stamped on the back of the file folders with stamps from the new Eccentric stamp set in distress archival ink.

    igirlzoe: tim holtz sizzix chapter 3
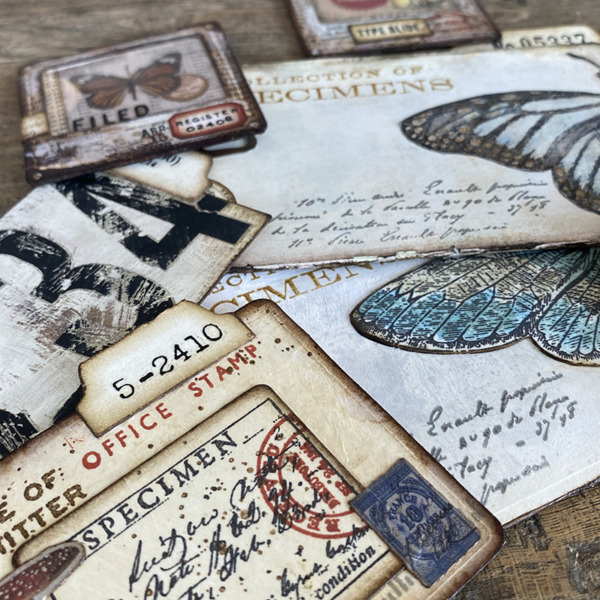
    I used stamps from field notes stamp set to stamp the inside of the file folders in different distress archival inks and added a stamp from the idea-ology field notes ephemera set. It reminds me of how they would validate some documents when I lived in Geneva, by using a postage stamp. I always think it makes a boring admin document look so pretty.

    igirlzoe: tim holtz sizzix chapter 3
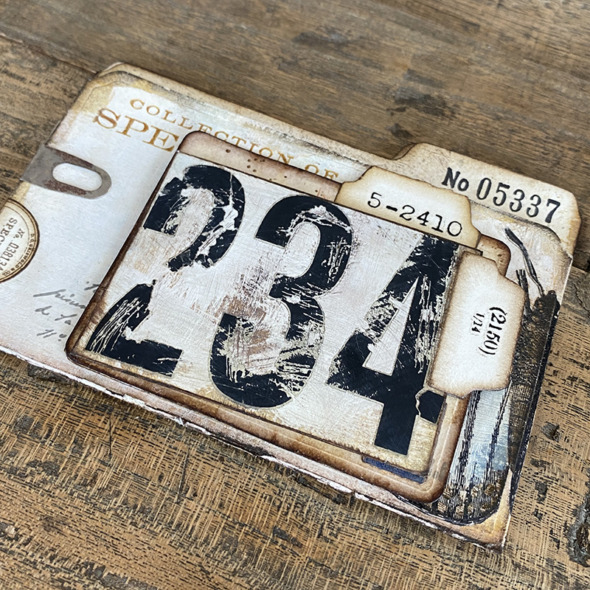
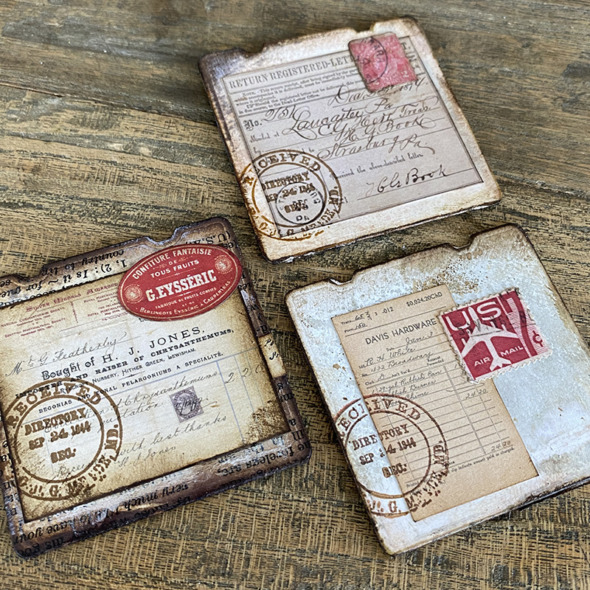
    Next I made some insert cards using more of the dies from the specimen set. I used the index tab die (which I LOVE) and several insert dies and cut more distress mixed media heavystock. I used remnant rubs to add numbers to the background and a distress tool to scratch it up. I then blended in walnut stain distress ink and wiped with a damp cloth, removing some of the excess ink.

    igirlzoe: tim holtz sizzix chapter 3
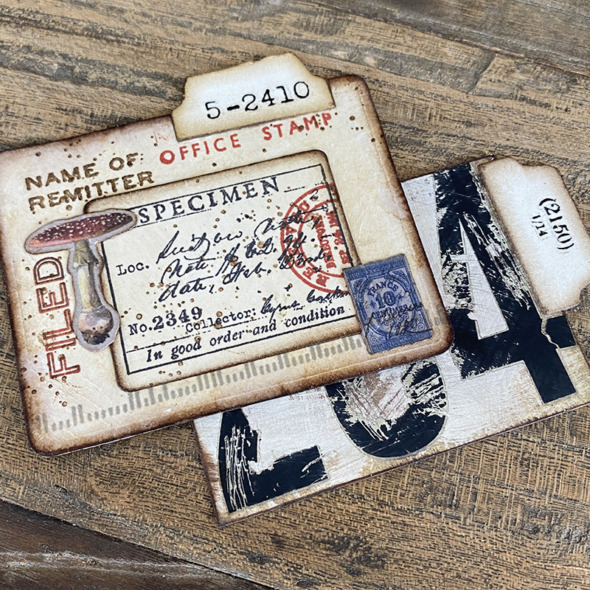
    I used stamps from field notes and correspondence, mixed with a little idea-ology ephemera to create this tabbed card. I love having so many different distress archival inks to stamp with too.

    igirlzoe: tim holtz sizzix chapter 3
    I used a stamp from the Laboratorie set on the back of both cards. I tapped each into a distress ink wash.

    Beginner Tip: To create a “distress ink wash”, simply squish your ink pad onto a non stick craft mat, spritz with lots of water and mix it all up with your finger. Then tap your card into the ink wash, lift out and dry with a heat tool or use a dry cloth to pick up excess water. Practice until you find the ink to water ratio you like. These things soon become second nature.

    igirlzoe: tim holtz sizzix chapter 3
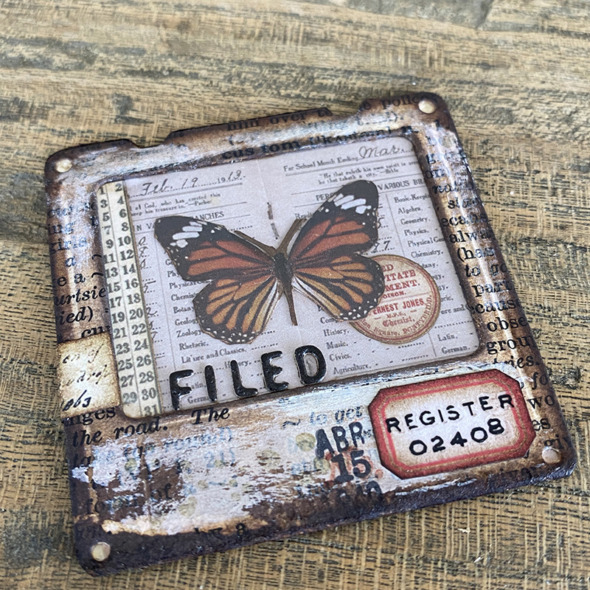
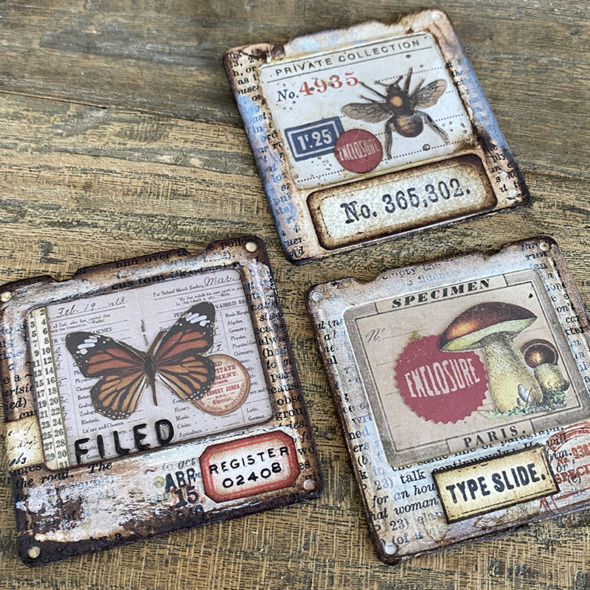
    Next to the specimen slides. They are so simple to die cut, ready to be decorated with endless possibilities. I added ephemera to the inside of mine, used a mica tile on top and added “FILED” cut from idea-ology black kraft stock. Because the letters are so tiny I mounted the kraft stock onto double sided adhesive sheets before die cutting. I stuck them onto the outer part of the slide.

    igirlzoe: tim holtz sizzix chapter 3
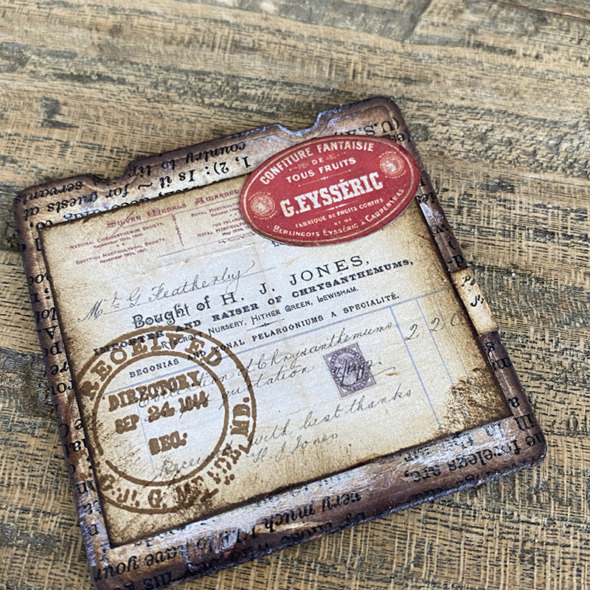
    I added more idea-ology ephemera to the back of the slides and stamped over top with distress archival ink.

    igirlzoe: tim holtz sizzix chapter 3
    I couldn’t stop making them but I didn’t have time to do step outs so I will be making some more and will share them in the next blog post.

    igirlzoe: tim holtz sizzix chapter 3
    It’s a great way to use your ephemera, I know you’re hoarding it too! 😉

    igirlzoe: tim holtz sizzix chapter 3
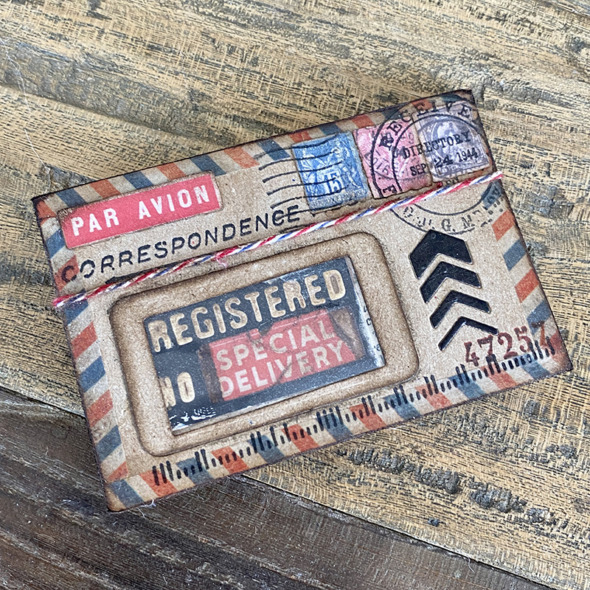
    My make concentrated on the specimen set and industrious 3D folder but I couldn’t resist using the postale set to make one tiny envelope. I’m really into airmail themed things so I pulled out some hoarded retired correspondence design tape with that gorgeous airmail striped tape. I die cut my envelope from a recycled envelope. I kept the clear glassine window and reused that too.

    igirlzoe: tim holtz sizzix chapter 3
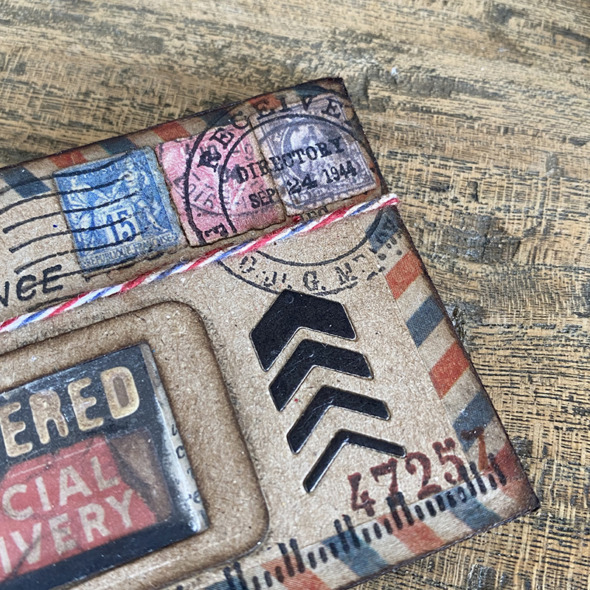
    I cut the arrows out of envelope front before mounting idea-ology black kraft stock into the recess. I added stamps from the snippets ephemera set and stamped with stamps from the correspondence set.

    igirlzoe: tim holtz sizzix chapter 3
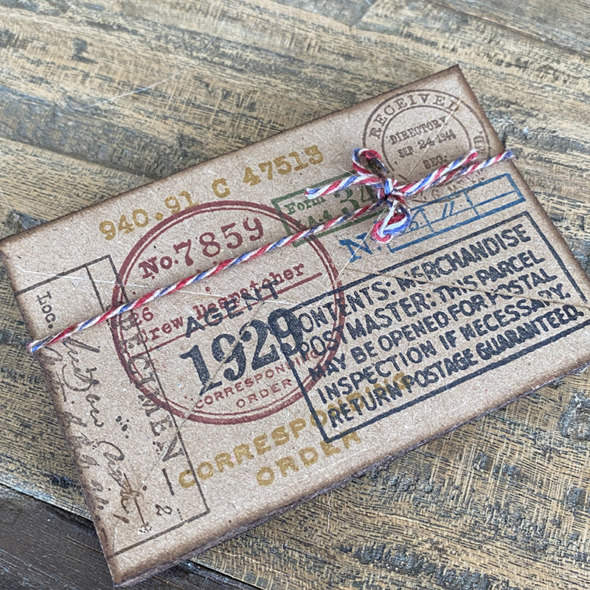
    I used various colors of distress archival inks and stamps from Eccentric, Field Notes and Correspondence stamp sets to decorate the back of the envelope.

    igirlzoe: tim holtz sizzix chapter 3
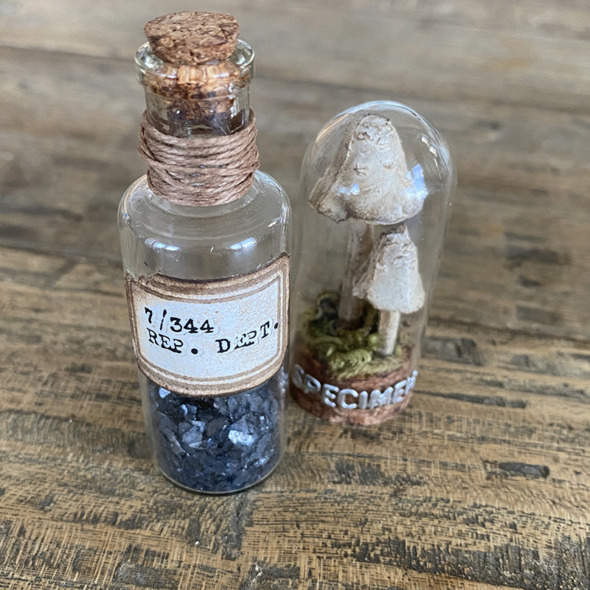
    I love to use idea-ology apothecary bottles and domes and love that the Chapter 3 dies work perfectly with my favorite pieces. I added a label from the vintage label thinlits die set to and apothecary bottle with remnant rubs added. I tore a corner off the label for a worn look. You have to check out Tim’s cool demo on how to ink and cut the vintage labels.

    igirlzoe: tim holtz sizzix chapter 3
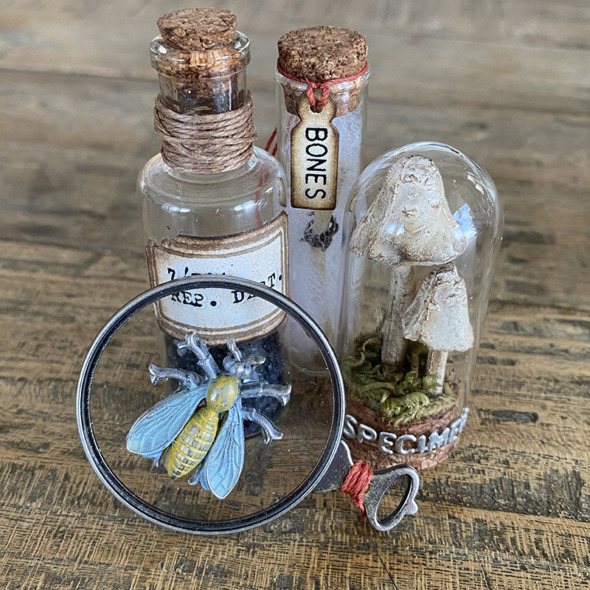
    I added “specimen” to the mini dome. I die cut this from idea-ology metallic kraft stock which I had backed with an adhesive sheet before die cutting. This is a much easier way to add the tiny letters to glass. I added an insect to the optical lens and wrapped with a piece of twine.

    igirlzoe: tim holtz sizzix chapter 3
    I added wadding and an idea-ology bone to a test tube and added a tiny label from the collector set with “bones” rubbed on from the halloween remnant rubs set. I like to do “Halloween” all year round so I always stock up on Halloween idea-ology when it comes around. Speaking of Halloween… I’ve got a busy weekend making ahead… 😉

    igirlzoe: tim holtz sizzix chapter 3
    Thanks for stopping by, I hope you’ve enjoyed this tour around my specimen box.  Let me know if you have any questions in comments and I’ll do my best to answer them.

    Have a great weekend.
    Zoe

    …
    affiliate links used at no cost to you


  5. Tim Holtz – The Best Chapter

    14th July, 2022 by iGirlZoe

    igirlzoe: tim holtz sizzix chapter 3

    Hello friends. I’m sure by now you’ve seen the incredible new Tim Holtz Chapter 3 dies and 3D folders. This is Tim’s chapter and the best ever chapter! If you missed the LIVE or want to have it on replay all day, you can see it and all the mind blowing maker inspiration over on Tim’s blog.
    igirlzoe: tim holtz sizzix chapter 3
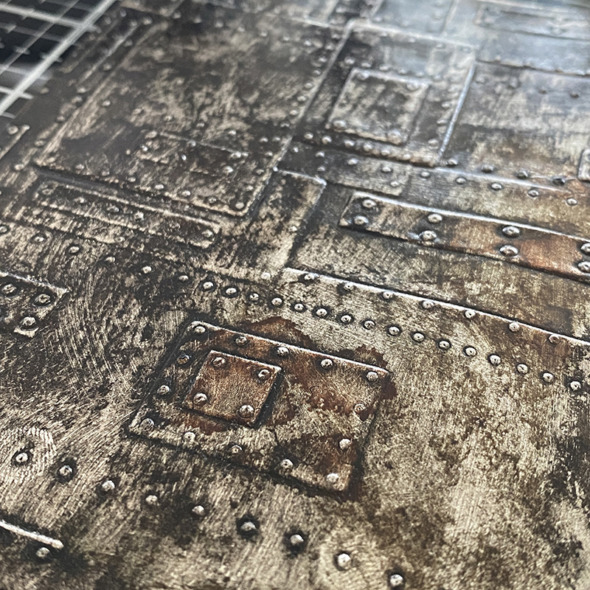
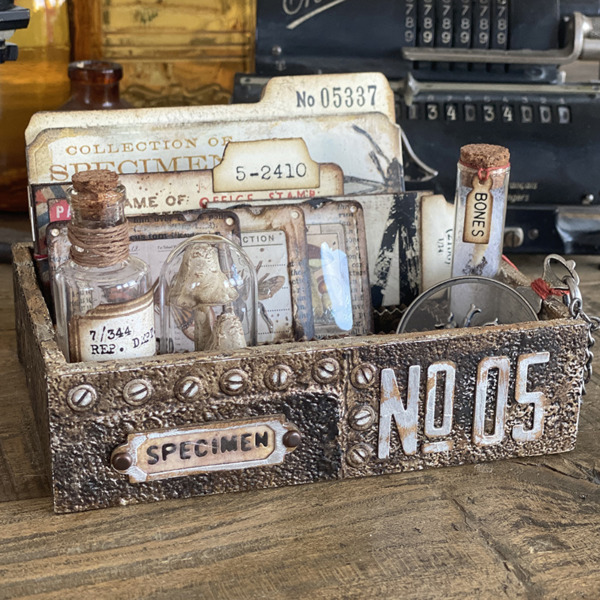
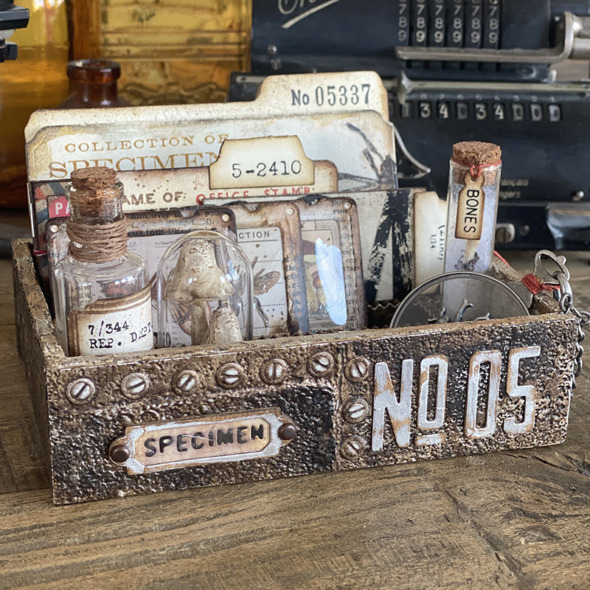
    If you know my maker style, I definitely have a love for all things industrial, so the new Industrious 3D folder made my grunge loving heart sing! The detail you get with this folder is incredible and those rivets! WHAAAT!!! The folder was the starting point of my specimen box which I’m going to share details of in this blog post.

    The contents of the box will be in a separate post as I’ve added extra detail in the description to hopefully answer some of the questions I’ve had from makers just starting out. Grab yourself some snacks, get comfortable and let’s get into it…
    igirlzoe: tim holtz sizzix chapter 3
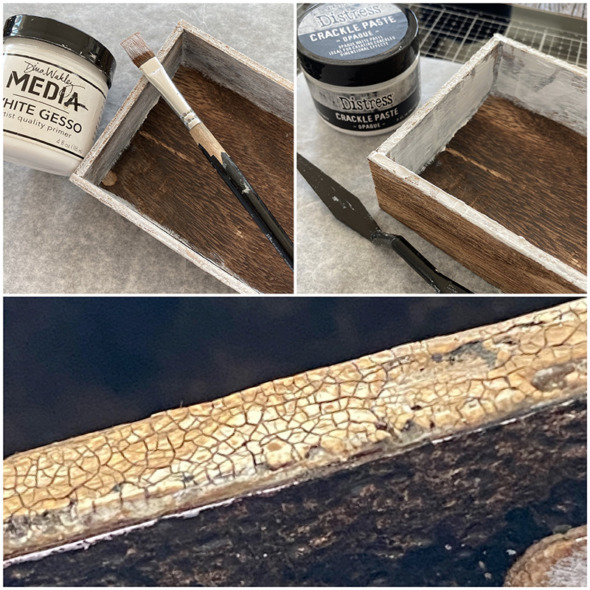
    Prime a large idea-ology vignette box with white gesso and once dry, add distress opaque crackle paste to the inside sides and border of the vignette. Dry brush vintage photo distress paint over the crackle and rub in walnut stain distress crayon.

    Beginner Tip: Dry brushing is an almost dry paint free brush. Add a little paint to a dry paint brush and remove the excess with a paper towel. Repeat, building the color slowly to add highlight but not a thick layer of paint.
    igirlzoe: tim holtz sizzix chapter 3
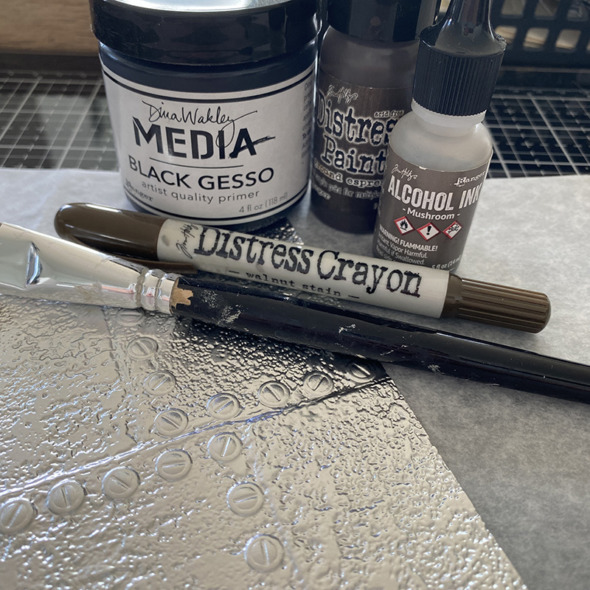
    Gather your supplies and using the new industrious 3D embossing folder, emboss idea-ology silver metallic kraft stock. Spritz the kraft side of the metallic kraft stock with a light mist of water and run through your machine inside the 3D folder.

    Note: I used the Tim Holtz Big Shot Foldaway machine and the pressure is so good that it only needs one pass.
    igirlzoe: tim holtz sizzix chapter 3
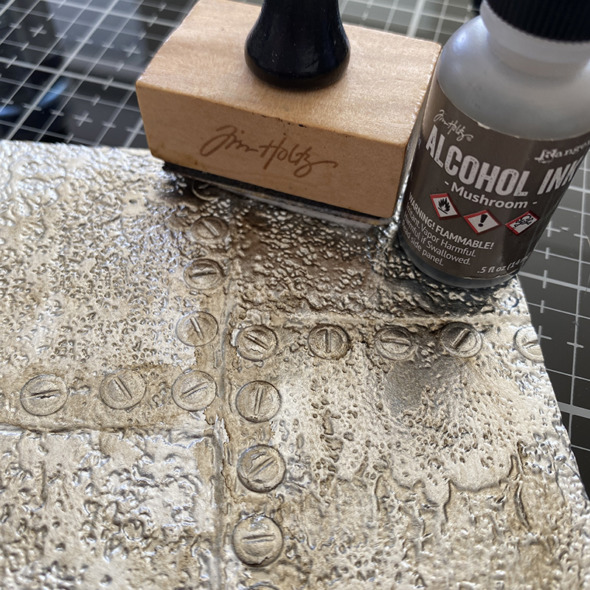
    Add a little mushroom alcohol ink to random parts of the background and allow to air dry.

    Note: You can skip this part, I find it adds a little “tooth” to the slick metallic kraft stock which the other mediums cling to, giving a more uneven finish, which I like.
    igirlzoe: tim holtz sizzix chapter 3
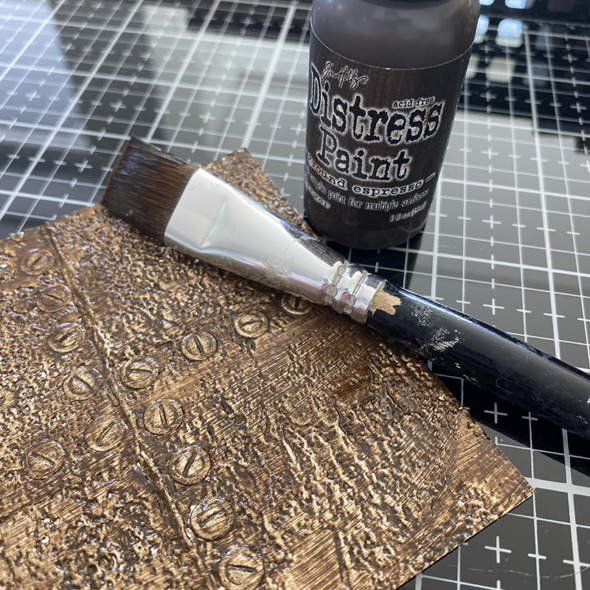
    Add a layer of ground espresso distress paint using a paintbrush. Get the paint right into the de-bossed areas. Allow the paint to dry a little and then wipe the excess away with a dry clean cloth.
    igirlzoe: tim holtz sizzix chapter 3
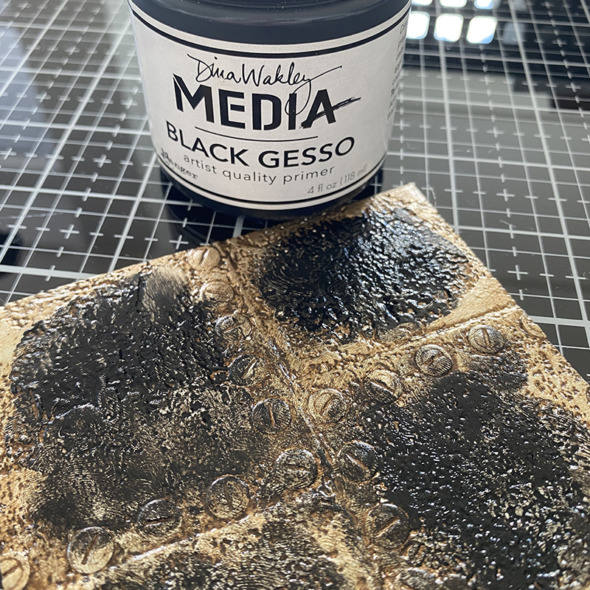
    Add a little black gesso with your finger but this time don’t allow to dry.
    igirlzoe: tim holtz sizzix chapter 3
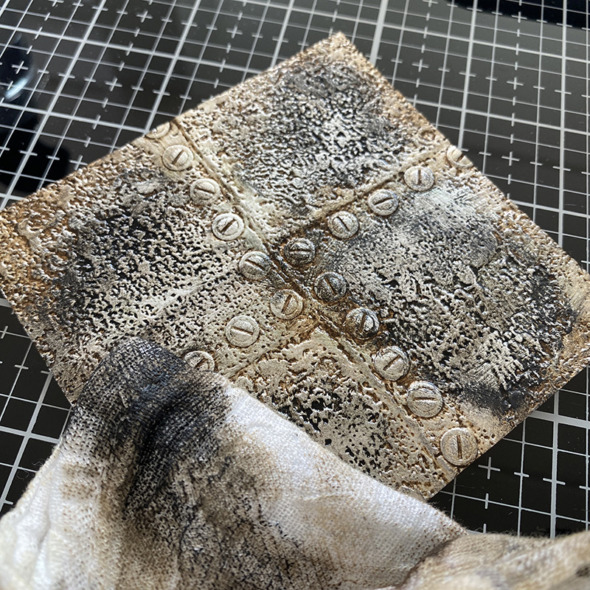
    Use a clean dry cloth to wipe away most of the gesso and allow the remaining to dry.
    igirlzoe: tim holtz sizzix chapter 3
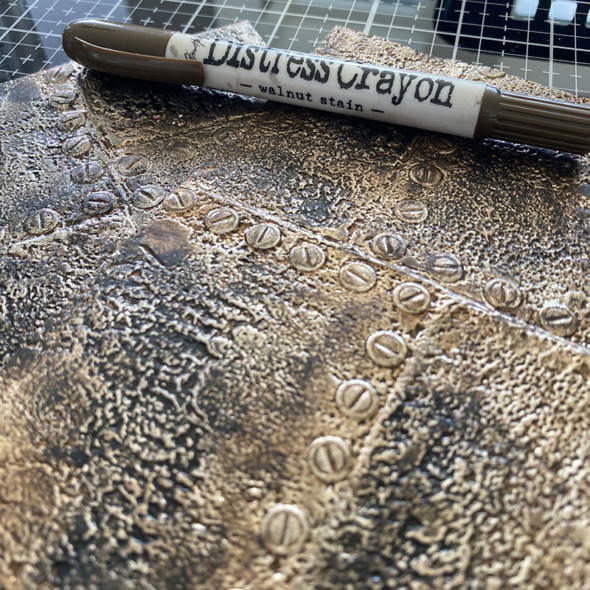
    Add walnut stain distress crayon to parts of the metallic kraft stock that you would like to be darker or grungier. Keep tinkering with it until you’re happy.
    igirlzoe: tim holtz sizzix chapter 3
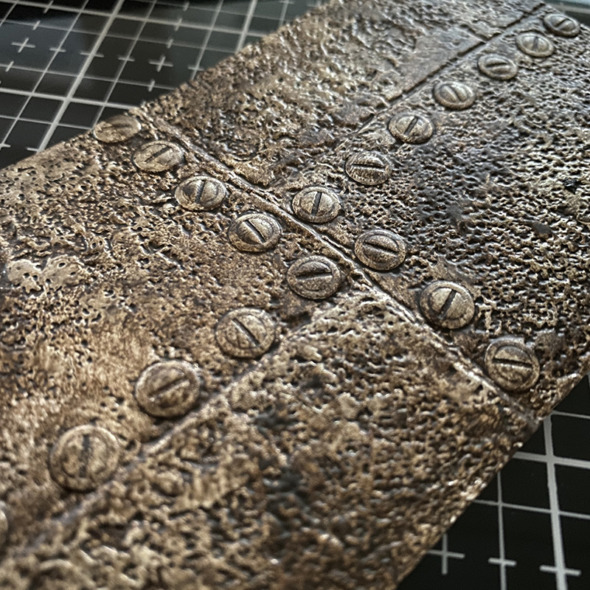
    Measure the parts of the vignette box you intend to cover and cut the embossed kraft stock to size. When cutting, think about where you want the rivets to sit on your panel.
    igirlzoe: tim holtz sizzix chapter 3
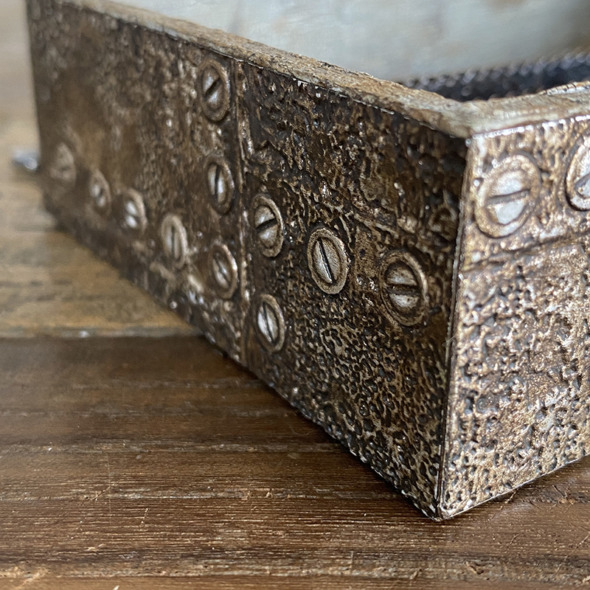
    Using distress collage medium, add the embossed panels to the vignette box.

    Note: I found it worked best to add a layer of collage medium to the vignette box and to the embossed panel.
    igirlzoe: tim holtz sizzix chapter 3
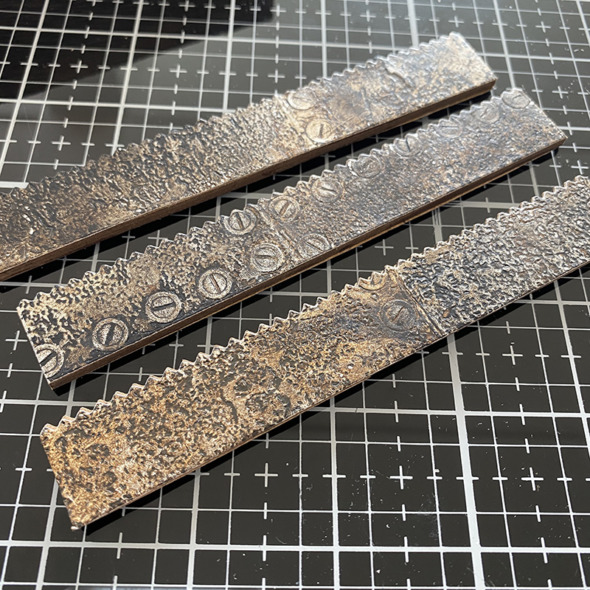
    To create the box dividers, use the decorative trims thinlits dies to cut strips from the metallic embossed kraft stock. Using distress collage medium, add them to both sides of etcetera thickboard pinked edge trims.

    Beginner Tip: Die cut first and 3D emboss second so you don’t flatten the embossed detail.
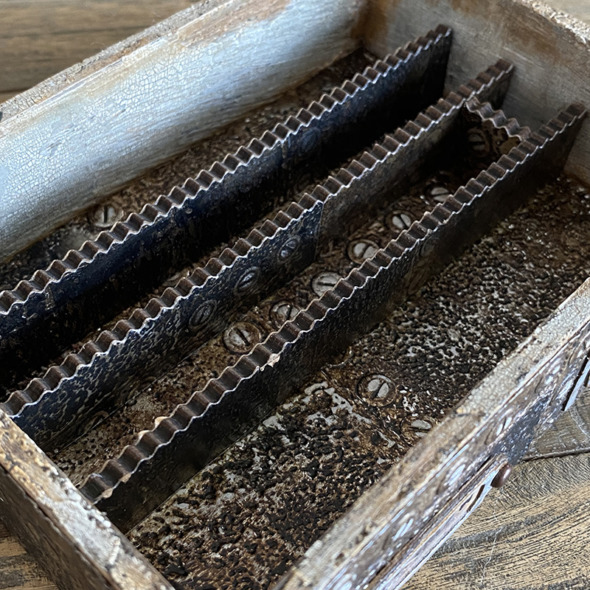
    igirlzoe: tim holtz sizzix chapter 3
    Using Tim’s Tonic scissors, trim the trims to fit inside the vignette box. Add a line of distress collage medium using the precision bottle to the bottom and sides of the trims and push into place. Hold in place for a few moments and then set aside and allow the collage medium to completely dry.
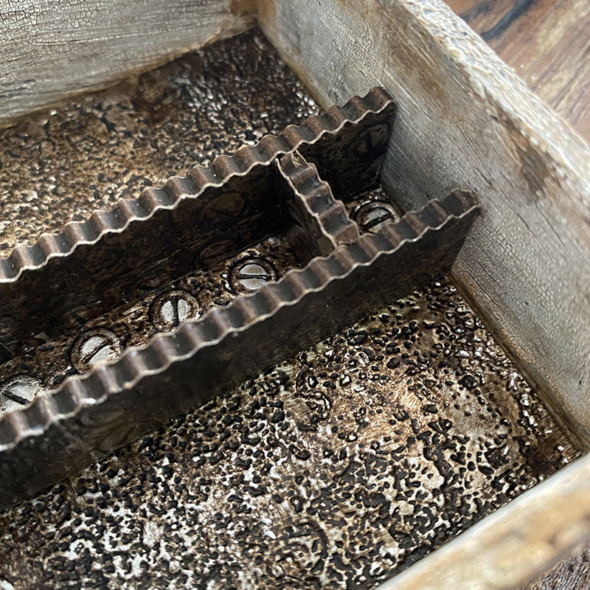
    igirlzoe: tim holtz sizzix chapter 3
    I used an offcut to add a compartment to fit an idea-ology test tube! Cut the trim to size and add the distress collage medium. Hold the test tube in place with one hand and slide the trim into place and then remove the test tube and allow to dry.

    Tip: If you need both hands, use a little poster putty/blu-tack to hold the test tube in place while you slide the trim in beside it.
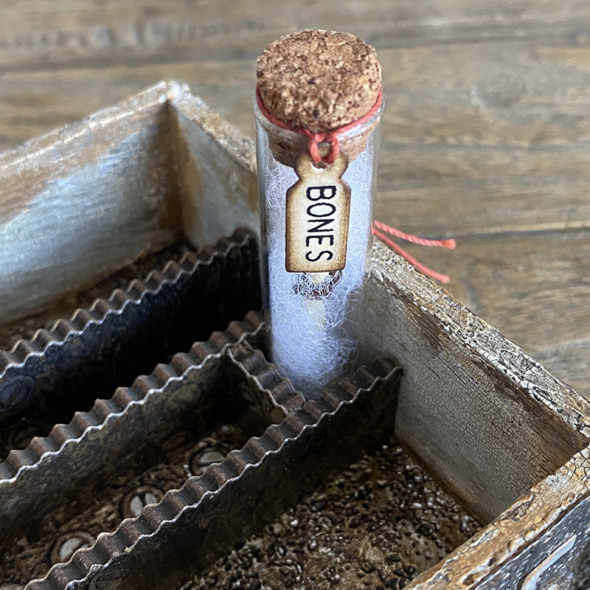
    igirlzoe: tim holtz sizzix chapter 3
    How cute is the tiny label from the Collector set? I have wanted a label this size for so long. Thanks Tim!
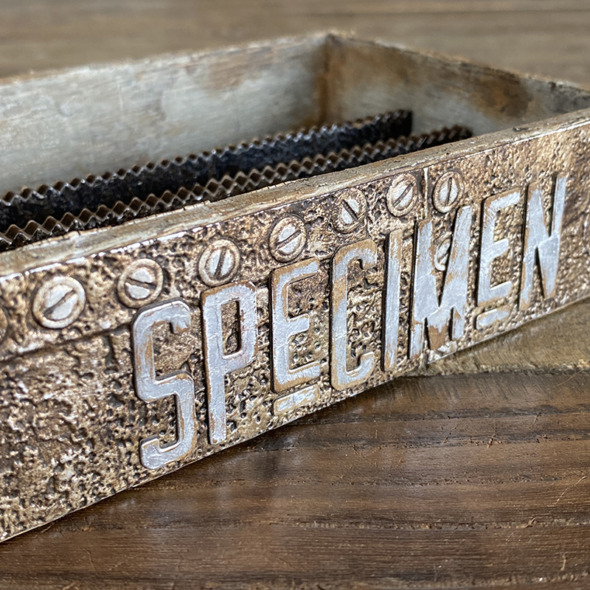
    igirlzoe: tim holtz sizzix chapter 3
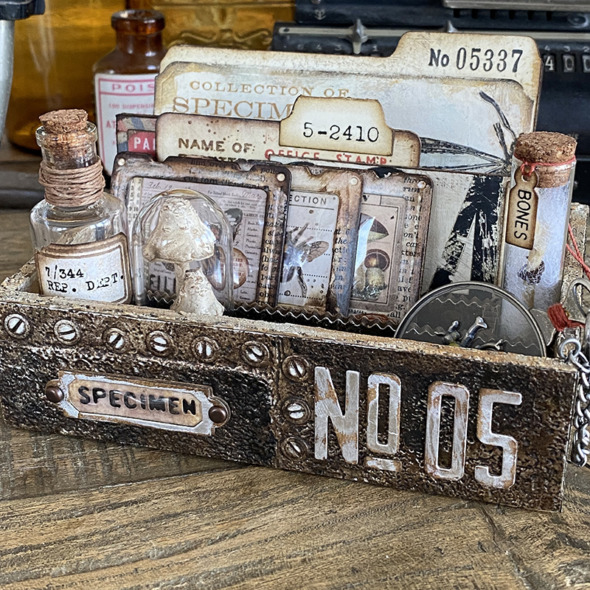
    I can see why Tim loves the new Theory Alphanumeric die set! You get 2 sizes of alphas and the blocks that sit under the smaller letters to lift them to the height of the larger set. SO COOL! I used idea-ology silver metallic kraft stock to cut “Specimen”, sanded, blended in a little walnut stain distress ink and added it to the back panel of the vignette box.
    igirlzoe: tim holtz sizzix chapter 3
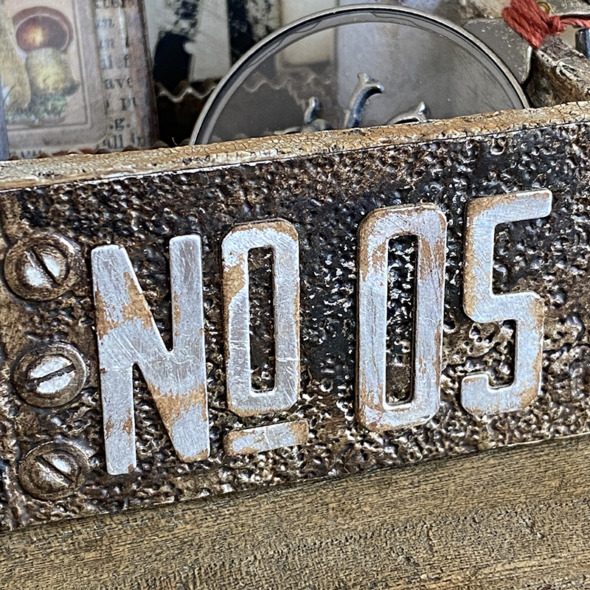
    On the front panel I added No 05. Gently sand the rivets to remove a layer of paint and show the metallic kraft stock underneath.

    Tip: I found sanding the rivets once the embossed panels were on the vignette box was easier as it’s a rigid surface to sand and you just catch the raised rivets without sanding the rest.
    igirlzoe: tim holtz sizzix chapter 3
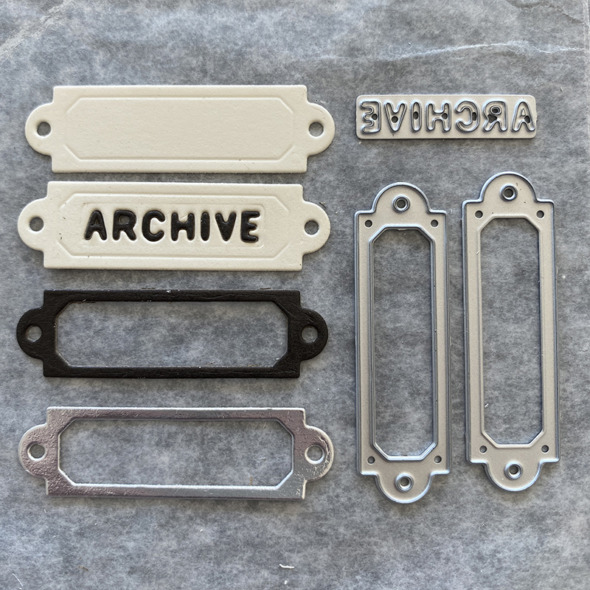
    I die cut idea-ology silver metallic kraft stock, black kraft stock and mixed media heavystock using the label frame and tiny word dies from the Specimen set. Layering them up to create a thicker label frame for the front of the specimen box. (ignore the word “Archive,” this was just to show what layers I used).
    igirlzoe: tim holtz sizzix chapter 3
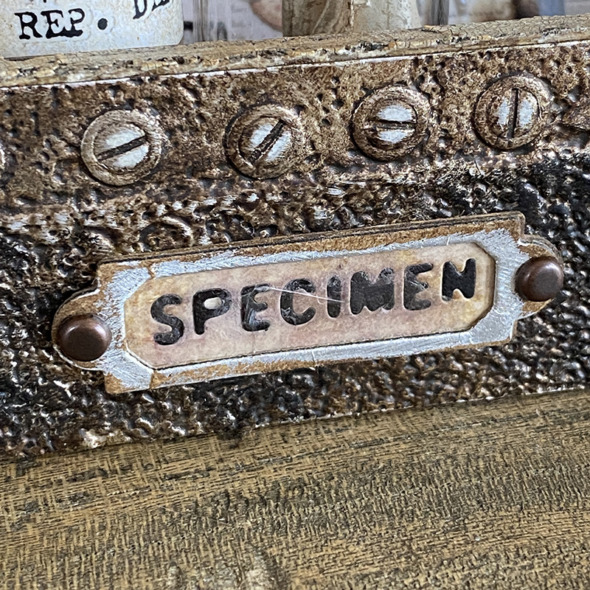
    I added mica tile under the top label piece and used idea-ology long fasteners through the holes and secured at the back and added the label frame to the front panel of the vignette box with distress collage medium.
    igirlzoe: tim holtz sizzix chapter 3
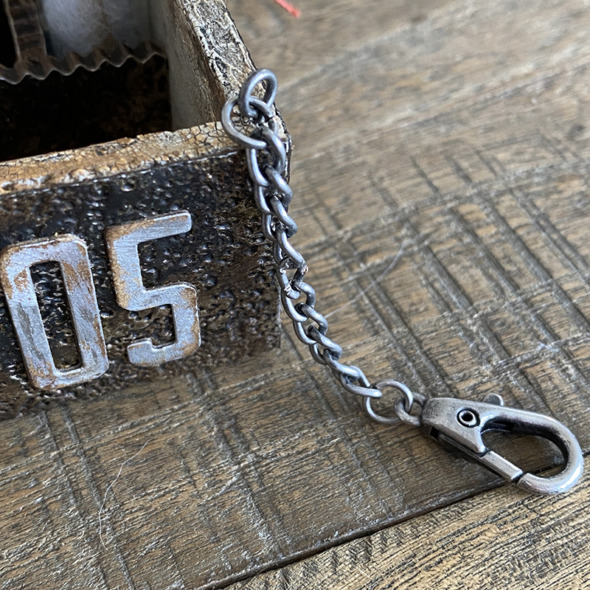
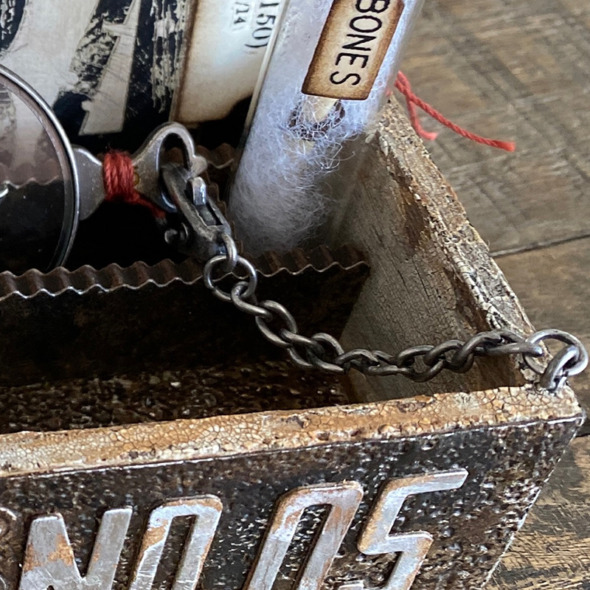
    Using the idea-ology vignette hardware set, I added a hook and an idea-ology hook clasp to the corner of the vignette box.
    igirlzoe: tim holtz sizzix chapter 3
    Does anyone remember the tools you would get at the science museum interactive exhibits that would be attached by chain so they wouldn’t be removed? That gave me the idea to use the hook clasp to attach the idea-ology optical lens to the specimen box.
    igirlzoe: tim holtz sizzix chapter 3
    Now your box is ready to fill…

    igirlzoe: tim holtz sizzix chapter 3
    I’ll be sharing the contents of this specimen box on my blog tomorrow, I hope you can stop by and take a look. If you have any questions, leave them in comments and I’ll do my best to reply.

    Zoe

    …
    affiliate links used at no cost to you


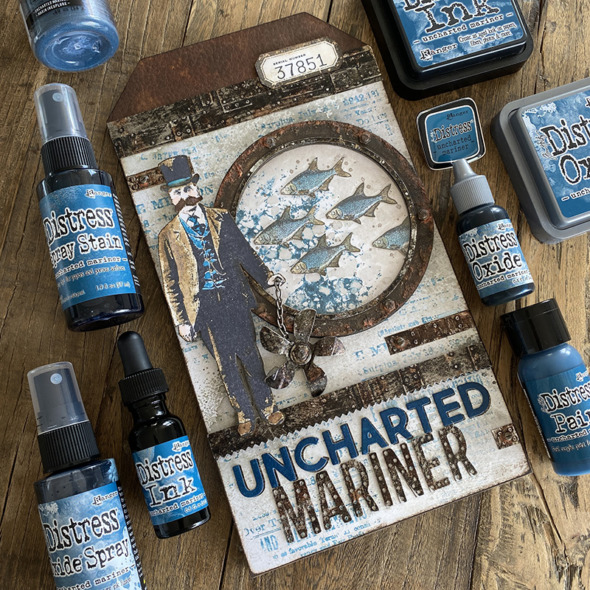
  6. Uncharted Mariner

    24th June, 2022 by iGirlZoe

    igirlzoe: tim holtz uncharted mariner distress ranger ink

    Hello friends. Happy FriYAY! Nearly weekend and I’ve got plans to spend this weekend making and I’m excited about that. I’m also excited about the new Distress. Did you meet the newest member of the Tim Holtz distress family, Uncharted Mariner? If you missed the new distress launch, you can catch the replay and maker inspiration over on Tim’s blog.

    igirlzoe: tim holtz uncharted mariner distress ranger ink
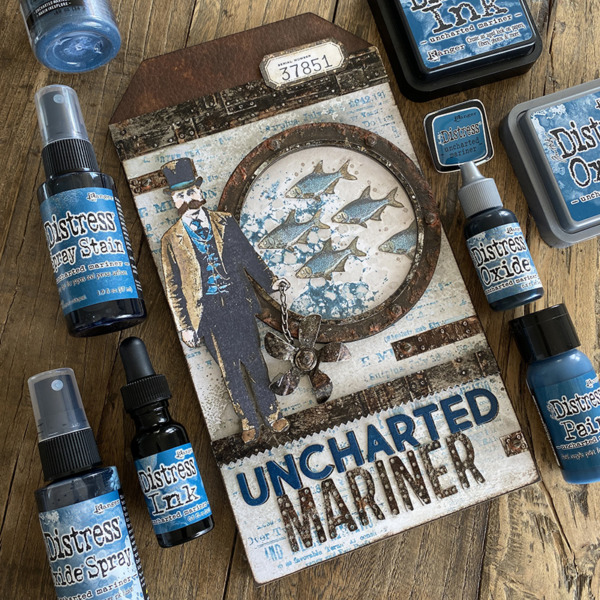
    I LOVE LOVE LOVE Uncharted Mariner. When I opened the box I gasped and swooned and I knew it was going into my favorites tin alongside my other desert island distress inks. I love the names that Tim comes up with and I wanted to celebrate the name and the color. Let’s get into some of the details…

    igirlzoe: tim holtz uncharted mariner distress ranger ink
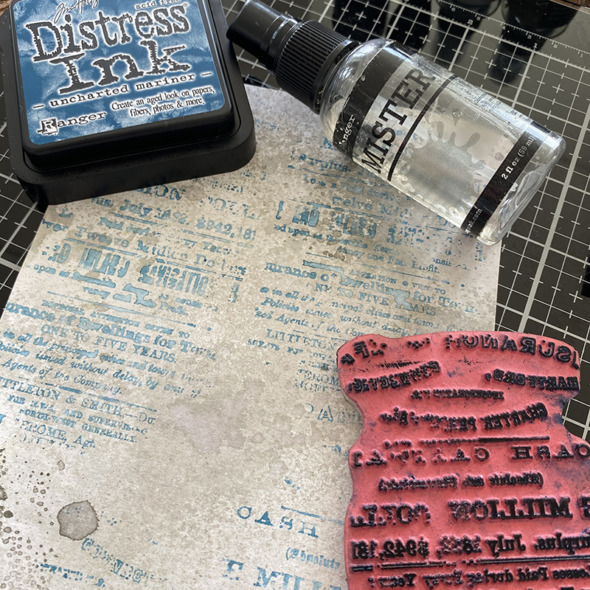
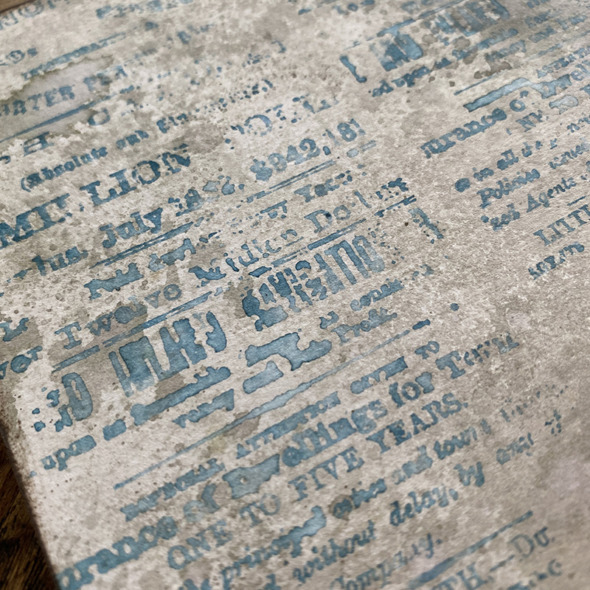
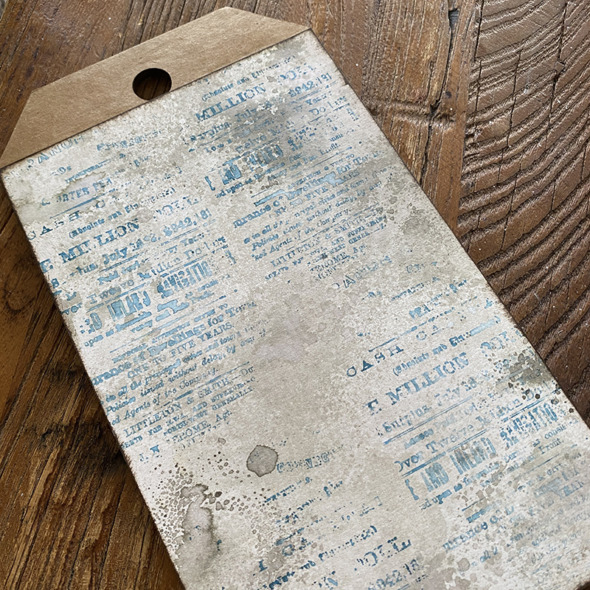
    Using the Uncharted Mariner distress ink pad, I inked up a background stamp from the The Professor 2 (CMS395) stamp set, misted the stamp with water and lightly stamped onto a piece of distress watercolor cardstock (smooth side) cut to fit a small etcetera thickboard tag, which I had swiped in a pumice stone distress ink wash.

    igirlzoe: tim holtz uncharted mariner distress ranger ink
    By misting the stamp with water after inking and before stamping, you will get a smudged image, but that’s what I was going for so the background would be out of focus and subtle.

    igirlzoe: tim holtz uncharted mariner distress ranger ink
    Ok, not going to lie… I over-trimmed the background, said some bad words and decided to make it work by adding a panel of cracked leather cardstock to the top. This however caused another problem… I glued the cracked leather cardstock over the distress watercolor cardstock and there was a ridge. By the time I noticed the ridge it was too late to pull them up, so the next idea was born out of total necessity…

    igirlzoe: tim holtz uncharted mariner distress ranger ink
    So onto the solution to cover “the ridge of cardstock doom”…

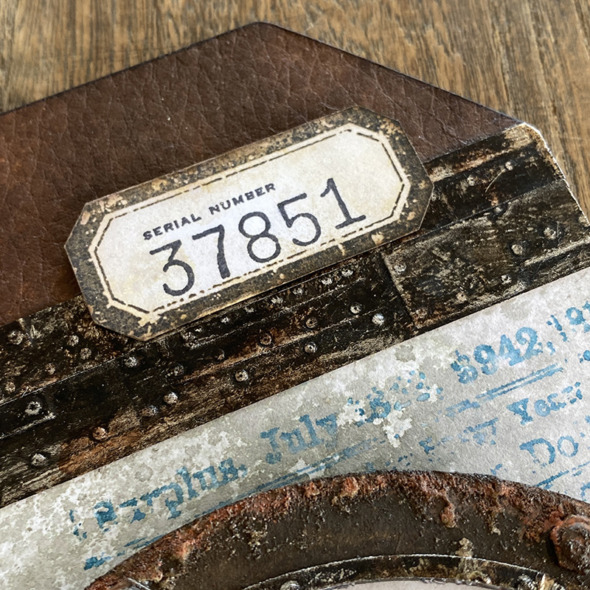
    I needed something with some height or texture and the Foundry 3D embossing folder was perfect. I embossed a piece of idea-ology metallic kraftstock, covered with a layer of ground espresso distress paint. Because the metallic kraftstock is shiny, there’s nothing for the paint to cling to, no “tooth”, so you may need to run your paintbrush over the background a couple of times to get coverage and wipe the excess away with a clean cloth. I also added mushroom and rust alcohol inks to portions of the background.

    igirlzoe: tim holtz uncharted mariner distress ranger ink
    What ridge? What wrongly trimmed cardstock? This is exactly to plan! 😉

    And this is how I make most of the time. It’s a series of corrected missteps and happy accidents. I just want you to know that I have no idea what I’m doing, but I have fun messing it up and fixing it up, and that’s what really matters.

    I added a label I stamped with the Apothecary stamp set (CMS138). I have a few stamp sets that I keep out all the time and this is one. I LOVE these labels! I added a stamp from the new Eccentric stamp set (CMS448) inside the label.

    igirlzoe: tim holtz uncharted mariner distress ranger ink
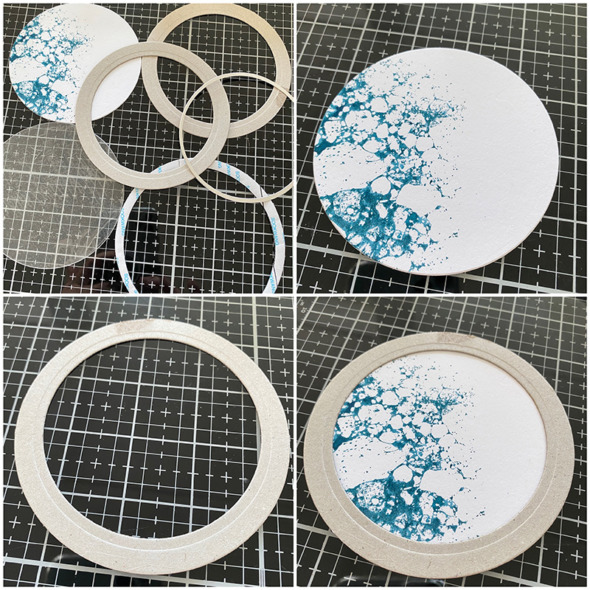
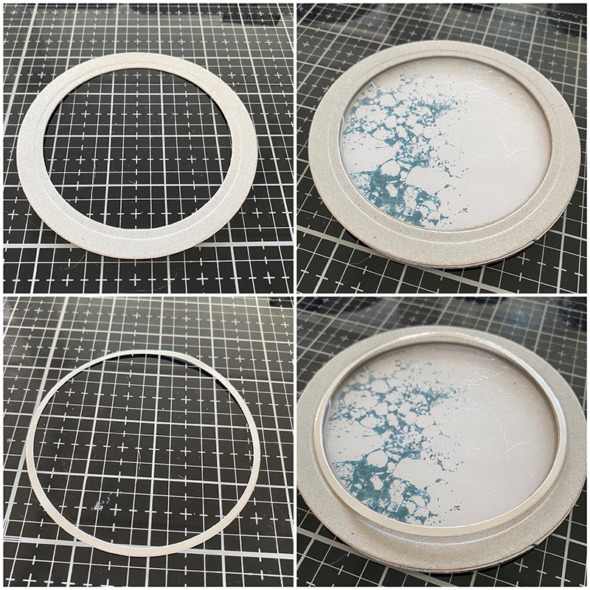
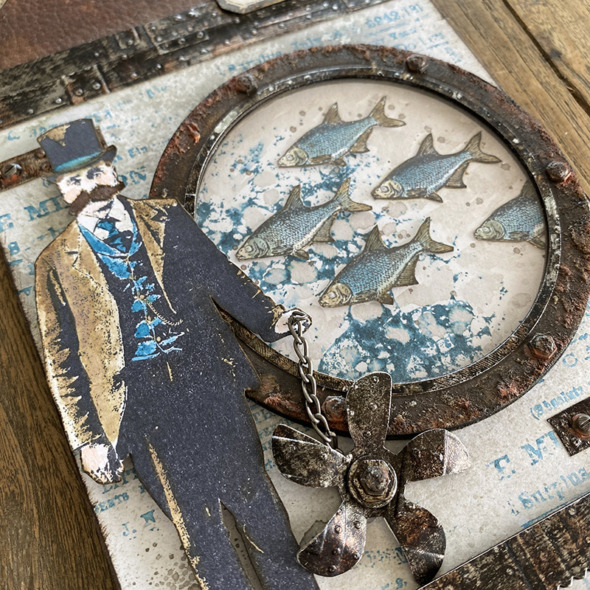
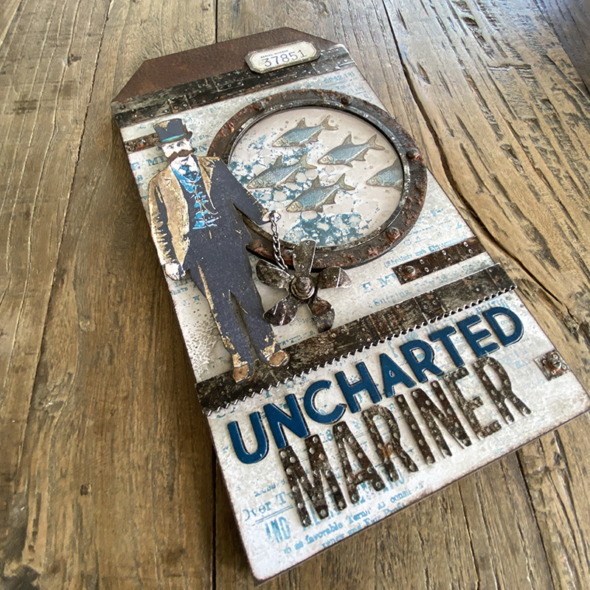
    For the porthole I used circle thin frame dies from Simon Says Stamp to create the porthole frame. The base layer is distress watercolor cardstock stamped with the new Bubble stamp (CMS449) with Uncharted Mariner distress ink. This stamp and this ink is a match made in heaven!! I added a chipboard circle over the top.

    igirlzoe: tim holtz uncharted mariner distress ranger ink
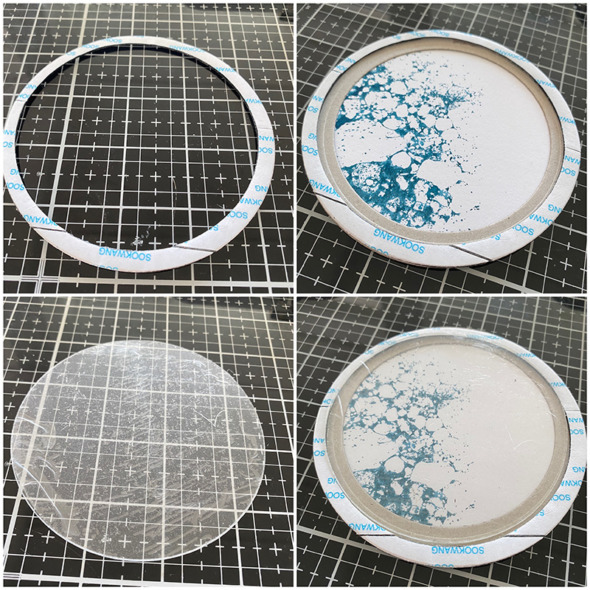
    I added a thin circle of adhesive foam so the acetate circle would sit away from the background.

    igirlzoe: tim holtz uncharted mariner distress ranger ink
    Then added the top layer and the inner circle which I cut from the embossed foundry sheet that I showed earlier in the post.

    Please note the above photos were to show the layers. I decorated the top of the porthole and added the fish before assembling. Here’s how…

    igirlzoe: tim holtz uncharted mariner distress ranger ink
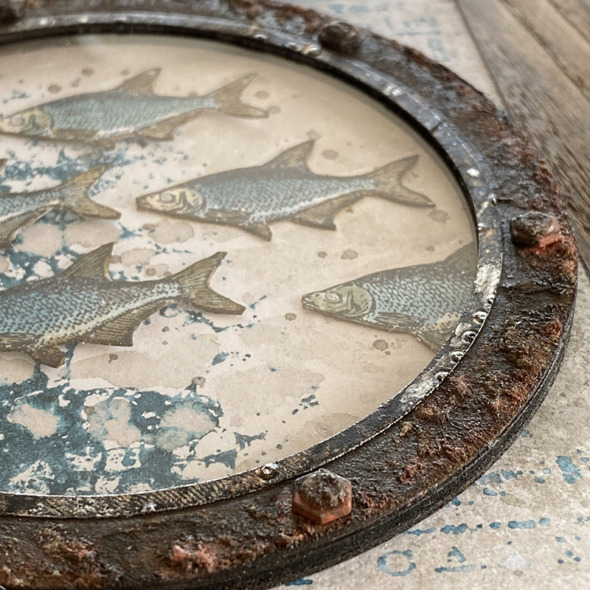
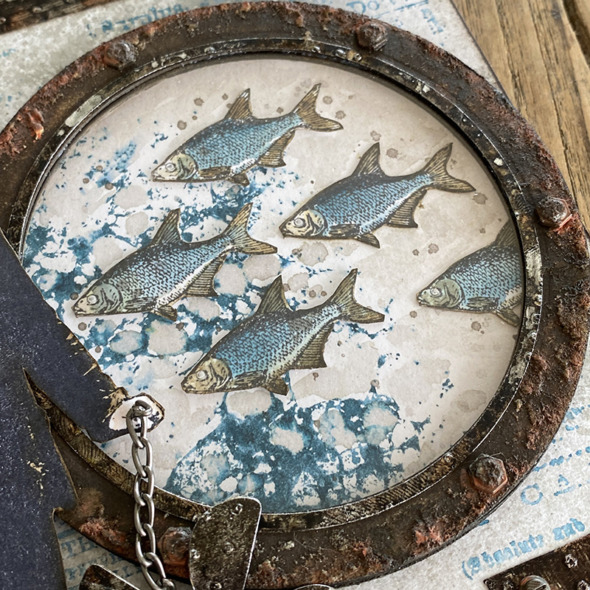
    I covered the porthole frame with distress translucent grit-paste, once dry, covered with ground espresso distress paint. I used crackling campfire distress paint brushed over the grit-paste and idea-ology hardware heads to imitate rust.

    igirlzoe: tim holtz uncharted mariner distress ranger ink
    I stamped and fussy cut fish from the Tiny Things stamp set (CMS164). I used Uncharted Mariner distress oxide reinker to watercolor them and added to the inside of the porthole before assembling.

    igirlzoe: tim holtz uncharted mariner distress ranger ink
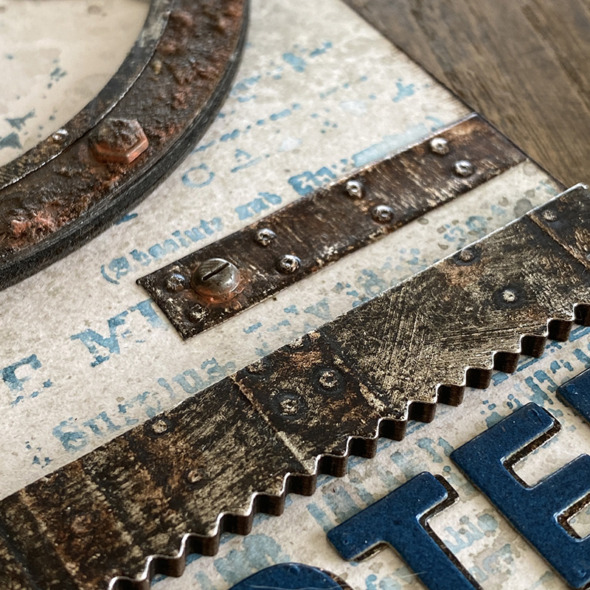
    Using more of that foundry embossed 3D metallic cardstock, I die cut using the decorative trims thinlits die set and added it to a thickboard etcetera pinked trim. I added a few fussy cut pieces to the edges of my tag. This is a cool design idea I picked up from the very talented Emma Williams.

    igirlzoe: tim holtz uncharted mariner distress ranger ink
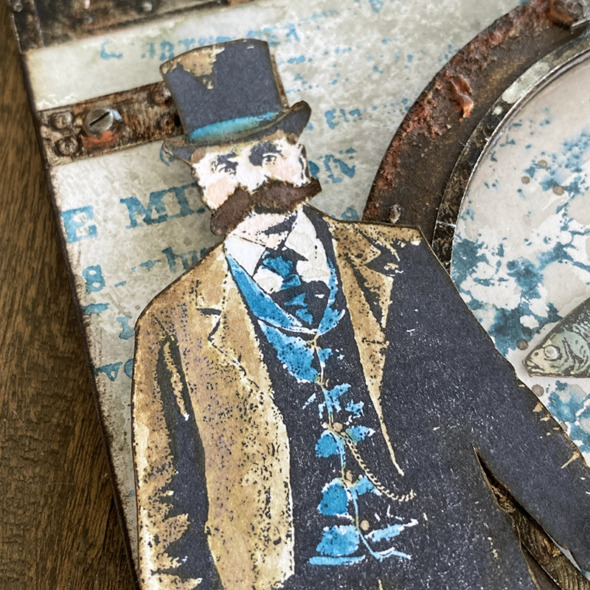
    Using the Uncharted Mariner distress reinker, I watercolored this Dapper Uncharted Mariner from the Paris Memoirs stamp set (CMS159). I used walnut stain distress ink to watercolor his coat.

    igirlzoe: tim holtz uncharted mariner distress ranger ink
    I fussy cut, mounted some adhesive foam on the back and added him to the decorative trim ledge.

    igirlzoe: tim holtz uncharted mariner distress ranger ink
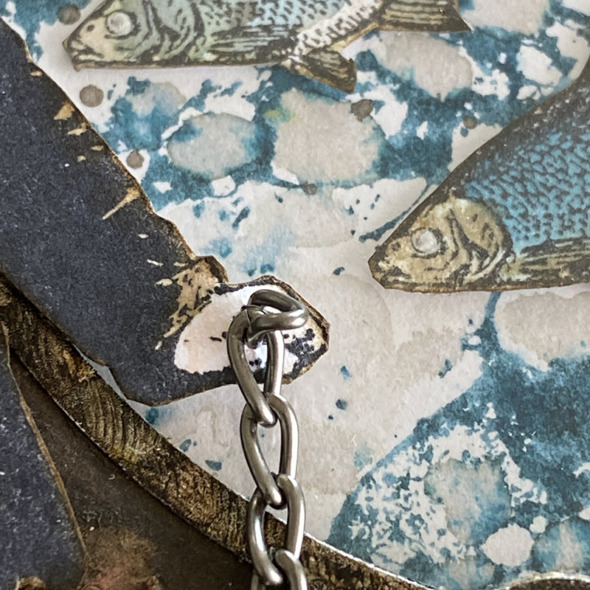
    I pushed a link of the idea-ology hook clasp through the hand and glued at the back to hold in place.

    igirlzoe: tim holtz uncharted mariner distress ranger ink
    I added a die cut a piece from the steampunk parts bigz die, again cut from the piece of foundry 3D embossed metallic kraftstock. I added a hardwear head to the top and curled the blades slightly.

    igirlzoe: tim holtz uncharted mariner distress ranger ink
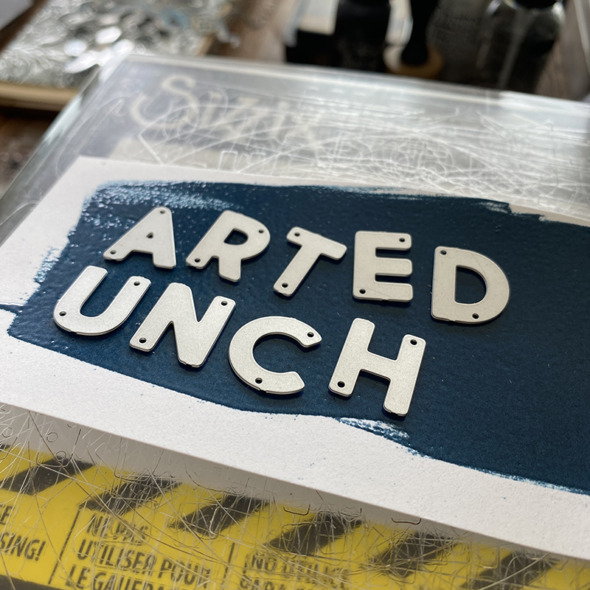
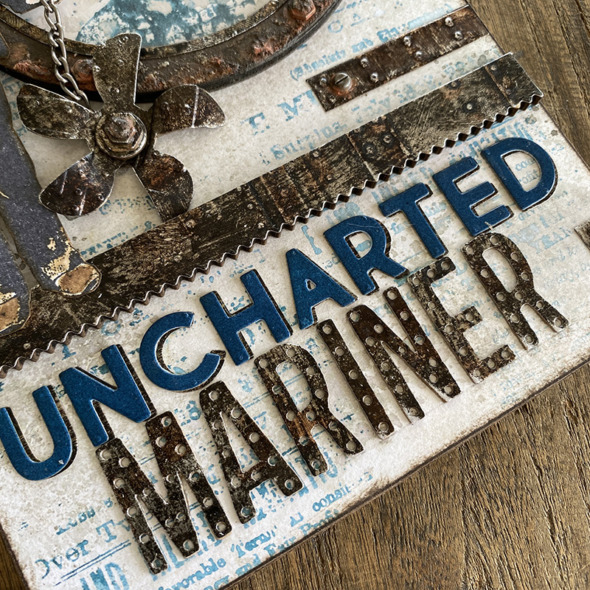
    I melted Uncharted Mariner distress embossing glaze over Uncharted Mariner distress oxide ink, rubbed directly onto a piece of distress white heavystock. I love how dark and glossy it looks. I placed the alphanumeric bold thinlits dies onto the glazed background and die cut.

    igirlzoe: tim holtz uncharted mariner distress ranger ink
    I mounted the glazed letters over letters die cut from idea-ology black kraftstock. Using the alphanumeric marquis thinlits dies I added “Mariner” to the tag, die cut from the foundry 3D embossed cardstock.

    igirlzoe: tim holtz uncharted mariner distress ranger ink
    I’m not someone who uses a lot of color in my makes or uses it in a bold way. It’s usually an accent and support act to the browns that I love. Uncharted Mariner works so beautifully with the brown distress palette and I know this is going to be a forever favorite of mine.

    Thanks for stopping by and let me know if you have any questions.
    Zoe

    …
    affiliate links used at no cost to you


  7. Eccentric

    16th June, 2022 by iGirlZoe

    igirlzoe: tim holtz stampers anonymous 2022 Eccentric

    Hello friends. Hope this finds you well. Are you excited for the new distress color launch this weekend? I know I am!! While we wait patiently to find out what The Professor has cooked up for us in his lab, I’m sharing an Etcetera tag I made for the Tim Holtz Stamp LIVE launch. You can watch the replay and see all the maker inspiration over on Tim’s blog.

    igirlzoe: tim holtz stampers anonymous 2022 Eccentric
    The Eccentric stamp set (CMS448) was my favorite from the launch and will be one that doesn’t go back into my stamp cabinet. I loved the idea-ology remnant rubs that Tim launched earlier in the year and to have some of them as stamps is awesome! They make the perfect background and support stamps but to me they can also be the star of the show.

    Here’s some details on how I made the tag…


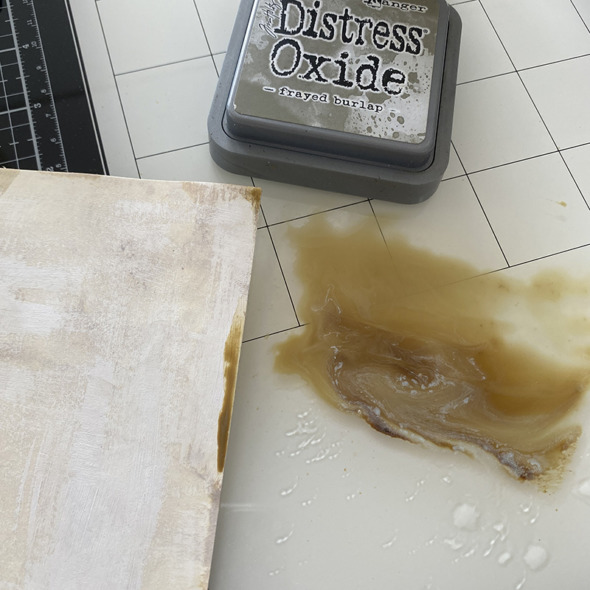
    Draw around a small etcetera tag and cut out of distress watercolor cardstock. Cover with a light layer of gesso and add a wash of frayed burlap distress ink to the edges.


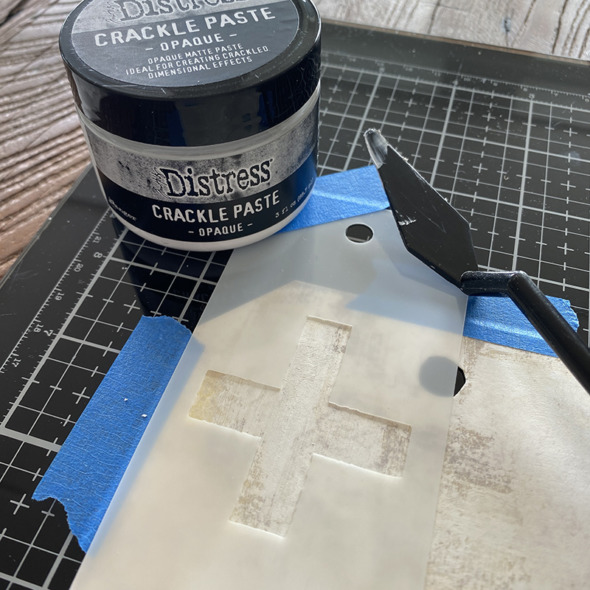
    Using the PLUS stencil from Mechanical Element Stencil set, spread distress opaque crackle paste with a palette knife and set aside to dry and crack.

    igirlzoe: tim holtz stampers anonymous 2022 Eccentric
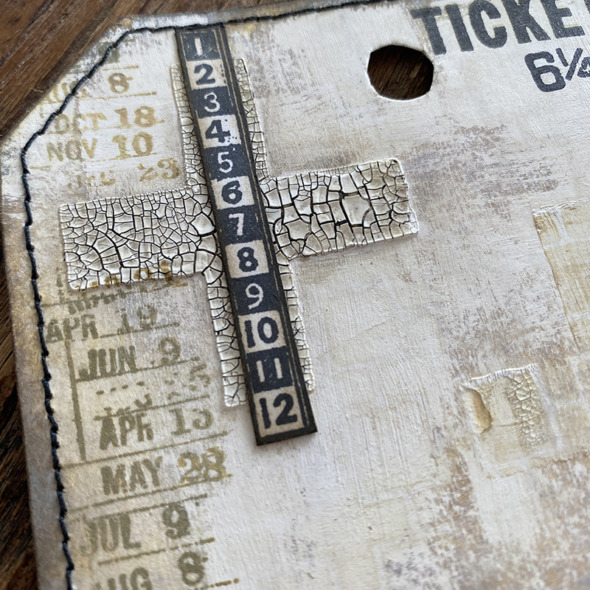
    Stamp the background using stamps from Eccentric with distress archival ink. Add distress crayon to the crackled stenciled PLUS and cover with a stamped fussy cut number strip, also from Eccentric.

    igirlzoe: tim holtz stampers anonymous 2022 Eccentric
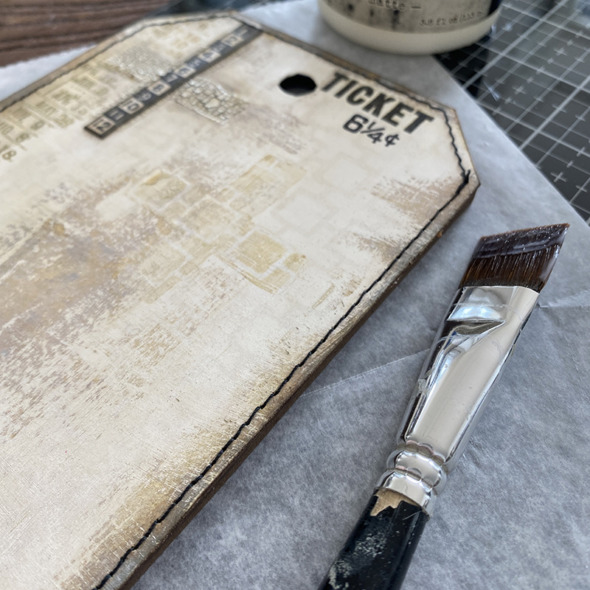
    Stitch the edge of the cardstock and using distress collage medium, adhere to a small etcetera thickboard tag.

    igirlzoe: tim holtz stampers anonymous 2022 Eccentric
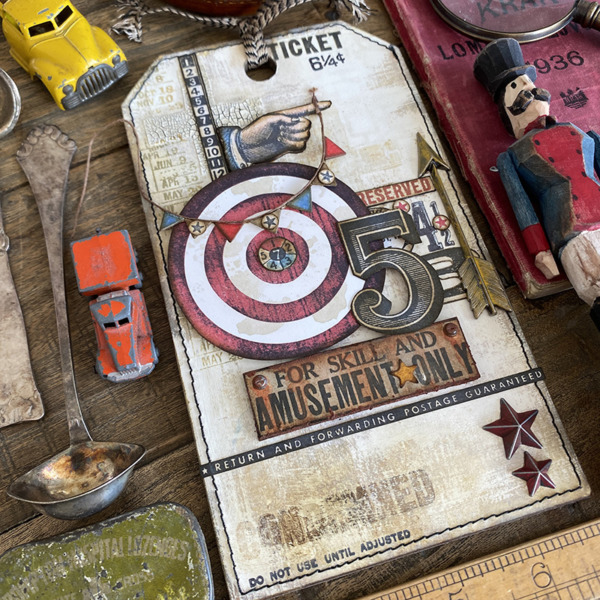
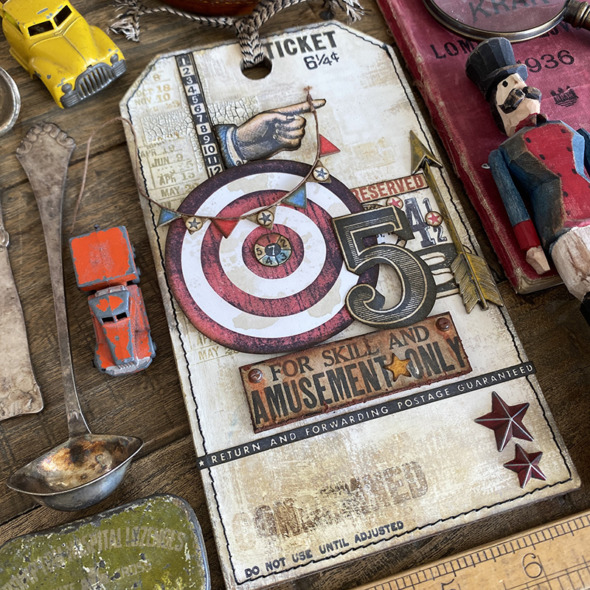
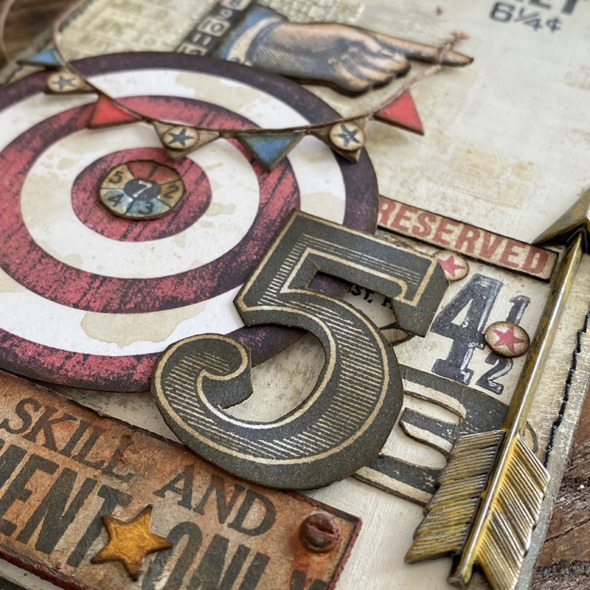
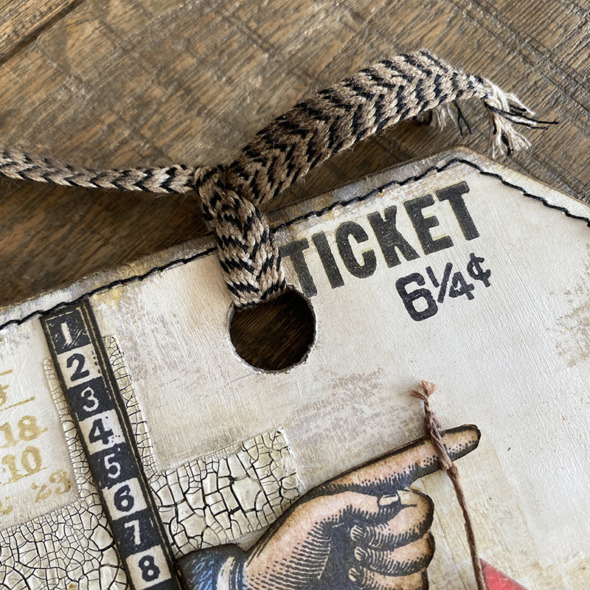
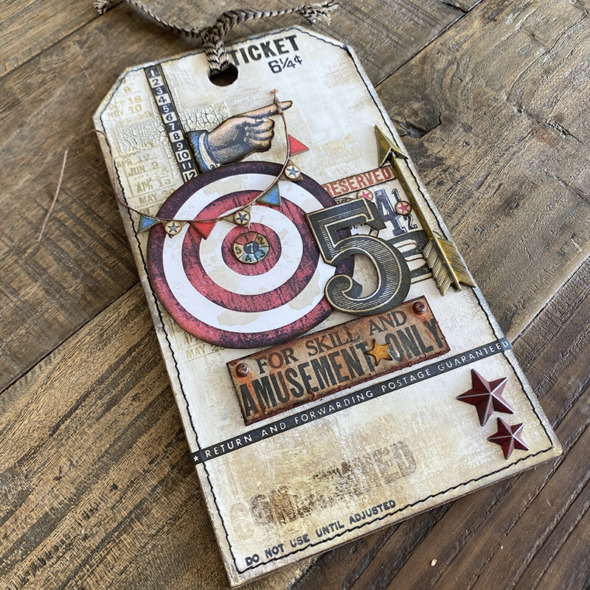
    I only used 1 stamp that wasn’t from Eccentric stamp set and it was this bullseye stamp from Inquisitive stamp set (CMS432). I stamped using fired brick distress archival ink and light tapped with black soot distress archival ink before stamping to create the distressed lines.

    igirlzoe: tim holtz stampers anonymous 2022 Eccentric
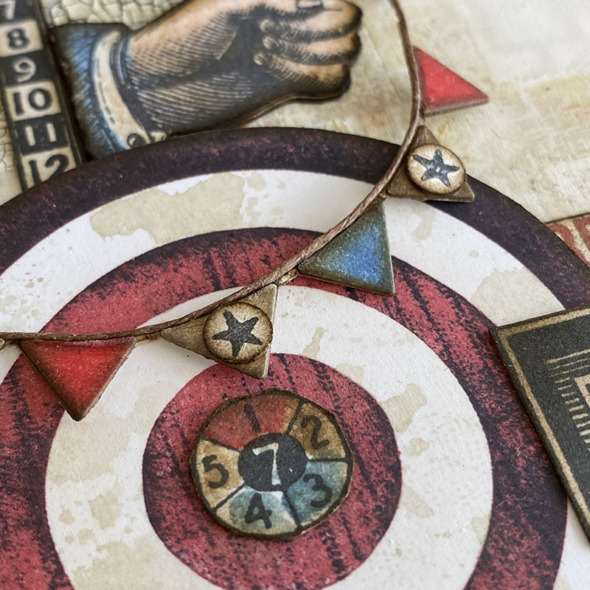
    I used a stamp from Eccentric to cover the center of the bullseye. I watecolored the pie sections with distress reinkers, fussy cut and added with distress collage medium.

    igirlzoe: tim holtz stampers anonymous 2022 Eccentric
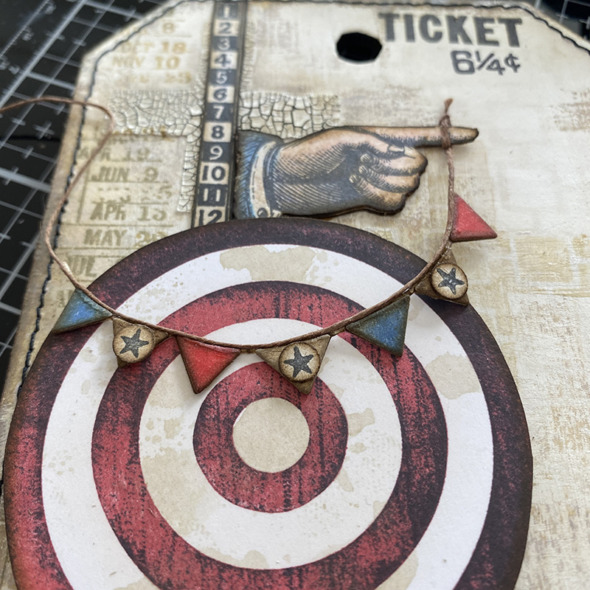
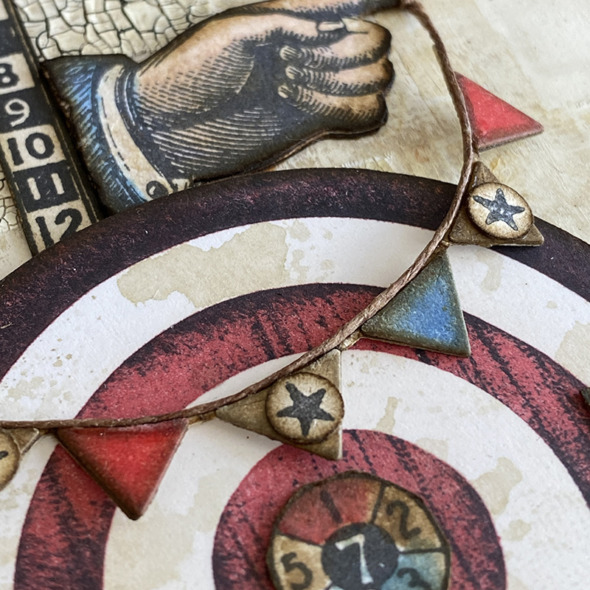
    I die cut the banner from Bunny Games thinlits die set and coloured with barn door, faded jeans and frayed burlap distress reinkers. I stamped the star trio onto distress watercolor cardstock and used a small single hole punch to punch out the stars, which I added to the frayed burlap sections of the banner.

    igirlzoe: tim holtz stampers anonymous 2022 Eccentric
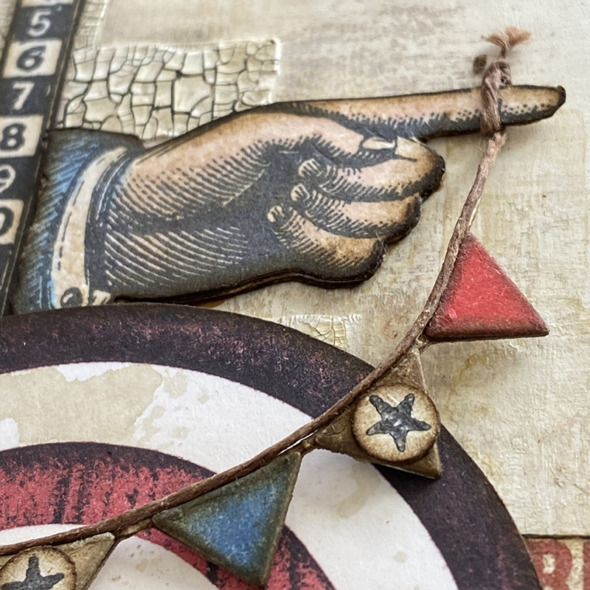
    I stamped and fussy cut the AWESOME pointy hand and added foam to the back of the hand but not the finger which I wanted to sit above the cardstock so I could add the string. I ran a piece of twine along the top of the banner and secured in place with distress collage medium. The precision tip bottle of collage medium is perfect for this.

    igirlzoe: tim holtz stampers anonymous 2022 Eccentric
    I stamped some more images and added them to the tag, some I stamped directly onto the tag and others I fussy cut and mounted. I added an idea-ology adornments arrow that I added a little fossilized amber distress paint to.

    igirlzoe: tim holtz stampers anonymous 2022 Eccentric
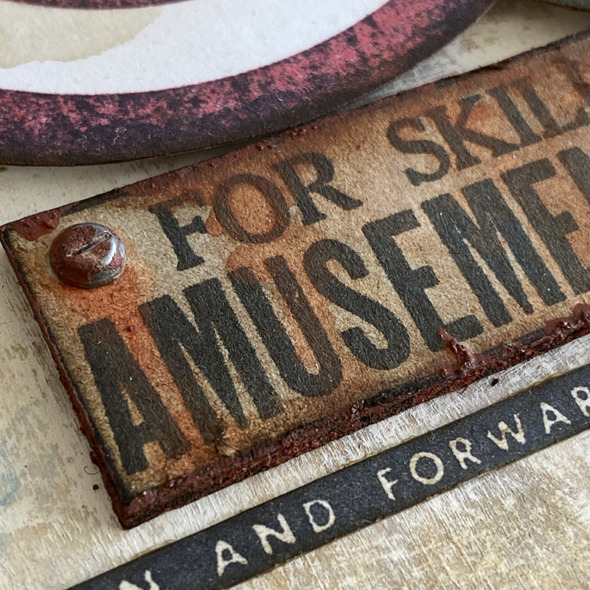
    I stamped this cool “For Skill And Amusement Only” onto distress watercolor cardstock and mounted onto foam. I added distress grit-paste to the edges of the sign and once dry, painted with layer of ground espresso and crackling campfire distress paint to simulate rust. I added idea-ology hardware heads with more faux rust added.

    igirlzoe: tim holtz stampers anonymous 2022 Eccentric
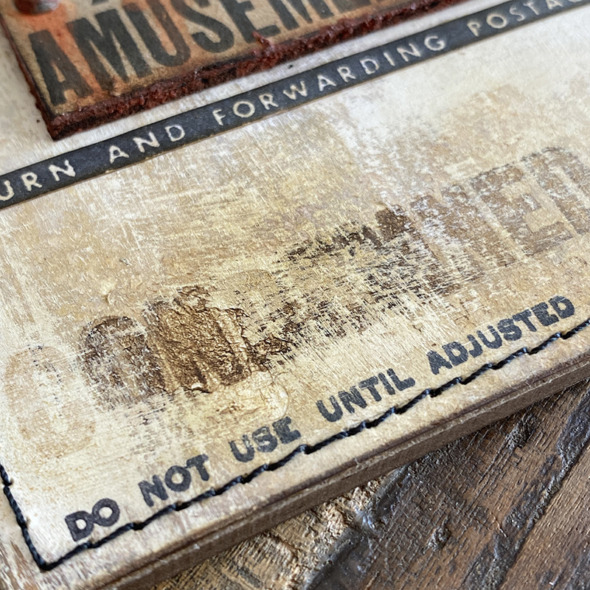
    I stamped “condemned” at the bottom of the tag which was partially resisted by the pastes I had added. I love the eroded decayed look. The lower stamped image is part of the same stamp but I stamped it separately and several times to get a b0ld stamped image. This is where using the stamp platform is essential.

    igirlzoe: tim holtz stampers anonymous 2022 Eccentric
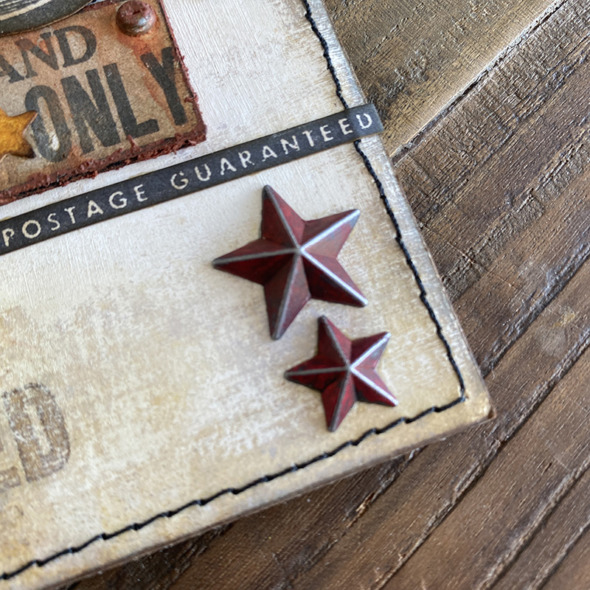
    I added a couple of idea-ology adornment stars which I added fired brick distress paint to and rubbed off in parts to give a chippy paint look.

    igirlzoe: tim holtz stampers anonymous 2022 Eccentric
    Finally I added a piece of ribbon from a very very retired idea-ology ribbon set.

    igirlzoe: tim holtz stampers anonymous 2022 Eccentric
    Thanks for stopping by and let me know if you have any questions.
    Zoe

    …
    affiliate links used at no cost to you


  8. Botanic Collage Mica

    13th June, 2022 by iGirlZoe

    igirlzoe: tim holtz stampers anonymous 2022 botanic collage

    Hello Friends, I hope this finds you well. Did you catch the Tim Holtz Stamp LIVE launch party on Saturday?! There were very early morning coffees and early evening cocktails being poured from the various world time zones while we took our front row seats for the show… If you missed the party, you can watch the replay and see all the maker inspiration over on Tim’s blog.

    igirlzoe: tim holtz stampers anonymous 2022 botanic collage
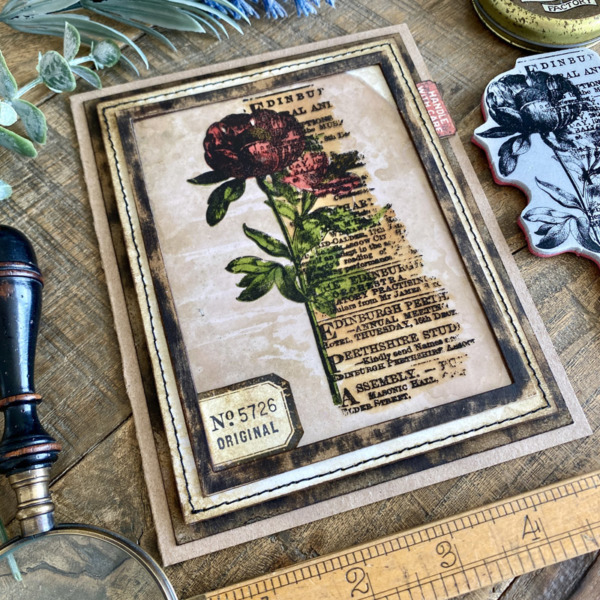
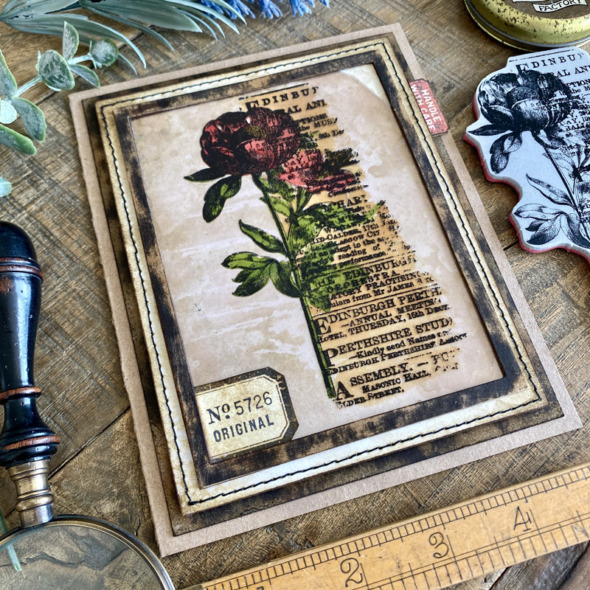
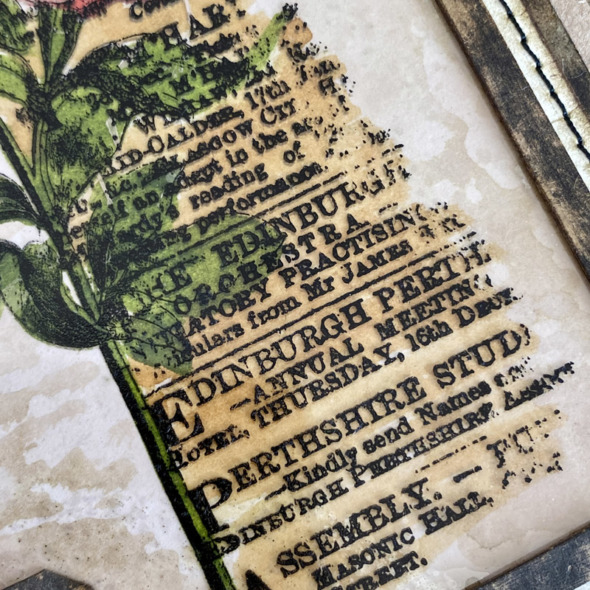
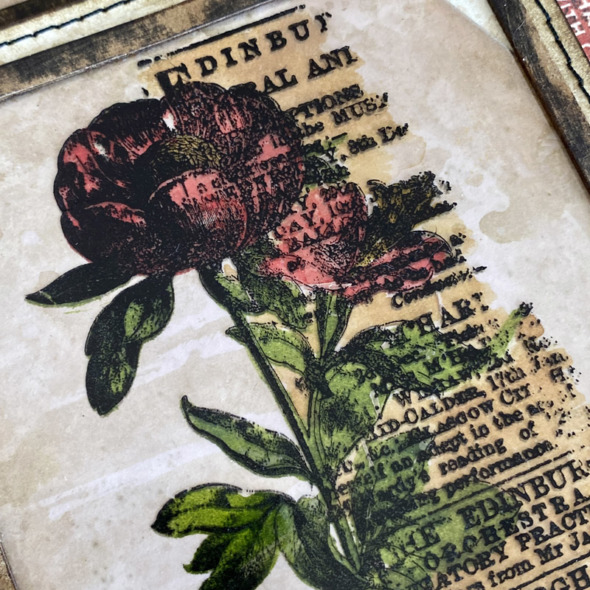
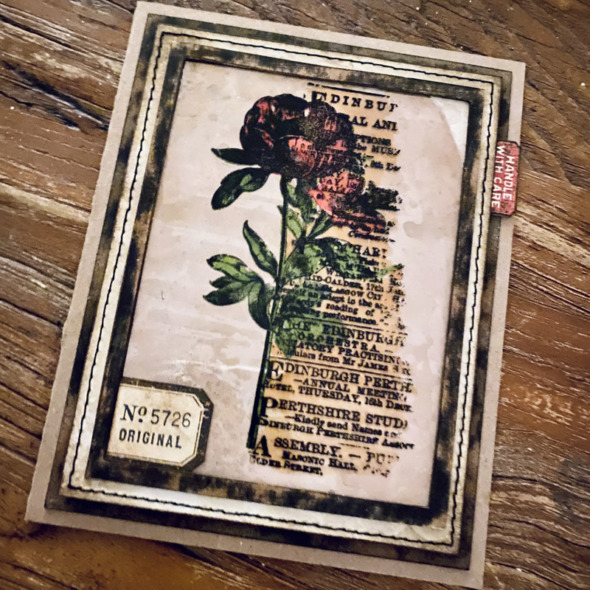
    I made this card using the new Botanic Collage stamp set (CMS447). I’m not usually drawn to the floral side of the force, but the newsprint background gives these stamps such a cool vibe for me that I had to use them.

    Let’s get into how I made it and the secret beneath the mica sheets! 😉

    igirlzoe: tim holtz stampers anonymous 2022 botanic collage
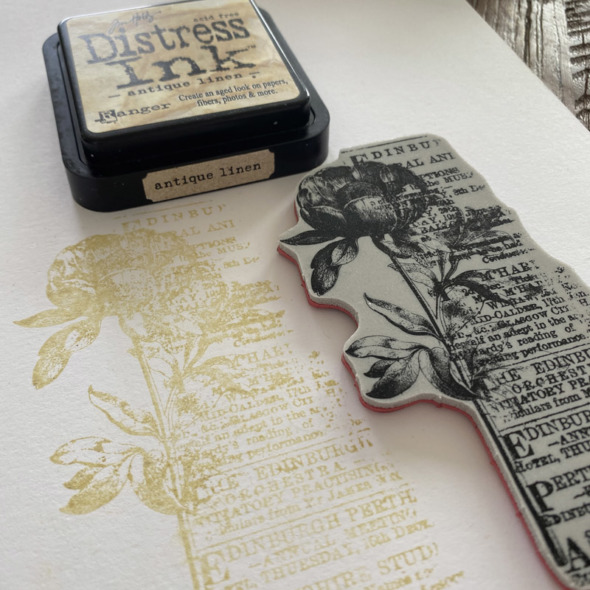
    Ink up your stamp with antique linen distress ink or another very light distress ink and stamp onto the smooth side of distress watercolor cardstock.

    igirlzoe: tim holtz stampers anonymous 2022 botanic collage
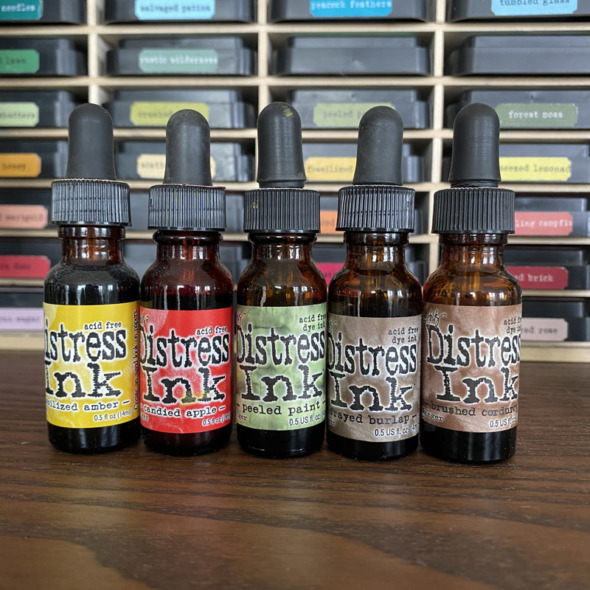
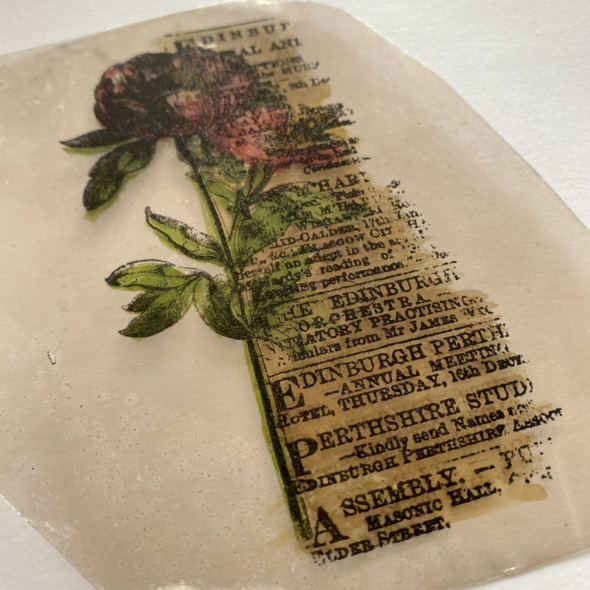
    Choose the distress reinker colors you want to watercolor your stamped image with. Put a tiny drop of each on your glass media mat ready to pick up with your paintbrush to watercolor.

    igirlzoe: tim holtz stampers anonymous 2022 botanic collage
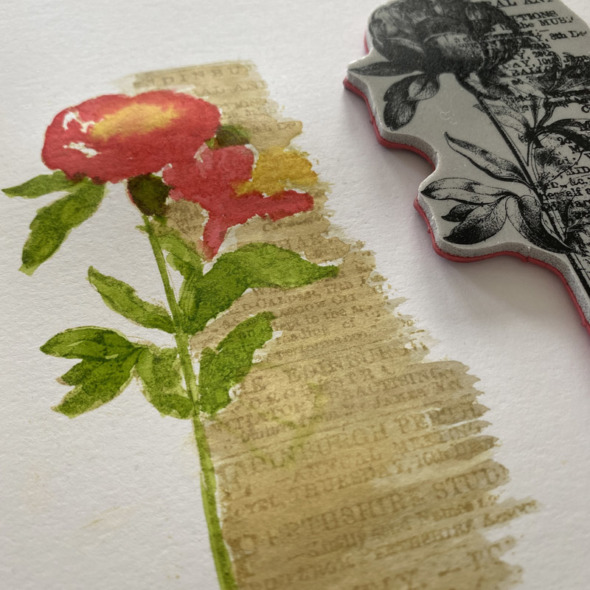
    As you watercolor the stamped image, you will see the antique linen stamped lines become less prominent. You don’t need to be too delicate with this, however, do try to stay within the lines-ish. I set the stamp next to me when I’m watercoloring so I can check the design where the stamped image lines are feint.

    igirlzoe: tim holtz stampers anonymous 2022 botanic collage
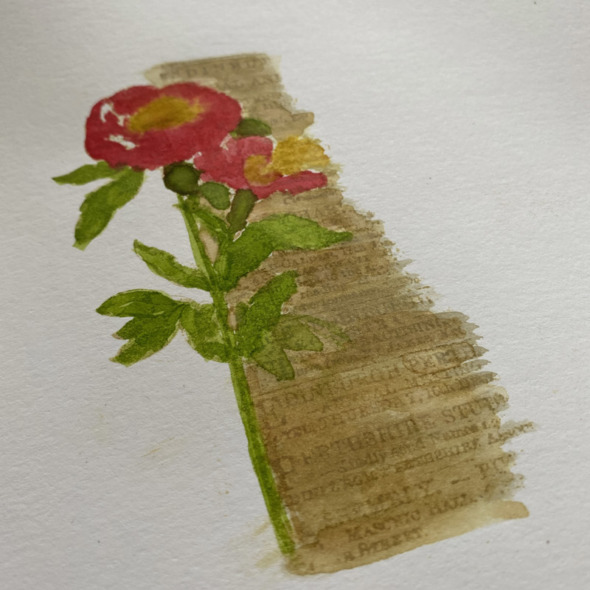
    I know it looks like a hot mess, but stay with me…

    igirlzoe: tim holtz stampers anonymous 2022 botanic collage
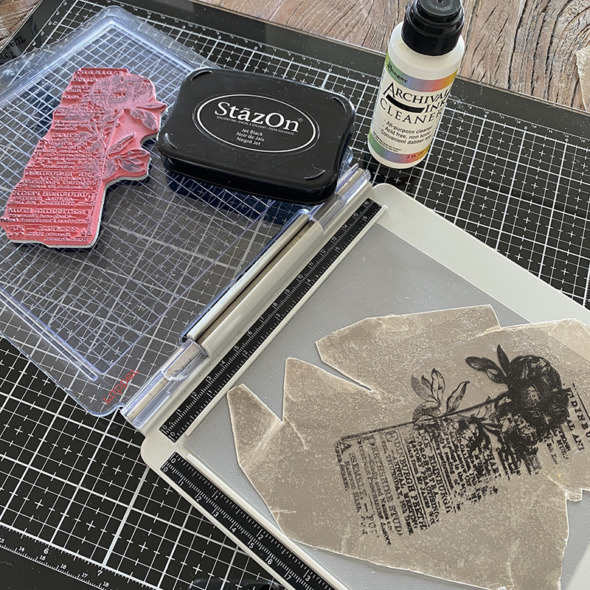
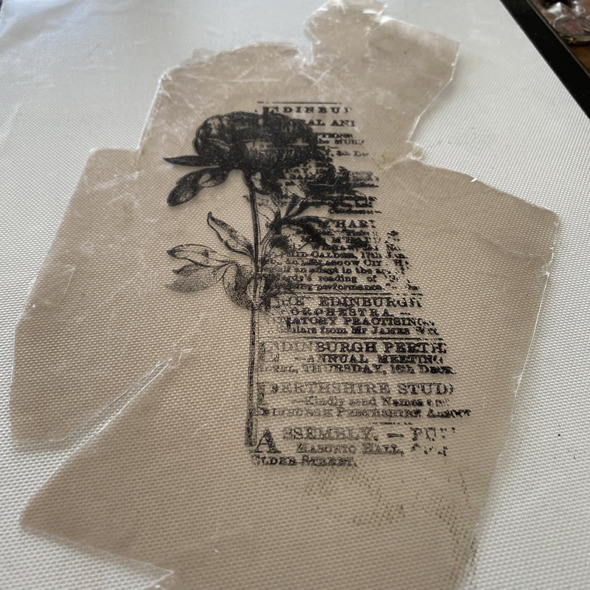
    Place your mica onto your stamp platform. The Tim Holtz Tonic Media Grip Mat will keep the mica tile from moving. Magnets will work, but I wouldn’t use sticky grid because it makes a mess of the back of the mica. Position your stamp, ink with Stazon and stamp onto the mica tile. Because it’s Stazon ink, you will need to use stamp cleaner afterwards and then wash the stamp cleaner off with dish soap and water.

    igirlzoe: tim holtz stampers anonymous 2022 botanic collage
    Your mica tile is now ready to place over the top of your hot mess watercolor background.

    igirlzoe: tim holtz stampers anonymous 2022 botanic collage
    Ta Dah!

    igirlzoe: tim holtz stampers anonymous 2022 botanic collage
    igirlzoe: tim holtz stampers anonymous 2022 botanic collage
    igirlzoe: tim holtz stampers anonymous 2022 botanic collage
    igirlzoe: tim holtz stampers anonymous 2022 botanic collage
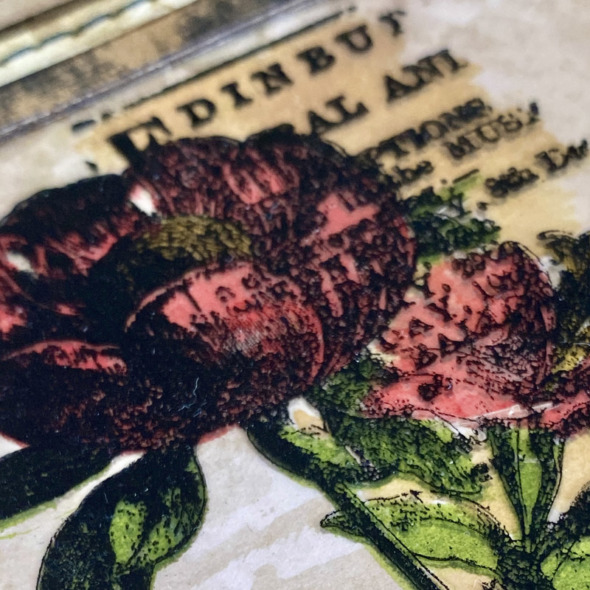
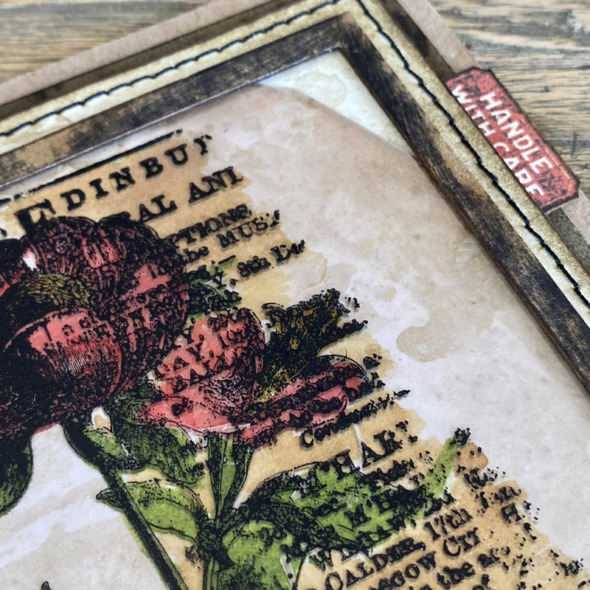
    I added a frame over the top and trimmed the mica to size. Using distress collage medium to attach the mica tile at the edges and leave the center to sit slightly above the background.

    igirlzoe: tim holtz stampers anonymous 2022 botanic collage
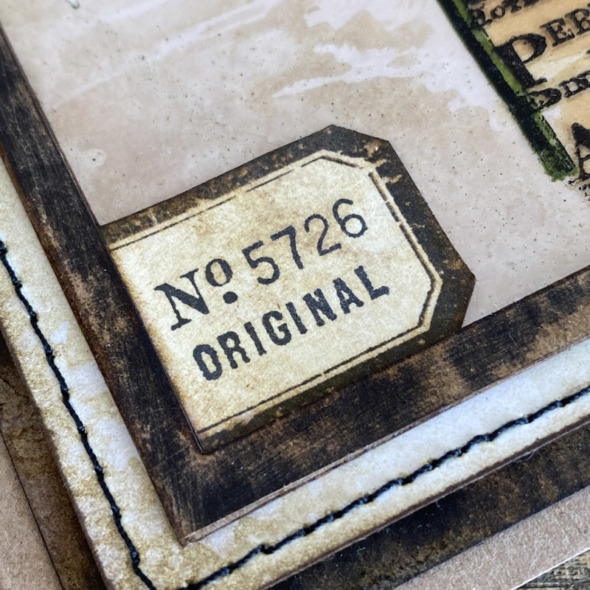
    I added a couple of stamped images from the new Eccentric stamp set (CMS448) which I am OBSESSED with!

    igirlzoe: tim holtz stampers anonymous 2022 botanic collage
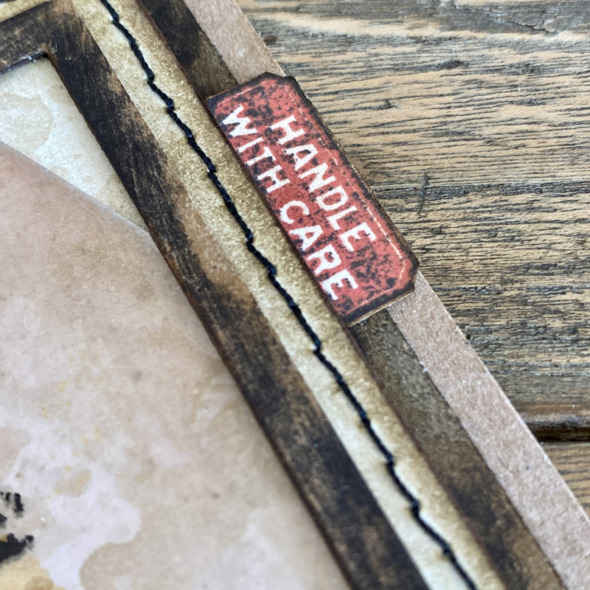
    I stamped the “handle with care” stamp with barn door distress archival ink once and then lightly touched the stamp with a black soot distress archival ink pad and stamped very lightly. I fussy cut and tucked under the background layer which I stitched.

    igirlzoe: tim holtz stampers anonymous 2022 botanic collage
    It’s a pretty quick card to make and you could easily adapt this to a slimline card or tag.

    Thanks for stopping by and let me know if you have any questions.
    Zoe

    …
    affiliate links used at no cost to you


  9. Tim Holtz idea-ology 2022

    9th May, 2022 by iGirlZoe

    igirlzoe: tim holtz idea-ology 2022

    Hello friends! I’m finally getting to posting my idea-ology 2022 LIVE launch makes. I’ve been really busy and then I got into re-organizing my entire craft stash and now my apartment is a hot mess, so I’m taking a break from the chaos to write this blog post. I don’t write them in advance, I’m not that person, I worship those people!

    igirlzoe: tim holtz idea-ology 2022
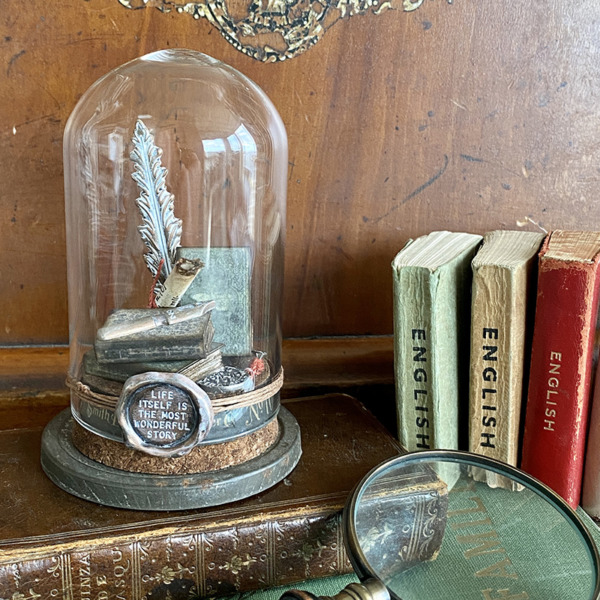
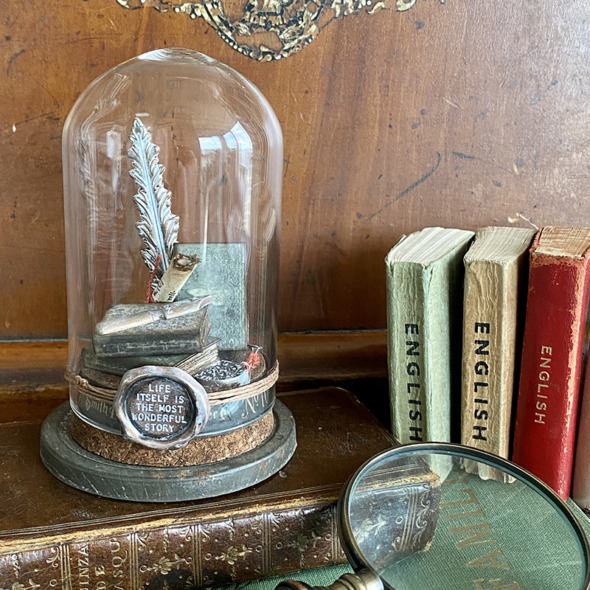
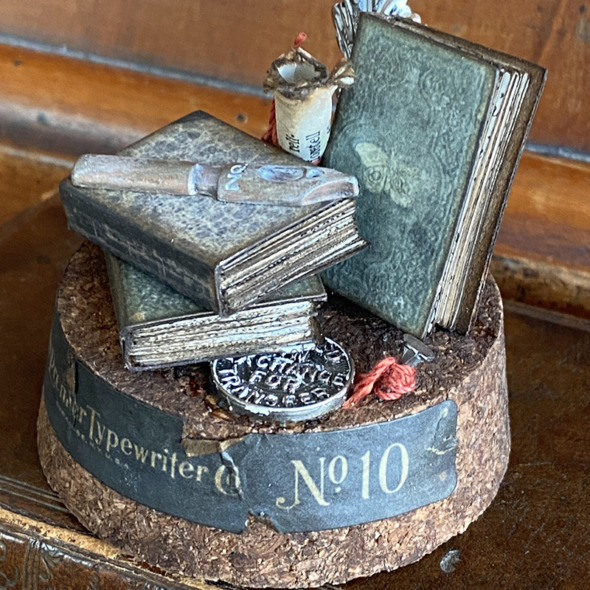
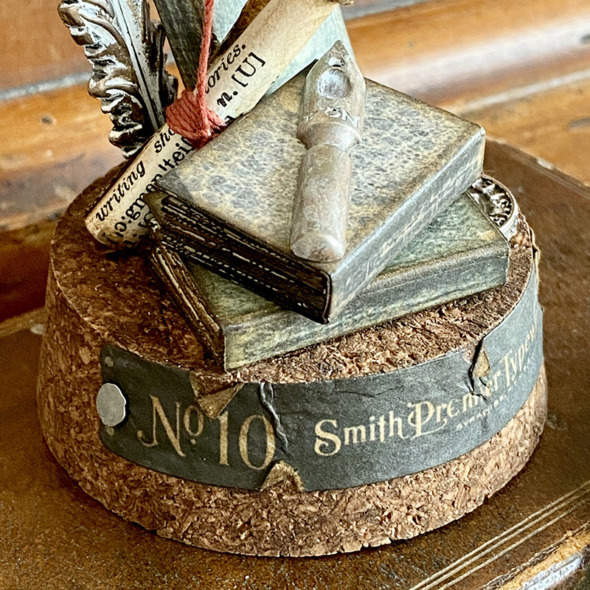
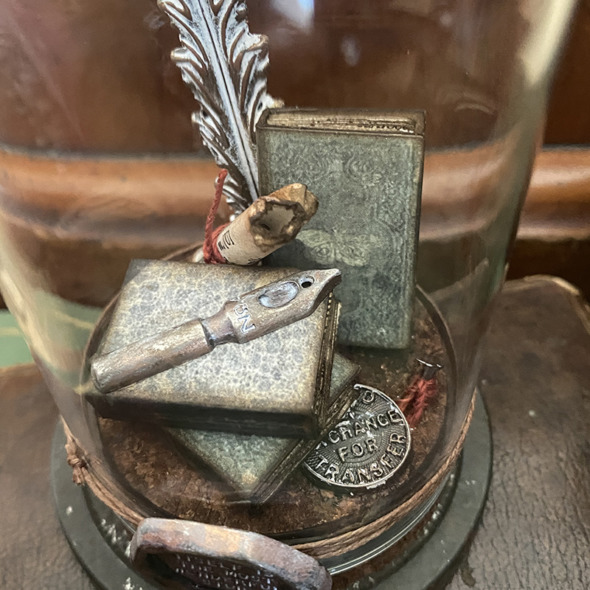
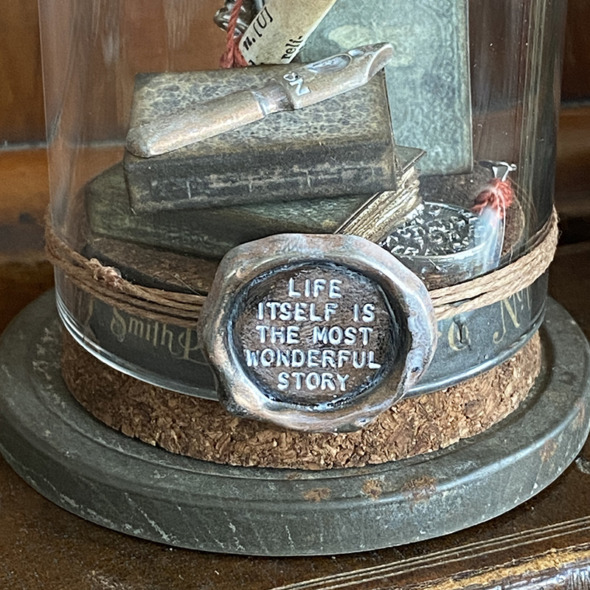
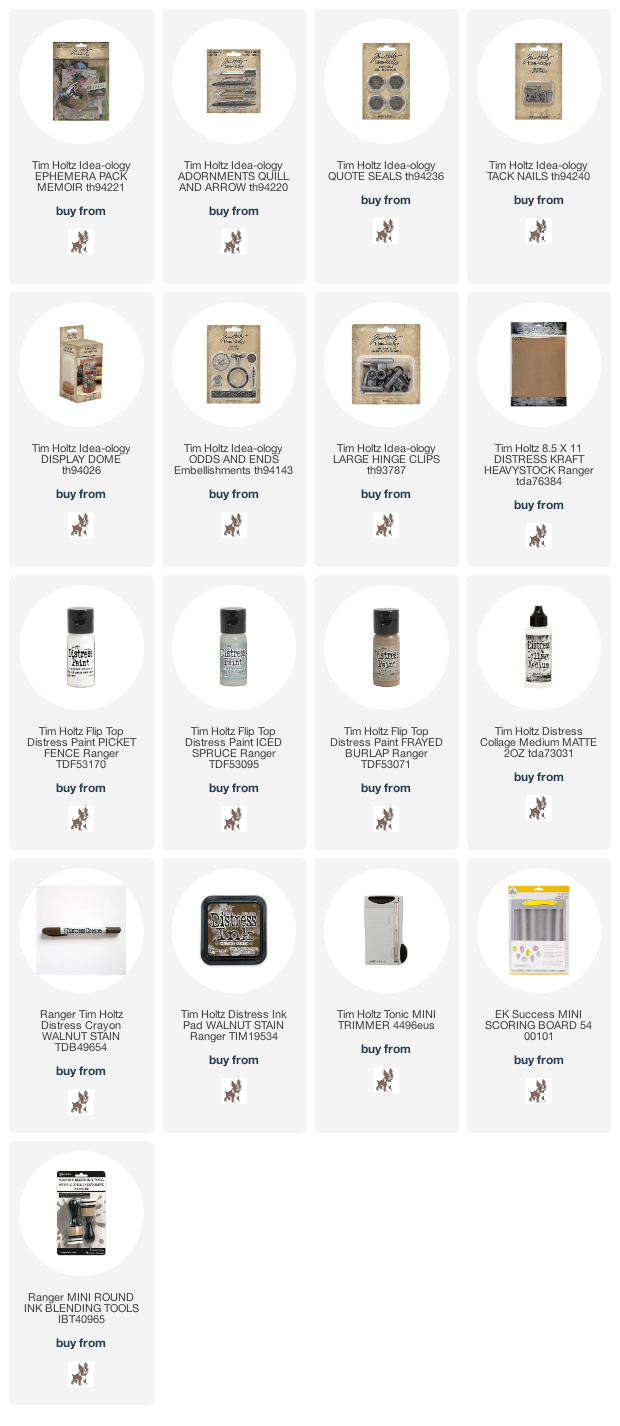
    I created a simple dome for the LIVE launch, you can see the replay on Tim Holtz blog. The idea-ology display domes are one of my favourite bases to work on and I was inspired by the quill from the idea-ology adornments quill and arrow set and book covers from the memoir ephemera set to create a writing themed dome.

    igirlzoe: tim holtz idea-ology 2022
    I love the book covers that come in the ephemera packs. I was so happy to see Tim bring them back after Halloween and add new ones. Tim always brings us the best vintage styled ephemera. Keeping my fingers crossed there will be a dedicated book ephemera pack one day!

    Here’s how I made the book covers into mini books…

    igirlzoe: tim holtz idea-ology 2022
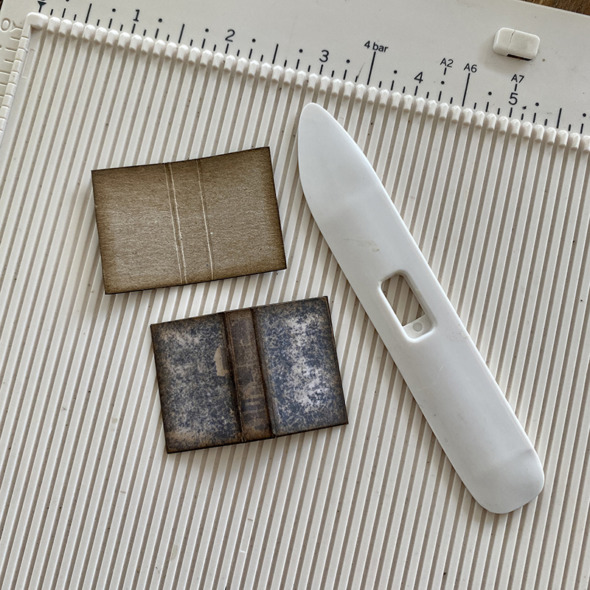
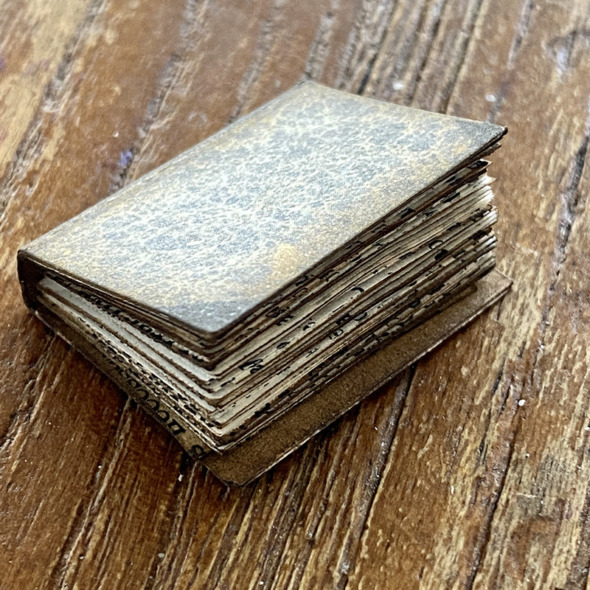
    I mounted book covers from the memoir ephemera pack onto distress kraft heavystock with distress collage medium, trimmed with my scissors and scored the spine with my scoring board. Mounting them gives you a nice hardback mini book.

    igirlzoe: tim holtz idea-ology 2022
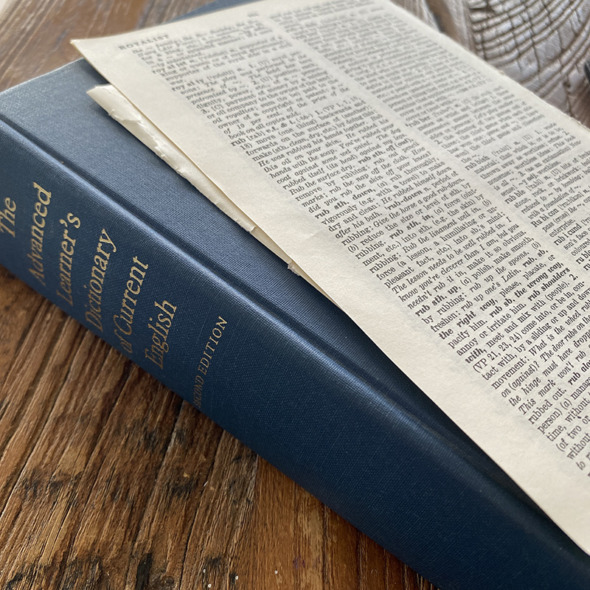
    I use pages from a very old oxford dictionary that my father in law kindly gifted me from his book stash years ago. I made sure that he knew I was going to cut it up for crafts. The pages are wafer thin but take distress ink beautifully.

    igirlzoe: tim holtz idea-ology 2022
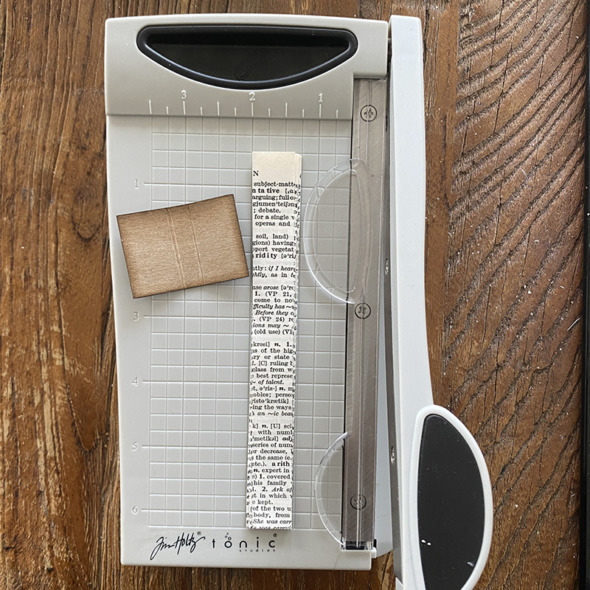
    Using the Tim Holtz Tonic mini trimmer, I cut strips of dictionary pages to fit the book cover.

    igirlzoe: tim holtz idea-ology 2022
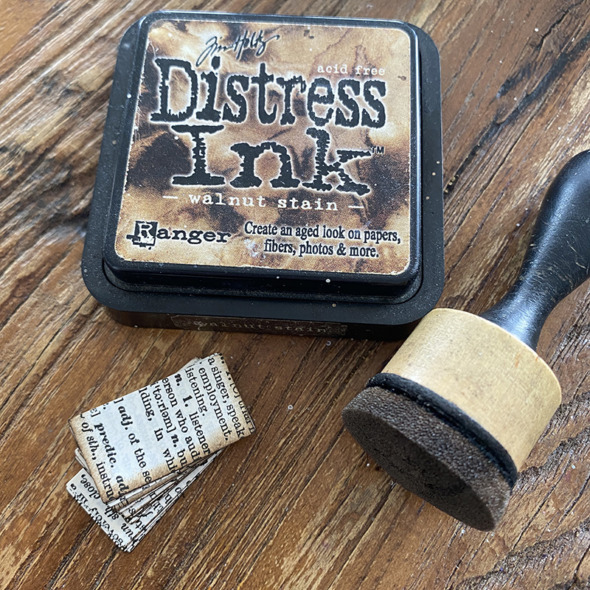
    Pinching the pages together, I inked 3 sides (no need to ink the side you’re gluing into the book cover).

    igirlzoe: tim holtz idea-ology 2022
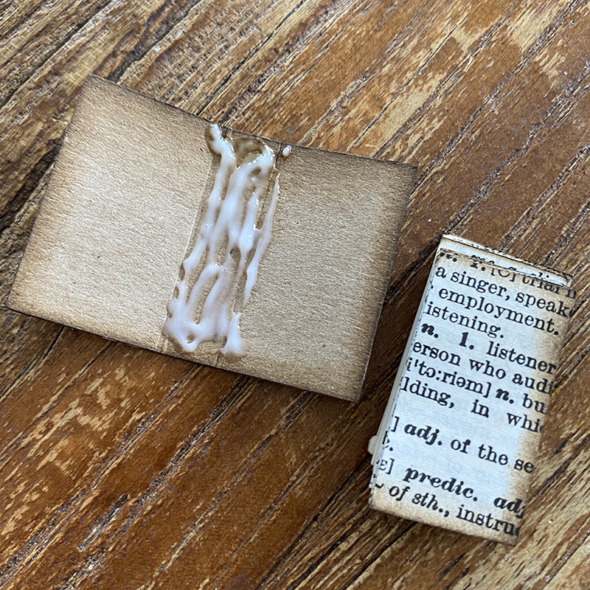
    Add a generous amount of distress collage medium to the inside spine of your book cover and place the pages into the book and pinch the covers together. Push the pages back toward the spine. Pinch and push, pinch and push.

    igirlzoe: tim holtz idea-ology 2022
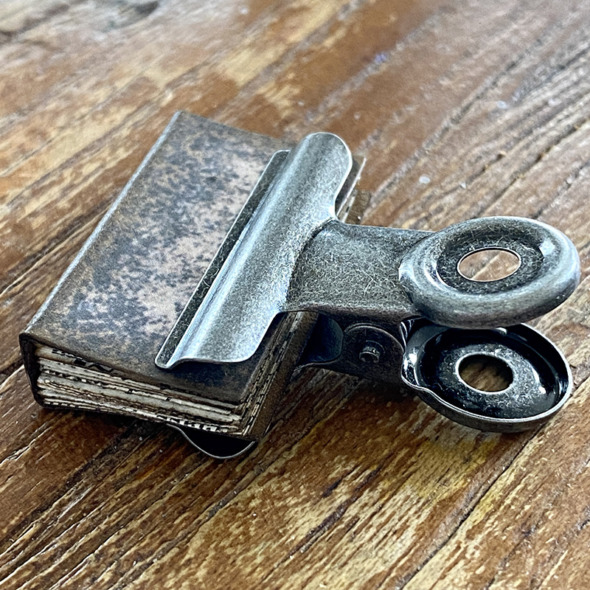
    I used an idea-ology large hinge clip to hold in place while the book pages dried.

    igirlzoe: tim holtz idea-ology 2022
    Cute right? And the distress kraft heavystock inside the book cover looks vintage.

    igirlzoe: tim holtz idea-ology 2022
    I added an idea-ology tack nail to the cork base and tied with a little string. I used the same string on the scroll (below). This string was leftover from the make and take at the 2019 Creativation show idea-ology booth. I like using it in my projects as it brings back great memories.

    igirlzoe: tim holtz idea-ology 2022
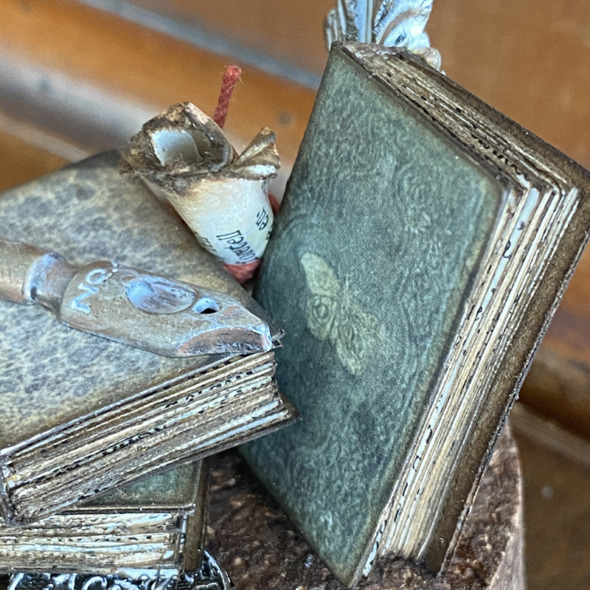
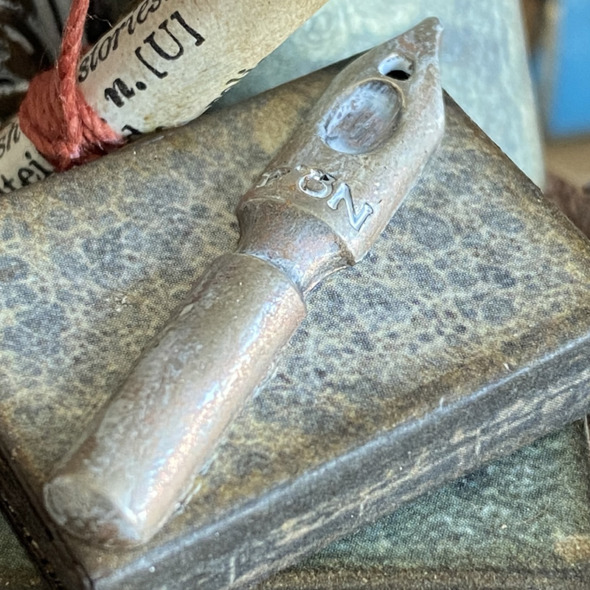
    The idea-ology pen nib from the odds and ends set was perfect for my writing themed dome. I added a little iced spruce and frayed burlap distress paint to age a little, pushing it into the recessed areas to highlight them.

    igirlzoe: tim holtz idea-ology 2022
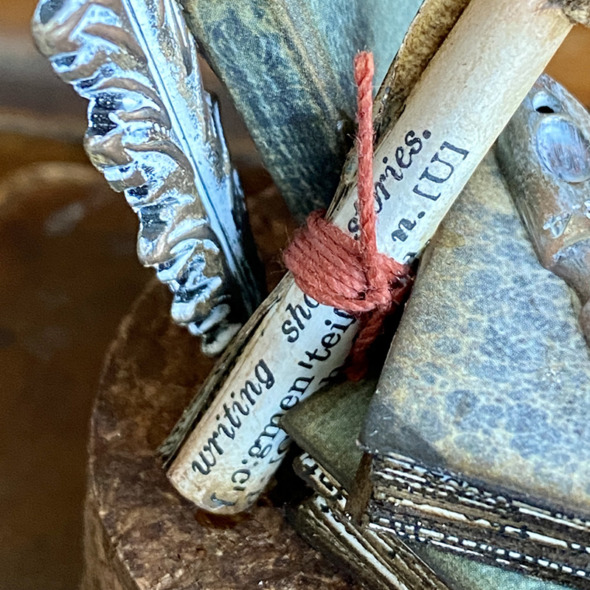
    To alter the quill from the idea-ology adornments quill and arrow set. I added iced spruce and picket fence distress paint, removed the excess and once dry, rubbed walnut stain distress crayon over the top. I pushed the quill into the cork base with a little distress collage medium to stop it moving about.

    While I was cutting old dictionary pages I spotted the sentence “writing short stories” and knew I had to feature it in my dome as it was PERFECT for the writing theme. I love it when things like this happen. I rolled the paper into a scroll and tied with string.

    igirlzoe: tim holtz idea-ology 2022
    I added this cool piece of ephemera from the memoir ephemera set to the base with idea-ology tack nails. You need to make sure the tack nails are pushed right into the cork so that the glass dome will fit over the top.

    igirlzoe: tim holtz idea-ology 2022
    I added this idea-ology bus token which is one of my favorite idea-ology tokens ever, from the odds and ends set. All the pieces inside the dome are glued to the cork base or to something attached to the cork base with distress collage medium.

    igirlzoe: tim holtz idea-ology 2022
    Finally I added an idea-ology quote seal over the top of jute which I had wrapped around the outside of the dome. I pushed picket fence distress paint into the recessed areas of the seal and wiped away the excess with a cloth. I stood the dome on a vintage jar topper that Tim kindly gifted me.

    Thanks for stopping by and let me know if you have any questions.
    Zoe

    …
    affiliate links used at no cost to you


  10. Lucky is a state of mind

    12th April, 2022 by iGirlZoe

    igirlzoe: tim holtz sizzix chapter 2 bold text 2 cracked woven 3D folder

    Hello friends. Day 2 of my week of sharing here on my blog with another make for the Tim Holtz Sizzix Chapter 2 launch. If you’re looking for a quick and simple card, this is it. And if you missed the launch party, you can catch the replay and the inspiration makes over on Tim’s blog.
    igirlzoe: tim holtz sizzix chapter 2 bold text 2 cracked woven 3D folder
    “Lucky is a state of mind!” I have been trying to live this phrase a little more in my own life. It’s one of my many favourite quotes from the bold text 2 thinlits die set from Tim’s Chapter 2 release.

    I love that the bold text dies add a real statement to the card allowing you to keep it simple. Let’s get into how to make this quick card…
    igirlzoe: tim holtz sizzix chapter 2 bold text 2 cracked woven 3D folder
    To die cut the background I used a sticky grid covered cutting plate with a die from the bold text 2 thinlits set. Placed a piece of distress watercolor cardstock 3.5 inches by 5.25 inches over the top and ran it through my machine. For a quick cut like this, I use my bigshot foldaway machine. It’s quick to pull out and use and the pressure is AMAZING!

    igirlzoe: tim holtz sizzix chapter 2 bold text 2 cracked woven 3D folder
    Next I spritzed with water and embossed with the cracked 3D embossing folder.

    igirlzoe: tim holtz sizzix chapter 2 bold text 2 cracked woven 3D folder
    Finally I sprayed the background with frayed burlap distress spray and a little water and dried. I lightly blended in some walnut stain distress ink.

    igirlzoe: tim holtz sizzix chapter 2 bold text 2 cracked woven 3D folder
    I embossed a piece of distress watercolor cardstock sized 3.25 inches by 2.75 inches with the woven 3D embossing folder.

    igirlzoe: tim holtz sizzix chapter 2 bold text 2 cracked woven 3D folder
    Spritzed the background with distress spray stain and once dry, rubbed a walnut stain distress ink pad directly onto the raised detail.

    igirlzoe: tim holtz sizzix chapter 2 bold text 2 cracked woven 3D folder
    I die cut a couple of four leaf clovers from the lucky love impresslits folder from distress watercolor cardstock.


    Sprayed the clovers with frayed burlap and peeled paint distress spray stain.

    igirlzoe: tim holtz sizzix chapter 2 bold text 2 cracked woven 3D folder
    I added a little statue distress foundry wax over the top. Check out Tim’s awesome demo of this new product HERE.

    igirlzoe: tim holtz sizzix chapter 2 bold text 2 cracked woven 3D folder
    I added walnut stain distress crayon over the top to grunge it up a little and then stacked the 2 clovers over each other and glued to the background with distress collage medium.

    igirlzoe: tim holtz sizzix chapter 2 bold text 2 cracked woven 3D folder
    I assembled and stitched my card.

    igirlzoe: tim holtz sizzix chapter 2 bold text 2 cracked woven 3D folder
    Finally I mounted onto idea-ology black kraftstock and distress kraft heavystock.

    igirlzoe: tim holtz sizzix chapter 2 bold text 2 cracked woven 3D folder
    Thanks for stopping by and let me know if you have any questions.
    Zoe

    …
    affiliate links used at no cost to you