‘Tim Holtz’ Category

  1. 12 Tags of 2016 – January take 2

    31st January, 2016 by iGirlZoe

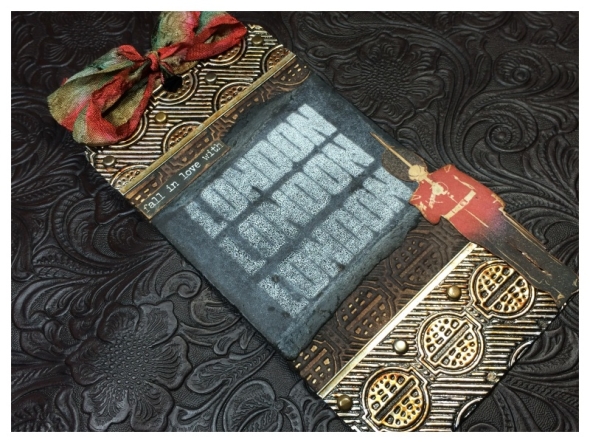
    12 Tags of 2016 is back and this time Tim Holtz is master mixing it up with a remix of techniques! I’m squeezing my second tag in just under the wire.

    resize_54299780_800px
    I started the background last weekend, but had a really busy week organizing things for our relocation so only got back to it tonight.

    resize_54299884_800px
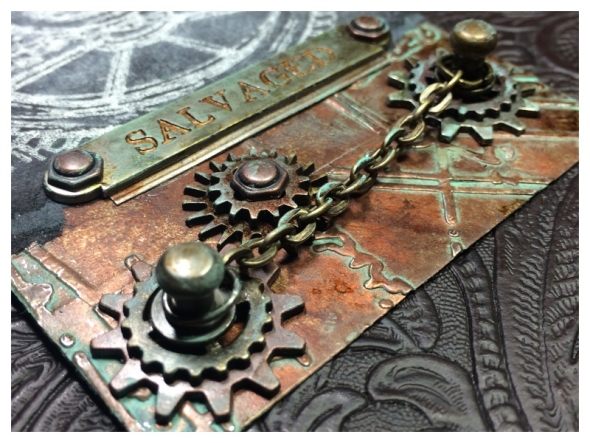
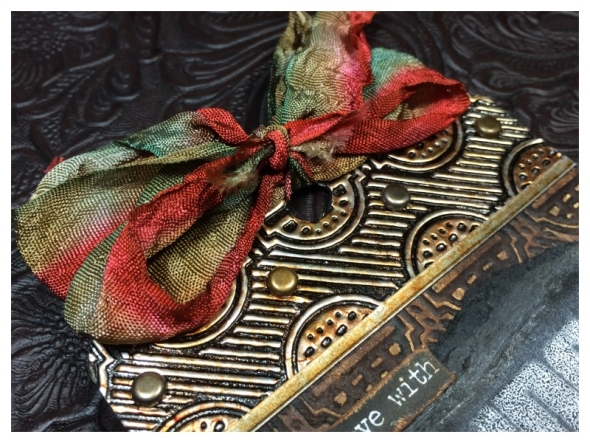
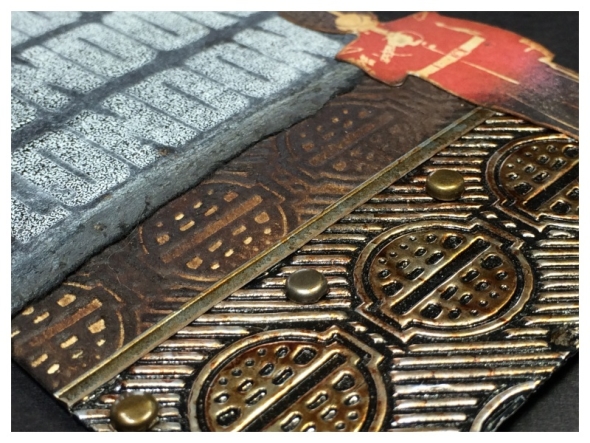
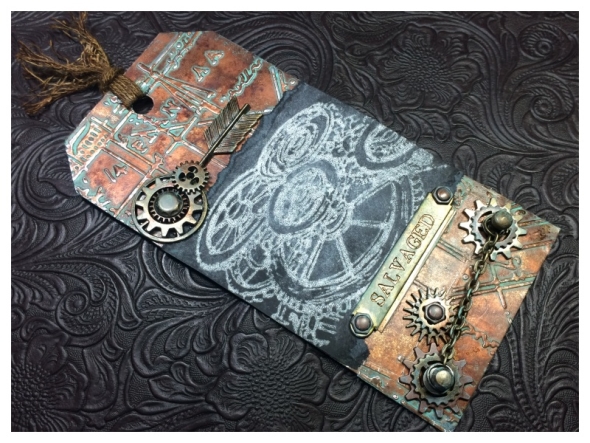
    I followed Tim’s techniques which you can see on his blog, using cracked pistachio distress paint instead of black soot. I then ponced alcohol inks over the foil.

    resize_54299915_800px
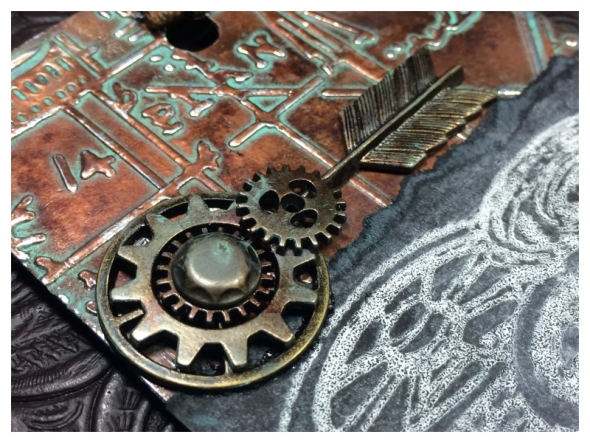
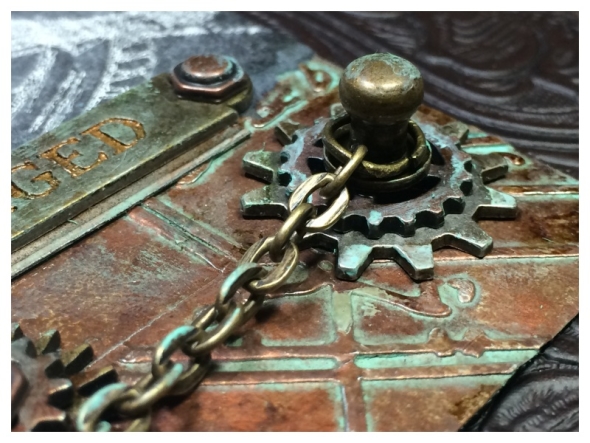
    I rubbed a little cracked pistachio distress paint over the top of the metal findings with my finger to give a faux patina effect.

    resize_54299962_800px
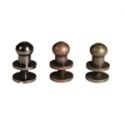
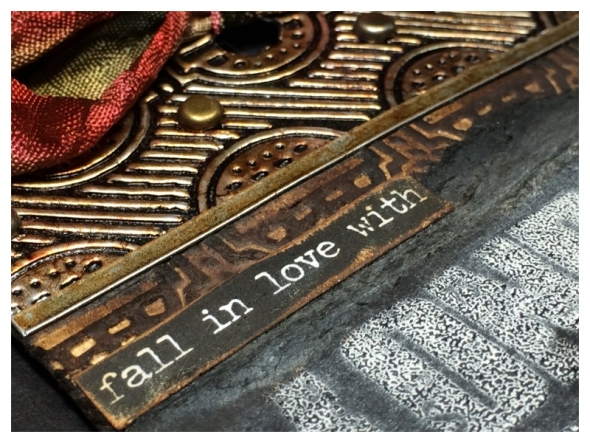
    Finally I attached lots of gadget gears and a word band which I altered with alcohol inks and attached using the new idea-ology nail heads. LOVE THEM!

    You can see all the techniques for this month’s tag on Tim’s blog.


  2. 12 Tags of 2016 – January

    28th January, 2016 by iGirlZoe

    12 Tags of 2016 is here as Tim Holtz brings us another year of challenges! This time he’s master mixing it up with a remix of techniques! I love these challenges. I love to see where the technique or products take me and I love to see where it takes others who play along. It’s like a big craft party each month!

    iGirlZoe: 12 Tags of 2016 January
    I’m moving to Denmark in a couple of months and my mood is pretty grey. Because of this I couldn’t get excited about silver, black and white. This tag needed warm colours for me and so it was alcohol ink to the rescue. And this is exactly why I love these challenges, you literally have no idea where you are going to end up, well at least I don’t. It’s like Narnia!

    iGirlZoe: 12 Tags of 2016 January
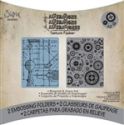
    With travel on the mind at the moment, I opted for the globes texture fades folder, it’s one of my current favourites.

    iGirlZoe: 12 Tags of 2016 January
    I have been thinking a lot about home too, so I used the Paris to London stamp set by Tim Holtz.

    iGirlZoe: 12 Tags of 2016 January
    This tag really was the truest form of “art therapy” for me. I’m hoping that the Scandanavians are a creative bunch and want to get inky with me. With the gorgeous array of chunky knitwear and Denmark being the home of design, the odds are in my favour, right?! I CAN DO THIS!

    Thanks for stopping by. You can see all the techniques for this month’s tag on Tim’s blog. I’ll be back tomorrow with a second tag!


  3. Frilly & Funkie Friday Focus

    22nd January, 2016 by iGirlZoe

    Today I have the pleasure of hosting the Friday Focus at the Frilly and Funkie Blog! We’re featuring Texture Fades Embossing Folders and for the next two weeks The Funkie Junkie Boutique are giving an extra 15% discount off Texture Fades! YAY!

    iGirlZoe: Friday Focus Texture Fades

    iGirlZoe: Friday Focus Texture Fades
    For a closer look at this weeks Friday Focus, pop over to the Frilly and Funkie Blog.

    Have a great weekend!


  4. CHA 2016 Tim Holtz Periscopes Day 2

    12th January, 2016 by iGirlZoe

    Hello! Back again with more periscopes from CHA 2016 featuring Tim Holtz. Thanks so much to everyone who scoped from CHA and shared this amazing show with people from around the world!

    If like me you’re going to miss getting the daily “whistle”, check out the following instagram accounts for loads of Tim Holtz BTS (behind the scenes) from CHA 2016.

    Tim Holtz
    Mario Rossi
    Paula Cheney
    Richele Christensen
    Sizzix
    Ranger Ink

    Enjoy…

    CHA2016 periscope – More with Tim (by Sizzix)

    CHA2016 periscope – What’s New at Sizzix with Tim Holtz (by Sizzix)

    CHA2016 periscope – Tim Holtz Good Morning from CHA (by Mario Rossi)

    CHA2016 periscope – Ranger Booth (by Brianna)

    CHA 2016 periscope – Tim Holtz (by Yvonne Blair)


  5. CHA 2016 Tim Holtz Periscopes

    11th January, 2016 by iGirlZoe

    Good Morning! It’s been an exciting and busy weekend for the craft world with the Craft and Hobby Association (CHA) 2016 show in full swing. If like me, you were glued to your screen all weekend watching Periscope and listening for the next “whistle,” you would have seen some of the incredible products being demonstrated. I also know that for some, it wasn’t possible to get Periscope or stream it in the 24 hour limit the videos are available for, especially those working their socks off at CHA!

    SO, my very clever and time generous husband spent his weekend saving and converting the scopes. A big thank you to him, as each video took several hours to download, convert and upload. Also a big thank you to everyone at CHA who took the time to periscope so people from around the world could feel part of the show.

    You can see the sneak peaks for all the new products on Tim Holtz Blog.

    Enjoy…

    CHA2016 periscope – Tim Holtz Opening Day

    CHA2016 periscope – Tim Holtz Sizzix Booth

    CHA2016 periscope – Tim Holtz Alterations here we go (by Mario Rossi)

    CHA2016 periscope – Tim Holtz Vagabond 2 demo (with Richele Christensen)

    CHA2016 periscope – Tim Holtz Sizzix booth village (with Annette Green)

    CHA2016 periscope – Tim Holtz Distress Crayons in Ranger booth


  6. 12 Tags of 2015 – November

    30th November, 2015 by iGirlZoe

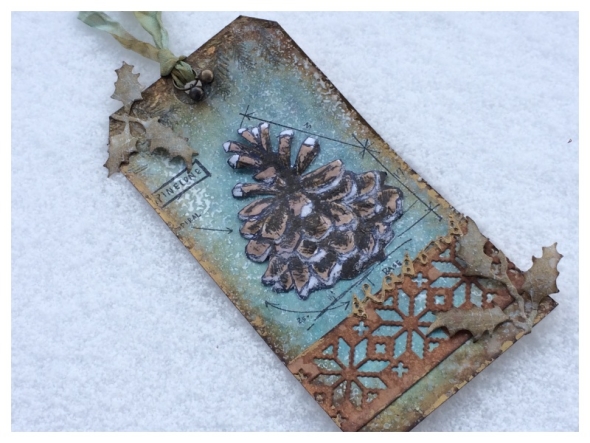
    I love November’s 12 tags of 2015 so much that I wanted to make a second.

    iGirlZoe: 12 Tags of 2015 November
    This time with a winter twist.

    iGirlZoe: 12 Tags of 2015 November
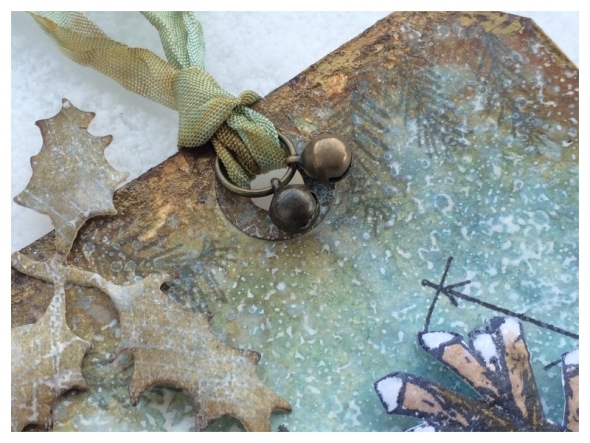
    I’m a bit obsessed with these tiny vintage bells, they have such a sweet jingle.

    iGirlZoe: 12 Tags of 2015 November
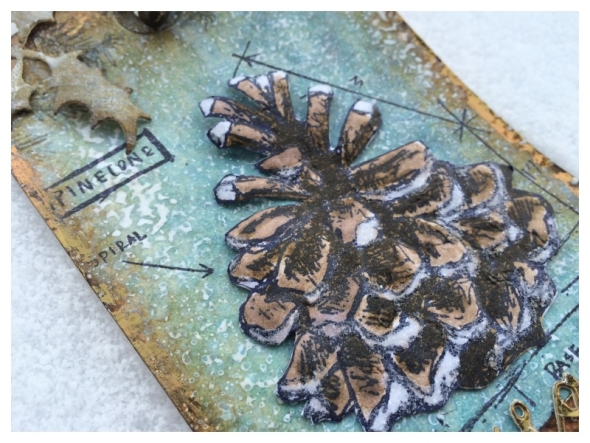
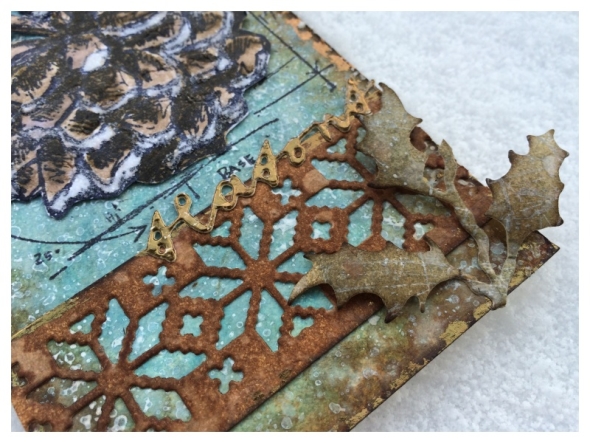
    I love the blueprint stamps and the dry embossing technique works really well with the pinecone.

    iGirlZoe: 12 Tags of 2015 November
    I didn’t realise how much I LOVE the new knit thinlit dies until I actually used them!

    Thanks for stopping by. You can see all the techniques for this month’s tag on Tim’s Blog.


  7. 12 Tags of 2015 – November

    6th November, 2015 by iGirlZoe

    Oh I utterly love November’s 12 tags of 2015! Tim offers up a trio of super cool techniques. I’ve already started thinking about my second tag.

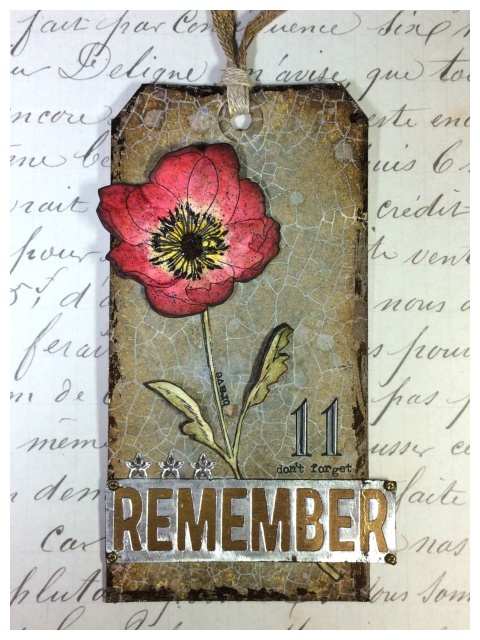
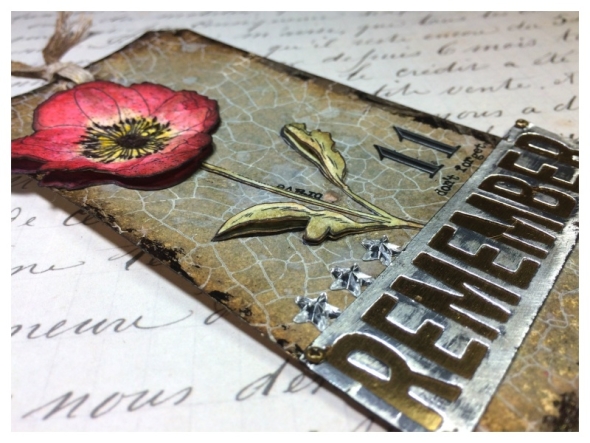
    iGirlZoe: 12 Tags of 2015 NovemberI wanted to make something in honour of remembrance day. My Grandfather served in the British army and each year I wear a poppy in remembrance of him and to honour those all around the world who serve and have served.

    iGirlZoe: 12 Tags of 2015 November
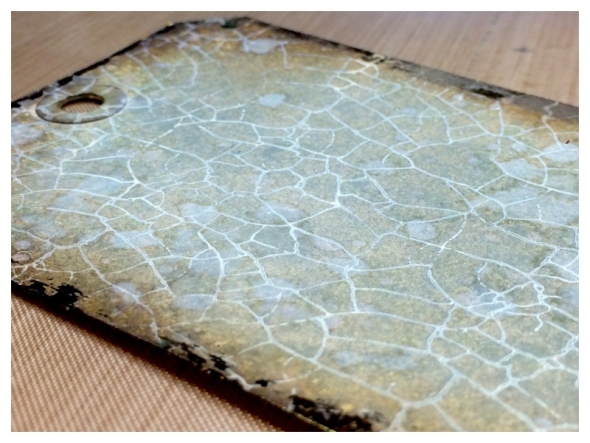
    The cracks stamp I used for the background gives an aged look which seemed appropriate to commemorate a tradition that began in 1919.

    iGirlZoe: 12 Tags of 2015 November
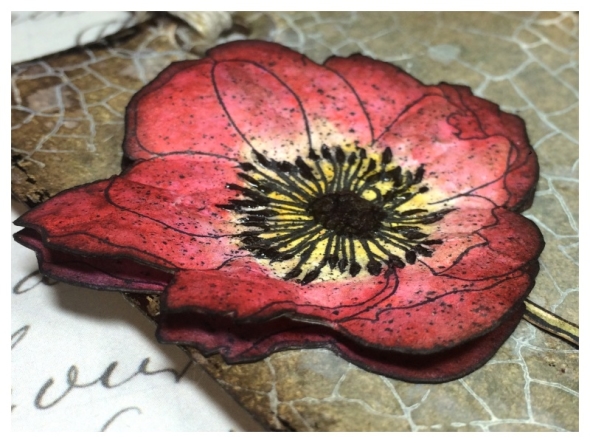
    I created a poppy with a stamp from the flower garden set and used the dry embossed technique.

    iGirlZoe: 12 Tags of 2015 November
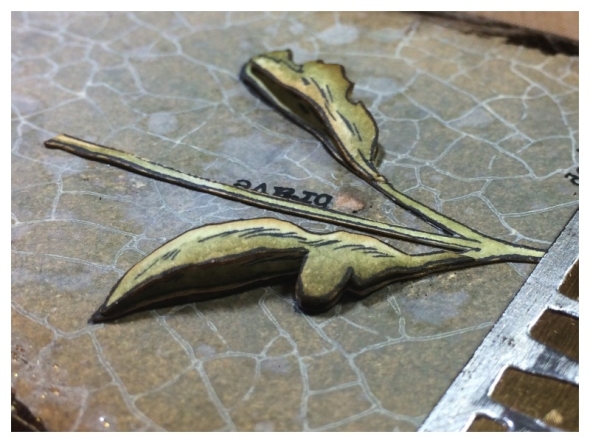
    You can really see this technique on the leaves, I didn’t even need any 3D foam! I placed over a flat leaf with a dab of glossy accents to give more dimension.

    iGirlZoe: 12 Tags of 2015 November
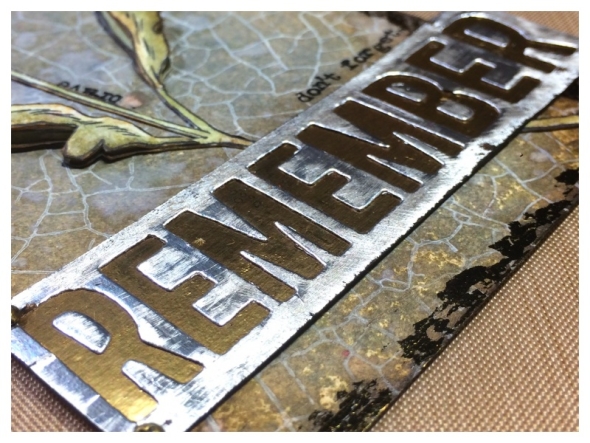
    I am obsessed with metallics at the moment and this metallic kraft core is just divine! I used a word block die with silver and gold kraft core, which I sanded and inked with ground espresso distress.

    iGirlZoe: 12 Tags of 2015 November
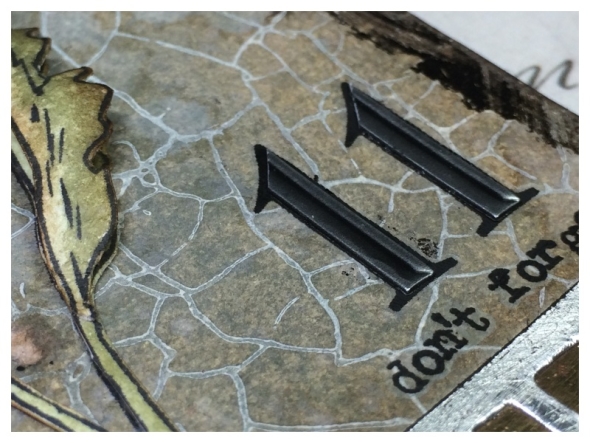
    I added the number 11 from a sheet of remnant rubs and added cut down strips of industrious stickers to give them a vintage metal look.

    iGirlZoe: 12 Tags of 2015 November
    Thanks for taking the time to look at my tag. You can see this months tag and techniques on Tim’s blog and you can see the post translated into French on Scrapdeco’s blog.


  8. The Countess

    21st October, 2015 by iGirlZoe

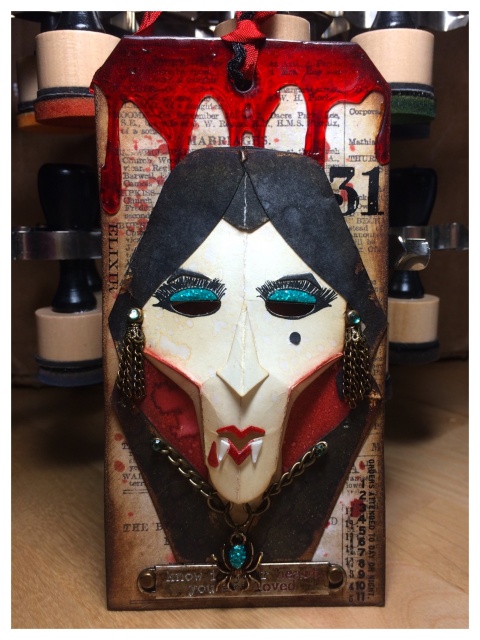
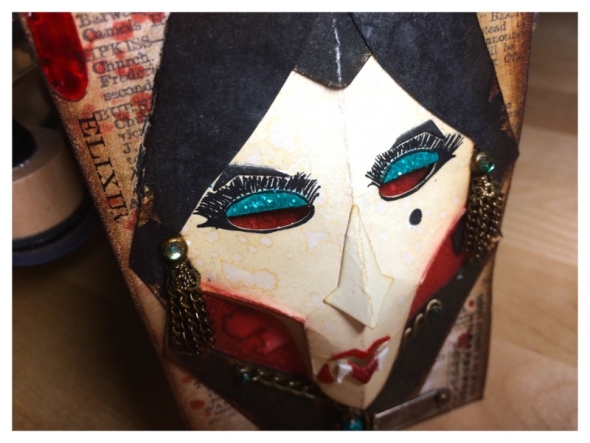
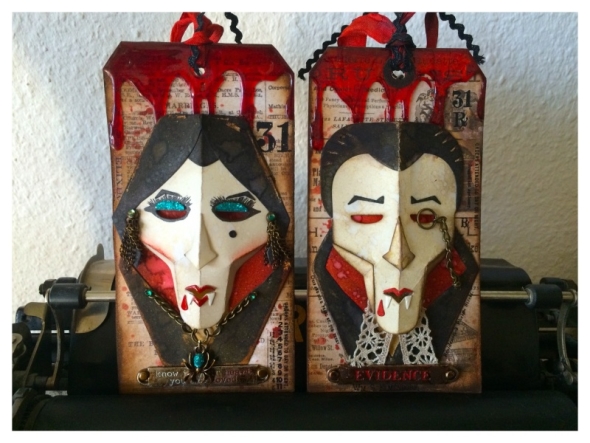
    A few months ago I introduced you to Count Frightful and for this months 12 tags of 2015 he revealed his more dapper side and got himself a love interest…

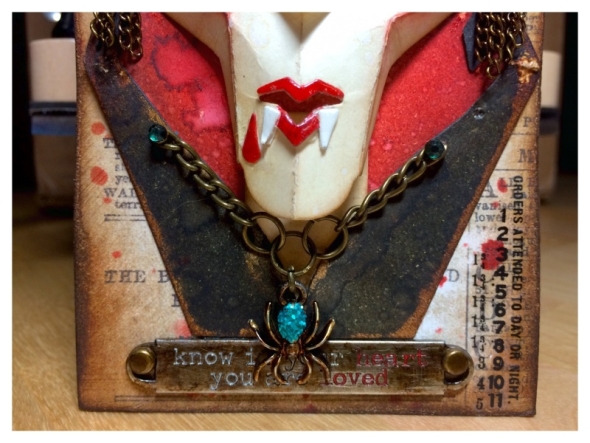
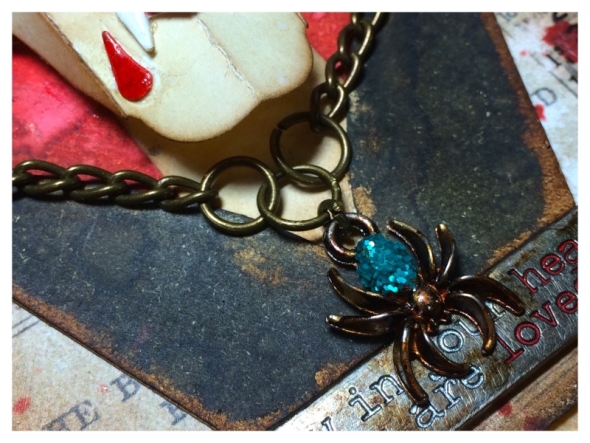
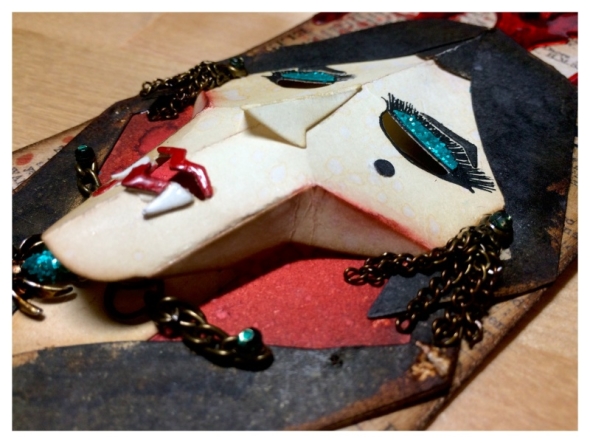
    Introducing the Countess!

    iGIrlZoe: The Countess

    iGIrlZoe: The Countess

    iGIrlZoe: The Countess

    iGIrlZoe: The Countess

    iGIrlZoe: The Countess

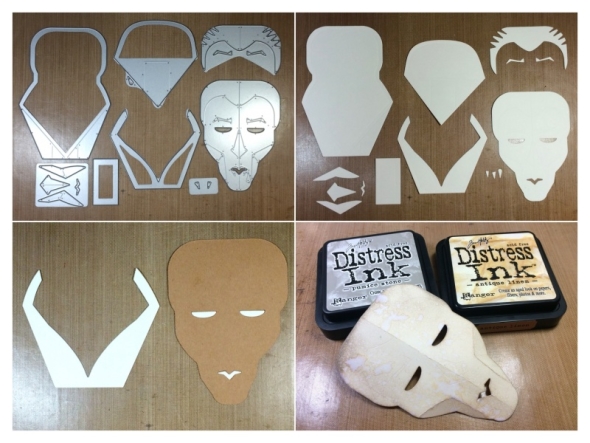
    I used the techniques that Tim demonstrates on this months tag and by making a few alterations to the sizzix vampire die cuts, I created my second tag. Here’s how…

    iGIrlZoe: The Countess
    Cut the sizzix vampire thinlits die set from mixed media cardstock. Cut an extra collar die cut to create the female vampire hair and keep the eyes and mouth from the face portion, (as pictured). The eyes will become the eyeshadow and the lips will sit between the fangs to give a more feminine mouth. Blend a little pumice stone and antique linen distress ink onto the face, spritz with water and dry.

    iGIrlZoe: The Countess
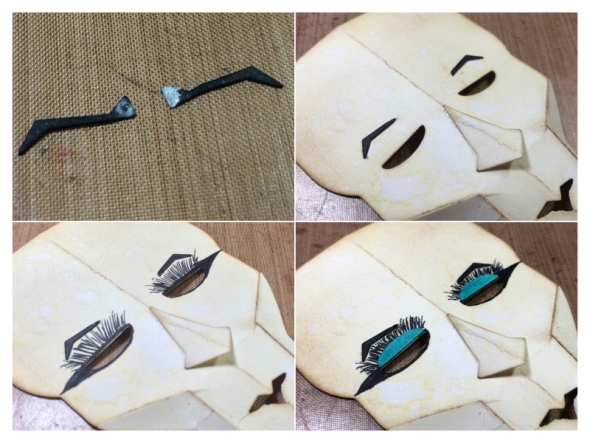
    Trim the eyebrows, removing the portions which appear white in the picture and adhere to the face. They look more feminine right? Using a black journaling pen, add eyelashes and eyeliner detail around the eyes.

    iGIrlZoe: The Countess
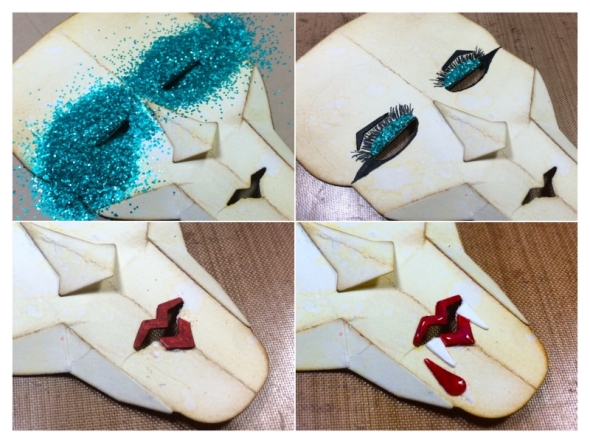
    Using the eyes from the face that you would normally discard for the male vampire, colour with distress ink, (I used peacock feathers). Cover with a layer of glossy accents and sprinkle distress glitter over the top, (peacock feathers again).
    Attach the top mouth piece. Using the mouth die cut saved from the face, adhere underneath, trimming the sides to make room for the fangs. Cover the lips, fangs and blood drip with glossy accents.

    iGIrlZoe: The Countess
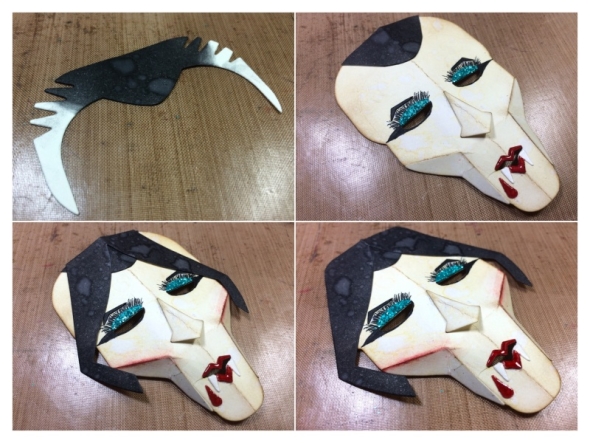
    Trim the original hair piece and adhere. Turn the additional die cut collar upside down to use as hair, adhere and trim the excess, (as pictured).

    iGIrlZoe: The Countess
    Thank you for stopping by and taking a look at my tag. You can see this months tag and techniques on Tim’s blog and you can see the post translated into French on Scrapdeco’s blog.


  9. Oh Christmas Tree!

    17th October, 2015 by iGirlZoe

    I’m delighted to share my second project for the Tim Holtz holiday inspiration series using the new seasonal products. Check Tim’s blog to see all the other designers fabulous festive projects.
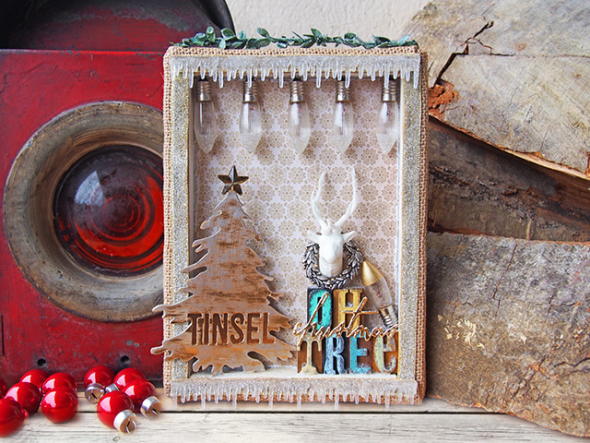
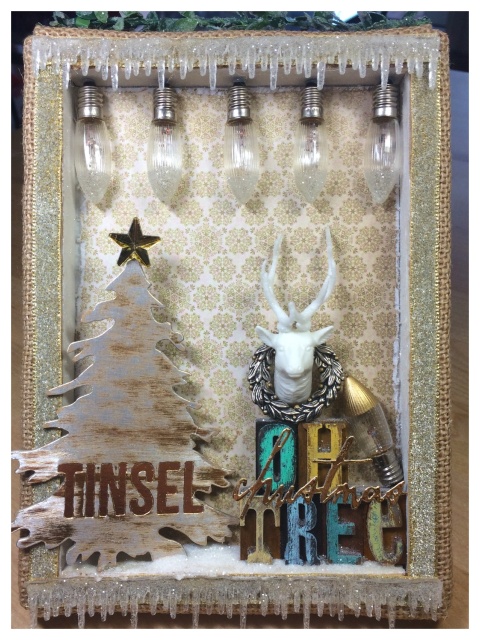
    iGIrlZoe: Oh Christmas Tree
    I LOVE Christmas, to me it really is the most wonderful time of the year and one of my favourite holiday traditions is “tree day!” We go and get our Christmas tree and my DH straps it to the car roof and we drive back up the mountain and decorate it while listening to Christmas music.

    I wanted to make a home decor piece to celebrate this Christmas tradition. It’s a really simple project to decorate your home or make as a gift. Here’s the step-by-step…
    iGIrlZoe: Oh Christmas Tree
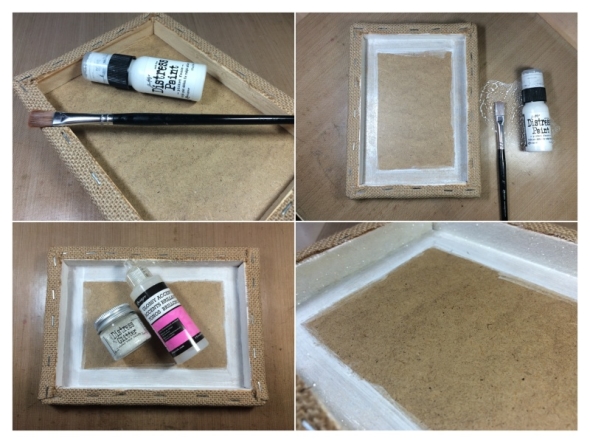
    Take a burlap panel, turn it over and trim any burlap that overlaps the edges of the frame. Paint the inside edges of the frame with picket fence distress paint and set aside to dry. Paint a thin layer of glossy accents to the inside edges of the frame and cover with clear rock candy distress glitter. Tap off excess over paper and return to the pot.
    iGIrlZoe: Oh Christmas Tree
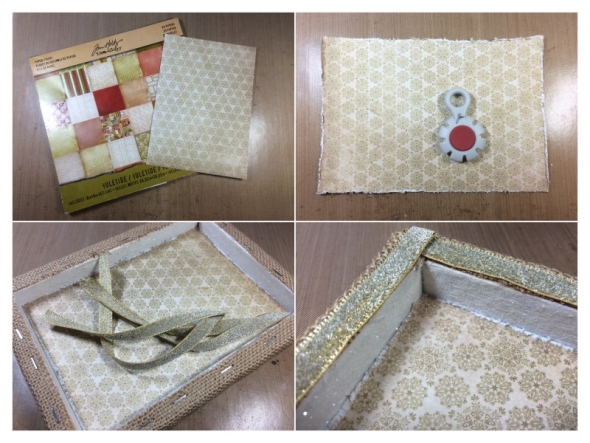
    Select a sheet of paper from the new yuletide paper stash and cut to fit inside the burlap panel. Distress the edges with a paper distressing tool and adhere to the frame with multi medium. Cut 4 pieces of ribbon from the new metallic trimmings to cover the staples. Using double sided adhesive tape stick down.
    iGIrlZoe: Oh Christmas Tree
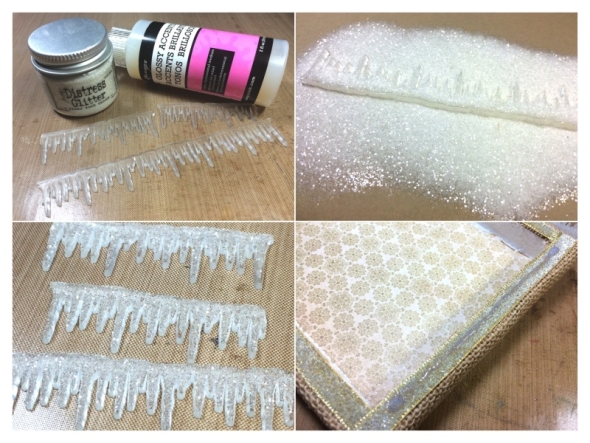
    Snip small and large icicles from the AMAZING new frozen alpha parts… (when I pulled these from my box of goodies I went a bit crazy). Cover with a modest layer of glossy accents and sprinkle over clear rock candy distress glitter! Tap off excess and set aside to dry. To attach the icicles, run a layer of glossy accents along the trimming where you want to place the icicle and allow to dry without sticking down. This strip of DRIED glossy accents will act as “tooth” for the alpha part.
    iGIrlZoe: Oh Christmas Tree
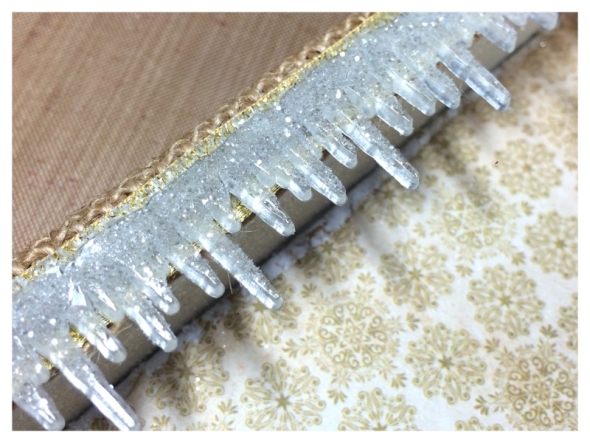
    Apply a layer of glossy accents to the back of the icicle and stick in place. Press down for a few moments and then set aside until the glossy accents have dried.
    iGIrlZoe: Oh Christmas Tree
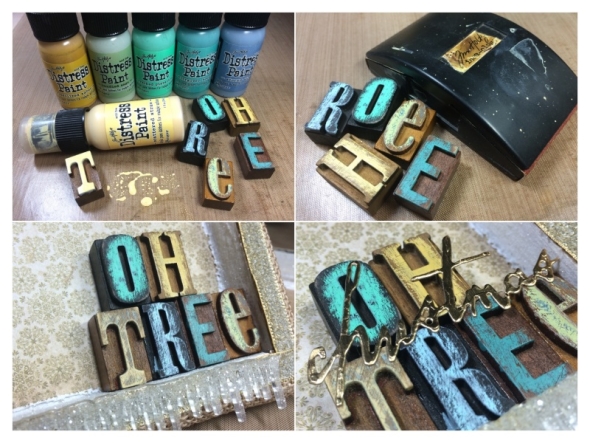
    Cover letterpress blocks in distress paint and allow to dry completely. Using a sanding grip, sand the letter to give a distressed look. Mount onto the burlap panel with glossy accents. Die cut “Christmas” from the new Sizzix thinlits handwritten holidays set from metallic kraft core and adhere.
    iGIrlZoe: Oh Christmas Tree
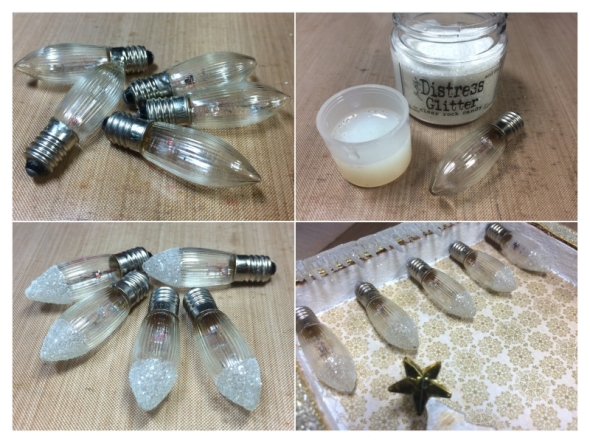
    My lovely Mum gave me these vintage light bulbs which were perfect for this project. I used a distress paint cap and filled it with glossy accents. Dip the end of the bulb into glossy accents and then sprinkle clear rock candy distress glitter over the top and tap off the excess. Attach to the inside top of the burlap panel with a dab of hot glue.
    iGIrlZoe: Oh Christmas Tree
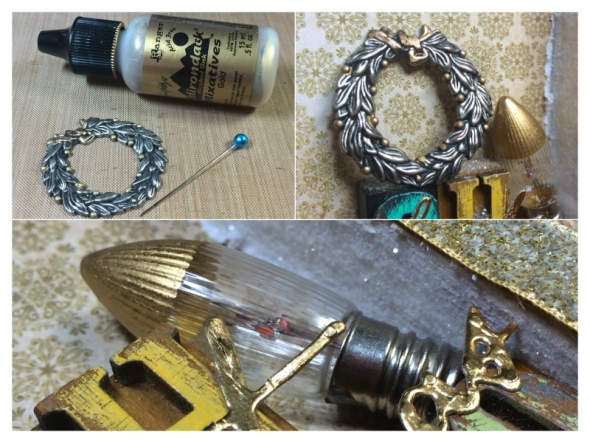
    Decorate a new adornment wreath with gold alcohol ink using a pin. Dip the pin in the alcohol ink and then lightly touch the pin to the berries on the wreath. I dipped a bulb in gold alcohol ink to use as an extra embellishment.
    iGIrlZoe: Oh Christmas Tree
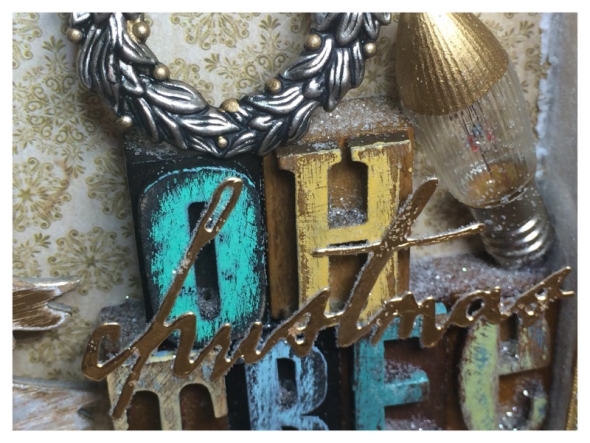
    Attach the bulb and wreath to the letterpress with a dab of hot glue.
    iGIrlZoe: Oh Christmas Tree
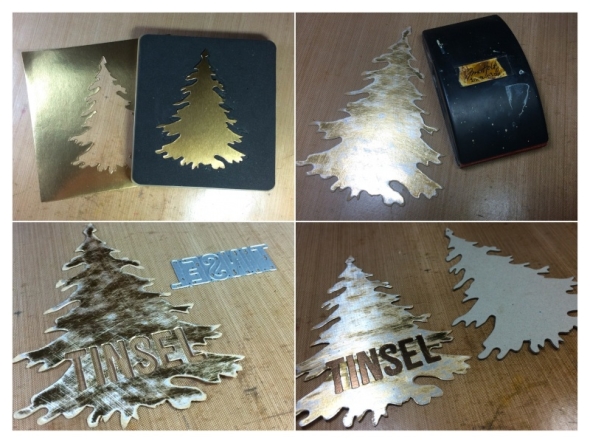
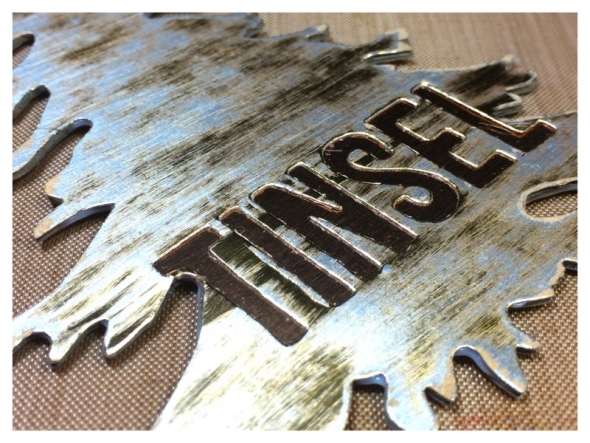
    Create an embellishment using the new Sizzix evergreen bigz die and the holiday word block 2 thinlit dies. Die cut a tree from metallic kraft core and sand with the sanding grip. Die cut “Tinsel” into the tree and then mount a different colour metallic kraft core sheet underneath. To reinforce, mount onto a second tree die cut from chipboard.
    iGIrlZoe: Oh Christmas Tree

    iGIrlZoe: Oh Christmas Tree
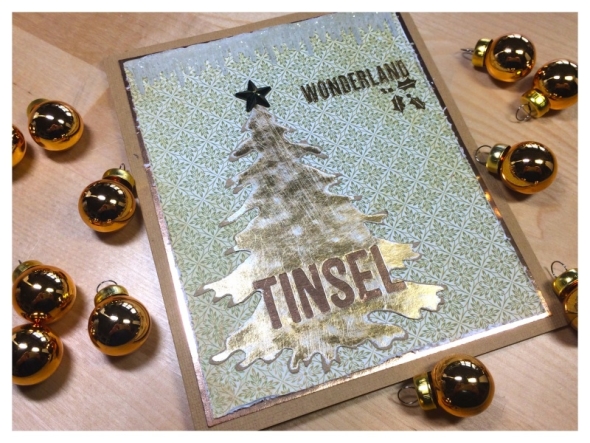
    I also made a card with the same products that I used for the burlap panel, as well as the new GOLD gilded holidays remnant rubs! YES GOLD! OH MY!
    iGIrlZoe: Oh Christmas Tree
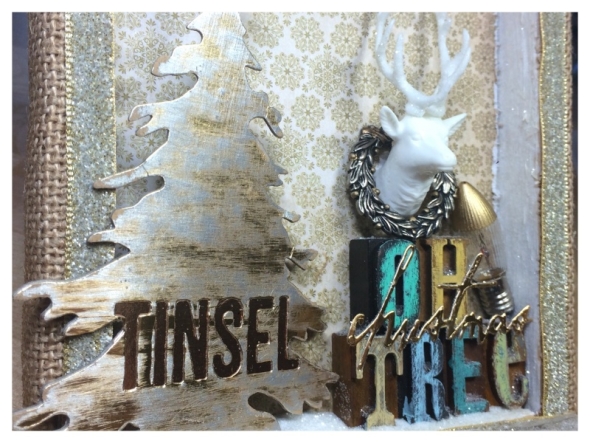
    Attach the tree at a slight angle to the inside base of the panel with glossy accents and cover the base with a little clear rock candy distress glitter. Attach the trophy antlers inside the adornment wreath with a dab of hot glue.
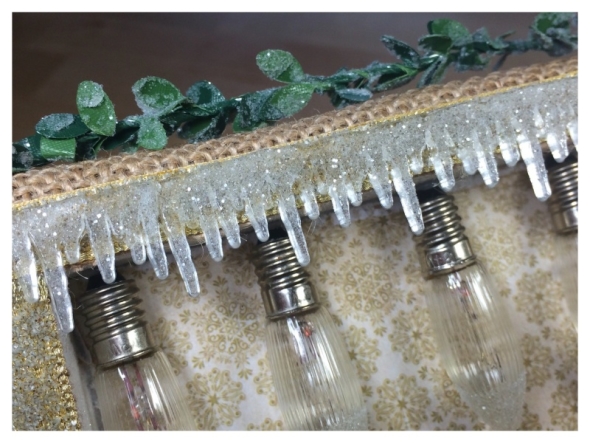
    iGIrlZoe: Oh Christmas Tree
    For a final flourish cut a strip of the new boxwood twine. Cover with glossy accents using your fingers and then sprinkle over clear rock candy distress glitter. Attach to the top of the burlap panel with a dab of hot glue at each end of the twine.
    iGIrlZoe: Oh Christmas TreeThanks for stopping by, I hope this has given you a little holiday inspiration. I have had so much fun playing with all the new products and really appreciate all the kind and encouraging comments you have left here and on social media. A big thank you to Tim, Paula and Mario for inviting me to create samples, it’s been such a great pleasure.

    I’ll be back next week with more Halloween projects, but for now, I hope you have a great weekend.



  10. 12 Tags of 2015 – October

    12th October, 2015 by iGirlZoe

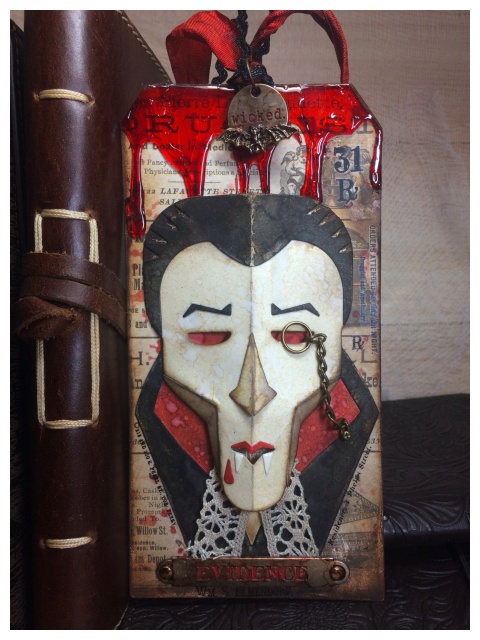
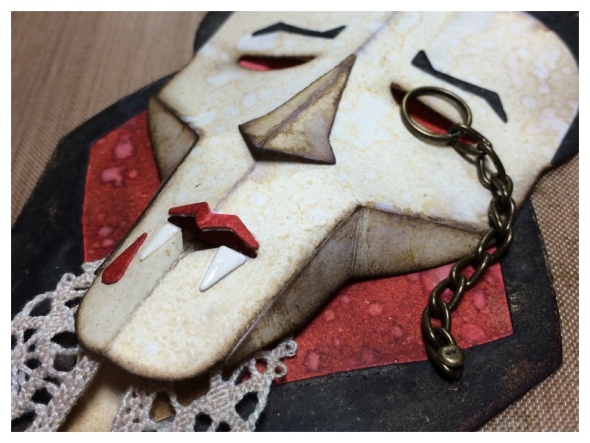
    12 Tags of 2015 time again. I love Tim’s October tag, the new thinlits monster dies are SO fun that I couldn’t wait to grab my vampire die.

    iGIrlZoe: 12 Tags of 2015 OctoberCount Frightful is back and this time he’s dressed for DINNER!

    iGIrlZoe: 12 Tags of 2015 October
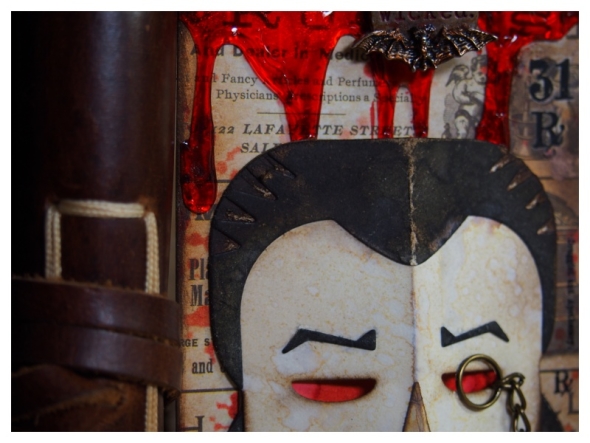
    I added lace to his collar and an o ring monocle and chain, pinned to his lapel. Doesn’t he look rather dapper?!

    iGIrlZoe: 12 Tags of 2015 October
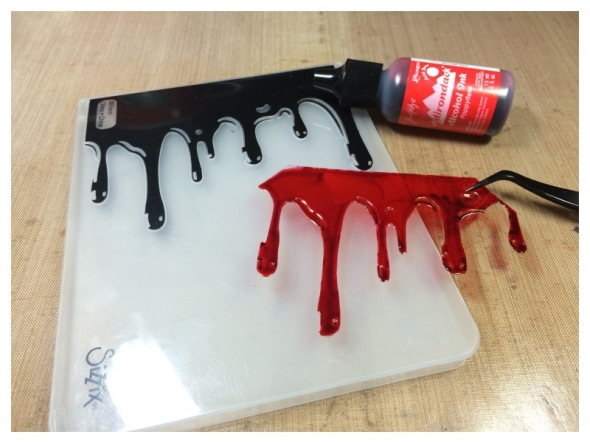
    My dripping texture fade embossing folder arrived just in time. I used packaging from one of Tim’s BIGZ dies and embossed with the dripping folder, cut around the embossed outline and covered with poppyfield alcohol ink.

    iGIrlZoe: 12 Tags of 2015 October
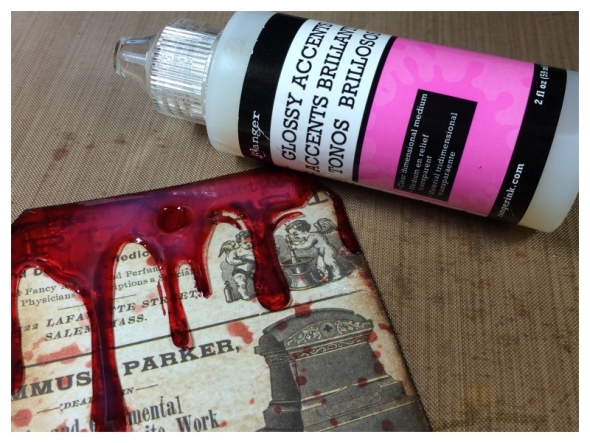
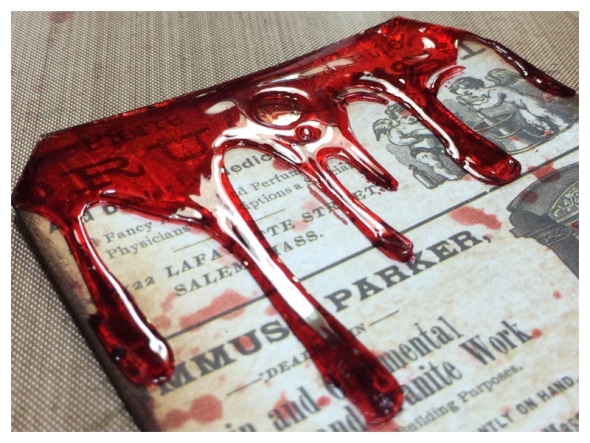
    I wanted the drips to look wet even when dry so I covered with a generous layer of glossy accents and set aside to dry.

    iGIrlZoe: 12 Tags of 2015 October
    The dripping has a lovely glossy look like toffee apple toffee.

    iGIrlZoe: 12 Tags of 2015 October
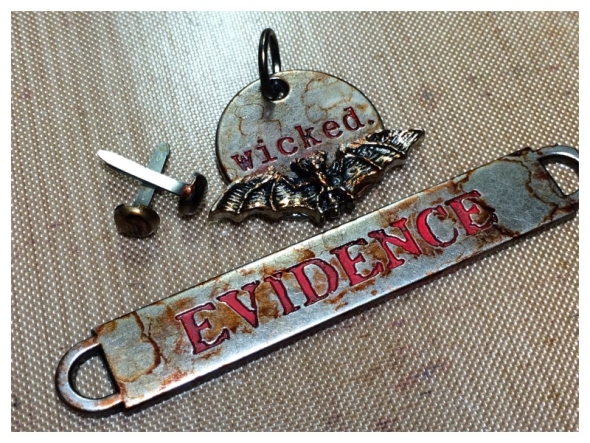
    I dabbed mushroom and butterscotch alcohol ink onto some idea-ology to give an aged look. I cut the loop off the bat charm with wire cutters and glued it to the wicked token with glossy accents.

    iGIrlZoe: 12 Tags of 2015 October
    You can see this months tag and techniques on Tim’s blog and you can see the post translated into French on Scrapdeco’s blog.

    Thanks for taking the time to look at my tag and I just want to take a moment to thank everyone for their kind comments on my blog and instagram recently. I really appreciate the feedback and support and it encourages me to share my tiny corner of the craft world with you. Thanks lots and lots. 🙂