‘Ranger Ink’ Category

  1. Ice Flake Baby!

    5th December, 2018 by iGirlZoe

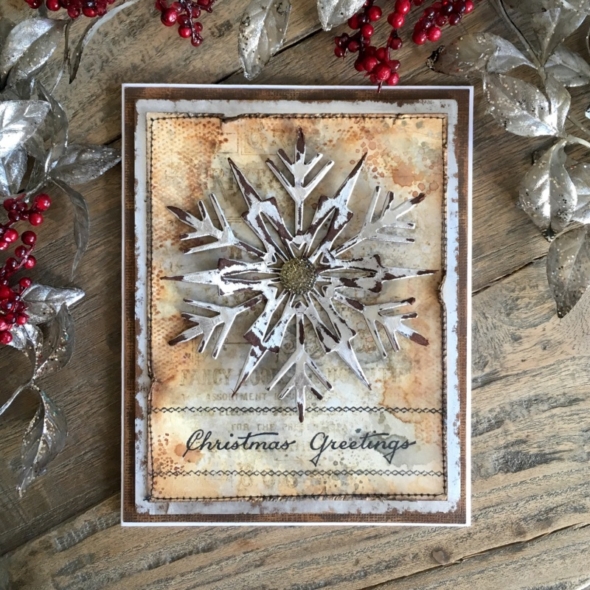
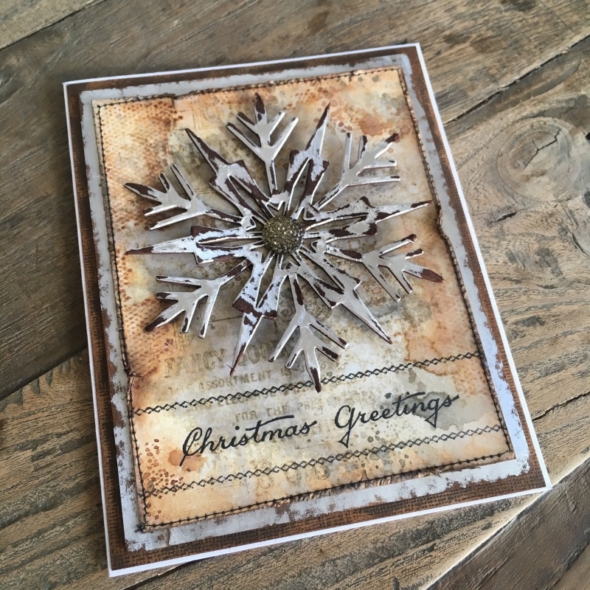
    Hello friends! I’m back with another Christmas card. I’m pretty sure that I am way behind schedule at this stage, but the fun I am having creating holiday cards in the correct season, makes up for the late nights and sheer panic that await me… at some point I must start my Christmas shopping! *insert hysterical laughter*

    iGirlZoe: Tim Holtz, sizzix, ice flake bigz die, stampers anonymous, music and advert stamps, ornate trims, idea-ology, gumdrop, metallic kraft stock, holidays, christmas card
    As soon as Tim Holtz announced his holiday dies, the ice flake bigz die went to the top of my MUST HAVE list.

    iGirlZoe: Tim Holtz, sizzix, ice flake bigz die, stampers anonymous, music and advert stamps, ornate trims, idea-ology, gumdrop, metallic kraft stock, holidays, christmas card
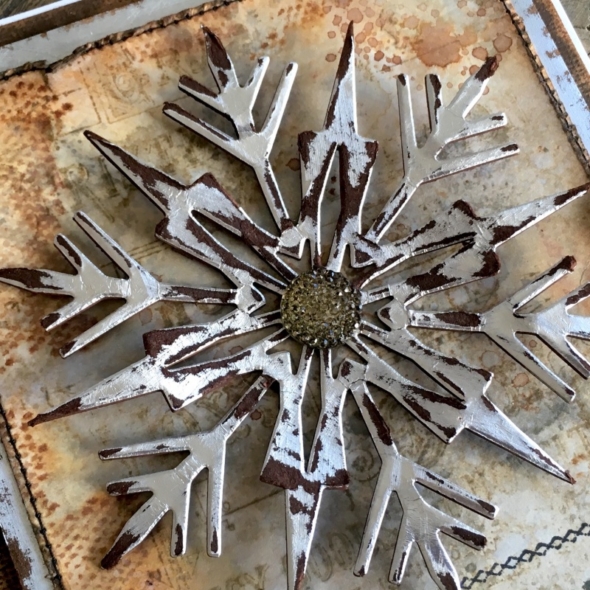
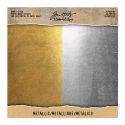
    Glue metallic kraft stock to distress mixed media heavystock and die cut using the ice flake bigz die.

    iGirlZoe: Tim Holtz, sizzix, ice flake bigz die, stampers anonymous, music and advert stamps, ornate trims, idea-ology, gumdrop, metallic kraft stock, holidays, christmas card
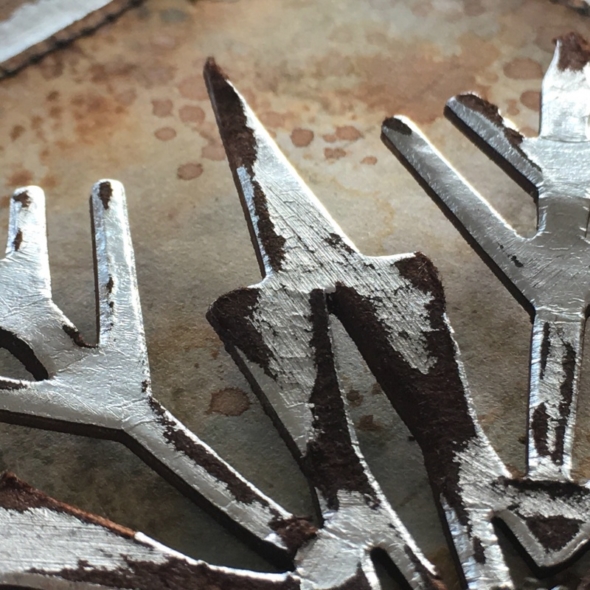
    Using the sanding grip, sand parts of the ice flake and blend in vintage photo distress ink. I love that the metallic kraft stock can be so grungy with a little light sanding.

    iGirlZoe: Tim Holtz, sizzix, ice flake bigz die, stampers anonymous, music and advert stamps, ornate trims, idea-ology, gumdrop, metallic kraft stock, holidays, christmas card
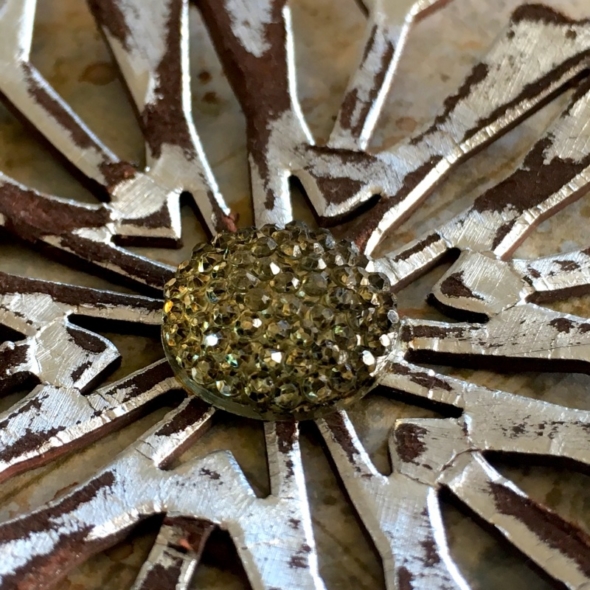
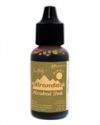
    Attach to the card at the center of the ice flake with distress collage medium and add an idea-ology gumdrop coloured with mushroom alcohol ink.

    iGirlZoe: Tim Holtz, sizzix, ice flake bigz die, stampers anonymous, music and advert stamps, ornate trims, idea-ology, gumdrop, metallic kraft stock, holidays, christmas card
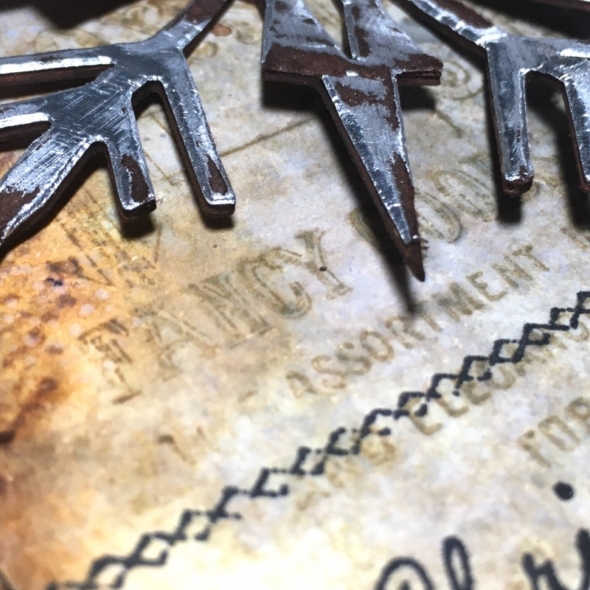
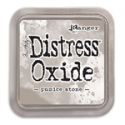
    Using Tim Holtz stamps, stamp the advert from music and advert set (cms358) onto heavystock using archival ink. Drag through a wash of frayed burlap, iced spruce and pumice stone distress spray. Use an ornate trims stamp (cms326) to create a border for the the greeting, stamped from the yuletide set (cms356).

    iGirlZoe: Tim Holtz, sizzix, ice flake bigz die, stampers anonymous, music and advert stamps, ornate trims, idea-ology, gumdrop, metallic kraft stock, holidays, christmas card
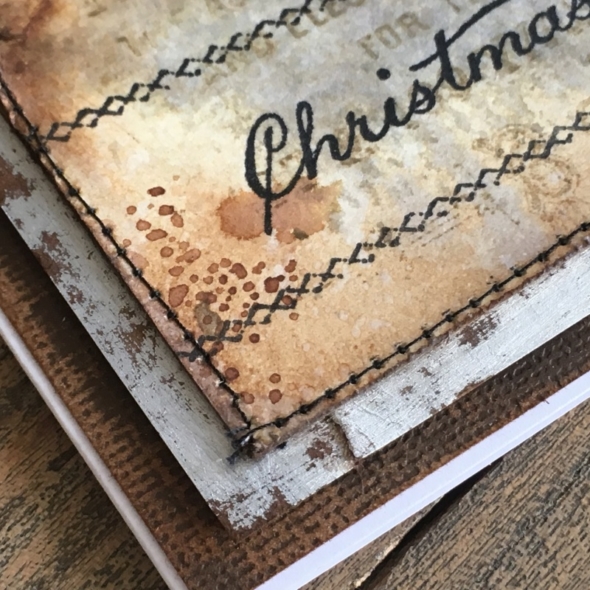
    Layer onto more metallic kraft stock and classic kraft stock, lightly sand and blend in vintage photo distress ink.

    iGirlZoe: Tim Holtz, sizzix, ice flake bigz die, stampers anonymous, music and advert stamps, ornate trims, idea-ology, gumdrop, metallic kraft stock, holidays, christmas card
    Another card to add to my stack.

    Zoe x


  2. Tick Tock Christmas O’Clock

    3rd December, 2018 by iGirlZoe

    I don’t want to freak anyone out, but we’re 3 days into December! Just going to leave that there…

    I find it difficult to skip the details when using Tim Holtz products. They work so perfectly together that it’s easy to get carried away, even when time isn’t on your side. That said, having the right tools makes even the more detailed cards, short work. Tools such as the travel stamp platform, sidekick and glitter duster make it easy to work quickly and in batches.

    iGirlZoe: Tim Holtz, stampers anonymous, inventor, stamps, inventor 1, idea-ology, clock hands, stamptember, sizzix, funky festive, festive greens, glitter duster, holidays, christmas card
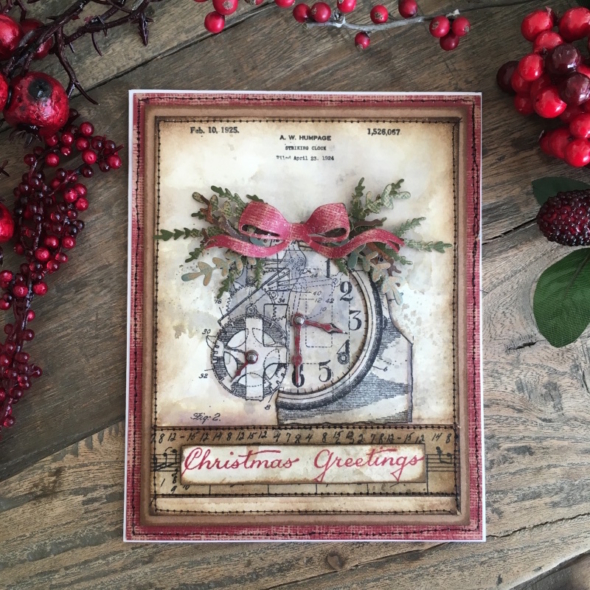
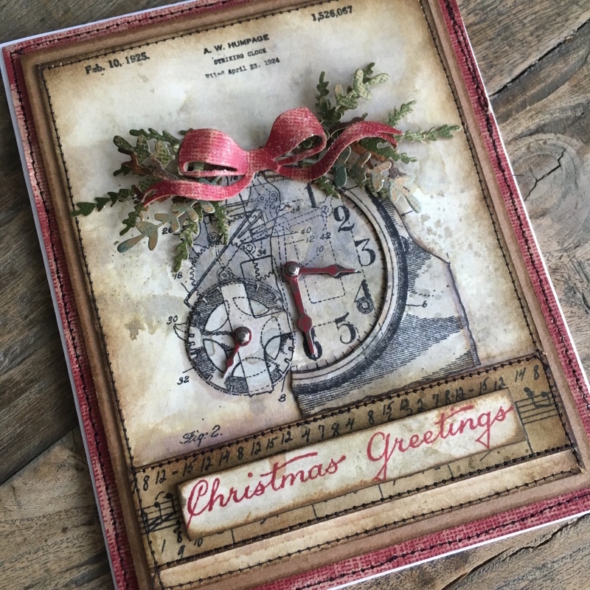
    I reached for the inventor stamps again, this time going back to the beginning and using Inventor 1 set. I saw a clock adorned with fresh foliage at a garden center a few weeks ago and immediately the inventor clock came to mind.

    iGirlZoe: Tim Holtz, stampers anonymous, inventor, stamps, inventor 1, idea-ology, clock hands, stamptember, sizzix, funky festive, festive greens, glitter duster, holidays, christmas card
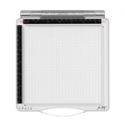
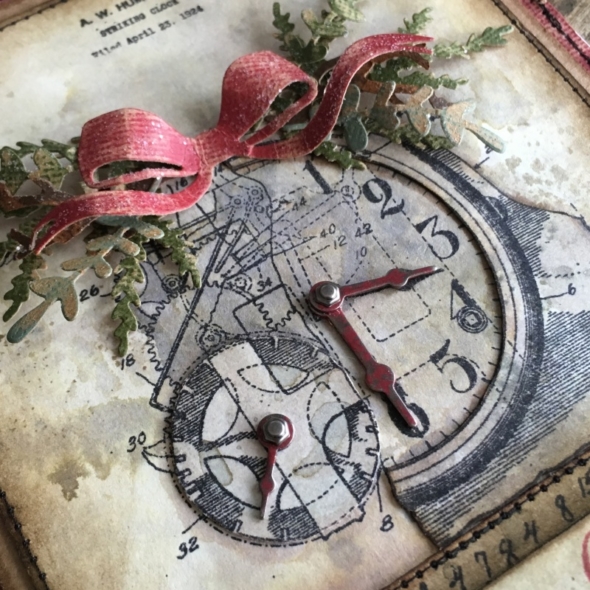
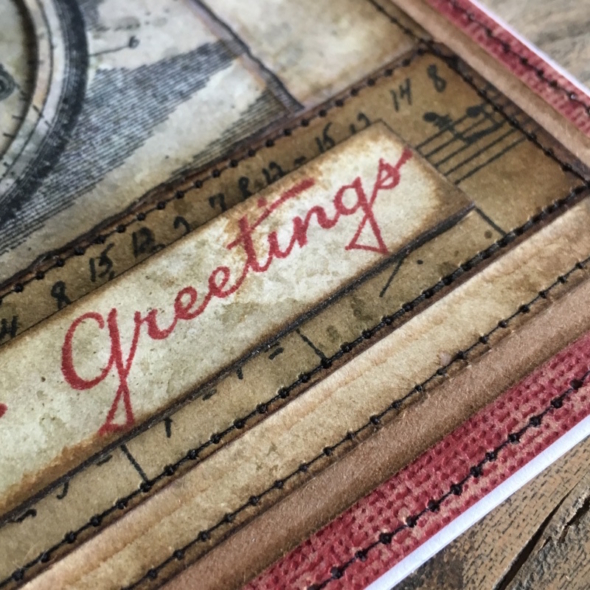
    Using the travel stamp plaform, ink and stamp the clock only. Slide the heavystock down the stamp platform and ink and stamp the header text onto the top of the heavystock! This is why I LOVE the stamp platform. I stamped a music strip and Christmas greeting onto heavystock with stamps from the Tim Holtz Stamptember 2018 stamp set. Stamping a second clock and fussy cutting a portion to stick over the original stamped image to give a little dimension.

    iGirlZoe: Tim Holtz, stampers anonymous, inventor, stamps, inventor 1, idea-ology, clock hands, stamptember, sizzix, funky festive, festive greens, glitter duster, holidays, christmas card
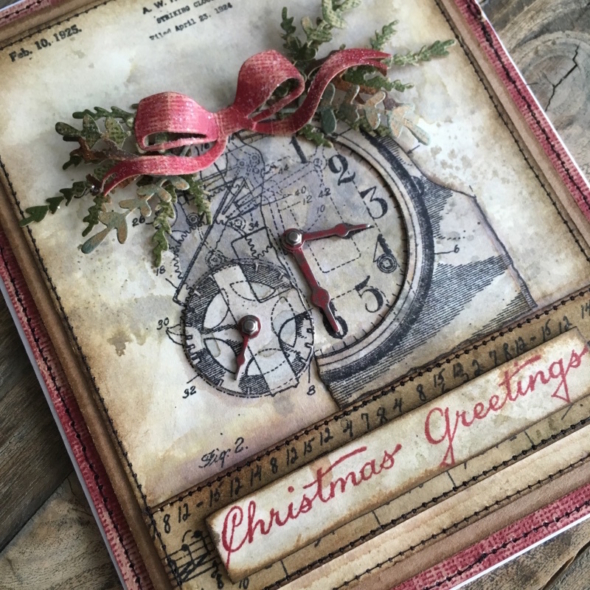
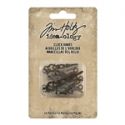
    Paint idea-ology clock hands with candied apple distress paint, rubbing some of the paint off to create a weathered look. Attach to the clock with idea-ology hex fasteners.

    iGirlZoe: Tim Holtz, stampers anonymous, inventor, stamps, inventor 1, idea-ology, clock hands, stamptember, sizzix, funky festive, festive greens, glitter duster, holidays, christmas card
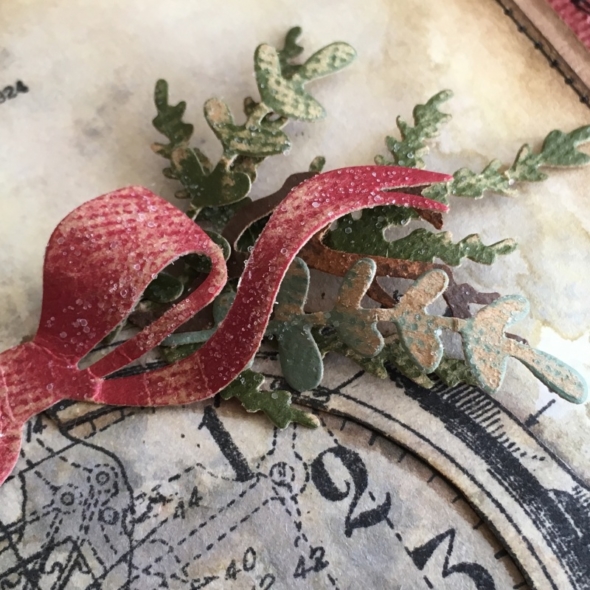
    The foliage is cut from the funky festive thinlits die set from classic kraft stock using the sidekick. The bow I used is from last years festive greens thinlits die set. I love this bow! It was all given the glitter duster treatment. I LOVE this new tool because it gives you such a fine layer of glitter. Check out Tim Holtz blog post to see it in action.

    iGirlZoe: Tim Holtz, stampers anonymous, inventor, stamps, inventor 1, idea-ology, clock hands, stamptember, sizzix, funky festive, festive greens, glitter duster, holidays, christmas card
    I stitched the edges with my sewing machine. I was especially pleased with how straight my stitching was on this card. It’s blind luck, because 2 cards later the stitching was wonky and off the edge… LOL I try!

    iGirlZoe: Tim Holtz, stampers anonymous, inventor, stamps, inventor 1, idea-ology, clock hands, stamptember, sizzix, funky festive, festive greens, glitter duster, holidays, christmas card
    Thanks for stopping by.

    Zoe x


  3. Holiday idea-ology Table Decoration

    29th November, 2018 by iGirlZoe

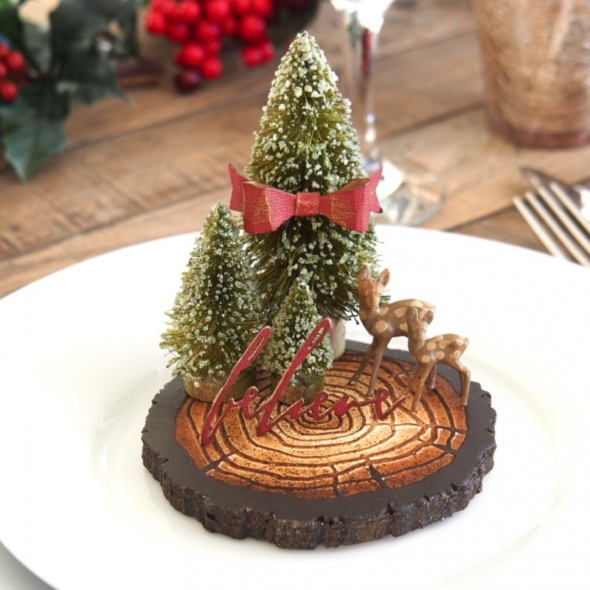
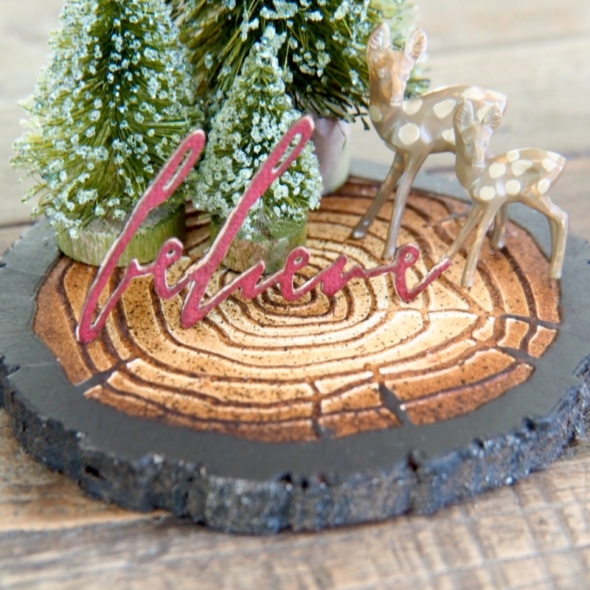
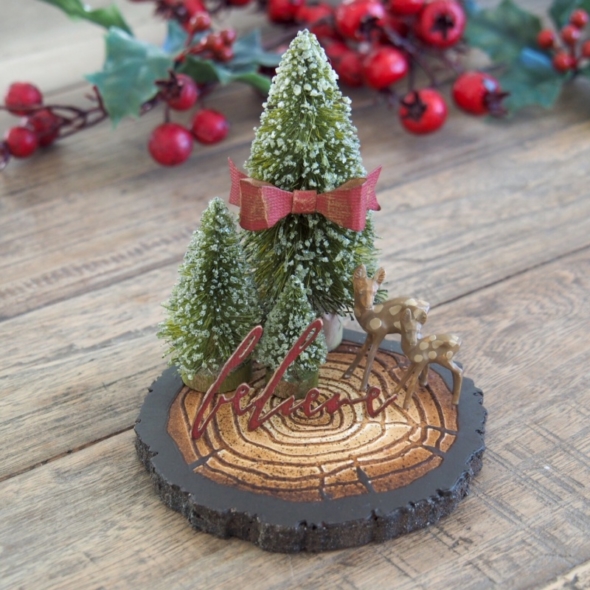
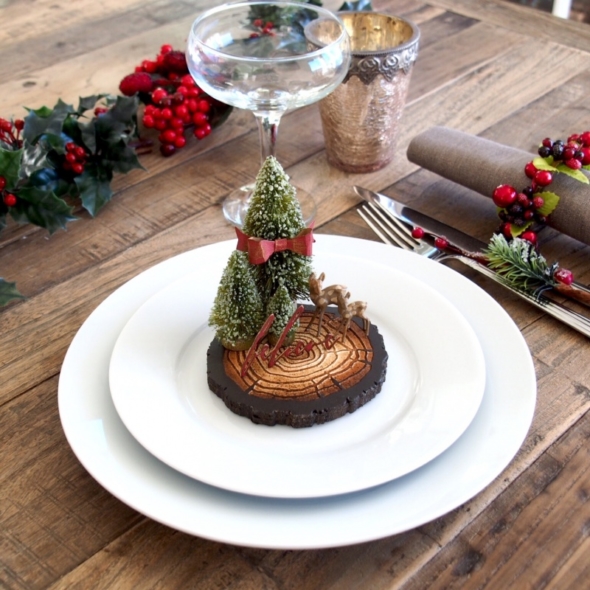
    Christmas is coming and it’s time to think about decking the halls. I was inspired by the wonderful new Tim Holtz holiday idea-ology to make a holiday table decoration.

    iGirlZoe: Tim Holtz, idea-ology, holidays, christmas, sizzix, tree ring bigz die, woodlands trees, decorative deer
    Living in Denmark for the past couple of years, I wanted to add a little Scandi style to my Christmas decorations. The woodland theme is popular here, so the tree ring die was perfect and that’s where I began…

    iGirlZoe: Tim Holtz, idea-ology, holidays, christmas, sizzix, tree ring bigz die, woodlands trees, decorative deer
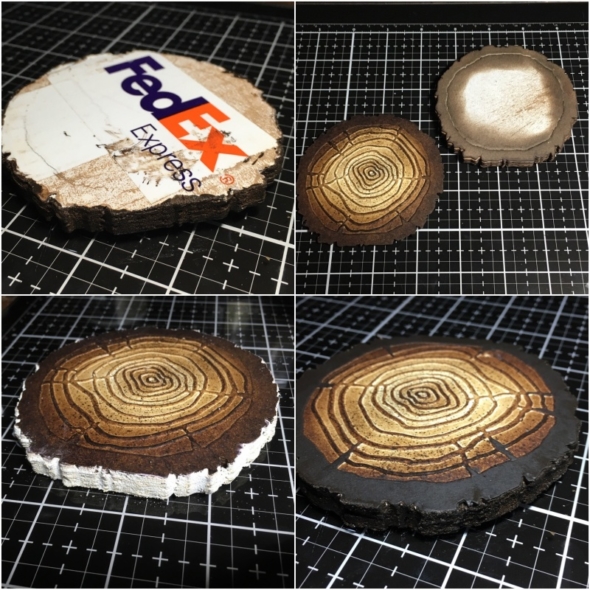
    To make a dimensional base, I upcycled some shipping boxes I had amassed during a lot little black friday sale shopping!

    Step 1: Die cut slices of tree ring from the shipping boxes and glue them together using distress collage medium.
    Step 2: Die cut one piece from distress mixed media heavystock, (this is the piece you’ll emboss, using the matching texture fades folder that accompanies the tree ring die). Blend in vintage photo distress ink and adhere onto the top of the stack.
    Step 3: Using a finger, spread distress grit paste onto the side to hide the layers of corrugated cardboard packaging, wiping any grit paste off the top surface and set aside to dry.
    Step 4: Paint the side and top outer tree ring with ground espresso distress paint and set aside to dry.

    iGirlZoe: Tim Holtz, idea-ology, holidays, christmas, sizzix, tree ring bigz die, woodlands trees, decorative deer
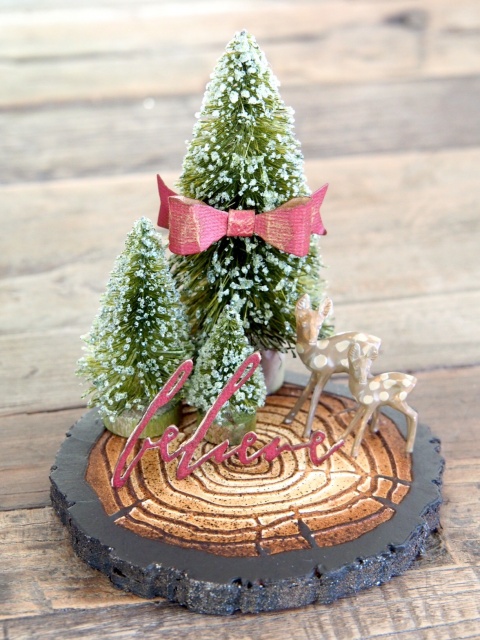
    Using a Stampers Anonymous Splatbox, spray a mini, small and large woodlands tree with peeled paint distress spray.

    iGirlZoe: Tim Holtz, idea-ology, holidays, christmas, sizzix, tree ring bigz die, woodlands trees, decorative deer
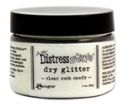
    Brush distress collage medium over the trees with your finger and sprinkle over distress rock candy glitter. If you use the new glitter duster that was recently released by Stampers Anonymous, you get a much finer layer of glitter than pictured here.

    iGirlZoe: Tim Holtz, idea-ology, holidays, christmas, sizzix, tree ring bigz die, woodlands trees, decorative deer
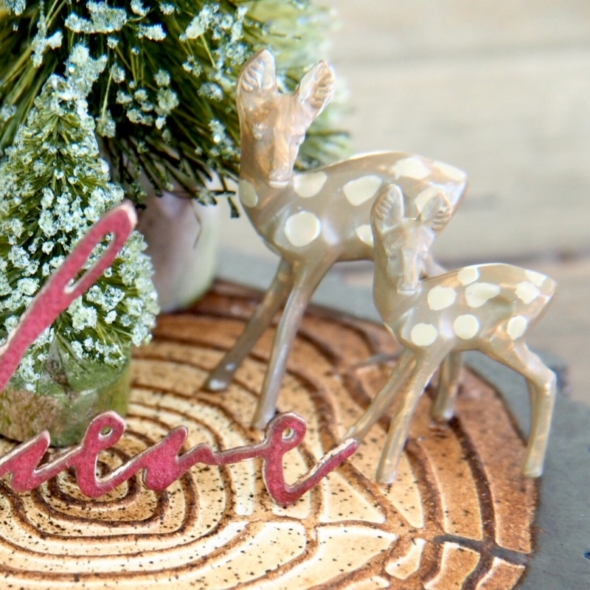
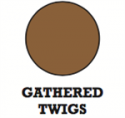
    Paint a small and large idea-ology decorative deer with gathered twigs distress paint and once completely dry, add circles with antique linen distress paint.

    iGirlZoe: Tim Holtz, idea-ology, holidays, christmas, sizzix, tree ring bigz die, woodlands trees, decorative deer
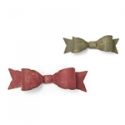
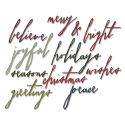
    Die cut a bow and word from Tim Holtz thinlits handwritten holidays and fold-up bows thinlits dies, from idea-ology classic kraft stock. Adhere everything to the base using distress collage medium (a little goes a long way and it dries in seconds).

    iGirlZoe: Tim Holtz, idea-ology, holidays, christmas, sizzix, tree ring bigz die, woodlands trees, decorative deer
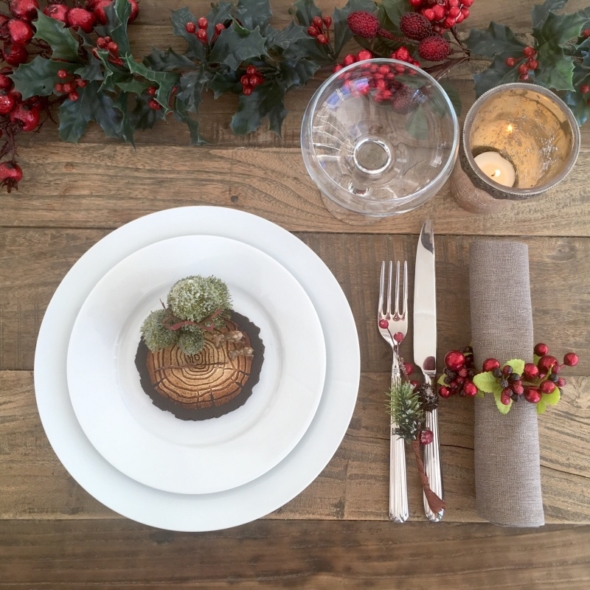
    There are so many options with this decoration. You could add an idea-ology memo pin with a name and use it as place-card holder. You could leave off the “believe” die cut and put an electric tea light in the front. You could also add a bent word band to the front. I will be making some more for my family Christmas table and will share them on my instagram.

    iGirlZoe: Tim Holtz, idea-ology, holidays, christmas, sizzix, tree ring bigz die, woodlands trees, decorative deer

    iGirlZoe: Tim Holtz, idea-ology, holidays, christmas, sizzix, tree ring bigz die, woodlands trees, decorative deerThanks for stopping by and I hope that this has inspired you to make something for the holidays. You can see all of Tim Holtz holiday idea-ology products on Tim’s blog.

    Zoe


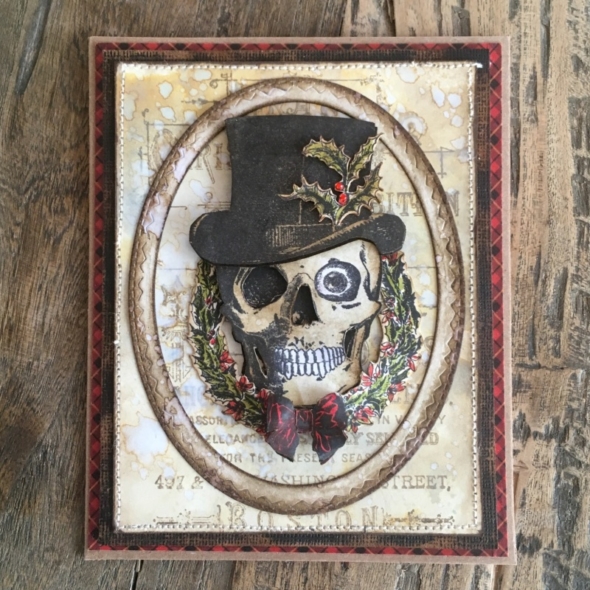
  4. Ebenezer Bones

    8th November, 2018 by iGirlZoe

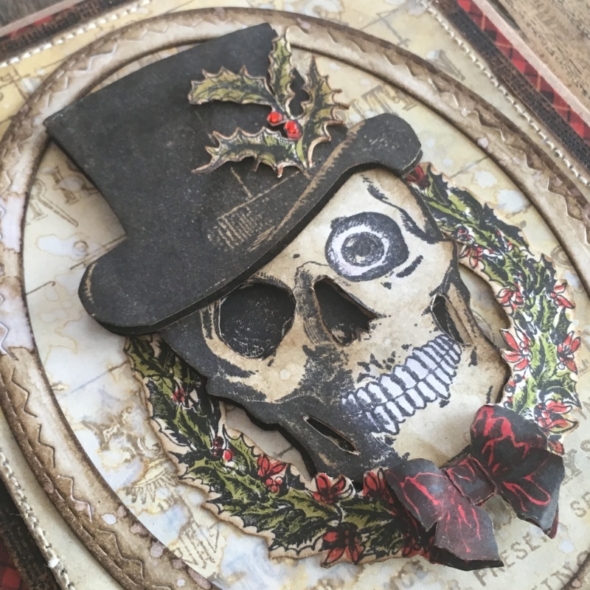
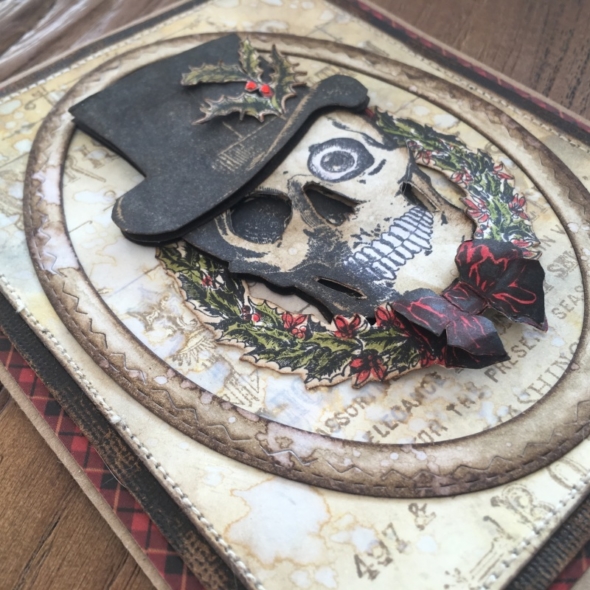
    Meet Ebenezer Bones, with a hat straight off the pages of Dickens ‘A Christmas Carol’… it had to be done!

    iGirlZoe: Tim Holtz, stampers anonymous, idea-ology, distress oxide, mr bones, yuletide. christmas
    I’m slowly weaning myself off halloween and finding my Christmas spirit. Made easier with the new Tim Holtz Stampers Anonymous holiday stamps… yuletide (cms356), music & advert (cms358) and mr bones (cms345).

    iGirlZoe: Tim Holtz, stampers anonymous, idea-ology, distress oxide, mr bones, yuletide. christmas
    Mr Bones fit perfectly into the wreath from the yuletide set. His teeth and eye were a little stained so I painted a layer of clean water over both, left for a few seconds and patted with a cloth to lift the distress ink.

    iGirlZoe: Tim Holtz, stampers anonymous, idea-ology, distress oxide, mr bones, yuletide. christmas
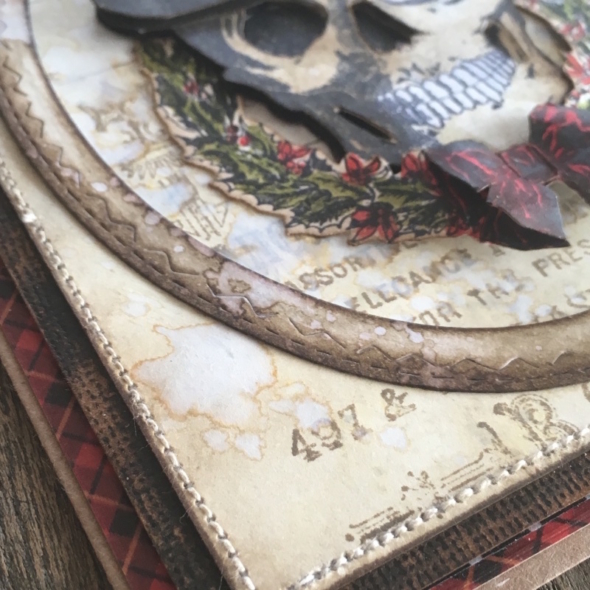
    I love the new Christmas design tape and used it around the edges of the bottom layer of the mount to give a pop of colour amidst the various shades of brown! This is one of my favourite ways to use design tape and you can edge a failed background and no one will ever know. 😉

    iGirlZoe: Tim Holtz, stampers anonymous, idea-ology, distress oxide, mr bones, yuletide. christmas
    Phew, first Christmas card done…

    Thanks for stopping by.
    Zoe


  5. Tim Holtz Tag Press Witches Hat

    4th November, 2018 by iGirlZoe

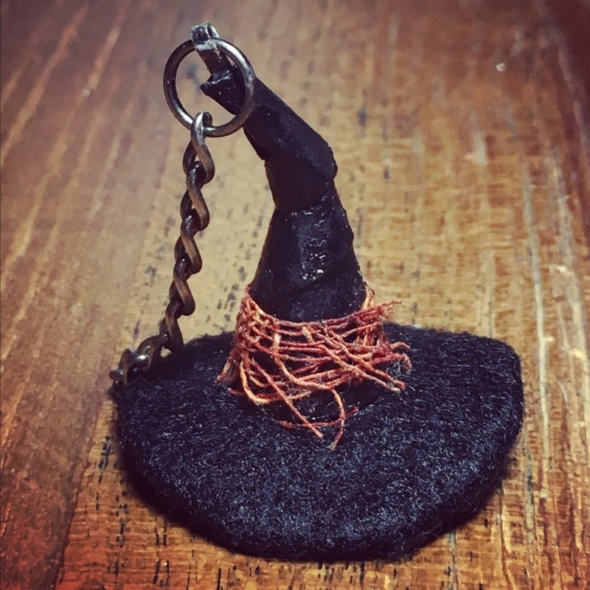
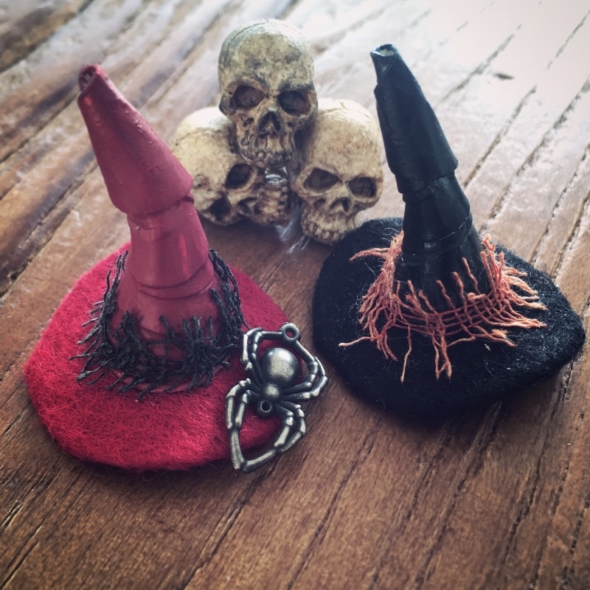
    Hello friends. I am back with a Sunday step by step for the witches hat that is hanging in The Witches Boutique, using the Tim Holtz idea-ology tag press.

    iGirlZoe: Tim Holtz, idea-ology, tag press, mummy cloth, distress spray, mixed media, halloween, witches hat, felt

    iGirlZoe: Tim Holtz, idea-ology, tag press, mummy cloth, distress spray, mixed media, halloween, witches hat, felt
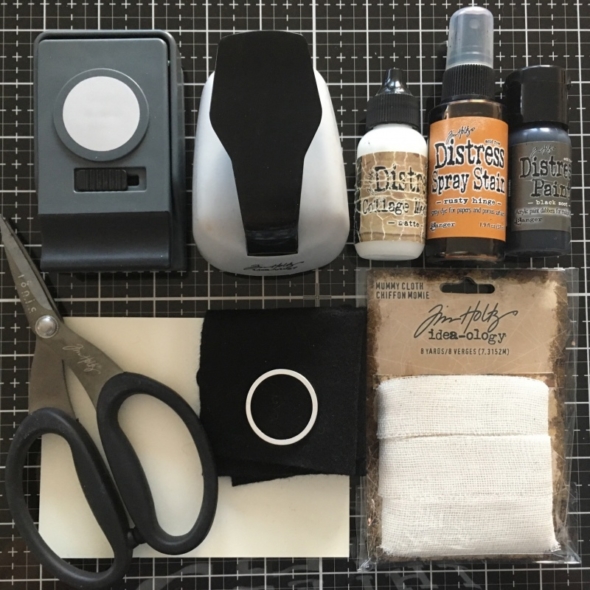
    Gather these supplies, all are listed at the bottom of the post and the black felt is from my own stash. I WISH I had some deep purple felt, I’ll have to order some witchy colours and make some more. I already have an idea for a home decor project for next year. But for now, here’s how…

    iGirlZoe: Tim Holtz, idea-ology, tag press, mummy cloth, distress spray, mixed media, halloween, witches hat, felt
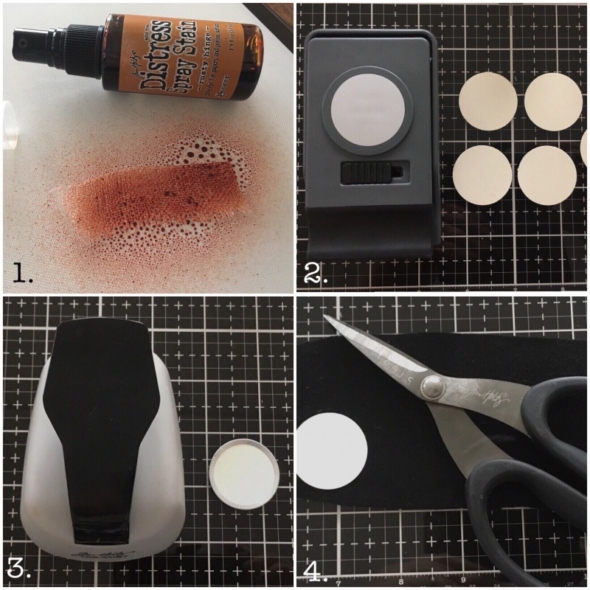
    1. Spray mummy cloth with distress spray stain and set aside to dry.
    2. Using the Tim Holtz large circle paper punch, punch 4 circles out of distress mixed media heavystock.
    3. Place one of the heavystock circles into the tag press frame and press.
    4. Use the second circle as a guide by placing it onto a piece of felt and cutting around the circle, leaving a half inch border, (t0 fold over the frame).

    iGirlZoe: Tim Holtz, idea-ology, tag press, mummy cloth, distress spray, mixed media, halloween, witches hat, felt
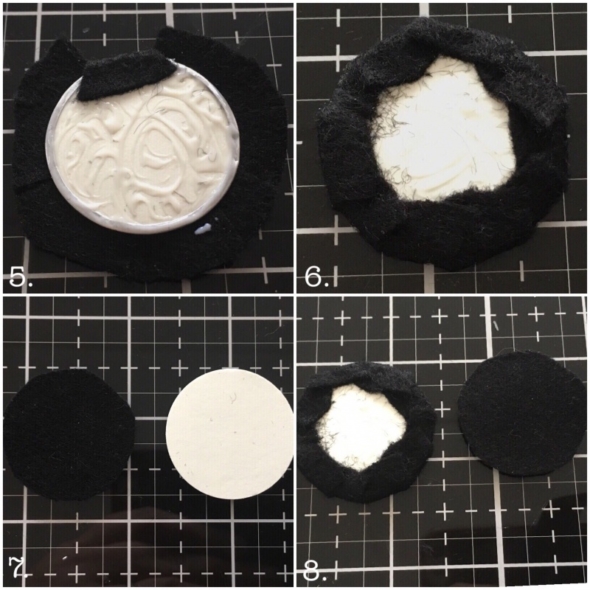
    5. Place the pressed tag onto the felt you just cut and snip lines all the way around from the edge of the felt to the circle frame. Cover with distress collage medium and start to fold the felt over the frame.
    6. Continue to fold the felt over the frame and press down into the collage medium and set aside to dry.
    7. Cut another piece of felt using the heavystock circle as a template, (this time don’t leave a border).
    8. Adhere the felt circle over the back of the circle frame to hide the gathered material.

    iGirlZoe: Tim Holtz, idea-ology, tag press, mummy cloth, distress spray, mixed media, halloween, witches hat, felt
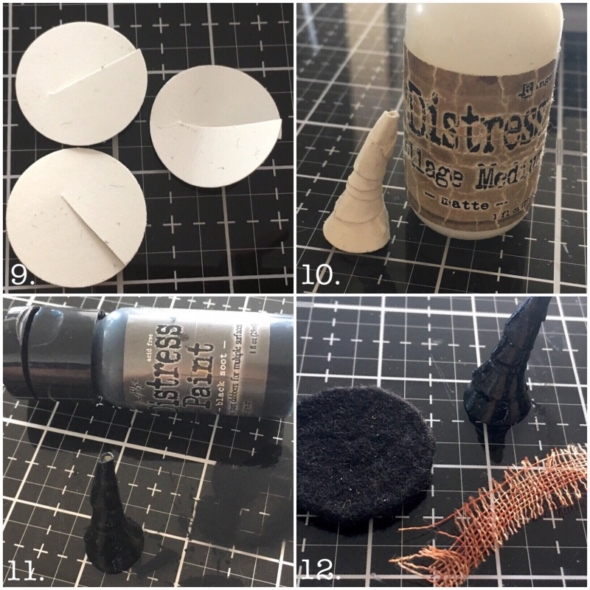
    9. Take the 3 remaining heavystock circles and cut a line across the middle leaving a quarter uncut.
    10. Roll each of the circles into cones and stack them on top of each other, covering in a layer of collage medium to hold in place.
    11. Once the glue is dry, cover in a layer of distress paint that best matches the felt and allow to air dry.
    12. Assemble the hat with collage medium. Once completely dry, gently bend the frame of the pressed circle tag to create the signature witch hat curve.

    iGirlZoe: Tim Holtz, idea-ology, tag press, mummy cloth, distress spray, mixed media, halloween, witches hat, felt
    Use a smaller circle tag and punch for different size hats and mix your distress paints to colour match to your felt. The possibilities are endless, I hope you give it a go.

    Thanks for stopping by.
    Zoe


  6. Wicked and Co

    9th October, 2018 by iGirlZoe

    Hello everyone. I hope you are enjoying October and all the wonderful things it brings. This is my favourite time of year and love decorating my home for Autumn and Halloween. This year I am trying to make Halloween decorations to match my home decor and I wanted to share a piece I made using the new Tim Holtz Halloween idea-ology and etcetera tag with tombstone overlay.
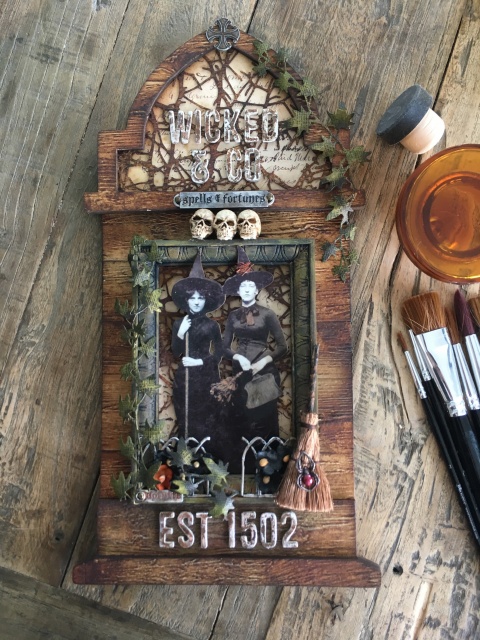
    iGirlZoe: Tim Holtz, etcetera tombstone overlay, 3D lumber texture fades, idea-ology, sizzix, stampers anonymous, ranger ink, mixed media, halloween, witches, skulls, paper dollsI was inspired by a new gothic and gripping British TV series, “A Discovery of witches,” which I believe is going to air in the US in January. Much of the series so far has been set at Oxford University and specifically in the library. With lots of wood and old style architecture, it was perfect inspiration to match my craft living room, which has lots of dark wood and an old library feel.
    iGirlZoe: Tim Holtz, etcetera tombstone overlay, 3D lumber texture fades, idea-ology, sizzix, stampers anonymous, ranger ink, mixed media, halloween, witches, skulls, paper dolls
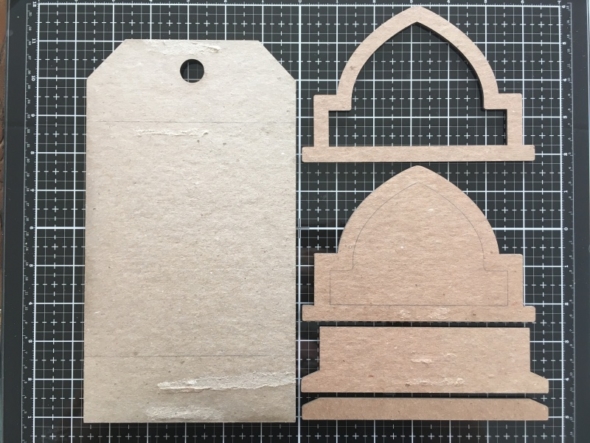
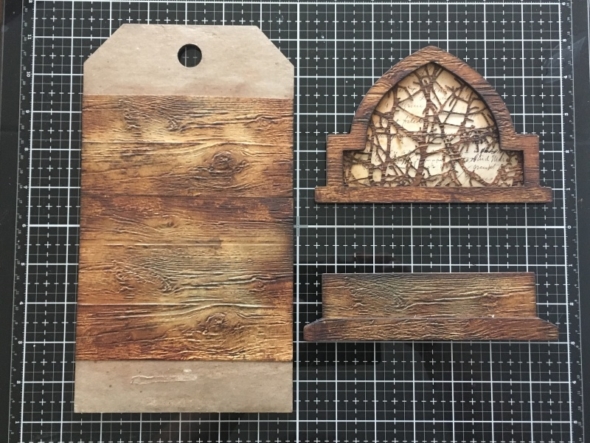
    If you have used an etcetera tag before, you will recognise the tag, (on the left) and the tombstone overlays are on the right. Having them in pieces makes life so much easier when covering with paper or decorating. I marked where the overlays would sit with a pencil. *the torn parts are where I used double sided tape to plan my tag.
    iGirlZoe: Tim Holtz, etcetera tombstone overlay, 3D lumber texture fades, idea-ology, sizzix, stampers anonymous, ranger ink, mixed media, halloween, witches, skulls, paper dolls
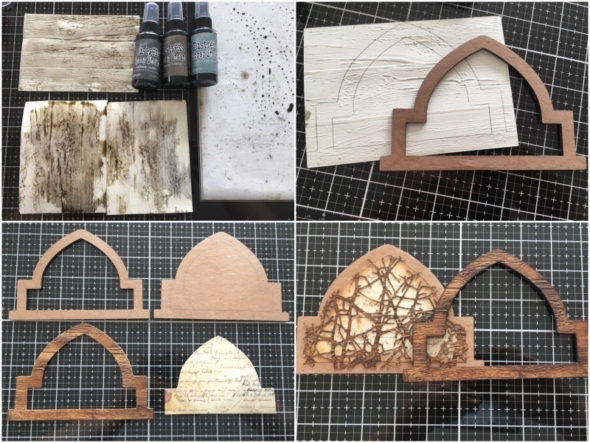
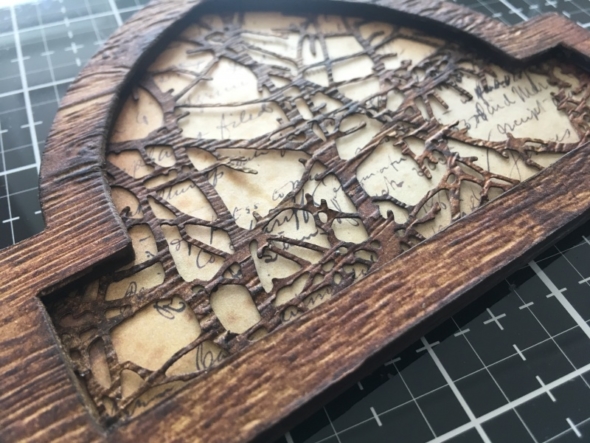
    Emboss 3 pieces of distress mixed media heavystock using the Tim Holtz 3D lumber texture fades folder. Spray distress spray onto a glass media mat and drag the heavystock through. Once dry, blend in vintage photo and walnut stain distress ink. Next, trace around the overlay on the back of the heavystock. Use the inside of the overlay as a template to trace onto paper from the halloween paper stash. Cut out and adhere onto the overlays using distress collage medium. Cut heavystock with the tangled twigs thinlits die, emboss with the 3D lumber texture fades folder and blend in vintage photo and walnut stain distress ink. Trim to fit the overlay and adhere just at the edges so the tangled twigs float slightly above the background paper from the halloween paper stash.
    iGirlZoe: Tim Holtz, etcetera tombstone overlay, 3D lumber texture fades, idea-ology, sizzix, stampers anonymous, ranger ink, mixed media, halloween, witches, skulls, paper dolls
    Adhere the overlay over the top with distress collage medium and place under something heavy to press, like a pupmkin casserole dish… lol
    iGirlZoe: Tim Holtz, etcetera tombstone overlay, 3D lumber texture fades, idea-ology, sizzix, stampers anonymous, ranger ink, mixed media, halloween, witches, skulls, paper dolls
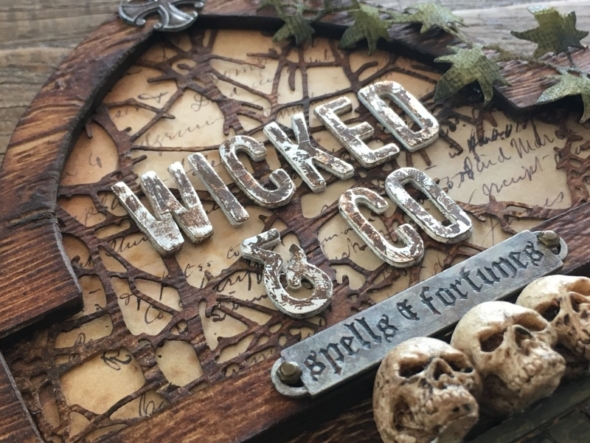
    Adhere the lumber embossed heavystock to the tag just overlapping the pencil lines marked out earlier, trimming to fit. Adhere the tombstone overlays to the tag with distress collage medium. Once completely dry, blend in walnut stain distress ink around the edges of the tag and overlay, using a mini blending tool.
    iGirlZoe: Tim Holtz, etcetera tombstone overlay, 3D lumber texture fades, idea-ology, sizzix, stampers anonymous, ranger ink, mixed media, halloween, witches, skulls, paper dolls
    Decorate the tombstone with idea-ology. Add an adornment from the milagros set to the top of the overlay and a halloween word band, altered with picket fence distress paint and mushroom alcohol ink. Adhere heavystock to adhesive foam and die cut using the alphanumeric thinlits die. Add distress paint and when almost dry, rub with a dry cloth to give a weathered look. Add idea-ology skulls to the top of the vignette frame (detailed below)…
    iGirlZoe: Tim Holtz, etcetera tombstone overlay, 3D lumber texture fades, idea-ology, sizzix, stampers anonymous, ranger ink, mixed media, halloween, witches, skulls, paper dolls
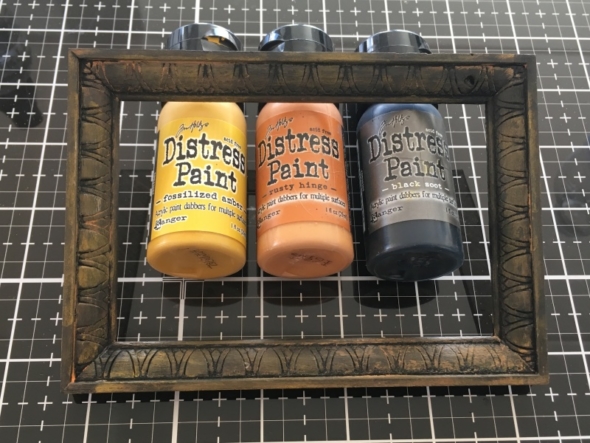
    Cover an idea-ology vignette frame with rusty hinge distress paint and set aside to dry. Repeat using black soot distress paint, allowing to almost dry and rubbing gently with a dry cloth to expose tiny portions of the rusty hinge layer. Once completely dry, dry brush fossilized amber distress paint over parts of the frame.
    iGirlZoe: Tim Holtz, etcetera tombstone overlay, 3D lumber texture fades, idea-ology, sizzix, stampers anonymous, ranger ink, mixed media, halloween, witches, skulls, paper dolls
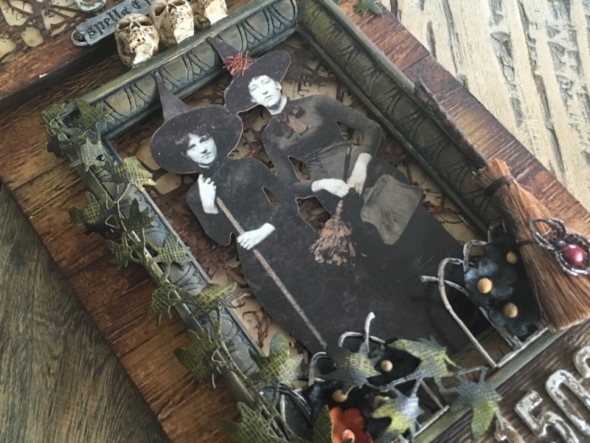
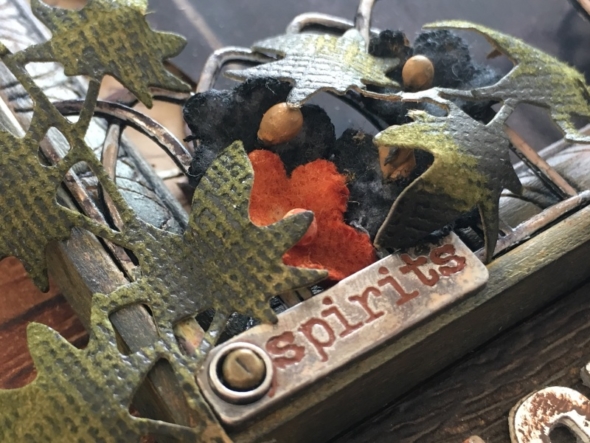
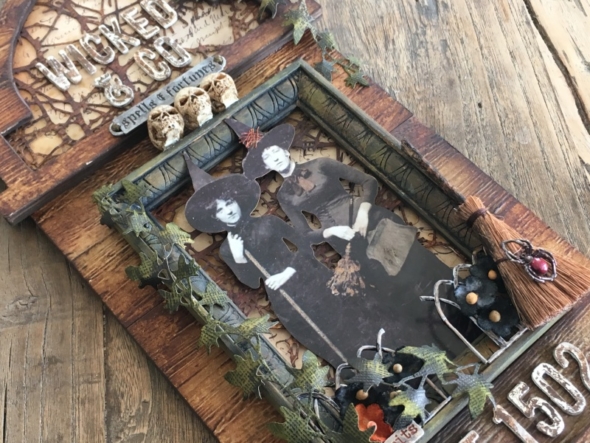
    Create the same underlay, of tangled twigs die cut and halloween paper stash, to create a base for the frame. Tuck in witches from the paper dolls ancestors, (so pleased the witches are back again). Use distress markers to colour parts of the paper dolls and allow to air dry before lightly rubbing with a cotton bud. Add a little flair to the hat with dyed mummy cloth, ribbon or twine. Using wire cutters, cut an idea-ology metal gate in half. I freaking love these metal gates and bought up quite a few to hoard and use throughout the year. Alter with picket fence distress paint and mushroom alcohol ink and adhere with distress collage medium to the inside edges of the vignette frame. Add idea-ology bouquet findings flowers, dyed with distress markers and stems painted with distress paint. Add an idea-ology adornment halloween spider to a broomstick and adhere to the frame. These spiders are so creepy I can barely touch them, (tweezers)!
    iGirlZoe: Tim Holtz, etcetera tombstone overlay, 3D lumber texture fades, idea-ology, sizzix, stampers anonymous, ranger ink, mixed media, halloween, witches, skulls, paper dolls
    Alter an idea-ology story stick with mushroom alcohol ink and rusty hinge distress paint and add to the frame. Die cut ivy from classic kraft stock using the garden greens thinlits die and adhere around the frame and to the top overlay. This is an older Tim Holtz die, but I just love how the older products work so brilliantly with the new ones.
    iGirlZoe: Tim Holtz, etcetera tombstone overlay, 3D lumber texture fades, idea-ology, sizzix, stampers anonymous, ranger ink, mixed media, halloween, witches, skulls, paper dolls
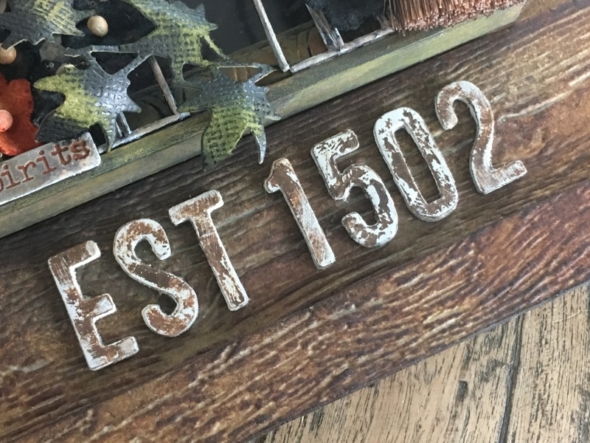
    Add the more of the die cut letters to the bottom portion of the overlay. I used “Est 1502” in place of where a death date would go to show when these naughty witches established their “Wicked & Co” boutique. If you would like to see what they’re selling in there, keep an eye on my blog…
    iGirlZoe: Tim Holtz, etcetera tombstone overlay, 3D lumber texture fades, idea-ology, sizzix, stampers anonymous, ranger ink, mixed media, halloween, witches, skulls, paper dolls
    I hope you have enjoyed this idea-ology and etcetera tombstone overlay tag tutorial and it has inspired you to get creative. These products are seasonal and available in limited quantities, (one and done), so don’t delay in picking them up from your local or online retailer.

    The 2018 Tim Holtz Halloween release is a gothic wonder, so a huge shout out and thank you to Tim Holtz, Mario Rossi and Paula Cheney who collaborate to bring us these amazing products to craft with.

    Thanks for stopping by.

    Zoe


  7. Sinister

    2nd October, 2018 by iGirlZoe

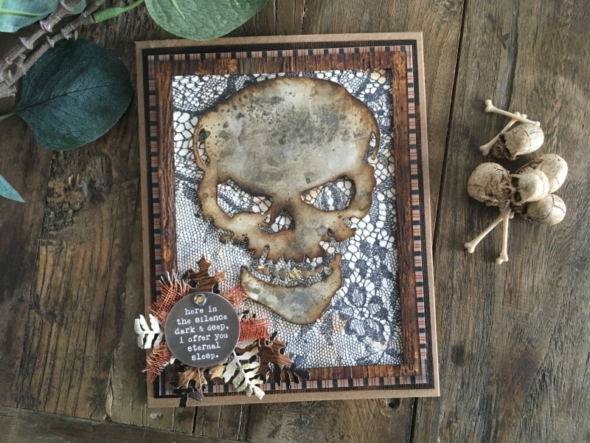
    Hello friends. It’s a couple of weeks since my last post and I’ve been busy cooking up some things in my cauldron. While waiting for a project to dry, I made this quick card to send to a friend for Halloween.

    iGirlZoe: Tim Holtz, funky foliage thinlit dies, sinister bigz die, idea-ology, design tape, sizzix, stampers anonymous, ranger ink, mixed media, ornate and lace, halloween, skull, fall, leaves
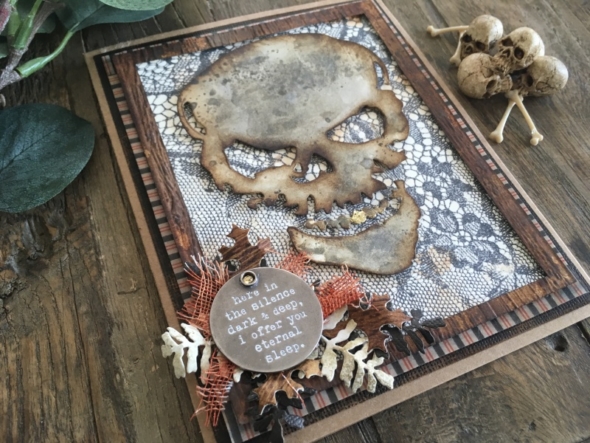
    I LOVE the new Sizzix Sinister Bigz die by Tim Holtz! I was a smitten kitten when it was launched on Tim Holtz’s facebook live, and it does not disappoint.

    iGirlZoe: Tim Holtz, funky foliage thinlit dies, sinister bigz die, idea-ology, design tape, sizzix, stampers anonymous, ranger ink, mixed media, ornate and lace, halloween, skull, fall, leaves
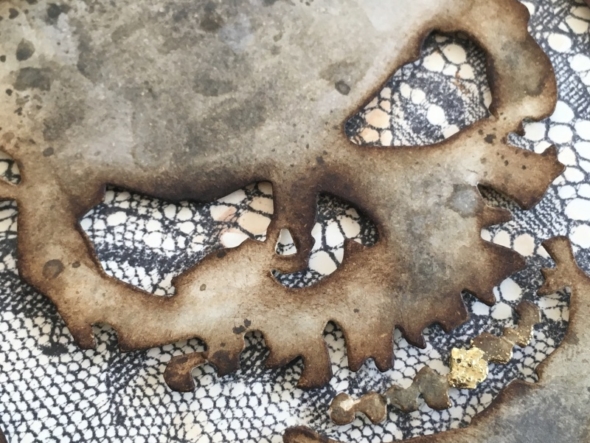
    I dragged distress mixed media heavystock through hickory smoke and frayed burlap distress spray. Die cut with the sinister bigz die and blended in walnut stain distress ink to the edges of the die cut. The die cut was mounted onto the card backing with 3D adhesive foam to give some dimension.

    iGirlZoe: Tim Holtz, funky foliage thinlit dies, sinister bigz die, idea-ology, design tape, sizzix, stampers anonymous, ranger ink, mixed media, ornate and lace, halloween, skull, fall, leaves
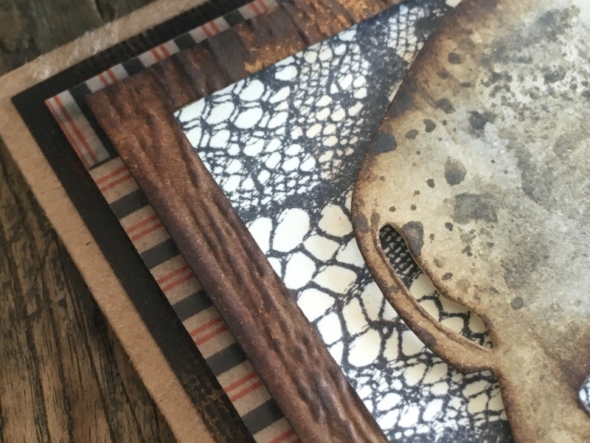
    The backing mounts are Kraft card, black classic kraft stock sanded with the sanding grip and blended with vintage photo distress ink, scrap paper covered with halloween design tape. The background under the skull is heavystock stamped with the lace stamp from the Tim Holtz ornate and lace set with a frame embossed with the 3D lumber texture fades, adhered over the top.

    iGirlZoe: Tim Holtz, funky foliage thinlit dies, sinister bigz die, idea-ology, design tape, sizzix, stampers anonymous, ranger ink, mixed media, ornate and lace, halloween, skull, fall, leaves
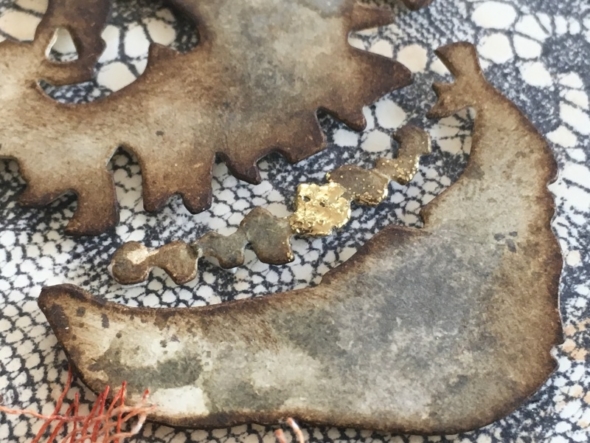
    I loved his gold tooth on the packaging image, so had to include one myself. I covered with a dab of distress collage medium and dipped into gold embossing powder and melted.

    iGirlZoe: Tim Holtz, funky foliage thinlit dies, sinister bigz die, idea-ology, design tape, sizzix, stampers anonymous, ranger ink, mixed media, ornate and lace, halloween, skull, fall, leaves
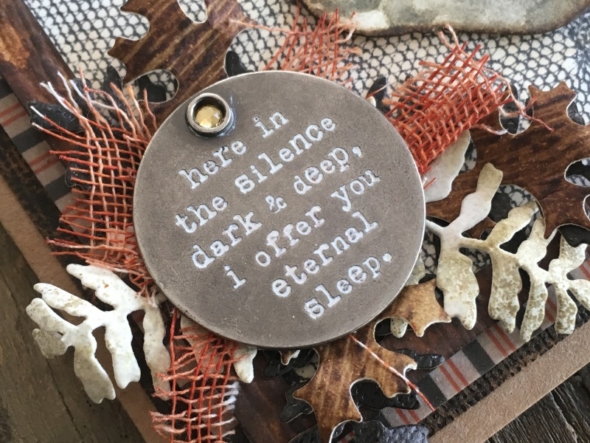
    I die cut several pieces of foliage from the funky foliage thinlits set. Including some teeny wood grain leaves from a piece of 3D lumber embossed heavystock. I added a piece of mummy cloth, sprayed with rusty hinge distress spray. I covered an idea-ology halloween quote token with picket fence distress crayon.

    iGirlZoe: Tim Holtz, funky foliage thinlit dies, sinister bigz die, idea-ology, design tape, sizzix, stampers anonymous, ranger ink, mixed media, ornate and lace, halloween, skull, fall, leaves
    Thanks for stopping. I will be back this week with my first idea-ology seasonal project and it’s quite wicked…
    Zoe


  8. August

    8th August, 2018 by iGirlZoe

    It’s Wednesday and time for the funkie side of the design team to share our projects for the current challenge over at the Frilly and Funkie Challenge Blog!

    The current challenge is hosted by team member Suzz who has chosen the theme AUGUST …Suzz says, “I am hosting the current challenge and it is inspired by the month of August. In doing a little online research I learned that the month of August was re-named for Augustus Caesar. He was the first Roman Emperor and was very proud of the influence he had on the architecture of the country. For this challenge I am asking you to be inspired by marble, arches or columns. You will need to create a vintage or shabby chic project using some type of marble effect, arches or columns.”

    iGirlZoe: Tim Holtz, 3D texture fades, dapper stamps, inventor stamps, distress crayons, distress paint, idea-ology design tape, distress collage medium, crackle texture paste, sizzix, stampers anonymous, ranger ink, idea-ology, mixed media
    For this challenge I concentrated on the marble effect as I utterly love the distress paint marbling technique.

    iGirlZoe: Tim Holtz, 3D texture fades, dapper stamps, inventor stamps, distress crayons, distress paint, idea-ology design tape, distress collage medium, crackle texture paste, sizzix, stampers anonymous, ranger ink, idea-ology, mixed media
    I embossed a piece of black cardstock using the new Tim Holtz 3D texture fades embossing folders. I rubbed rusty hinge and metallic distress crayons over the top using my finger.

    iGirlZoe: Tim Holtz, 3D texture fades, dapper stamps, inventor stamps, distress crayons, distress paint, idea-ology design tape, distress collage medium, crackle texture paste, sizzix, stampers anonymous, ranger ink, idea-ology, mixed media
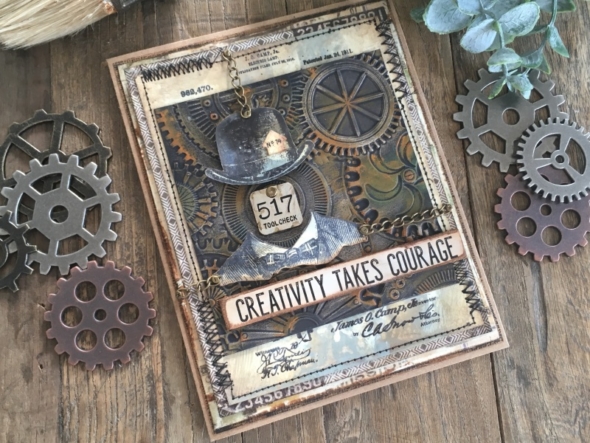
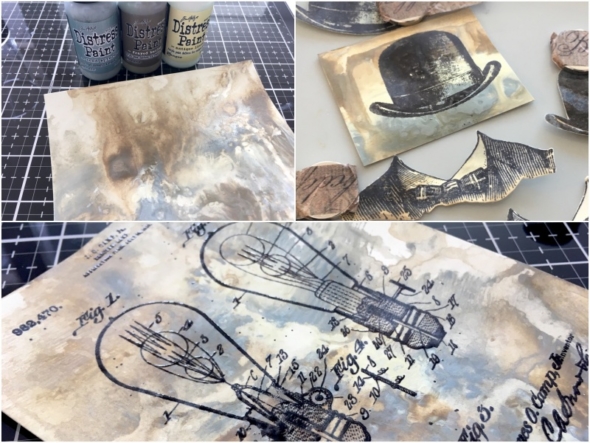
    I created my marbled background, (see the technique on Tim Holtz blog). I stamped the hat and suit from my officially favourite stamp set ever, dapper (CMS267), onto the background and fussy cut. I also stamped the inventor 2 stamp set (CMS341), and this time added clear embossing powder over the stamped image and melted with my heat tool.

    iGirlZoe: Tim Holtz, 3D texture fades, dapper stamps, inventor stamps, distress crayons, distress paint, idea-ology design tape, distress collage medium, crackle texture paste, sizzix, stampers anonymous, ranger ink, idea-ology, mixed media
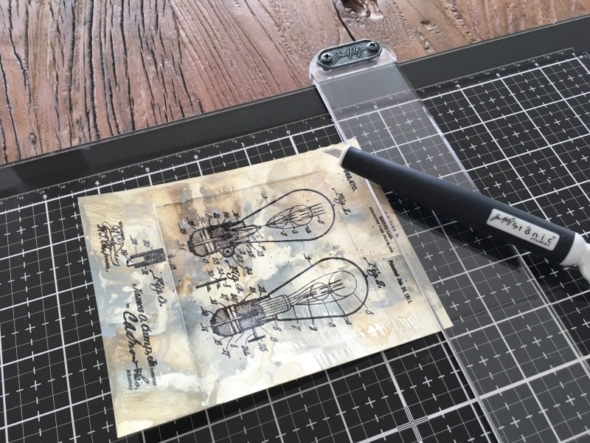
    I stamped the complete inventor stamp but I didn’t want to use the lightbulbs, so I cut them out to save for another project. This was so simple using the Tim Holtz Tonic glass media mat, cutting ruler from the media tool set and craft knife. The glass media mat is a total game changer for me and YES you can cut on it and YES my GMM does have some tiny scratches on it, but it’s a tool, not a crystal decorative plate! 😉

    iGirlZoe: Tim Holtz, 3D texture fades, dapper stamps, inventor stamps, distress crayons, distress paint, idea-ology design tape, distress collage medium, crackle texture paste, sizzix, stampers anonymous, ranger ink, idea-ology, mixed media
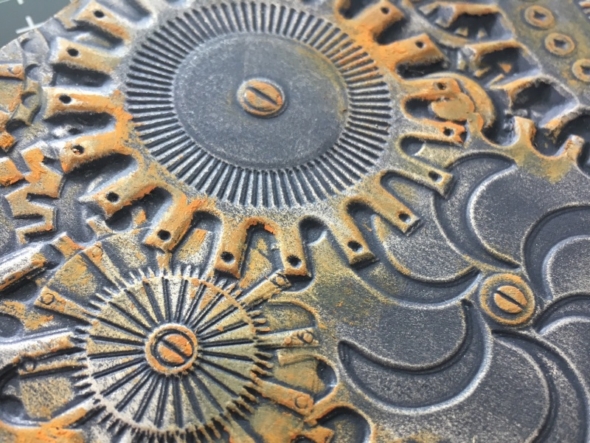
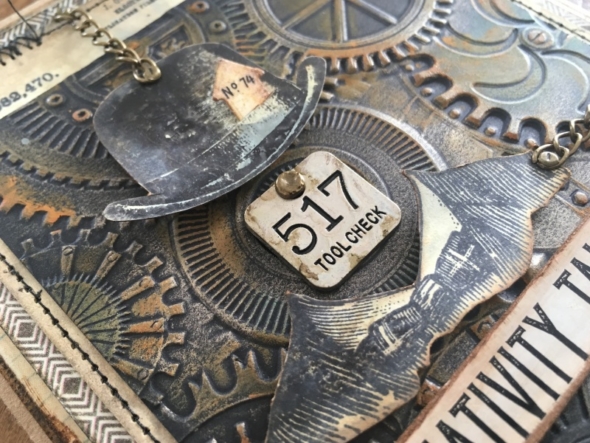
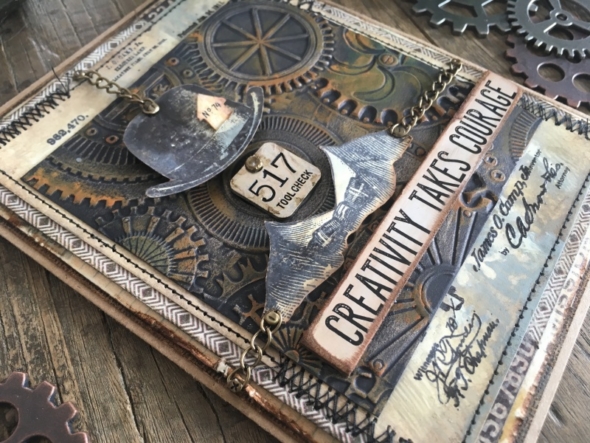
    As you can see, the 3D mechanics background covers the cut out perfectly and I get to keep the light bulbs for another project. I added an idea-ology foundry adornment, which I weathered with a little mushroom alcohol ink. I cut a slit in the hat and slipped in an arrow I had leftover from another project which I added remnant rubs to.

    iGirlZoe: Tim Holtz, 3D texture fades, dapper stamps, inventor stamps, distress crayons, distress paint, idea-ology design tape, distress collage medium, crackle texture paste, sizzix, stampers anonymous, ranger ink, idea-ology, mixed media
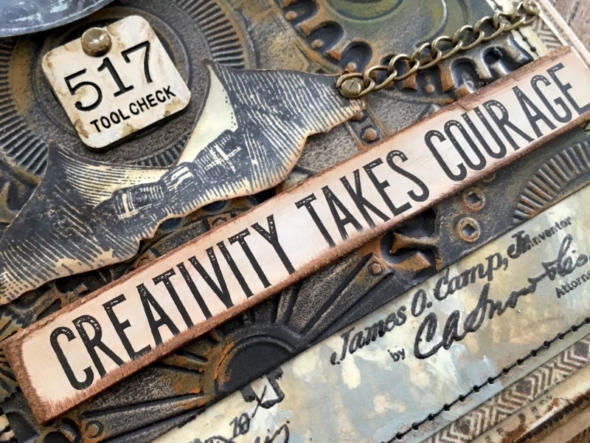
    I added a quote chip that I sanded and blended a little vintage photo distress in onto. I added some chains to the suit and hat, which I attached with idea-ology mini fasteners. The background mounts are edged with idea-ology design tape.

    iGirlZoe: Tim Holtz, 3D texture fades, dapper stamps, inventor stamps, distress crayons, distress paint, idea-ology design tape, distress collage medium, crackle texture paste, sizzix, stampers anonymous, ranger ink, idea-ology, mixed media
    Thanks for stopping by. I hope you will find time to join in the challenge and pop over to Frilly and Funkie challenge blog to see the rest of the DT’s projects. All the products I used are available from The Funkie Junkie Boutique.

    Zoe


  9. 539

    2nd August, 2018 by iGirlZoe

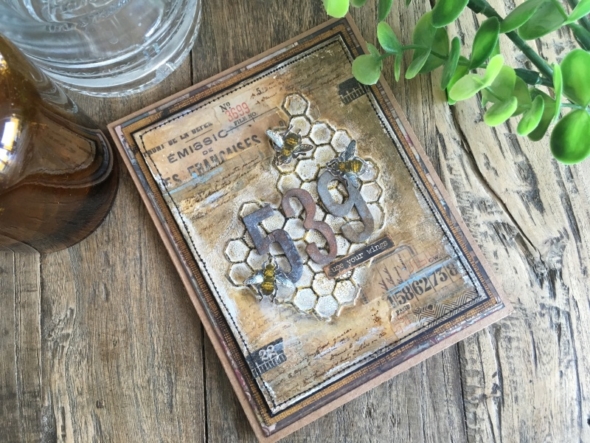
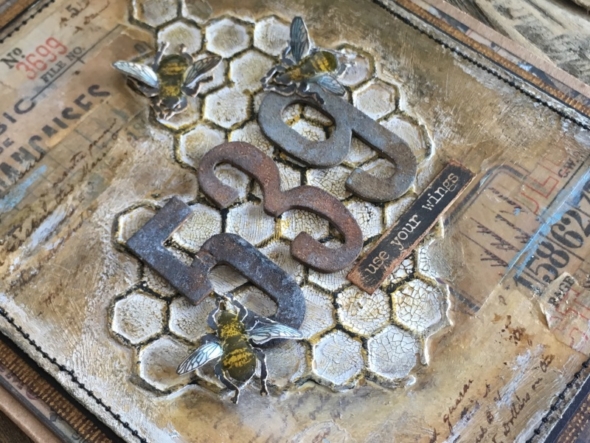
    It was definitely an indoor activity day in Copenhagen yesterday, with some much needed rain. With nature in mind I decided to break out the Tim Holtz Entomology stamp set and use one of my favourite thinlits mixed media die sets to create a card that I owe a friend and who has a thing about numbers…

    iGirlZoe: Tim Holtz, distress crayons, entomology stamps, mixed media thinlits dies, idea-ology design tape, distress collage medium, crackle texture paste, sizzix, stampers anonymous, ranger ink, idea-ology, mixed media

    iGirlZoe: Tim Holtz, distress crayons, entomology stamps, mixed media thinlits dies, idea-ology design tape, distress collage medium, crackle texture paste, sizzix, stampers anonymous, ranger ink, idea-ology, mixed media
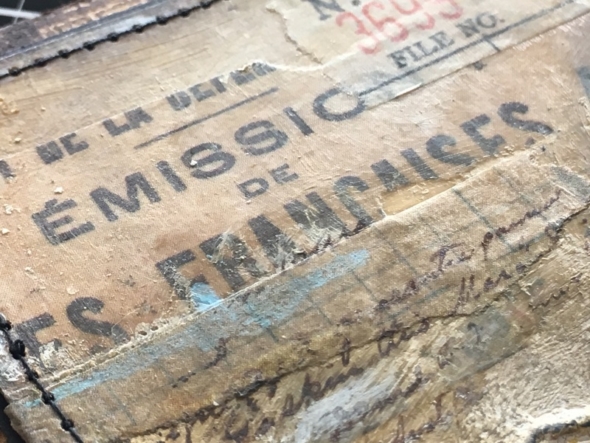
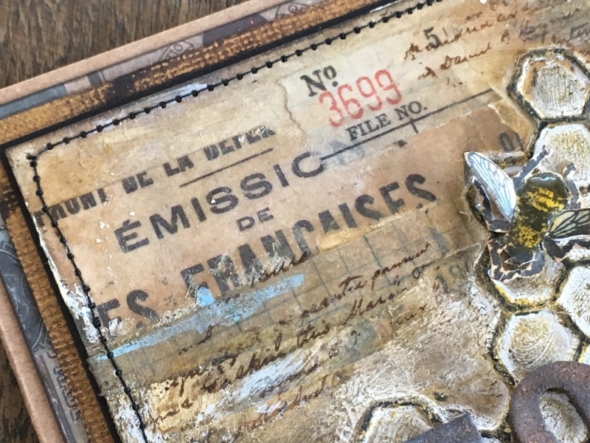
    I added some of the Tim Holtz design tape (collector) and covered with a thin layer of distress collage medium. I absolutely love this medium and it prepares the surface perfectly for distress crayons. It also stops flaking if you’ve added any kind of texture paste as it seals it in. The brush strokes from applying it make some cool texture marks too.

    iGirlZoe: Tim Holtz, distress crayons, entomology stamps, mixed media thinlits dies, idea-ology design tape, distress collage medium, crackle texture paste, sizzix, stampers anonymous, ranger ink, idea-ology, mixed media
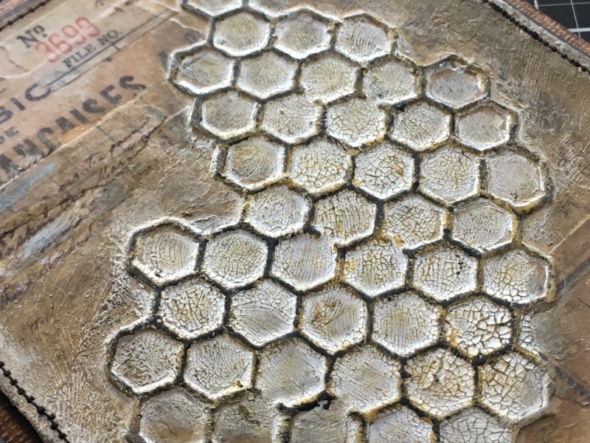
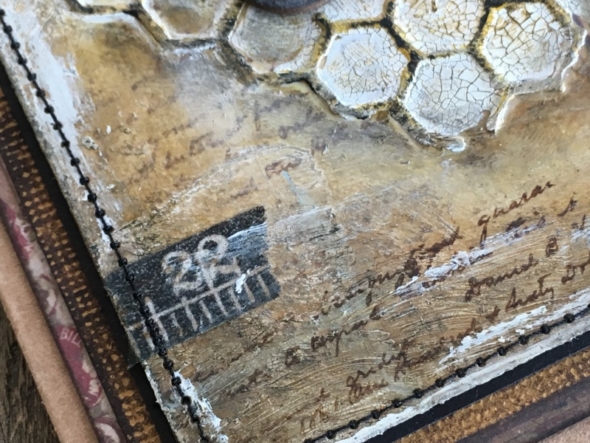
    I used the Tim Holtz mixed media thinlits die in a slightly different way. Instead of cutting into a background, I cut the honeycomb out. I die cut twice, moving the thinlits die and lining it up as best I could to create a continuous pattern. I then cut it away from the background with scissors.

    iGirlZoe: Tim Holtz, distress crayons, entomology stamps, mixed media thinlits dies, idea-ology design tape, distress collage medium, crackle texture paste, sizzix, stampers anonymous, ranger ink, idea-ology, mixed media
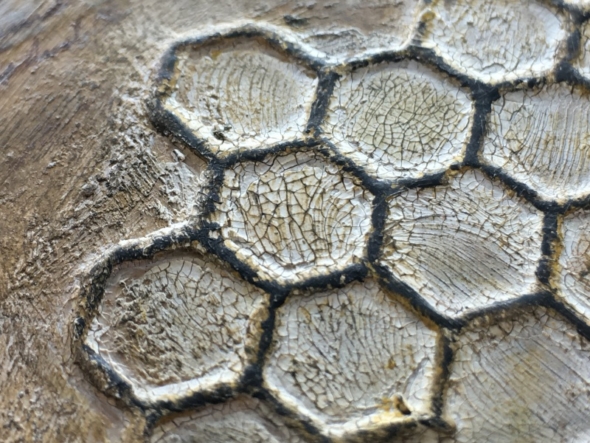
    I layed the die cut onto distress mixed media heavystock and brushed a layer of distress collage medium over the top. Once dry, I applied opaque crackle texture paste over the honeycomb with a palette knife and set aside to dry. I applied fossilized amber distress crayon directly to the raised portions of the honeycomb die cut, followed by walnut stain distress crayon and then blended a little with my finger.

    iGirlZoe: Tim Holtz, distress crayons, entomology stamps, mixed media thinlits dies, idea-ology design tape, distress collage medium, crackle texture paste, sizzix, stampers anonymous, ranger ink, idea-ology, mixed media
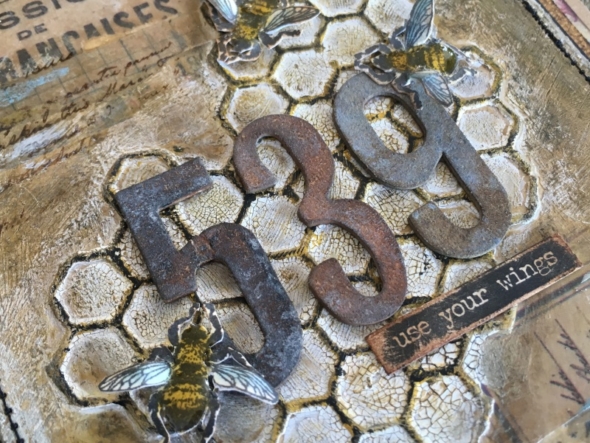
    I had some die cut numbers cut from a sadly retired surface called grungeboard. If there was one product I would love to see come out of retirement, it would be grungeboard… Fortunately I hoarded it when it was for sale and even more so when it was discontinued, so I have a healthy stash. It’s worth investing in products that are being retired if you’re going to use them. I covered the grungeboard die cut letters with walnut stain, vintage photo and frayed burlap distress crayon and, with my finger, patted on a little (almost dry) broken china distress paint. These were adhered with distress collage medium.

    iGirlZoe: Tim Holtz, distress crayons, entomology stamps, mixed media thinlits dies, idea-ology design tape, distress collage medium, crackle texture paste, sizzix, stampers anonymous, ranger ink, idea-ology, mixed media
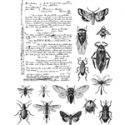
    I used distress crayons to colour my background and rubbed a little broken china distress paint on here and there. I stamped bees from the Tim Holtz Entomology stamp set from Stampers Anonymous. I don’t have the accompanying Sizzix Entomology framelits die set yet, but it’s top of my list. I used the background stamp from the Entomologt set to stamp randomly over the background. This stamp set is possibly my favourite release from Creativation 2018.

    iGirlZoe: Tim Holtz, distress crayons, entomology stamps, mixed media thinlits dies, idea-ology design tape, distress collage medium, crackle texture paste, sizzix, stampers anonymous, ranger ink, idea-ology, mixed media
    I stitched the heavystock background, added a little picket fence distress paint with my finger. Mounted onto classic kraft stock which I sanded and blended in vintage photo distress ink and mounted onto card edged with design tape and finally onto a kraft card.

    iGirlZoe: Tim Holtz, distress crayons, entomology stamps, mixed media thinlits dies, idea-ology design tape, distress collage medium, crackle texture paste, sizzix, stampers anonymous, ranger ink, idea-ology, mixed media
    Thanks for stopping by and I hope you liked this card.
    Zoe


  10. Planes, Trains and Automobiles

    25th July, 2018 by iGirlZoe

    It’s Wednesday and time for the funkie side of the design team to share our projects for the current challenge over at the Frilly and Funkie Challenge Blog!

    The current challenge is hosted by team member Kathy who has chosen the theme PLANES, TRAINS AND AUTOMOBILES …Kathy says, “ Summer is a great time to travel. For this challenge, create a vintage or shabby chic travel themed project. Think folded maps, cruise ships, road signs, compasses, passports, trains, planes or automobiles. As long as your project features a travel theme, you’re headed in the right direction.”

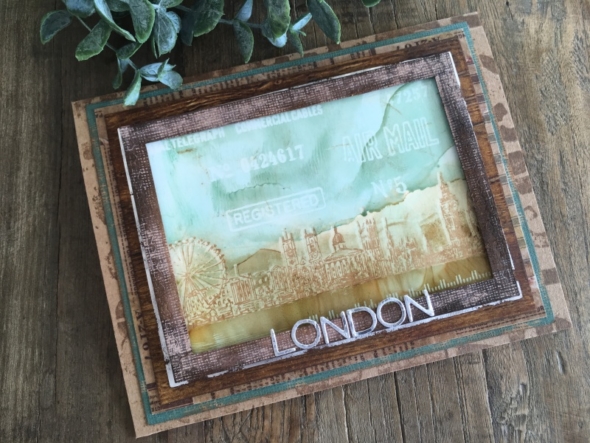
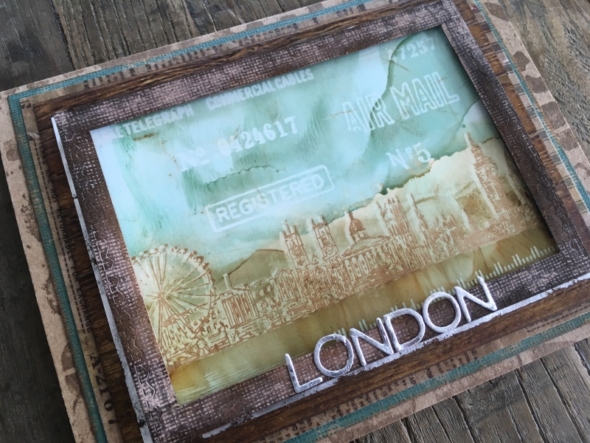
    iGirlZoe: Tim Holtz, alcohol lift-ink, alcohol inks, cityscape stamps, stitched rectangles thinlits dies, 3D foundry texture fades, aphanumeric thinlits, sizzix, stampers anonymous, ranger ink, idea-ology
    Having recently spent a week in beautiful rural France with family, I was very much in the mood for this theme.

    iGirlZoe: Tim Holtz, alcohol lift-ink, alcohol inks, cityscape stamps, stitched rectangles thinlits dies, 3D foundry texture fades, aphanumeric thinlits, sizzix, stampers anonymous, ranger ink, idea-ology
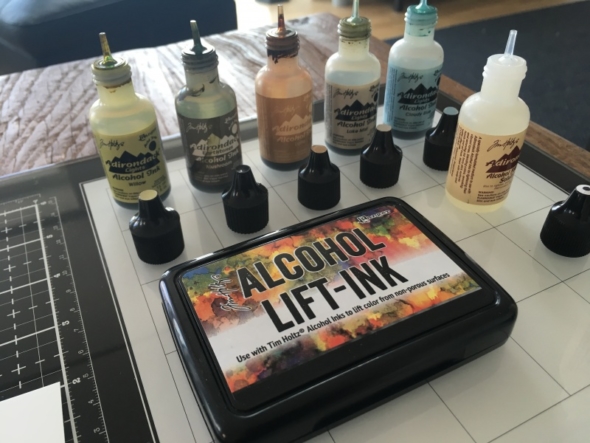
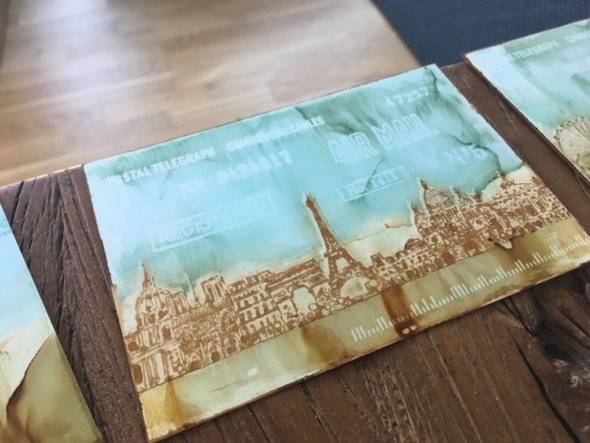
    I was still playing with the new Tim Holtz Alcohol Lift-ink, so decided to incorporate that into my challenge project.

    iGirlZoe: Tim Holtz, alcohol lift-ink, alcohol inks, cityscape stamps, stitched rectangles thinlits dies, 3D foundry texture fades, aphanumeric thinlits, sizzix, stampers anonymous, ranger ink, idea-ology
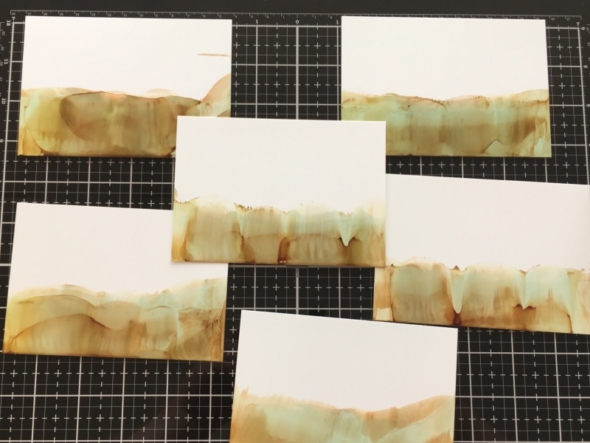
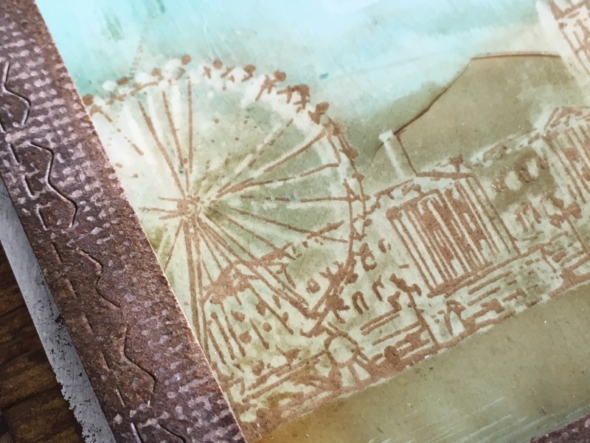
    I needed several cards so made a background for each cityscape stamp, plus a spare for testing. I dropped alcohol ink onto my glass media mat, added a few drops of alcohol blending solution and swiped yupo heavystock through it.

    iGirlZoe: Tim Holtz, alcohol lift-ink, alcohol inks, cityscape stamps, stitched rectangles thinlits dies, 3D foundry texture fades, aphanumeric thinlits, sizzix, stampers anonymous, ranger ink, idea-ology
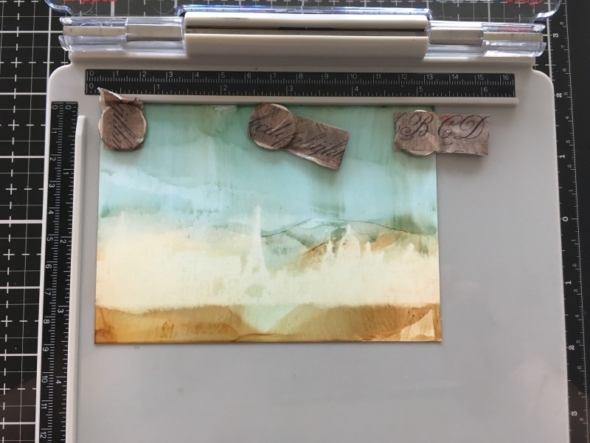
    I wanted to experiment and see if I could use the lift-ink to create a ghost background by rubbing the lift-ink off immediately after it was stamped to smudge the image and create a light background in the shape of the stamped image.

    iGirlZoe: Tim Holtz, alcohol lift-ink, alcohol inks, cityscape stamps, stitched rectangles thinlits dies, 3D foundry texture fades, aphanumeric thinlits, sizzix, stampers anonymous, ranger ink, idea-ology
    I then stamped over the top with archival ink to give the detailed stamped image, but this time left to air dry, (FOR HOURS)!

    iGirlZoe: Tim Holtz, alcohol lift-ink, alcohol inks, cityscape stamps, stitched rectangles thinlits dies, 3D foundry texture fades, aphanumeric thinlits, sizzix, stampers anonymous, ranger ink, idea-ology
    It’s still possible to smudge the image it you rub it… So, I created a frame using the stitched rectangle thinlits dies to prevent the image being touched (and smudged) too much. I’m all for “workarounds” 😉

    iGirlZoe: Tim Holtz, alcohol lift-ink, alcohol inks, cityscape stamps, stitched rectangles thinlits dies, 3D foundry texture fades, aphanumeric thinlits, sizzix, stampers anonymous, ranger ink, idea-ology
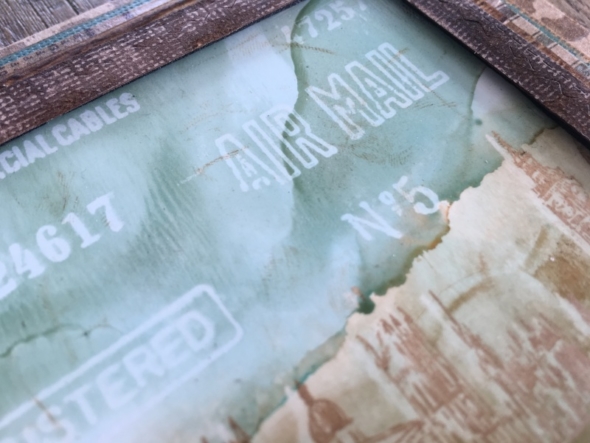
    I used the traditional lift-ink technique to lift stamped images from the correspondence set (CMS225). This set reminds me of the vintage steamer travel trunks covered in labels, perfect for this theme.

    iGirlZoe: Tim Holtz, alcohol lift-ink, alcohol inks, cityscape stamps, stitched rectangles thinlits dies, 3D foundry texture fades, aphanumeric thinlits, sizzix, stampers anonymous, ranger ink, idea-ology
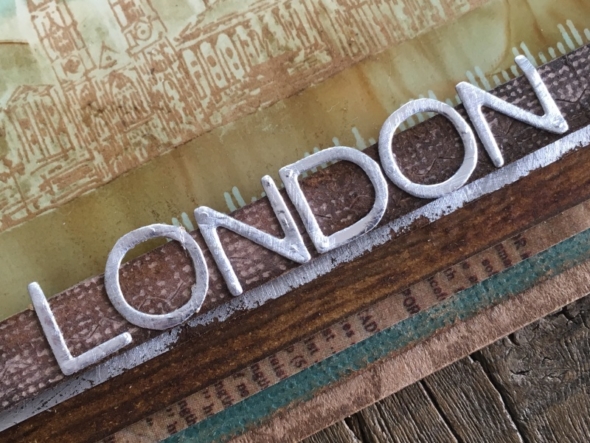
    I added “LONDON” cut from metallic kraft stock with the alphanumeric thinlits die which has become a firm favourite for me, it just seems to always fit and I love the font.

    iGirlZoe: Tim Holtz, alcohol lift-ink, alcohol inks, cityscape stamps, stitched rectangles thinlits dies, 3D foundry texture fades, aphanumeric thinlits, sizzix, stampers anonymous, ranger ink, idea-ology
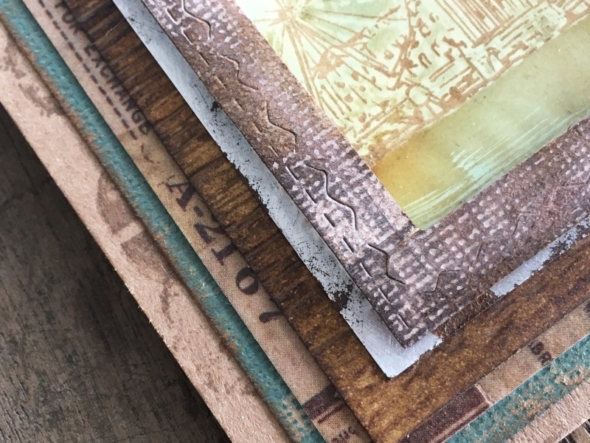
    The mounts, from top to bottom:
    – stitched rectangles thinlits die cut frame from classic kraft stock
    – metallic kraft stock
    – heavystock embossed with the 3-D lumber texture fades
    – scrap card covered with design tape
    – classic kraft stock
    – kraft card with numbers stamped from the purveyor stamp set

    iGirlZoe: Tim Holtz, alcohol lift-ink, alcohol inks, cityscape stamps, stitched rectangles thinlits dies, 3D foundry texture fades, aphanumeric thinlits, sizzix, stampers anonymous, ranger ink, idea-ology
    Thanks for stopping by. I hope you will find time to join in the challenge and pop over to Frilly and Funkie challenge blog to see the rest of the DT’s projects. All the products I used are available from The Funkie Junkie Boutique.

    Zoe