‘Ideaology’ Category

  1. December is here…

    2nd December, 2022 by iGirlZoe

    igirlzoe: tim holtz christmas idea-ology december daily

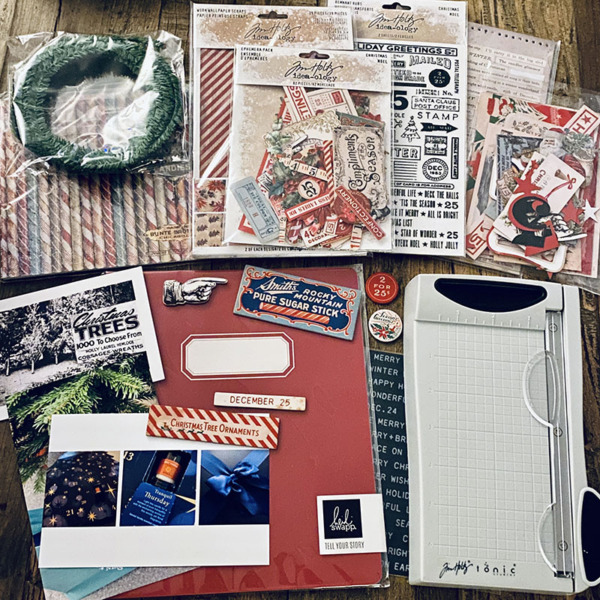
    Hello friends and happy December! I’m so happy it’s here. I love December and get so excited to crack open those tiny doors on Advent Calendars and decorate for Christmas without anyone grumbling about it being too early. I think December has a smell to it too, today it’s a yummy vanilla candle from day 1 (yesterday) of my Rituals Advent calendar. We take Advent Calendars pretty seriously in this house!

    igirlzoe: tim holtz christmas idea-ology december daily
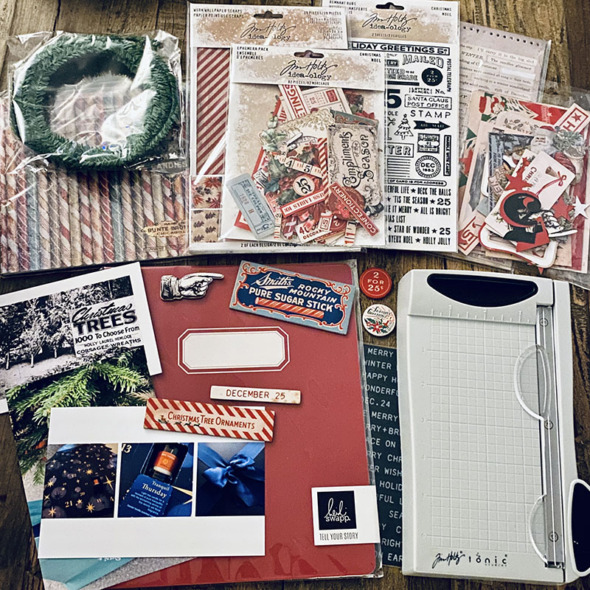
    We are putting our Christmas decorations up and have some special traditions when we do, things we eat and listen to. I really love the Christmas traditions that I have adopted over the years and every year I think I must document those traditions and the special moments. This year I finally decided not to wait another year and lightly follow December Daily using my Tim Holtz idea-ology products and a Heidi Swapp planner to document my December.

    igirlzoe: tim holtz christmas idea-ology december daily
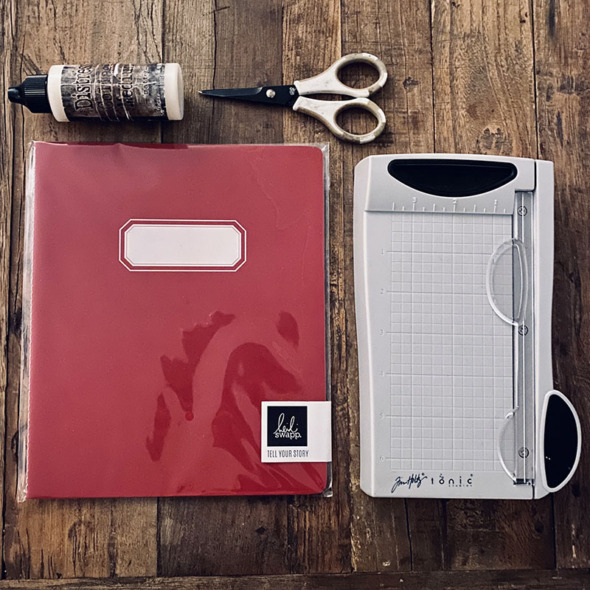
    I’m using a planner from Heidi Swapp and Tim Holtz Mini Trimmer and Distress Collage Medium. I fussy cut with EK scissors linked below. I also use an Epson XP8505 printer. It’s a European model and a fair few years old but it’s been low maintenance and it prints beautiful quality photos. This was a printer equivalent to a model that Ali Edwards recommended years ago on her blog. It’s pretty reasonable on ink cost wise and easy to use, I have zero patience for printer antics! ZERO!

    igirlzoe: tim holtz christmas idea-ology december daily
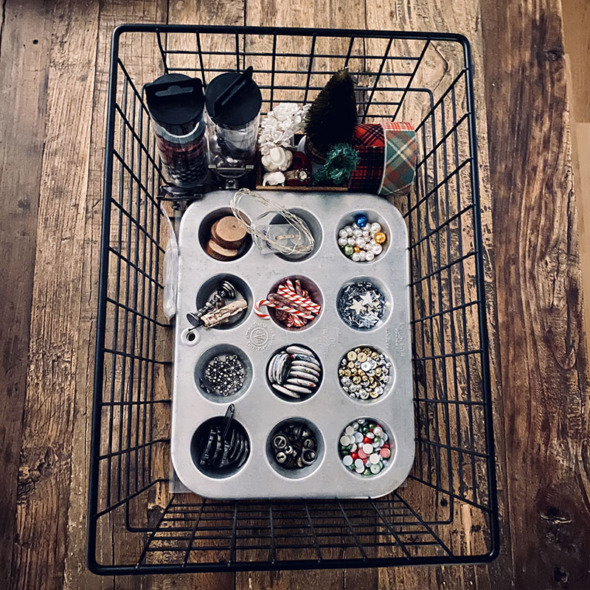
    I gather all my dimensional idea-ology in a muffin tin like Tim does. It helps being able to see it all when I’m making.

    igirlzoe: tim holtz christmas idea-ology december daily
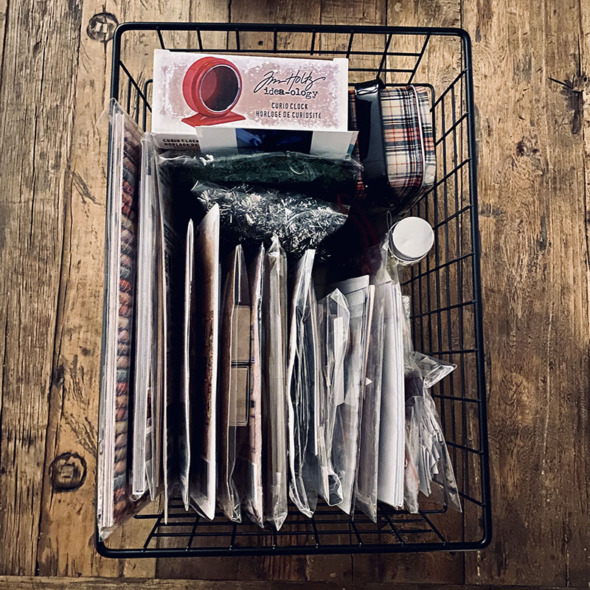
    This basket is known as the Christmas idea-ology paperie. Ready for me to dip in, to document December.

    igirlzoe: tim holtz christmas idea-ology december daily
    My sweet husband even got behind documenting December by staging this festive photo outside of a department store in central Copenhagen after Advent Calendar shopping.

    If you would like to follow along or even document some of your own December traditions, whether you celebrate Christmas or simply enjoy the coziness of winter, join me. I’ll be sharing here and on instagram.

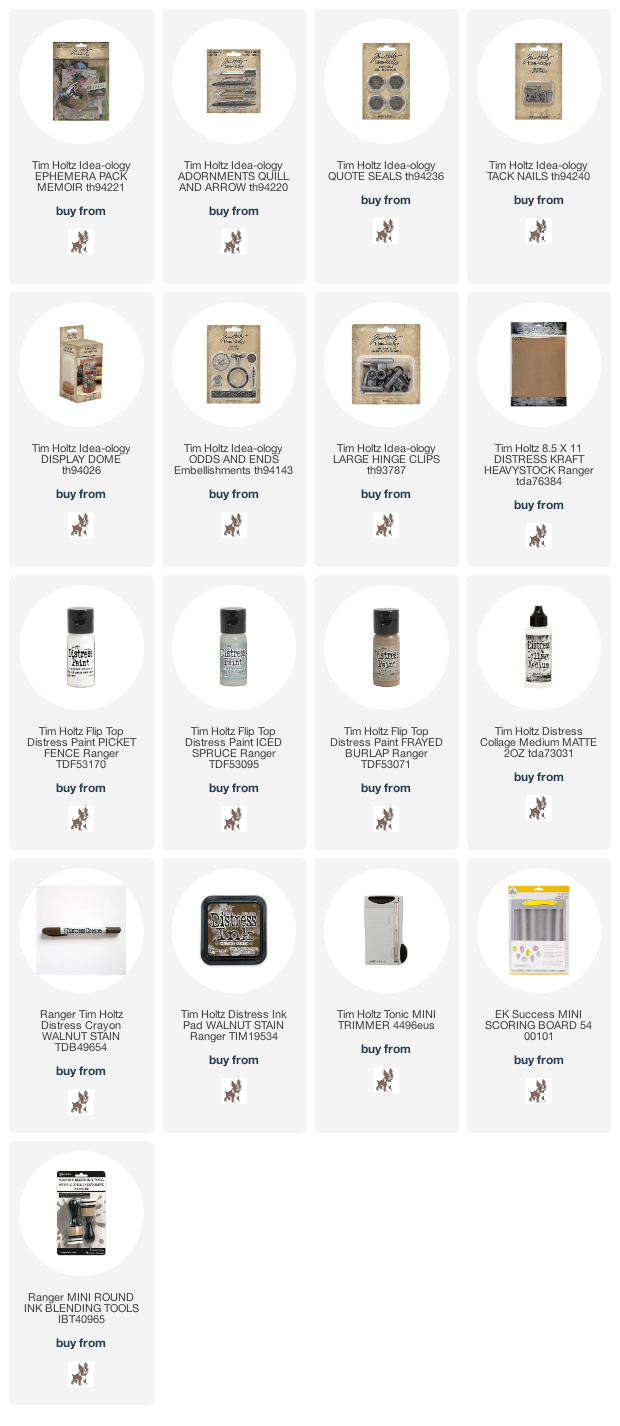
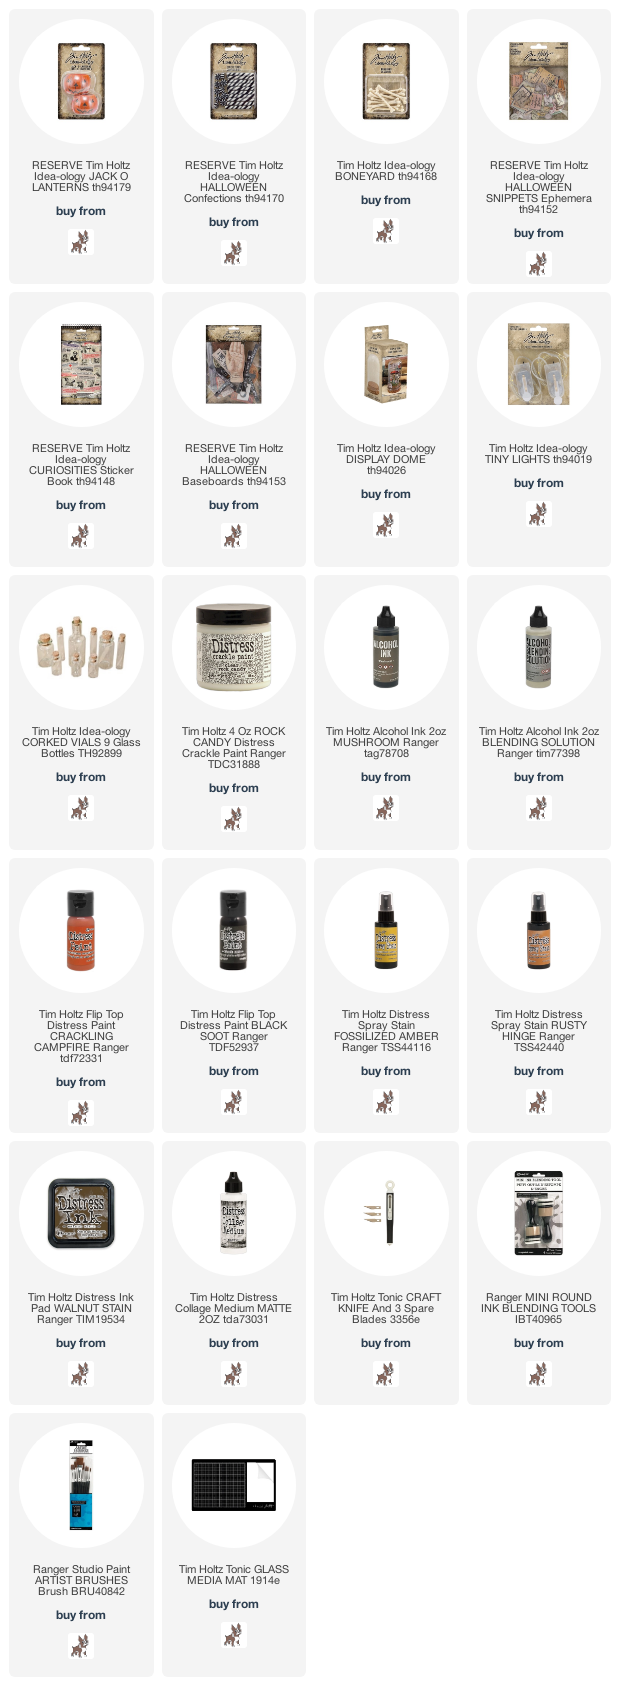
    I’ve linked to some of the items that I’m going to be using to document December.

    Let me know if you have any questions.

    Zoe


    affiliate links used at no cost to you


  2. Witches Potting Shed Part 1

    4th October, 2022 by iGirlZoe

    igirlzoe: tim holtz idea-ology halloween witches

    Hello friends. With Halloween on the horizon, have you stocked up on your Tim Holtz Halloween idea-ology? I like to make for the dark side all year round, so I’ve stocked up on seasonal products to last me… Some people collect purses and shoes, others collect cauldrons, skulls and pumpkins! 😉

    To see all the Halloween idea-ology products and incredible makes, head over to Tim’s blog for the LIVE replay.

    igirlzoe: tim holtz idea-ology halloween witches
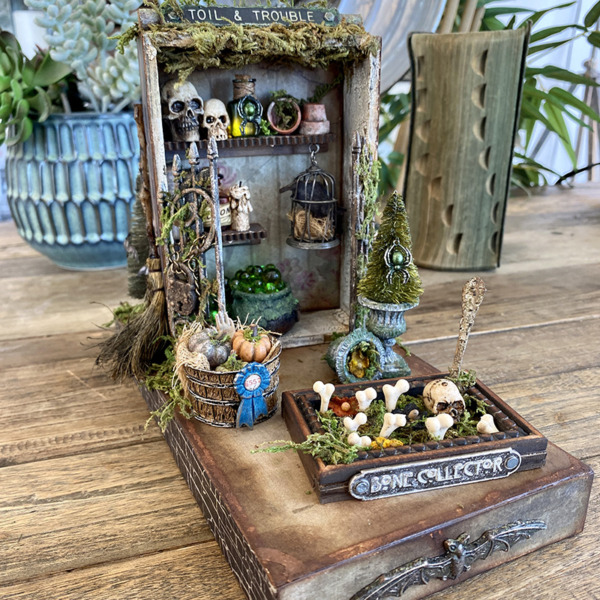
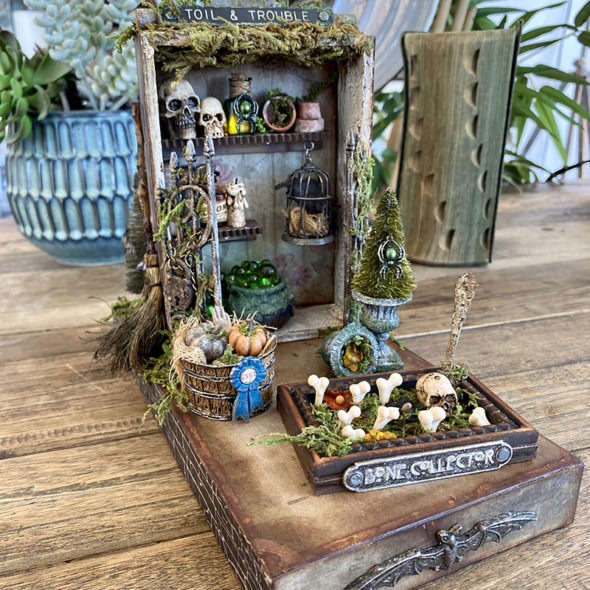
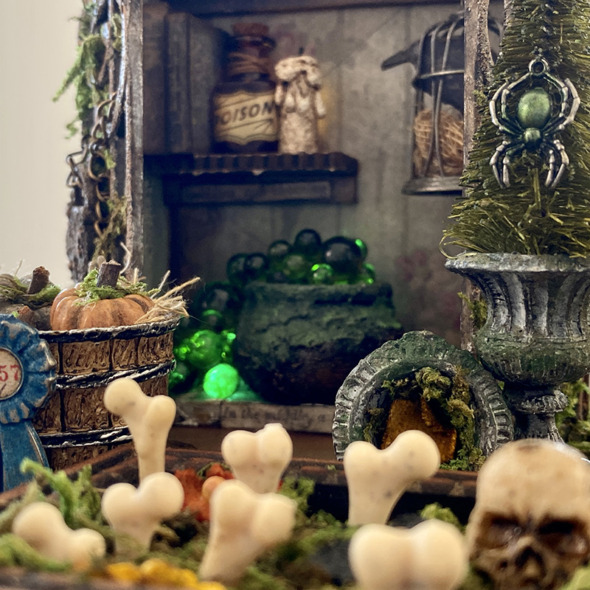
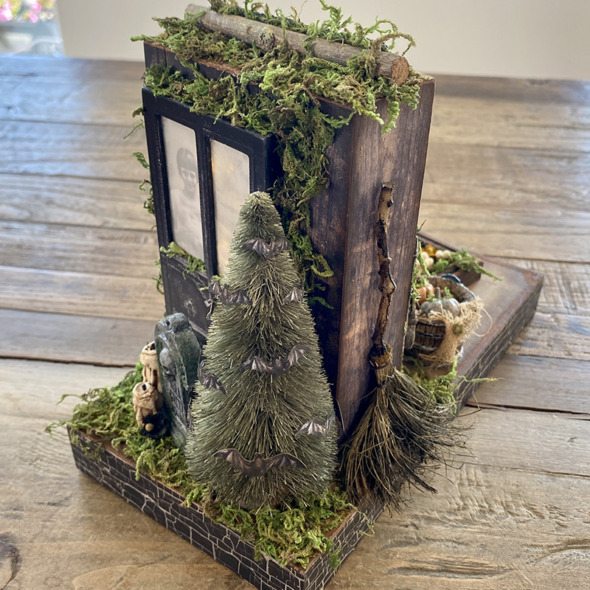
    Today I’m sharing part 1 of the witches potting shed made for the LIVE launch. You can see the introduction and close ups in my first post. Let’s get into the details…

    BASES + BACK DOOR

    igirlzoe: tim holtz idea-ology halloween witches
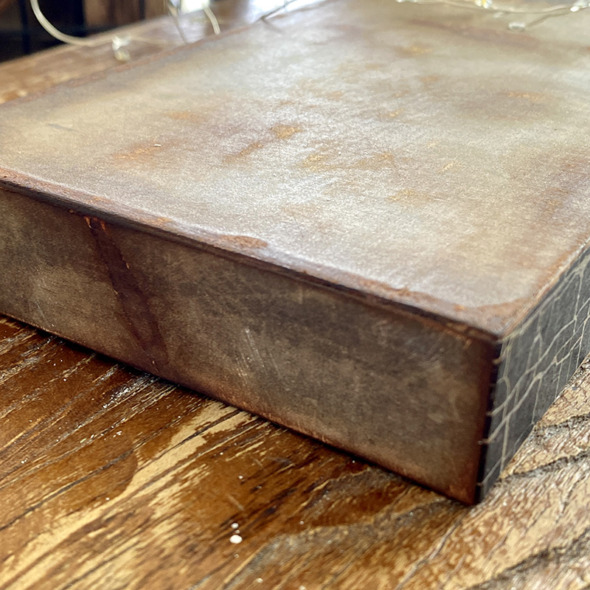
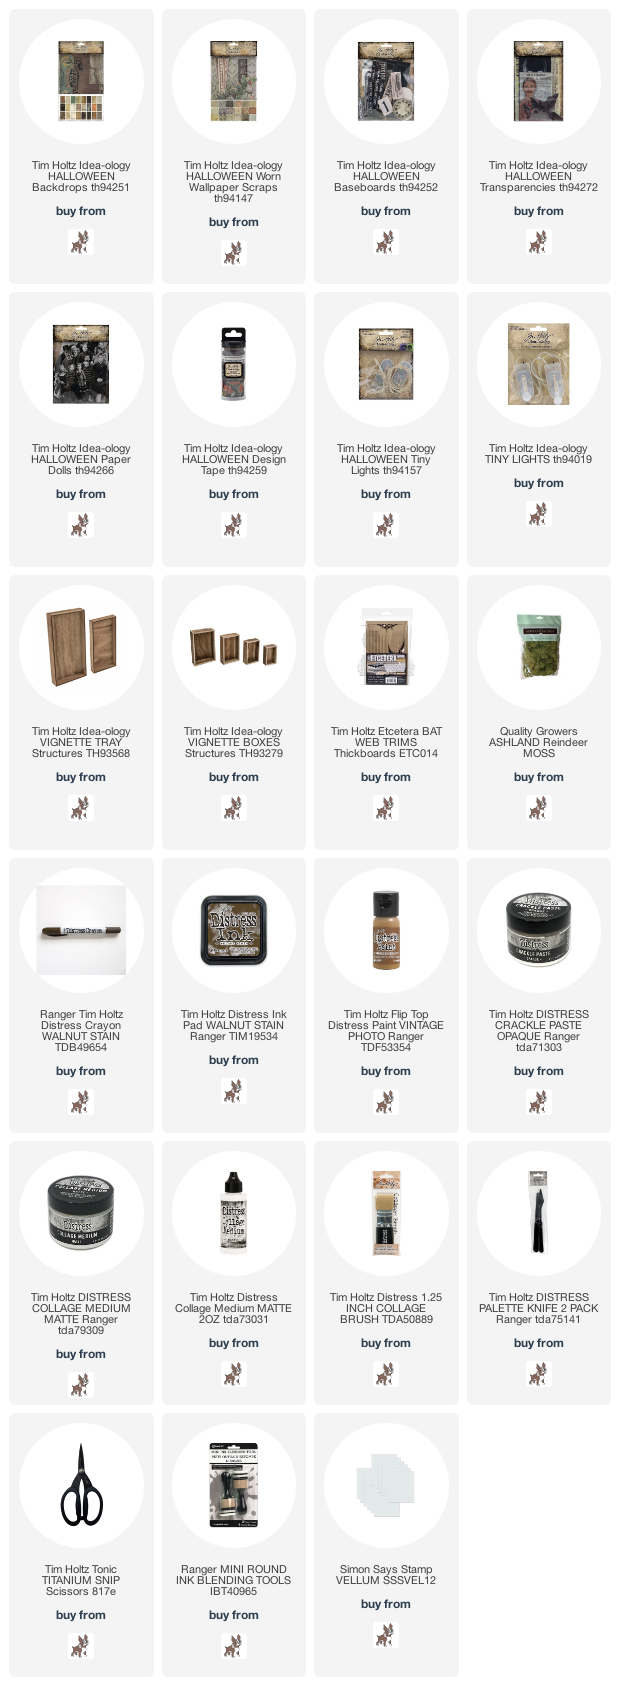
    To start with I covered the smaller vignette tray from the idea-ology vignette tray set with paper from halloween backdrops. I used the halloween design tape to cover 3 sides of the vignette and used the halloween backdrop paper to cover the front.

    igirlzoe: tim holtz idea-ology halloween witches
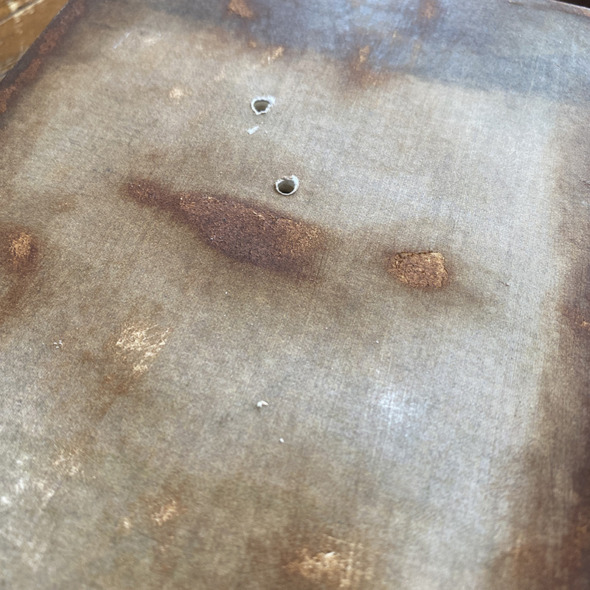
    I sanded and inked parts of the background for extra grunge and decided on the placement of potting shed and drilled 2 holes in the base with my Dremel micro. You can use a hand drill or any drill with a small drill bit or an awl to do this. I like using a Dremel micro as it’s small and light weight.

    PLEASE WEAR PROTECTIVE EYEWEAR WHEN USING POWER TOOLS!

    igirlzoe: tim holtz idea-ology halloween witches
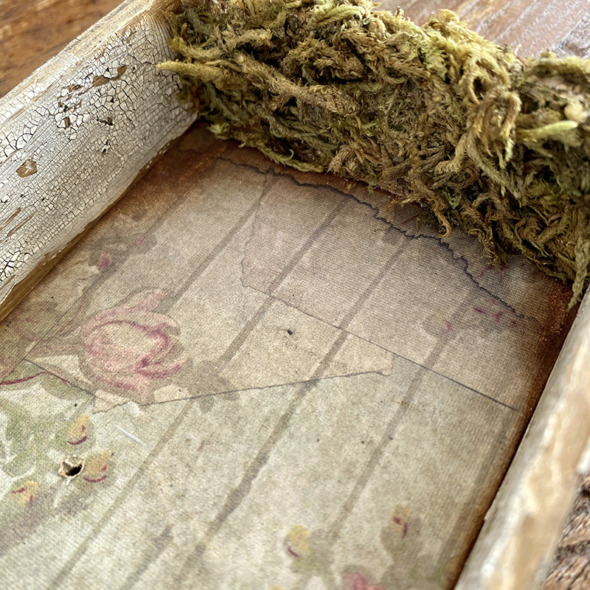
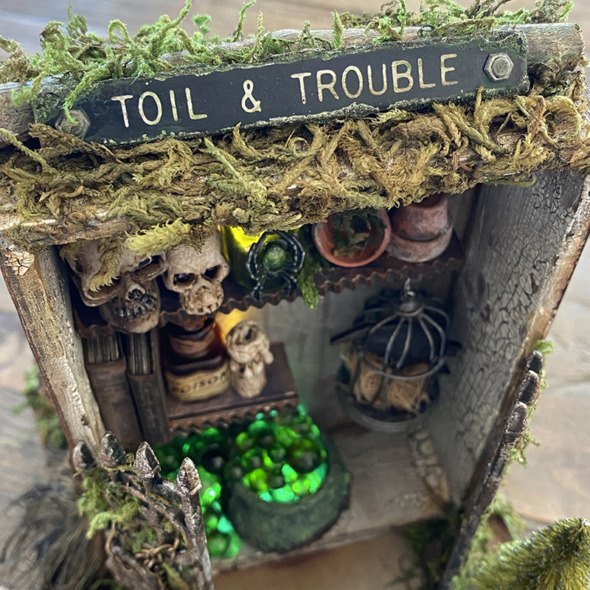
    Cover the back of the largest vignette from the vignette box set with idea-ology halloween worn wallpaper. Adding distress opaque crackle paste to the inside sides. I covered the inside top of the vignette with a generous layer of distress collage medium and pushed moss into place and allowed to dry. Some of the moss will fall off but you can add more if you need to. Remember, perfect doesn’t look natural, moss in nature is a hot mess.

    igirlzoe: tim holtz idea-ology halloween witches
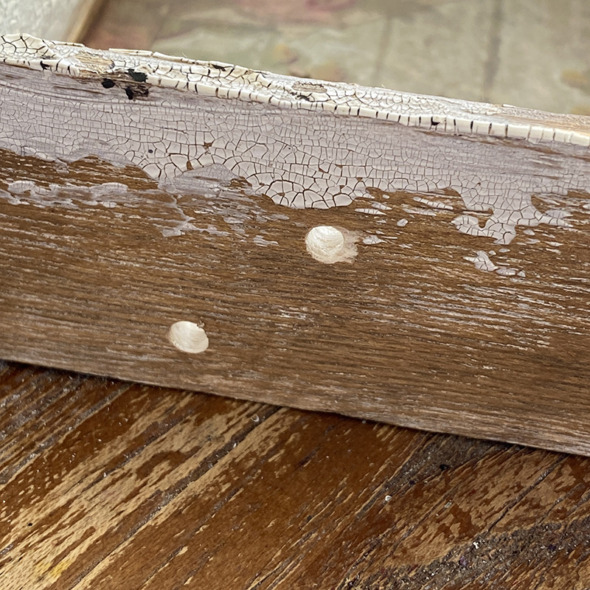
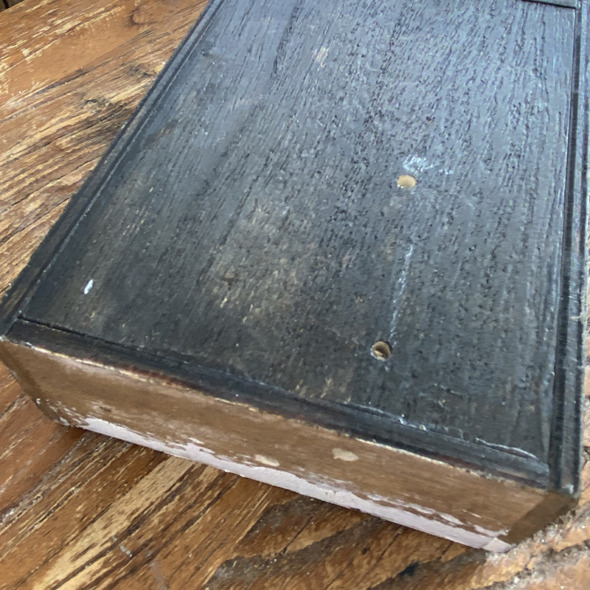
    Line up your vignette box over the vignette tray base and use a marker or pokey tool up through the holes in the vignette tray to mark the underside of the vignette box. If you don’t care about the exact placement of the holes you can eyeball it.

    igirlzoe: tim holtz idea-ology halloween witches
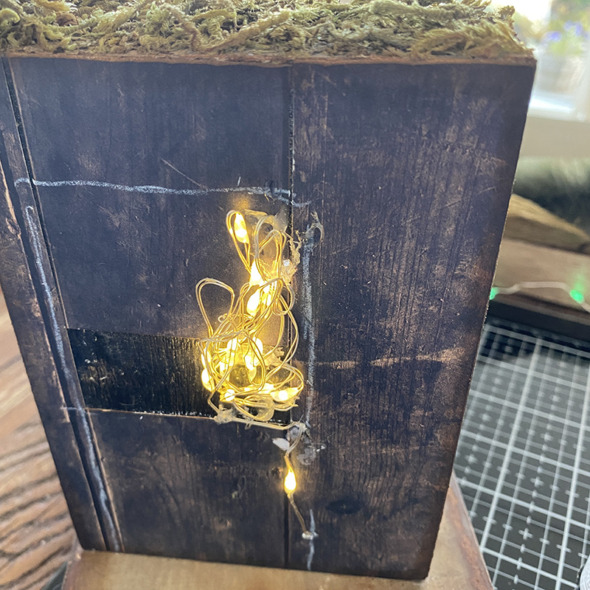
    The placement of the holes in the back of the vignette box are more important as they need to sit underneath where the door frame is going to be. I used chalk to mark out where the door would be.

    igirlzoe: tim holtz idea-ology halloween witches
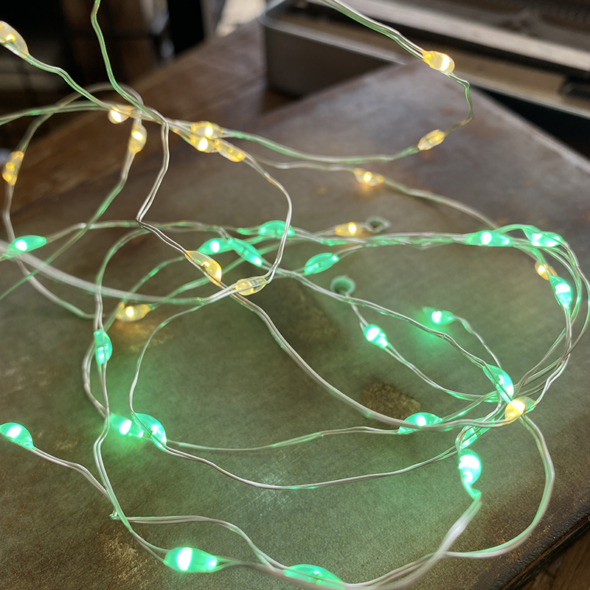
    I used 2 sets of tiny lights, a set of everyday tiny lights (white) and a set of Halloween tiny lights (green), thread up through the underside of the vignette tray. The battery packs are stuck to the underside of the vignette tray out of sight. I work with the tiny lights on as it’s easier to see positioning.

    igirlzoe: tim holtz idea-ology halloween witches
    I cut a piece of paper from the backdrops halloween collection into strips and covered the back and sides of the vignette box. You can see here where I marked a chalk line of where the windows were going to be versus the base of the door. The tiny lights have wire in them so it’s easy to bunch them together and they hold their place. I added a tiny dot of hot glue at the top and bottoms to hold them in place. DO NOT get hot glue on the bulbs as it can short the lights out.

    igirlzoe: tim holtz idea-ology halloween witches
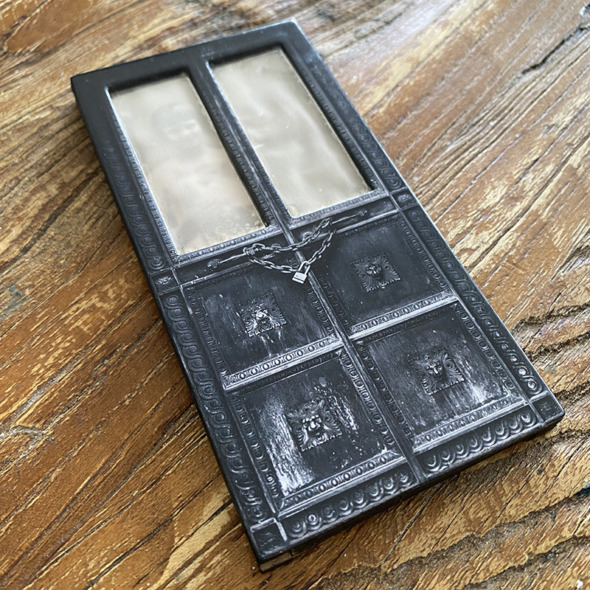
    Taking the door from the baseboards halloween set (pictured above)…

    igirlzoe: tim holtz idea-ology halloween witches
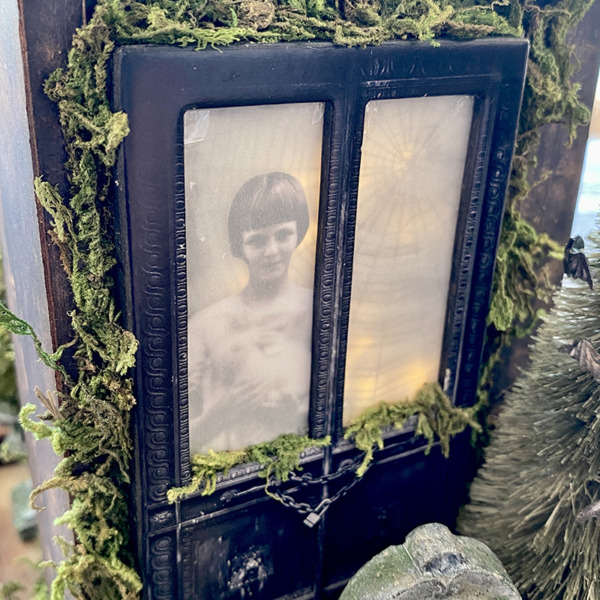
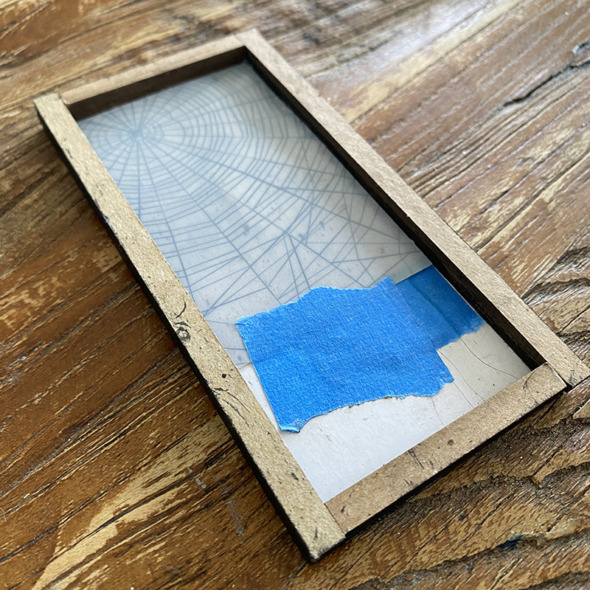
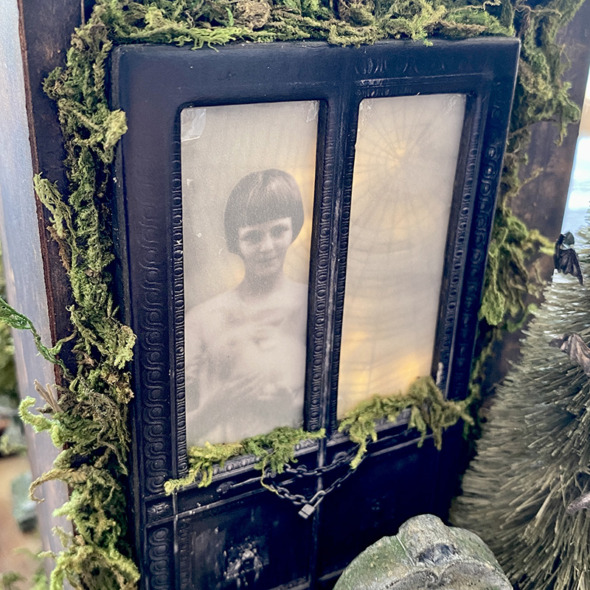
    I flipped it over and added a piece of vellum, a paper doll and a sheet of transparency (in that order) over the window. I built a frame using the straight trims from the etcetera bat and cobweb trims from stampers anonymous. It needs to be deep enough for the lights to sit behind the door and back light the cobweb transparency.

    igirlzoe: tim holtz idea-ology halloween witches
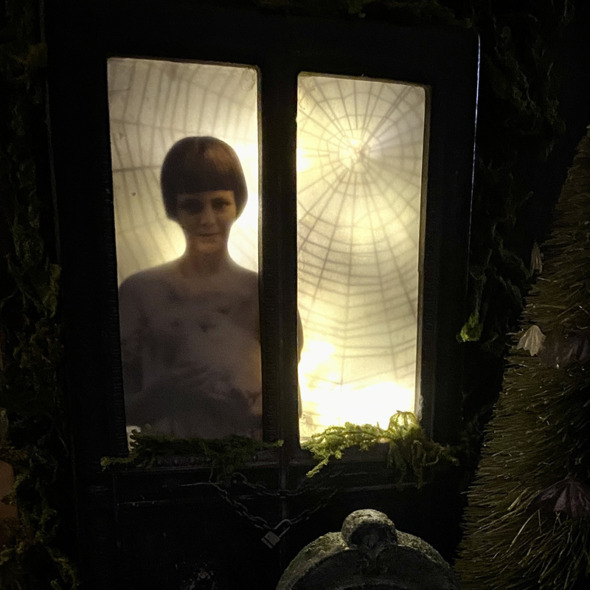
    I glued the door to the back of the vignette box with distress collage medium and added moss around the edges.

    igirlzoe: tim holtz idea-ology halloween witches
    So creepy right?! Trapped in the doorway forever…

    igirlzoe: tim holtz idea-ology halloween witches
    Thanks for stopping by, I hope you found this post helpful and it has inspired you to make. Let me know if you have any questions.

    Back as soon as I can with the next installment in the witches potting shed…
    Part 2 – Potting Shed, Cauldron + Gates

    Zoe


    affiliate links used at no cost to you


  3. Witches Potting Shed

    17th September, 2022 by iGirlZoe

    igirlzoe: tim holtz idea-ology halloween witches

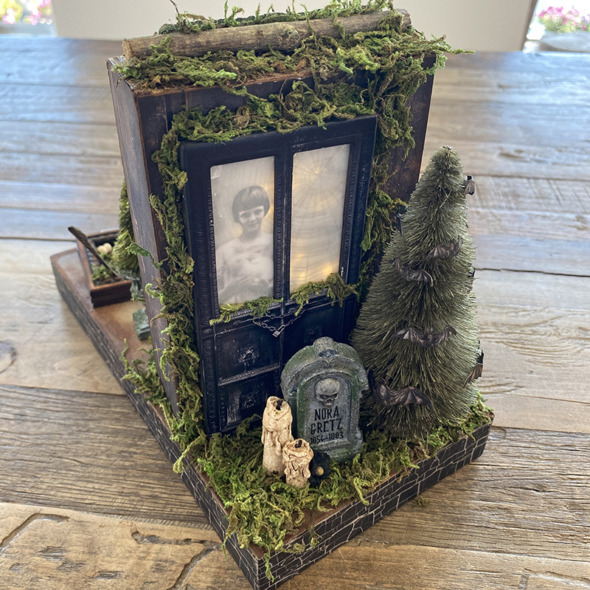
    Hello friends, hope you’re doing well! If you caught the Tim Holtz idea-ology Halloween LIVE launch party a few weeks ago, you may have caught sight of my witches potting shed and the other makers mind blowing makes! You can replay the launch to your halloween hearts content over on Tim’s blog.

    igirlzoe: tim holtz idea-ology halloween witches
    This Witches Potting Shed is a larger make, so today I’m going to share some close ups and then break each section into bite size pieces with step outs in separate posts. I’m sorry it’s taken longer than I had hoped to write these posts, I’ve been busy making for the next season. It’s still July, right?! LOL

    igirlzoe: tim holtz idea-ology halloween witches
    Part 1 – Bases + Back Door

    igirlzoe: tim holtz idea-ology halloween witches
    Part 2 – Potting Shed, Cauldron + Gates

    igirlzoe: tim holtz idea-ology halloween witches
    Part 3 – Bone Garden, Barrel + Urns

    igirlzoe: tim holtz idea-ology halloween witches
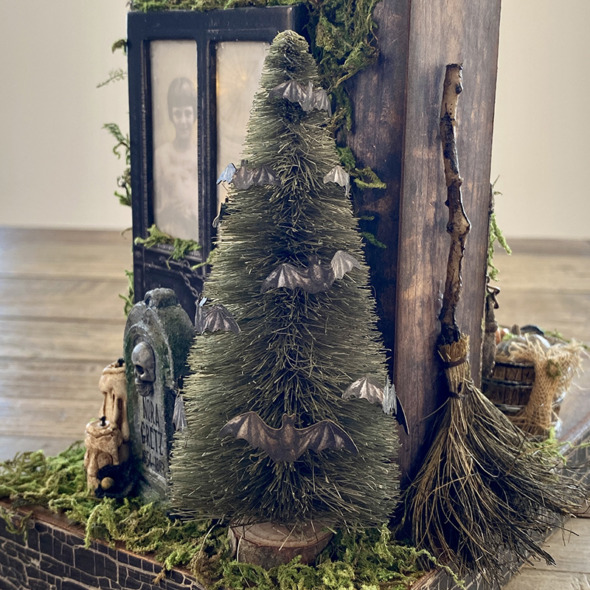
    Part 4 – Back Garden, Bat Tree, Tombstone + Broomstick

    Thanks for stopping by and let me know if you have any questions.
    Zoe


    affiliate links used at no cost to you


  4. Tim Holtz idea-ology 2022

    9th May, 2022 by iGirlZoe

    igirlzoe: tim holtz idea-ology 2022

    Hello friends! I’m finally getting to posting my idea-ology 2022 LIVE launch makes. I’ve been really busy and then I got into re-organizing my entire craft stash and now my apartment is a hot mess, so I’m taking a break from the chaos to write this blog post. I don’t write them in advance, I’m not that person, I worship those people!

    igirlzoe: tim holtz idea-ology 2022
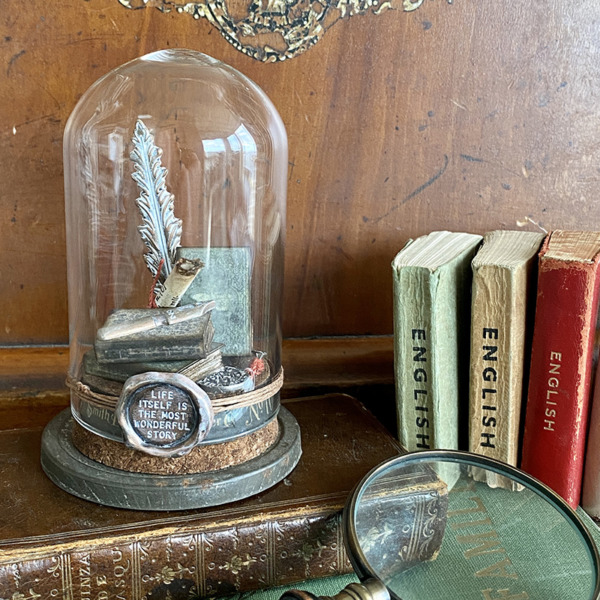
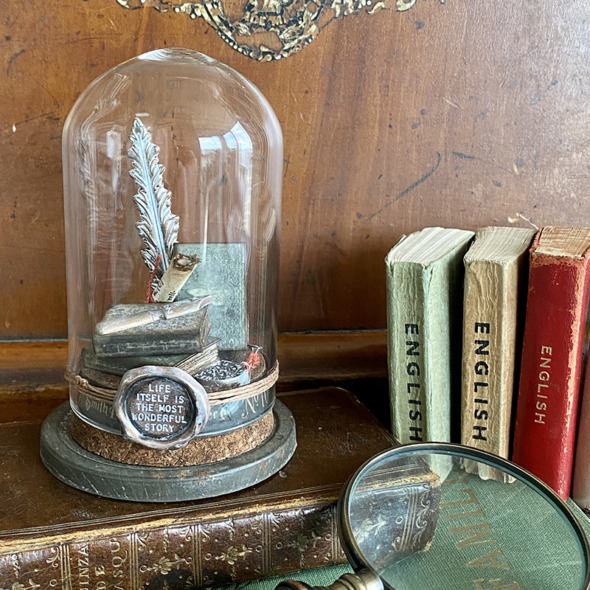
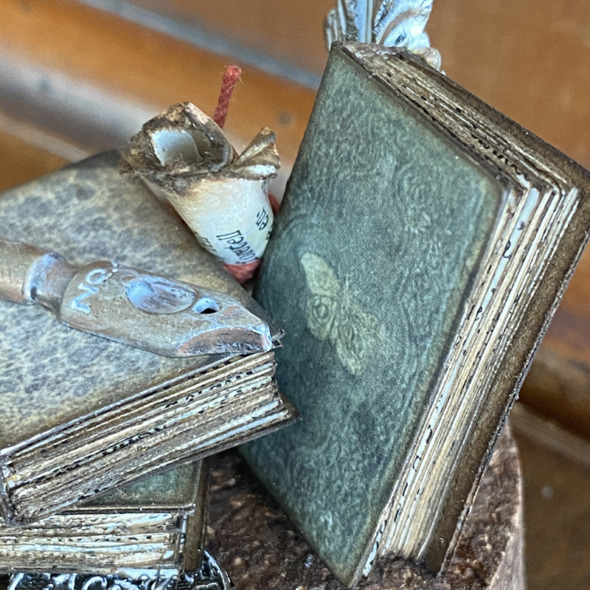
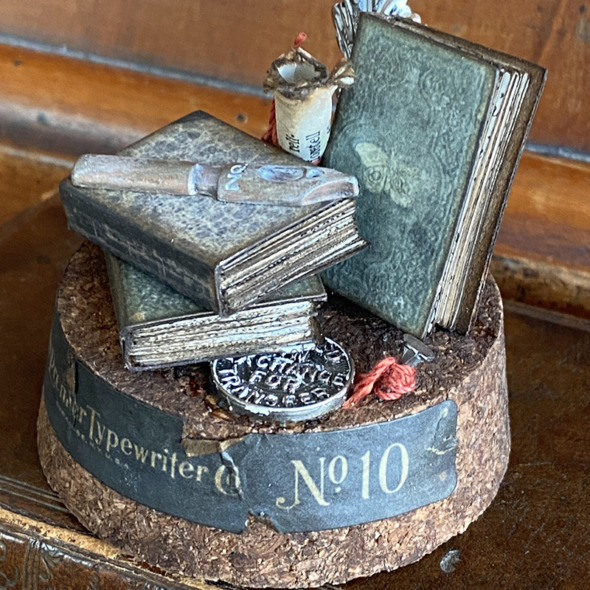
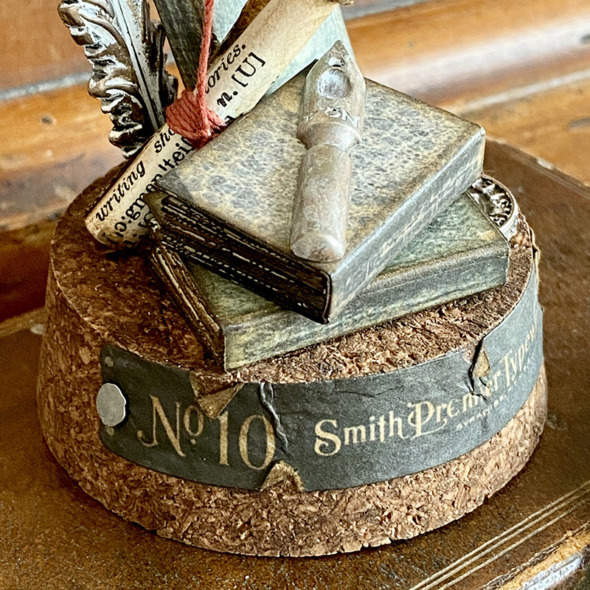
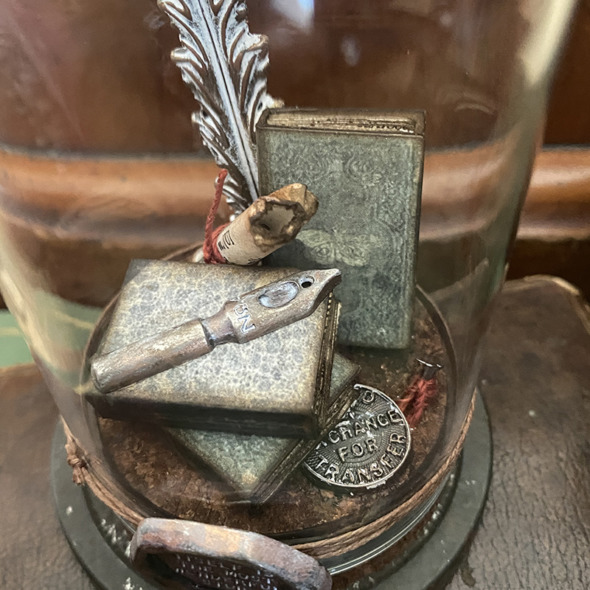
    I created a simple dome for the LIVE launch, you can see the replay on Tim Holtz blog. The idea-ology display domes are one of my favourite bases to work on and I was inspired by the quill from the idea-ology adornments quill and arrow set and book covers from the memoir ephemera set to create a writing themed dome.

    igirlzoe: tim holtz idea-ology 2022
    I love the book covers that come in the ephemera packs. I was so happy to see Tim bring them back after Halloween and add new ones. Tim always brings us the best vintage styled ephemera. Keeping my fingers crossed there will be a dedicated book ephemera pack one day!

    Here’s how I made the book covers into mini books…

    igirlzoe: tim holtz idea-ology 2022
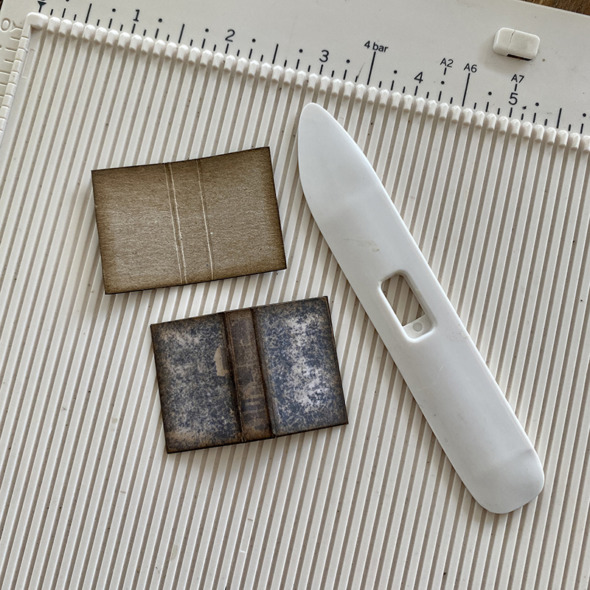
    I mounted book covers from the memoir ephemera pack onto distress kraft heavystock with distress collage medium, trimmed with my scissors and scored the spine with my scoring board. Mounting them gives you a nice hardback mini book.

    igirlzoe: tim holtz idea-ology 2022
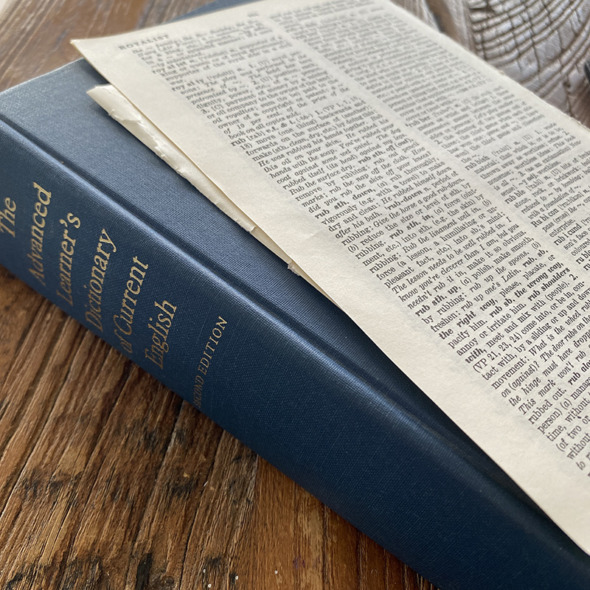
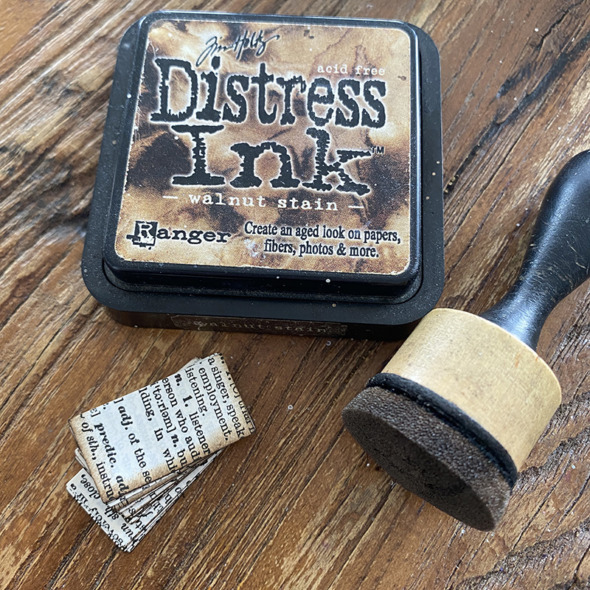
    I use pages from a very old oxford dictionary that my father in law kindly gifted me from his book stash years ago. I made sure that he knew I was going to cut it up for crafts. The pages are wafer thin but take distress ink beautifully.

    igirlzoe: tim holtz idea-ology 2022
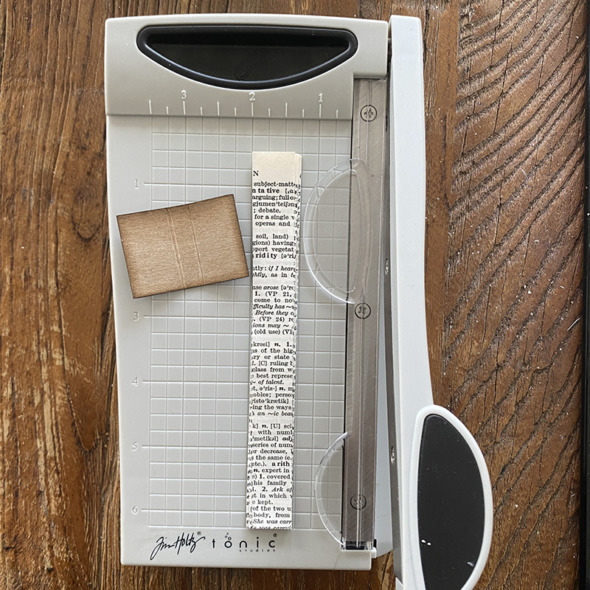
    Using the Tim Holtz Tonic mini trimmer, I cut strips of dictionary pages to fit the book cover.

    igirlzoe: tim holtz idea-ology 2022
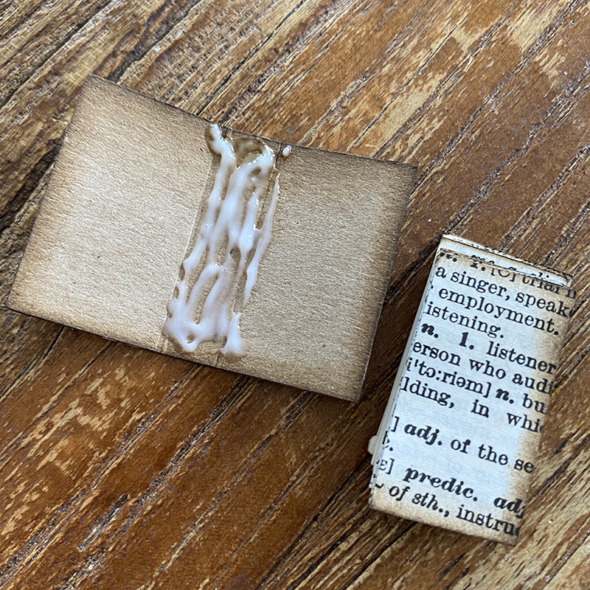
    Pinching the pages together, I inked 3 sides (no need to ink the side you’re gluing into the book cover).

    igirlzoe: tim holtz idea-ology 2022
    Add a generous amount of distress collage medium to the inside spine of your book cover and place the pages into the book and pinch the covers together. Push the pages back toward the spine. Pinch and push, pinch and push.

    igirlzoe: tim holtz idea-ology 2022
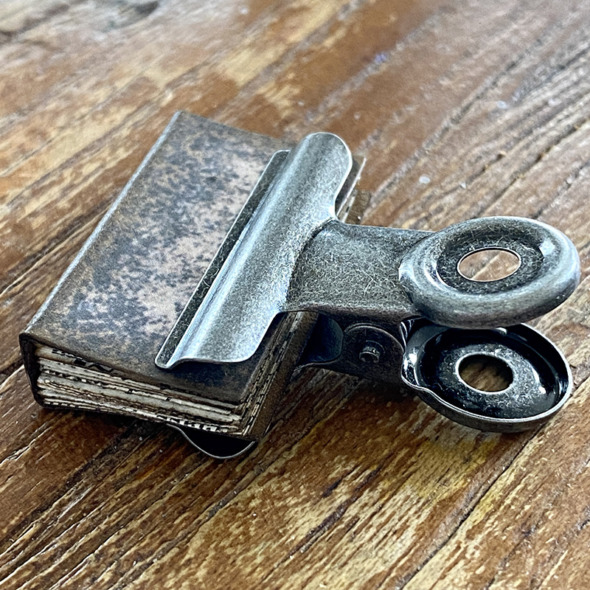
    I used an idea-ology large hinge clip to hold in place while the book pages dried.

    igirlzoe: tim holtz idea-ology 2022
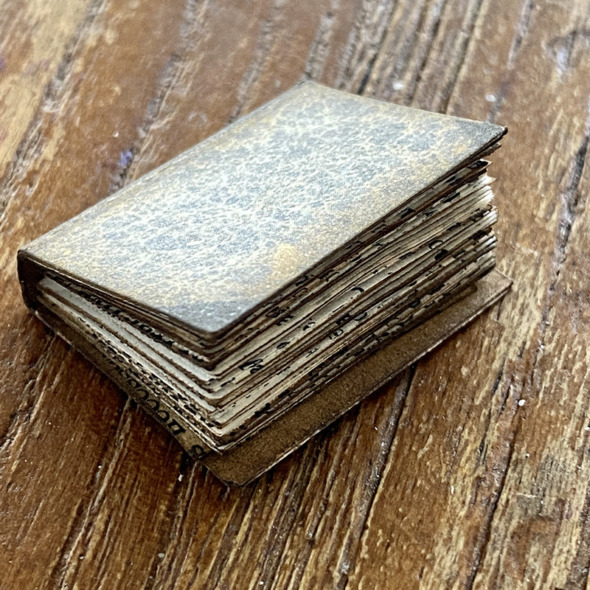
    Cute right? And the distress kraft heavystock inside the book cover looks vintage.

    igirlzoe: tim holtz idea-ology 2022
    I added an idea-ology tack nail to the cork base and tied with a little string. I used the same string on the scroll (below). This string was leftover from the make and take at the 2019 Creativation show idea-ology booth. I like using it in my projects as it brings back great memories.

    igirlzoe: tim holtz idea-ology 2022
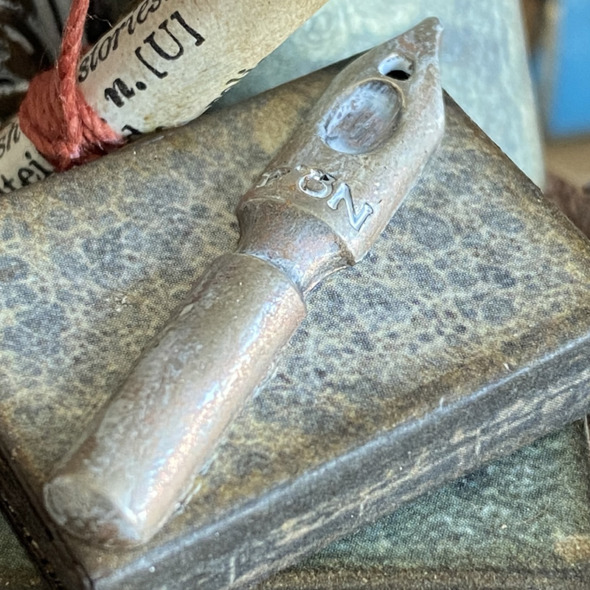
    The idea-ology pen nib from the odds and ends set was perfect for my writing themed dome. I added a little iced spruce and frayed burlap distress paint to age a little, pushing it into the recessed areas to highlight them.

    igirlzoe: tim holtz idea-ology 2022
    To alter the quill from the idea-ology adornments quill and arrow set. I added iced spruce and picket fence distress paint, removed the excess and once dry, rubbed walnut stain distress crayon over the top. I pushed the quill into the cork base with a little distress collage medium to stop it moving about.

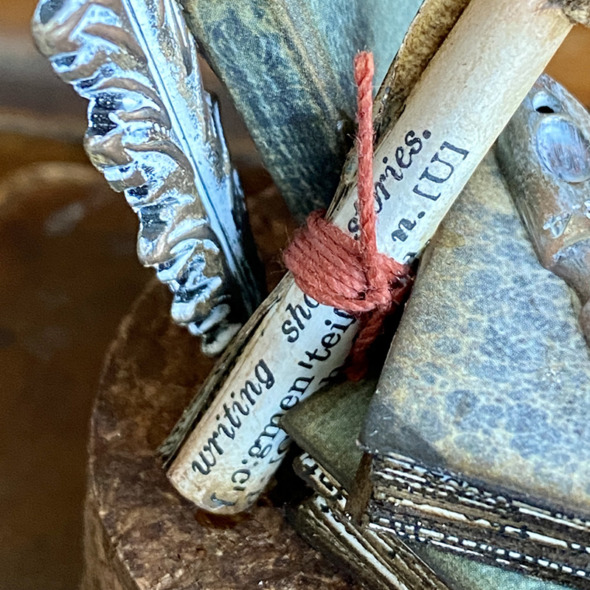
    While I was cutting old dictionary pages I spotted the sentence “writing short stories” and knew I had to feature it in my dome as it was PERFECT for the writing theme. I love it when things like this happen. I rolled the paper into a scroll and tied with string.

    igirlzoe: tim holtz idea-ology 2022
    I added this cool piece of ephemera from the memoir ephemera set to the base with idea-ology tack nails. You need to make sure the tack nails are pushed right into the cork so that the glass dome will fit over the top.

    igirlzoe: tim holtz idea-ology 2022
    I added this idea-ology bus token which is one of my favorite idea-ology tokens ever, from the odds and ends set. All the pieces inside the dome are glued to the cork base or to something attached to the cork base with distress collage medium.

    igirlzoe: tim holtz idea-ology 2022
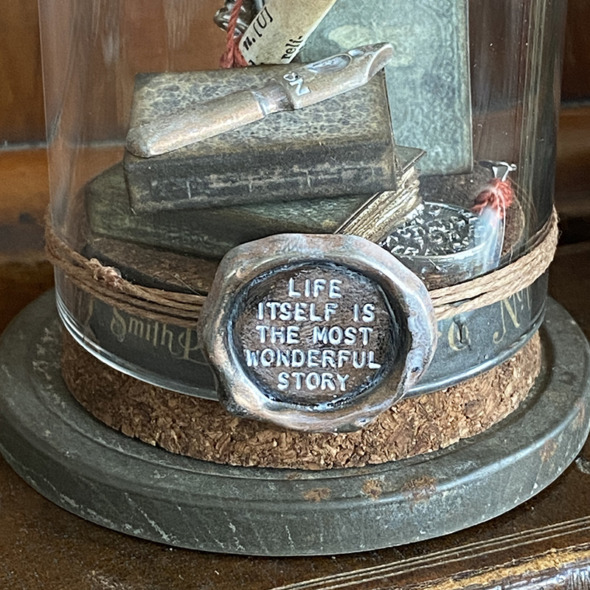
    Finally I added an idea-ology quote seal over the top of jute which I had wrapped around the outside of the dome. I pushed picket fence distress paint into the recessed areas of the seal and wiped away the excess with a cloth. I stood the dome on a vintage jar topper that Tim kindly gifted me.

    Thanks for stopping by and let me know if you have any questions.
    Zoe


    affiliate links used at no cost to you


  5. Christmas Candy Store

    16th December, 2021 by iGirlZoe

    igirlzoe: tim holtz idea-ology christmas 2021

    Hello friends! I hope you’re having a wonderful December and finding time to do some fun festive things. I’ve been busy decorating and getting ready for Christmas, but I thought I would take a quick break and pop in and share my Candy Store using the gorgeous new Tim Holtz Christmas idea-ology. You can catch the launch replay and makes over on Tim’s blog.

    igirlzoe: tim holtz idea-ology christmas 2021
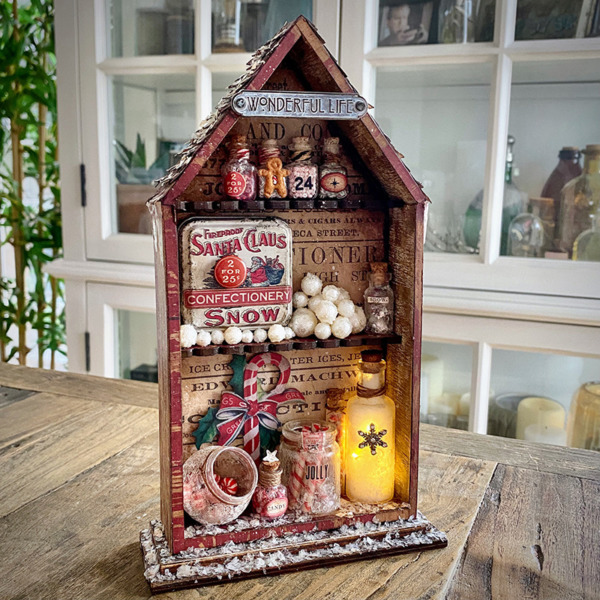
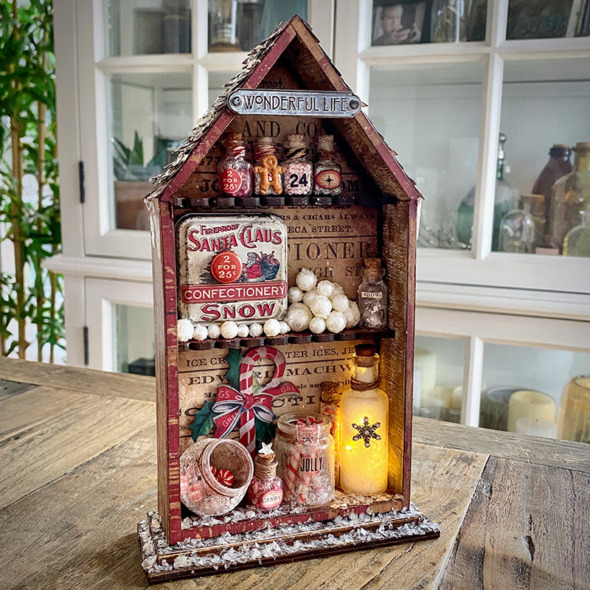
    I love candy cane everything and my obsession runs deep (think pumpkins)! I was very excited to see this years Christmas idea-ology release with candy cane stripes appearing in the backdrops, ephemera and the amazing confectionery! This was the starting point for my candy store. So grab a big cup of hot cocoa and a candy cane and let’s get into some of the details…

    igirlzoe: tim holtz idea-ology christmas 2021
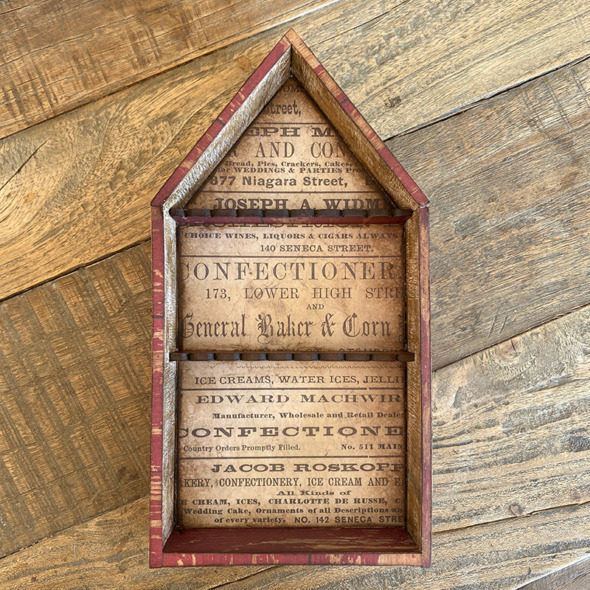
    I covered an idea-0logy vignette shrine with papers from the Christmas backdrops set. I love the size of the backdrop papers and the Christmas selection is simply delicious, you may want to pick up 2 packs, one to use and one to stroke! Just saying!!

    igirlzoe: tim holtz idea-ology christmas 2021
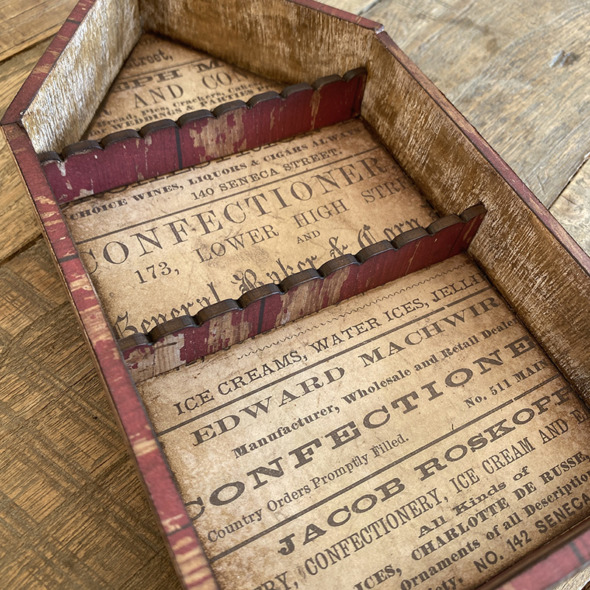
    I created a couple of shelves for my vignette shrine using etcetera thickboard scalloped trims and the matching trims thinlits dies. The trims die set allows me to die cut trims that perfectly cover the thickboard pieces, game changer for me as I used to cut them by hand. Use distress collage medium to glue into place.

    igirlzoe: tim holtz idea-ology christmas 2021
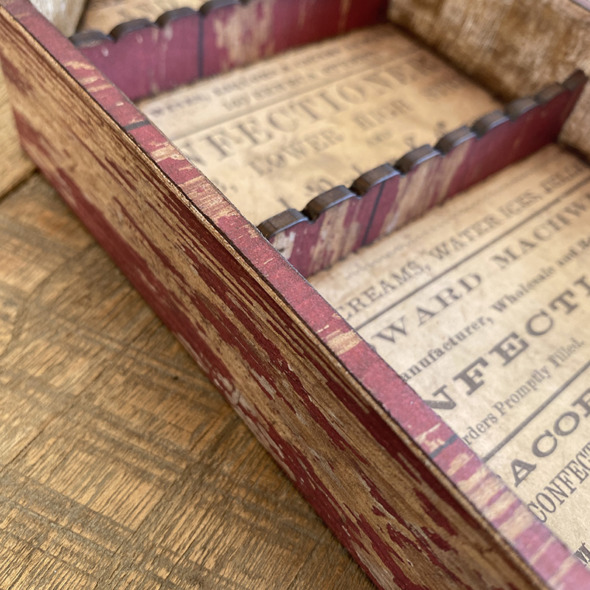
    I covered the side of the vignette shrine in matching paper from the Christmas backdrops pack. I love how weathered the paper looks. YUM!

    igirlzoe: tim holtz idea-ology christmas 2021
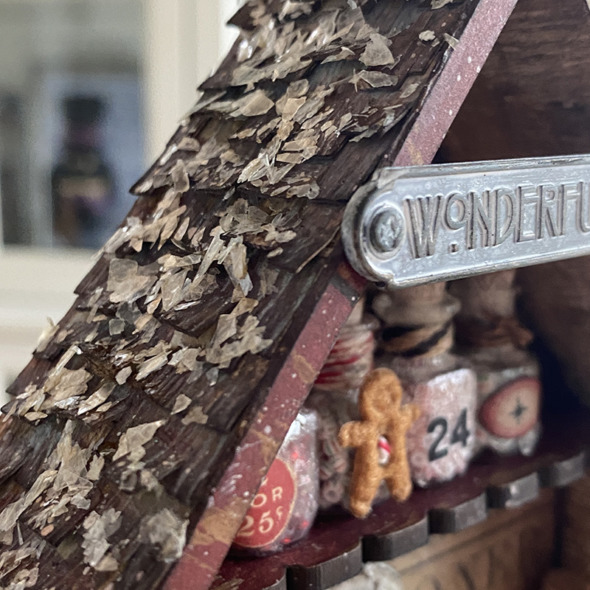
    I covered the roof by die cutting roof panels with a die from the village collection thinlits die set from idea-ology kraft stock and embossing with the lumber 3D folder. Glue into place with distress collage medium and cover with distress mica.

    igirlzoe: tim holtz idea-ology christmas 2021
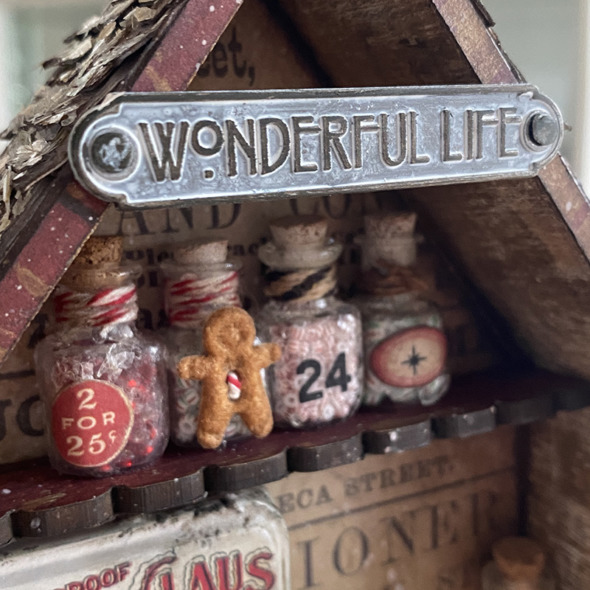
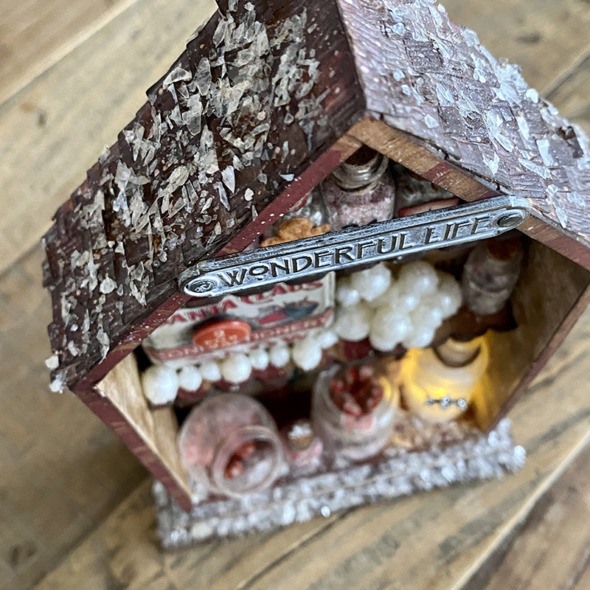
    It truly is a wonderful life and I love this word plaque from the Christmas set which I added to the vignette shrine by hammering in 2 of the stakes from the vignette hardware set. I added a little picket fence distress crayon to the word plaque.

    igirlzoe: tim holtz idea-ology christmas 2021
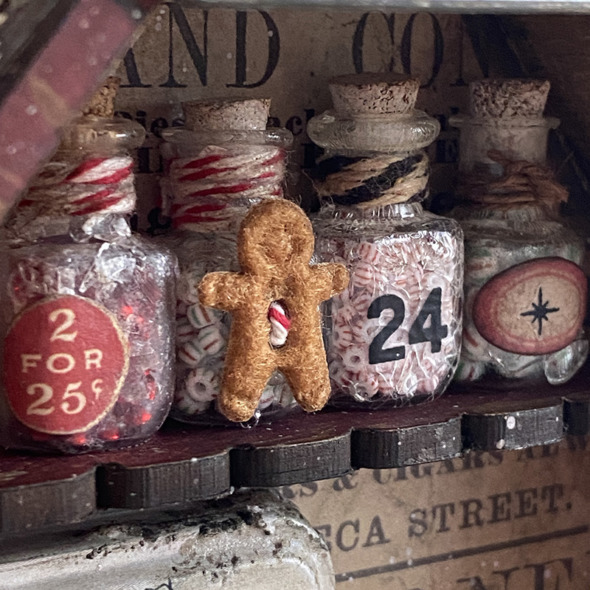
    For the top shelf I added some of the idea-ology tiny vials which I crackled. I have a how to on a previous post, see here (I skipped the alcohol ink step). I added idea-ology ephemera and remnant rubs to the bottles and painted the bottle corks with a picket fence distress paint wash for a wintry twist. I filled the bottles with seed beads, added a little twine and a gingerbread piece, all from my stash.

    igirlzoe: tim holtz idea-ology christmas 2021
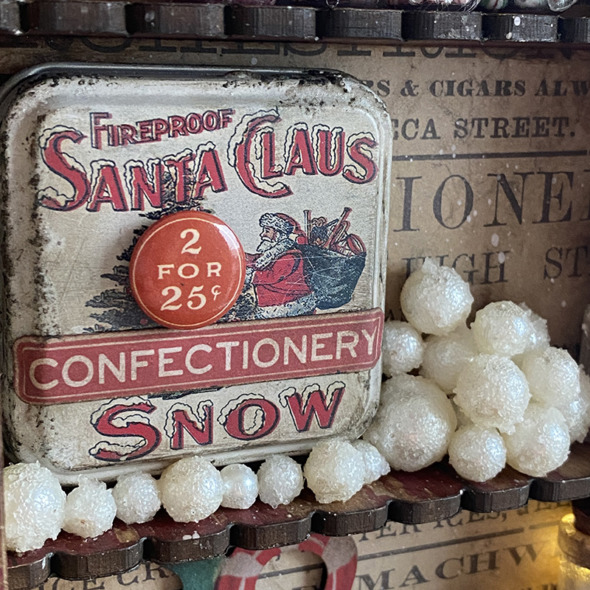
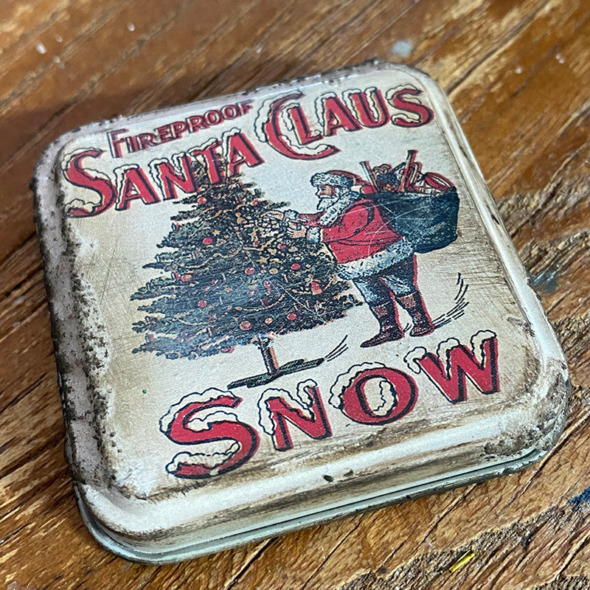
    I added a Christmas tin top and baubles to the middle shelf. To the tin top I added a piece of Christmas mini flair and a piece of ephemera.

    igirlzoe: tim holtz idea-ology christmas 2021
    To grunge up the idea-ology Christmas tin top, I scratched and added a little translucent distress grit-paste and once dry, rubbed in distress crayon which highlights the scratches.

    igirlzoe: tim holtz idea-ology christmas 2021
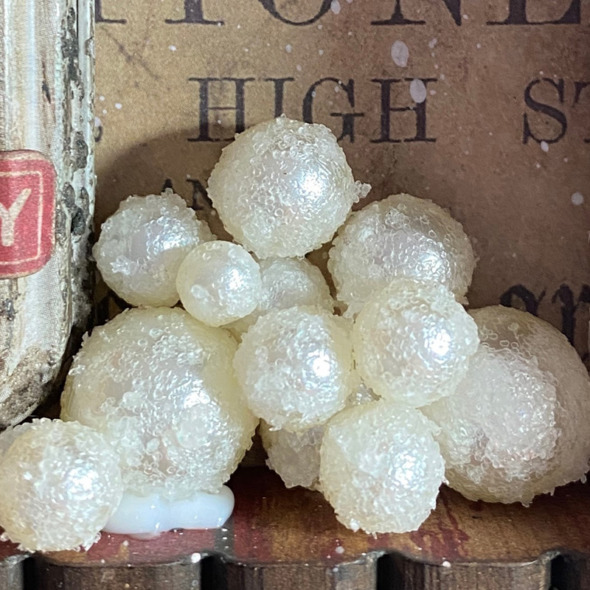
    I rolled idea-ology baubles in the distress snowfall grit-paste from the distress holiday texture set and glued together in a stack with distress collage medium.
    TIP: Make sure your inky fingers are clean to prevent ink transfer.

    igirlzoe: tim holtz idea-ology christmas 2021
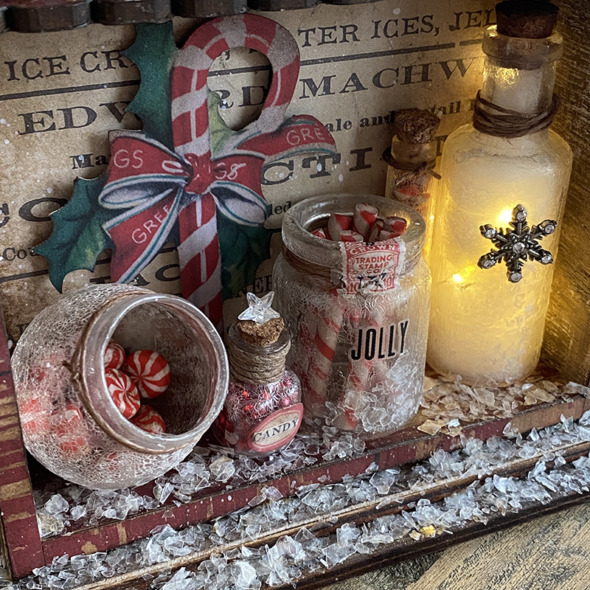
    For the lower shelf I really went to candy cane town and added a candy cane from the ephemera set using adhesive foam to mount it onto the back of the shrine, ready to add the bottles in front of it.

    igirlzoe: tim holtz idea-ology christmas 2021
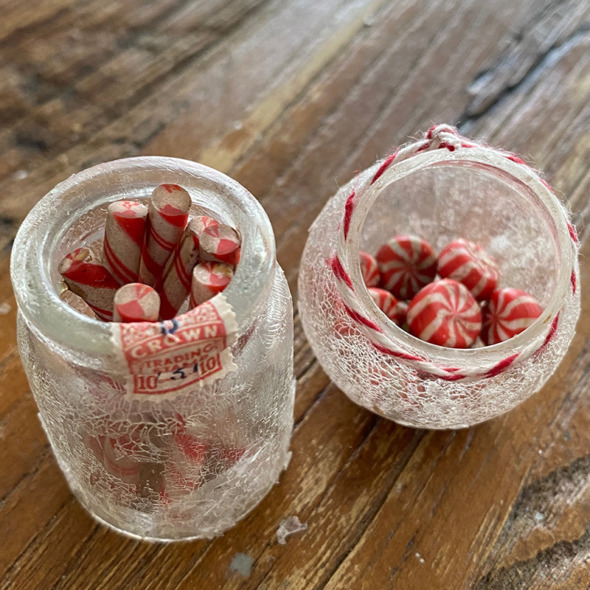
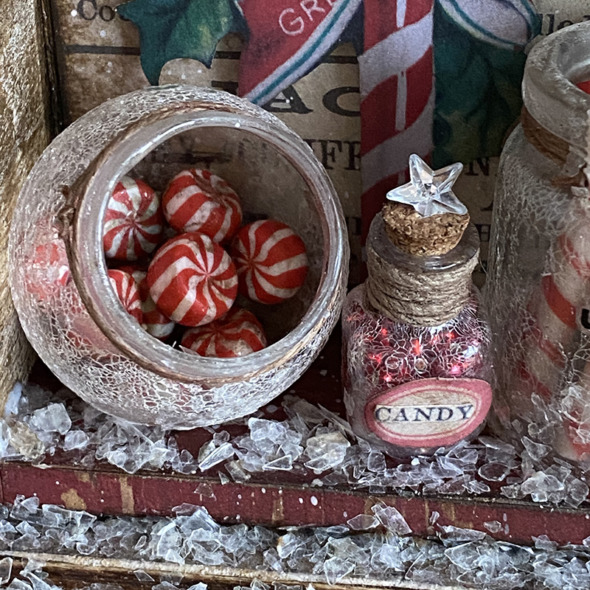
    I crackled a bottle from the idea-ology corked vials set and used the glass dome from the idea-ology snowglobe, turned upside down to create a candy bowl. I added a sticker from the christmas sticker book which I burnished onto the glass using distress collage medium. I added candy cane twine that I saved from some Christmas gifts last year and finally added the gorgeous new idea-ology christmas confections. I grunged them up with distress crayon and glued them into place with distress collage medium.

    igirlzoe: tim holtz idea-ology christmas 2021
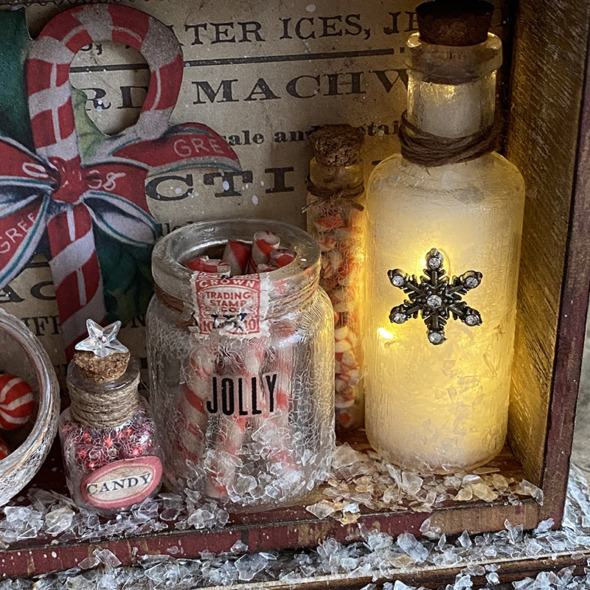
    I used one of the vial labels from the new idea-ology snippets ephemera set which I completely swooned over! I LOVE labels! I added some red seed beads I had in my stash to the bottle and cut a sticker with candy down to size and added on top of the label. Finally I pushed a star from the idea-ology mirrored stars set into the cork and covered everything with distress mica, held in place with a little brush of distress collage medium first.

    igirlzoe: tim holtz idea-ology christmas 2021
    Everything is better with lights… so I covered a bottle in distress collage medium and once dry, distress crackle paint. I filled the bottle with tiny lights and then used the end of a paintbrush to push stuffing filler into the bottle to diffuse the lights. This was an idea I got from Tim last year when he did that awesome crystal ball, see Tim’s Blog for details. I didn’t use anything to wrap my tiny lights around like Tim did, I simply thread them through a hole I made in the back of the vignette shrine and up into the bottle. I attached the battery pack to the back of the shrine and the wire is hidden behind he back of the bottle. I cut the loop off the snowflake with wire cutters and glued it onto the front. I love this light diffusing idea, thanks Tim!

    igirlzoe: tim holtz idea-ology christmas 2021
    I’m going to carry on decorating for Christmas. This year I’m making my own garlands and trying to get the kind of lights I want for them is proving rather tricky, but I’m persevering because it’s all about that perfect twinkle! 😉

    Thanks for stopping by.

    Zoe


    affiliate links used at no cost to you


  6. The one that Tim finished…

    21st November, 2021 by iGirlZoe

    igirlzoe: tim holtz idea-ology christmas 2021

    Hello friends and welcome to the final day of my week of Christmas makes. Thanks for hanging out with me for the week and for all your kind comments, it means a lot. This post is aptly titled like an episode of “Friends” because this make is representative of friendship.

    igirlzoe: tim holtz idea-ology christmas 2021
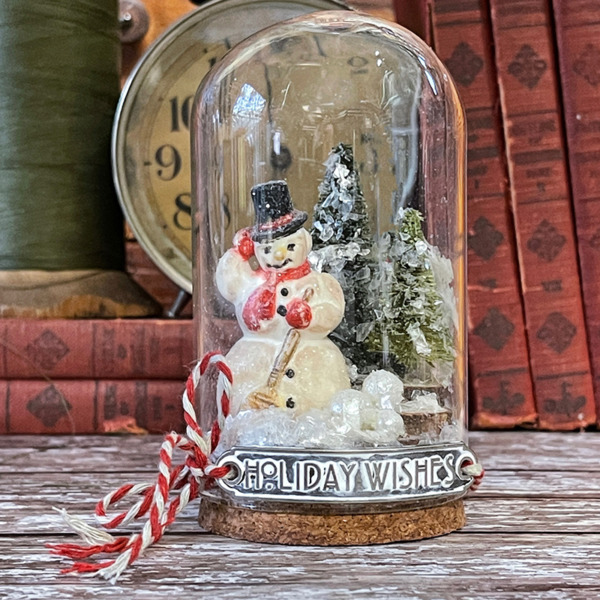
    I made this Christmas display dome (with a little help from my friend) for the Tim Holtz Christmas idea-ology launch. You can see all the details, replay and inspiration makes over on Tim’s Blog.

    igirlzoe: tim holtz idea-ology christmas 2021
    I was suffering from a little bit of maker burn out after a 12 week maker marathon. I was tired and one of my makes wasn’t working and what I thought would take me 3 hours, took 3 days, which left me short on time to finish this one. I somehow threw a dome together in under 30 minutes and with the paint and collage medium just about dry, the Fedex truck rolled up. But it wasn’t finished and as soon as I had shipped it, I wished I hadn’t!

    igirlzoe: tim holtz idea-ology christmas 2021
    An email later asking Tim not to include this dome in the LIVE and he offered to help even though it was on the eve of the LIVE and he must have been pretty busy. But like in the movies on Christmas eve, it brought it’s own magic and a little later Tim sent me a beautiful photo of my transformed dome.

    igirlzoe: tim holtz idea-ology christmas 2021
    It’s a perfect example of how idea-ology can transform a piece, and that craft friends are the best friends. Plus I get to keep the Holtz/Hillman collaboration piece! LOL This one was most definitely #mypile and thanks to Mario, who packed it up with his usual care and shipped it back to me. Big thanks to Tim for adding his special brand of magic and friendship… and that freaking incredible word plaque …and mica flakes …and candy cane string …and a little pixie dust!

    Thanks for stopping by (for a week)! Please take time and make yourself a Christmas dome and even better, make one with a friend, either in person or virtually. I hope you’ll share what you make and celebrate this season of magic, friendship and making.

    Zoe


    affiliate links used at no cost to you


  7. Oh Christmas Tree… Stand!

    16th November, 2021 by iGirlZoe

    igirlzoe: tim holtz idea-ology christmas 2021 trees stand

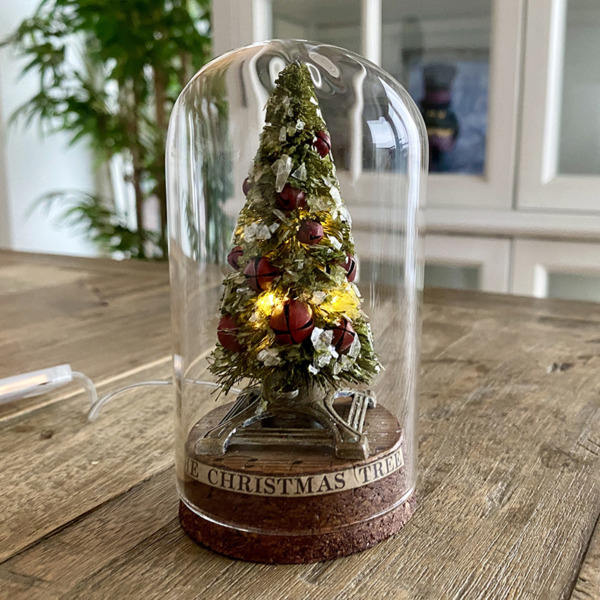
    Hello friends! Welcome to Day 2 of my week of Christmas makes. If you read yesterdays blog post (thank you) and you’ll see there’s a slight change of plans. The cute snowman will be back later in the week because I want to add a little something something before posting. So today it’s all about Christmas trees. I was so excited when Tim shared the new idea-ology tree stands. The entire product range this year is incredible, but the tree stands stole my Christmas tree loving heart. You can catch up on all the details of the Christmas idea-ology product launch and inspiration makes over on Tim’s blog.

    igirlzoe: tim holtz idea-ology christmas 2021 trees stand
    I love Christmas trees and have some wonderful, fond and fun memories of them. Baling my first real tree when I moved to Switzerland and strapping it to the top of our car and driving up the snowy mountain while playing driving home for Christmas. Sitting in front of the tree with a big cup of hot cocoa looking at all the ornaments and lights. I just love the precious memories that Tim’s idea-ology envokes and the new idea-ology tree stands just stole the show for me and it was top of my list to make with, here’s what I did…

    igirlzoe: tim holtz idea-ology christmas 2021 trees stand
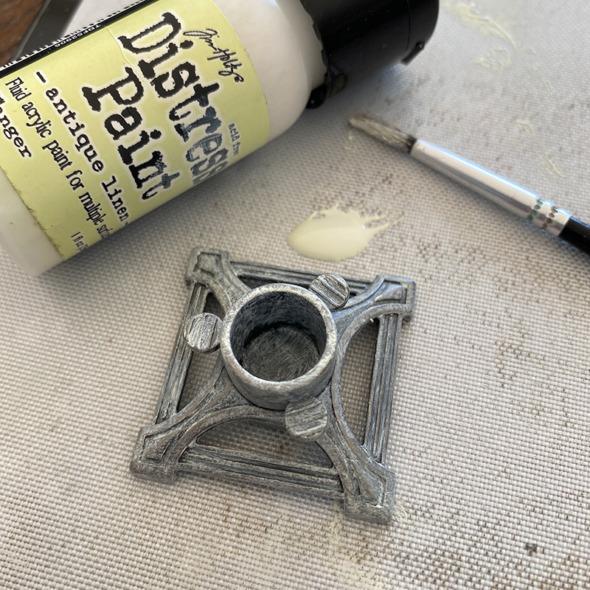
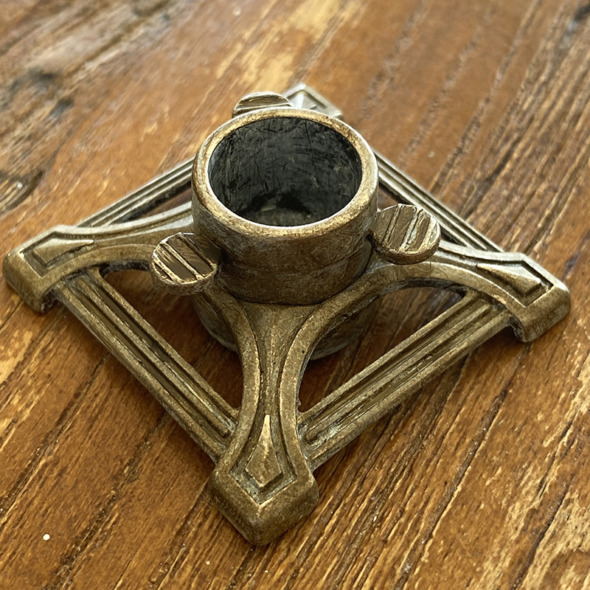
    Using a paintbrush, I picked up antique linen distress paint from the non stick mat portion of my glass media mat and brushed onto the idea-0logy tree stand.

    Please don’t get excited about my craft mat, I love it, use it and it’s stained. Relax, you’ll be just fine and there’s a replacement mat for your glass media mat linked at the end of the post! 😉

    igirlzoe: tim holtz idea-ology christmas 2021 trees stand
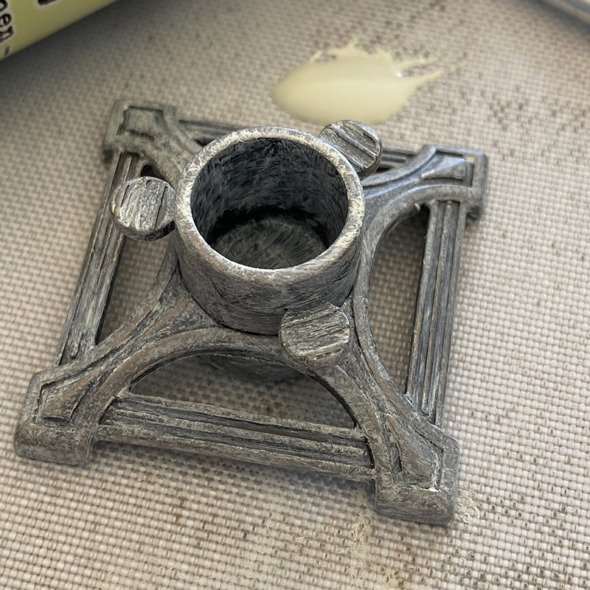
    Anyway… you should be looking at the AWESOME idea-ology tree stand. It even has the little tension screws the real stands have! Tim’s just rocks the details when he designs, it blows me away!

    igirlzoe: tim holtz idea-ology christmas 2021 trees stand
    Once the distress paint was dry, I rubbed in walnut stain distress crayon with my finger. When I was ready to put the woodland tree into the stand, I removed the wood stand the tree comes in, added hot glue to the center of the tree stand and placed the tree wire in and held in place until it cooled, it doesn’t take long.

    igirlzoe: tim holtz idea-ology christmas 2021 trees stand
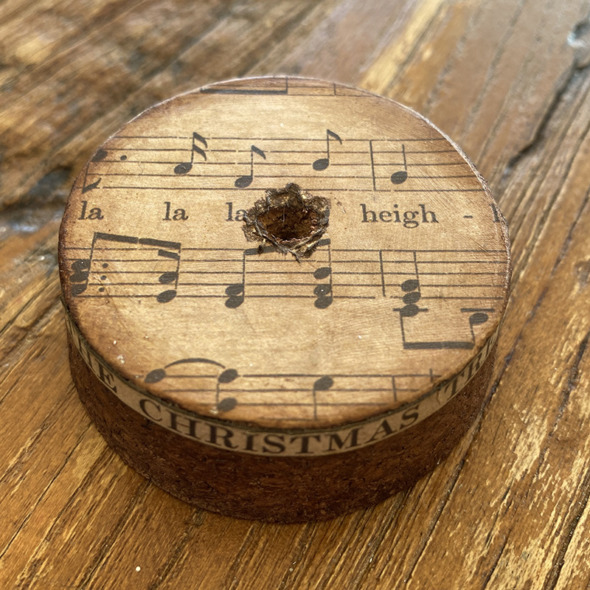
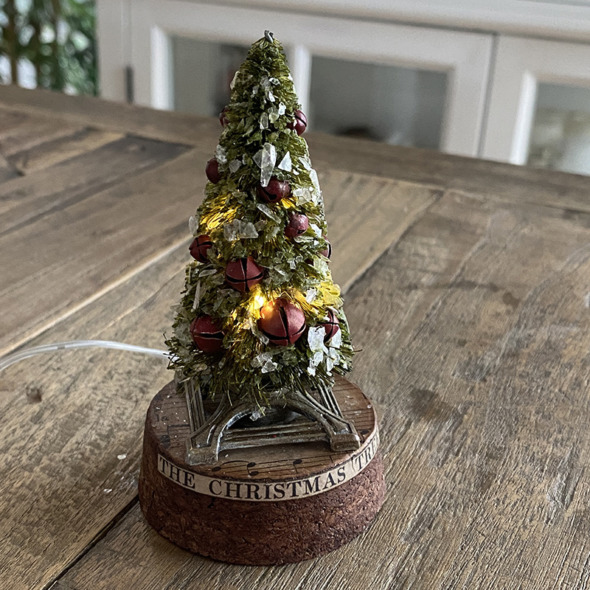
    I covered the cork base of an idea-ology display dome with paper from the christmas backdrops. Covered with distress collage medium and once dry, rubbed in walnut stain distress crayon. I used my Dremel micro tool to put a hole in the middle of the cork base.

    igirlzoe: tim holtz idea-ology christmas 2021 trees stand
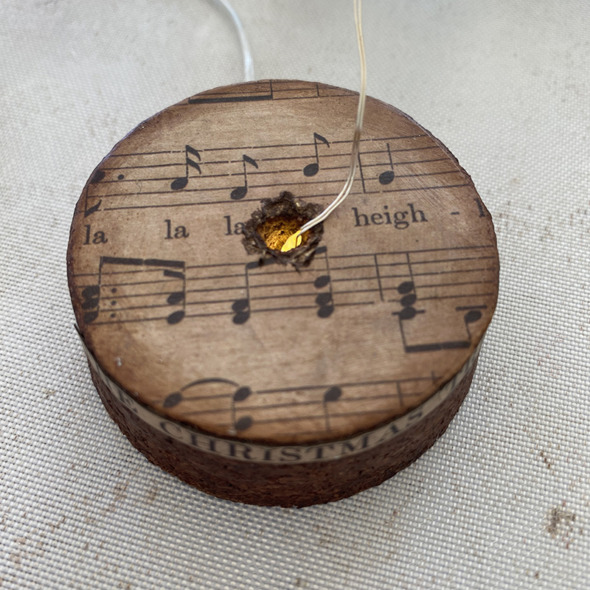
    I thread idea-ology tiny lights up through the hole and created a channel in the underside of the cork base for the wire so it sits flat.

    igirlzoe: tim holtz idea-ology christmas 2021 trees stand
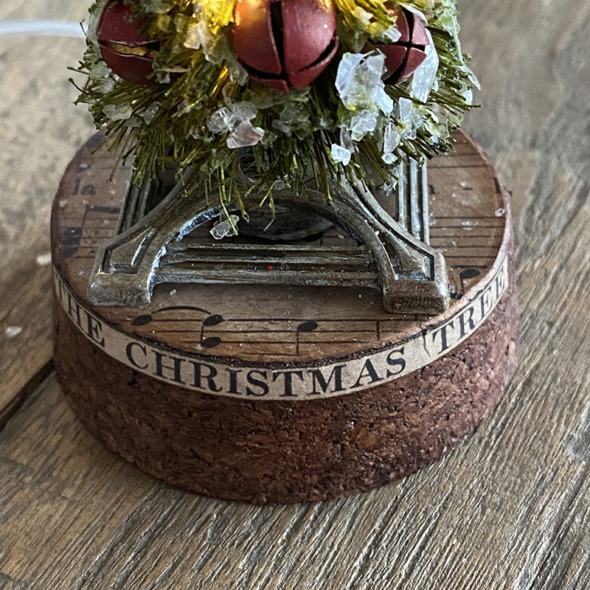
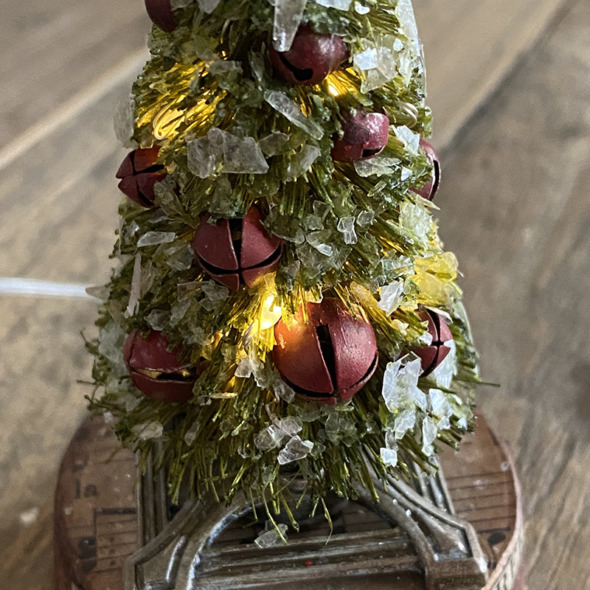
    I trimmed a piece of text from the music sheet of the idea-ology christmas backdrops and glued it around the top of the cork.

    igirlzoe: tim holtz idea-ology christmas 2021 trees stand
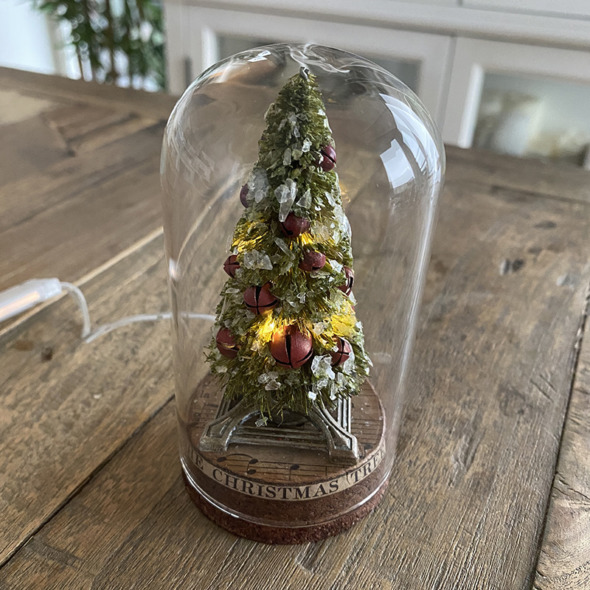
    I covered bells from the idea-ology tiny bells pack with candied apple distress paint, mixed together with a tiny bit of ground espresso distress paint. I sprayed a woodland tree with peeled paint distress spray and once dry, rubbed with distress collage medium and dipped in distress mica flakes. I pushed the bells into the tree with a dab of hot glue to hold in place.

    igirlzoe: tim holtz idea-ology christmas 2021 trees stand
    I tucked tiny lights into the tree and glued the tree stand to the cork dome base with distress collage medium.

    igirlzoe: tim holtz idea-ology christmas 2021 trees stand
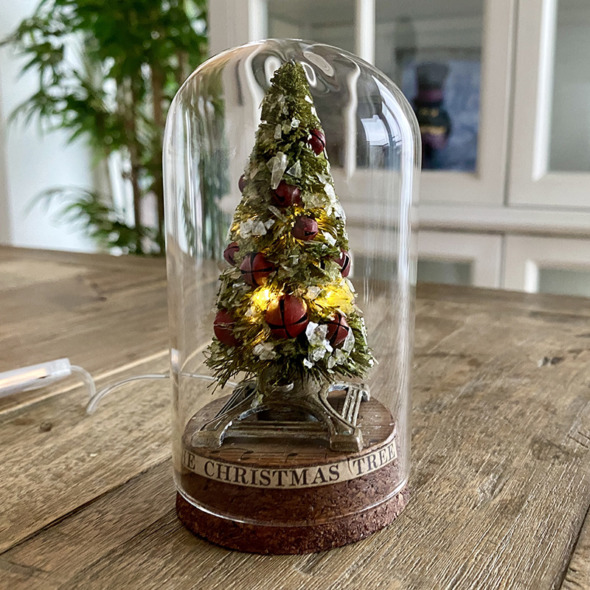
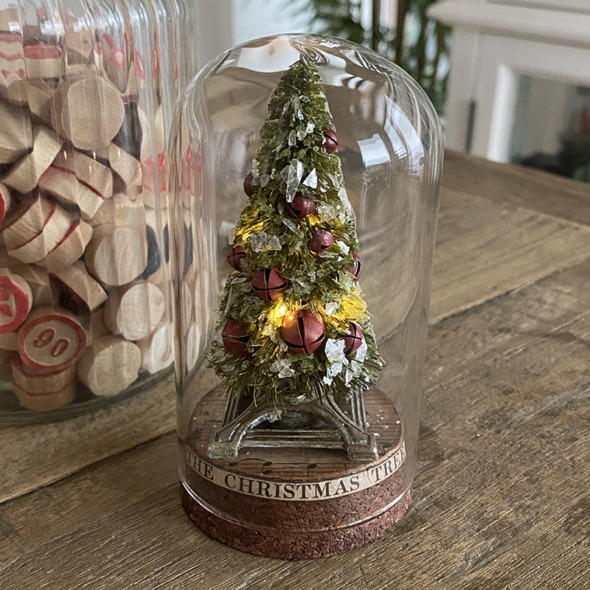
    Give the glass dome a little polish inside and out with a cloth (because dusting matters), put the glass dome on and it’s ready to display.

    igirlzoe: tim holtz idea-ology christmas 2021 trees stand
    Thanks for stopping by. I’m definitely in the mood for trees and snowy mountains now, so I’ll be back tomorrow with a little mountain magic.

    Zoe


    affiliate links used at no cost to you


  8. Witch-Craft

    5th November, 2021 by iGirlZoe

    Hello Friends and happy witching hour. Thank you so much for hanging out with me in Halloween town this week. I’m going to curl up in a big comfy chair with some snacks this weekend and read the comments and answer any questions. Today I’m sharing the last of my Halloween makes. This one I made for the Tim Holtz idea-ology Halloween LIVE launch, you can check out the replay over on Tim’s blog.
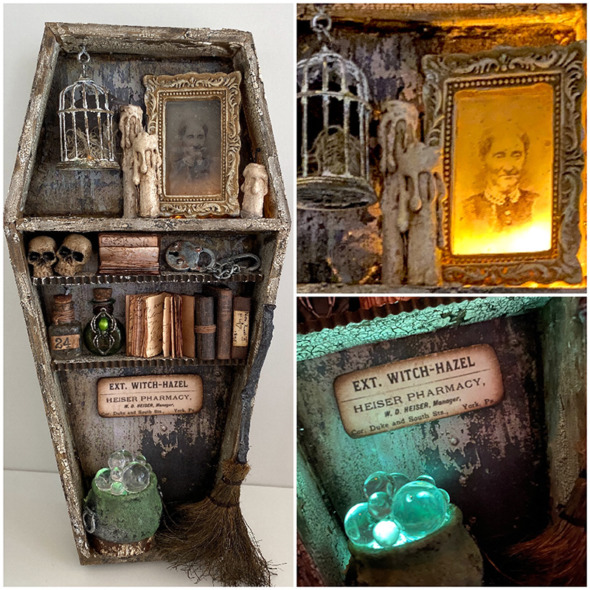

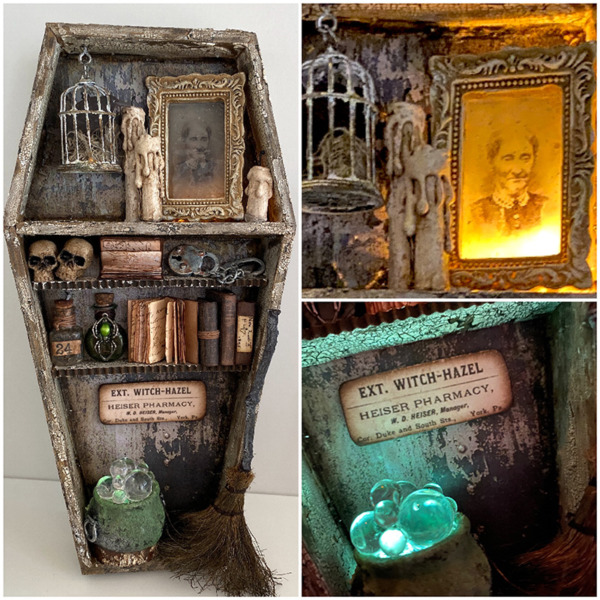
    This is a long blog post as I’ve tried to include how to’s where I can, so you may want to curl up in big comfy chair with some snacks too.
    igirlzoe: tim holtz idea-ology halloween 2021 witch
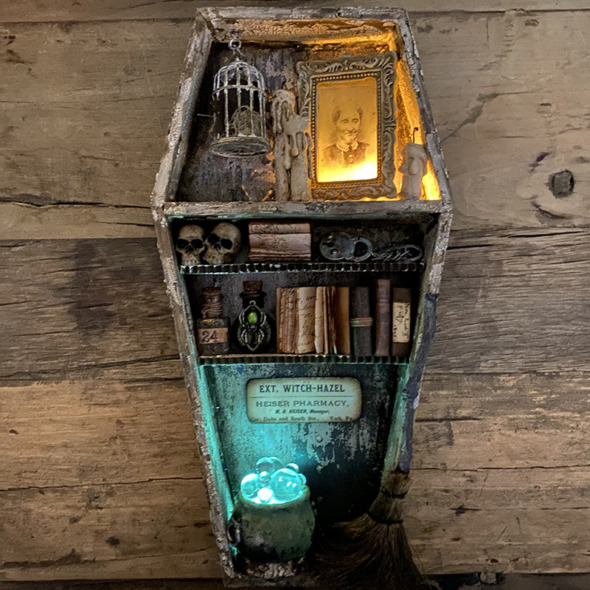
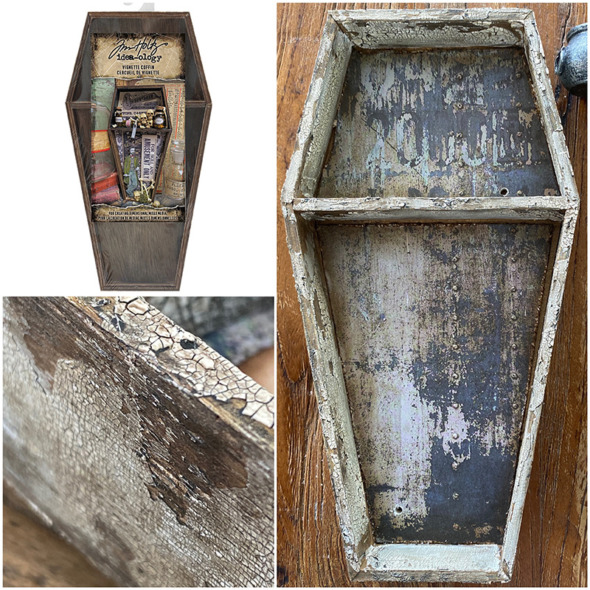
    For the surface I chose a vignette coffin from the idea-ology halloween line. Here’s how I altered it…
    igirlzoe: tim holtz idea-ology halloween 2021 witch
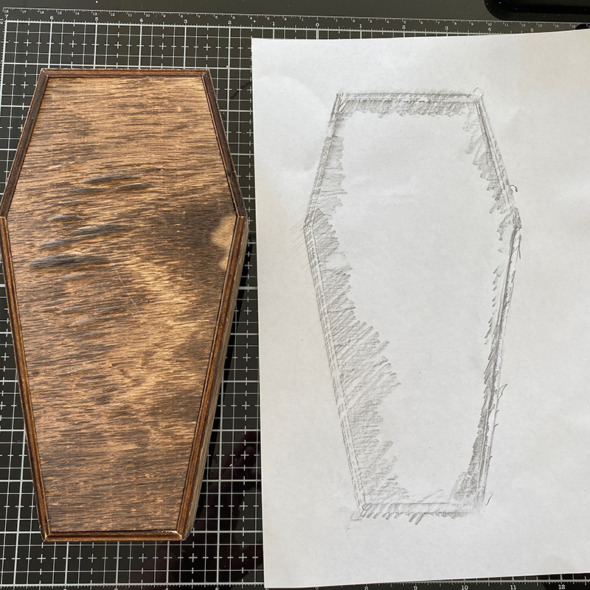
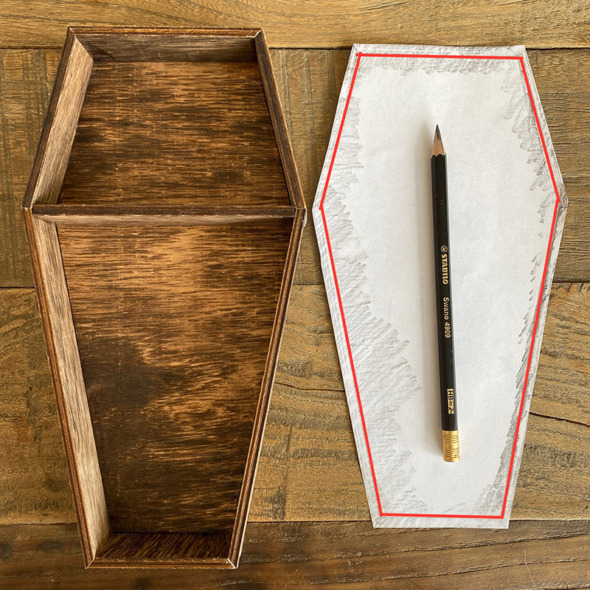
    Turn the vignette coffin over and take a “brass” rubbing from the back of it. You do this by placing a piece of copy paper over the top of the vignette and using the side of your pencil, gently rub around the edge of the vignette coffin.
    igirlzoe: tim holtz idea-ology halloween 2021 witch
    Cut the template on the inside line (marked in red). This is the inside measurement of the vignette, trim to fit inside your vignette coffin and you will have a template to trace around to cut your background paper from.
    igirlzoe: tim holtz idea-ology halloween 2021 witch
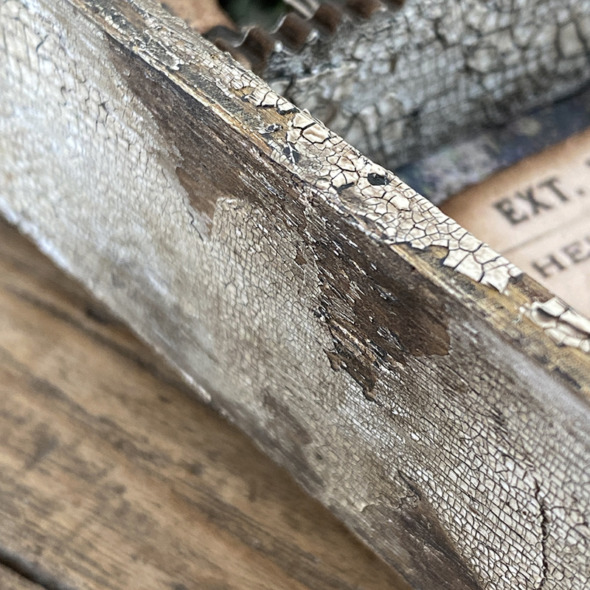
    I distressed the inside and outside edges by covering with a layer of white gesso and allowing to dry before adding vintage photo distress paint. Once dry I added distress crackle texture paste and set aside to dry and crack. Finally I rubbed in walnut stain distress crayon.
    igirlzoe: tim holtz idea-ology halloween 2021 witch
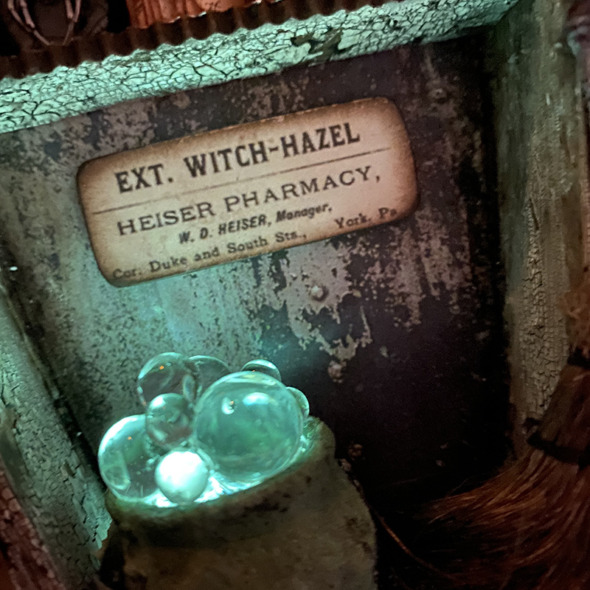
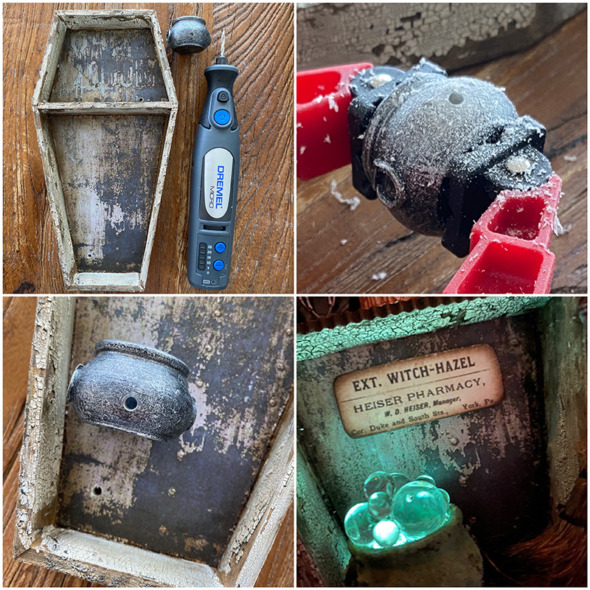
    To light up the cauldron, I drilled a small hole in the side of it using a dremel mirco tool with drill bit attachment. I also drilled a hole in the back of the vignette coffin where I wanted to thread the lights in from the back and into the base of the cauldron to up light the bubbles.
    igirlzoe: tim holtz idea-ology halloween 2021 witch
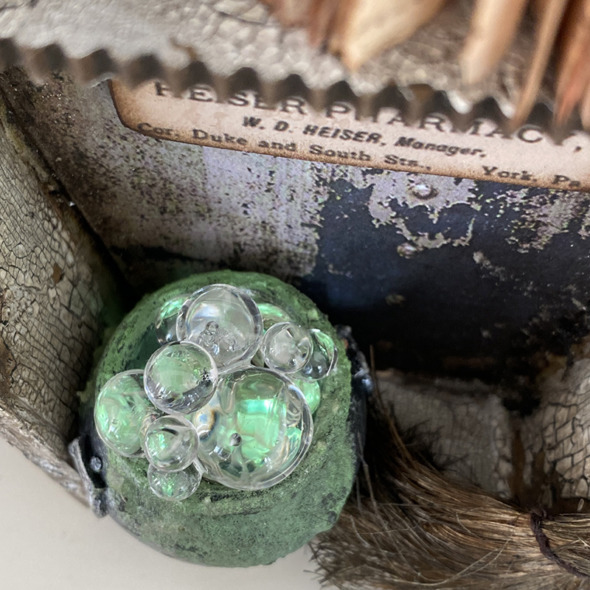
    I added distress grit-paste to the cauldron and once dry, painted with mowed lawn distress paint and dirtied up by rubbing in black soot distress crayon. I glued the green set of halloween tiny lights into the base of the cauldron and added bubbles over the top, gluing them to each other with glossy accents and not collage medium. The collage medium is matt and will make the bubbles matt too, so glossy accents for the clear bubbles.
    igirlzoe: tim holtz idea-ology halloween 2021 witch
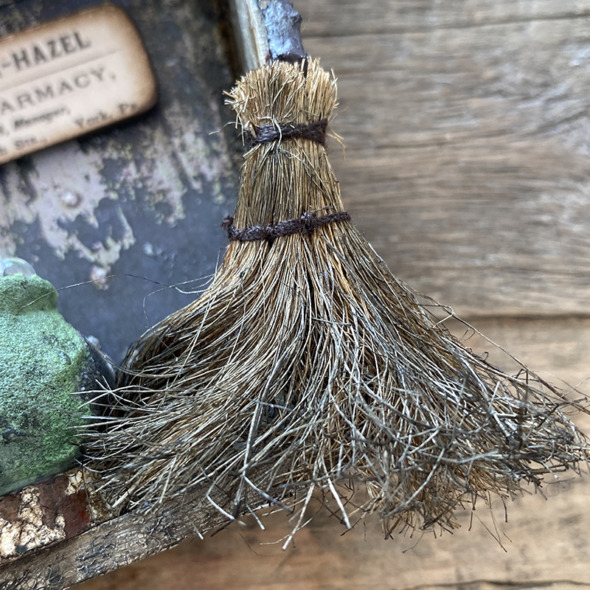
    I didn’t want the distress collage medium to feel pushed out, so I used some on this broom and then smashed it on my media mat to make it all gnarly. The collage medium sets and the brush stays in place. This was inspired by a broom that the awesome Stacy Hutchinson did a couple of Halloween moons ago.
    igirlzoe: tim holtz idea-ology halloween 2021 witch
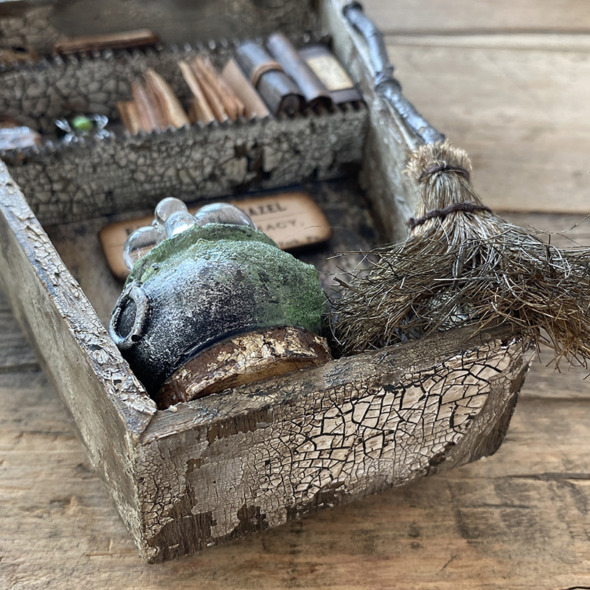
    I used a wood slice from the idea-ology Christmas line to raise the cauldron a little, purely for aesthetic reasons.
    igirlzoe: tim holtz idea-ology halloween 2021 witch
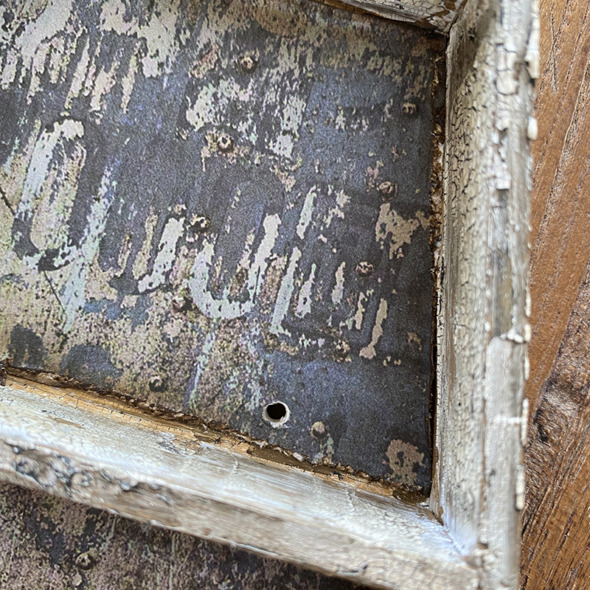
    I drilled another hole in the coffin, this time in the top, just above the fixed shelf. I thread white tiny lights through the back and glued in place in the corner. That gorgeous grungy paper is from the Halloween backdrops. I LOVE this new paper format and the paper designs are SO freaking awesome.
    igirlzoe: tim holtz idea-ology halloween 2021 witch
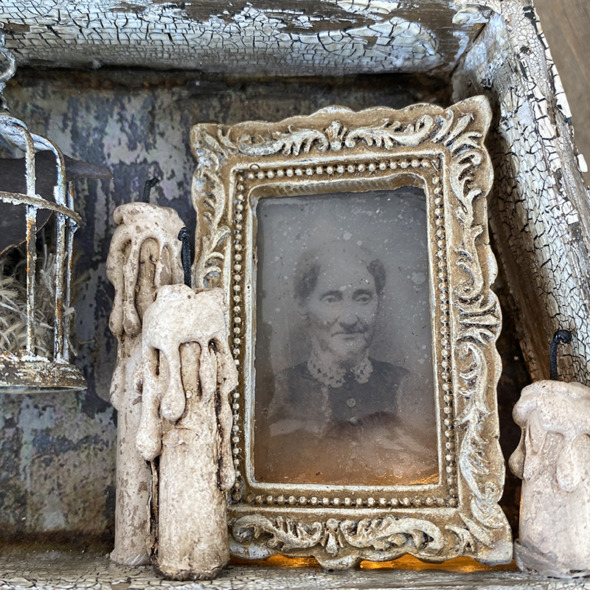
    I altered one of the new gothic frames by covering with white gesso and once dry, covering with vignette photo distress paint and wiping the paint off the raised molding of the frame. I rubbed a little distress crayon in when it was dry.

    I used one of the photo stickers from the curiosities sticker book to create a ghostly backdrop to the gothic frame. I covered the photo sticker with a piece of clear packing tape. You need to burnish it, which means rub the tape firmly with your finger so the tape has full contact with the photo sticker. This is because you are going to remove the paper part of the sticker with water.

    Turn the photo over and spritz the back with water and start gently rubbing the back of the photo with your finger, adding more water as required. The paper will pill and come away as you rub. Eventually you rub away all the paper and are left with the ink on the clear tape. I added a little collage medium to the back to give a smokey effect.
    igirlzoe: tim holtz idea-ology halloween 2021 witch
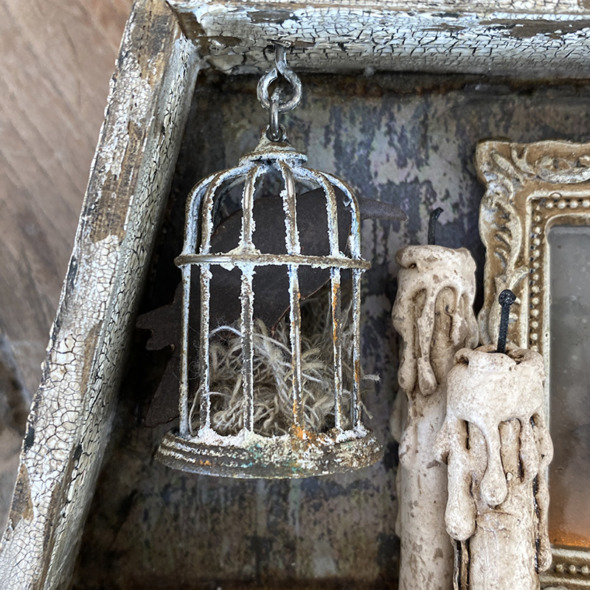
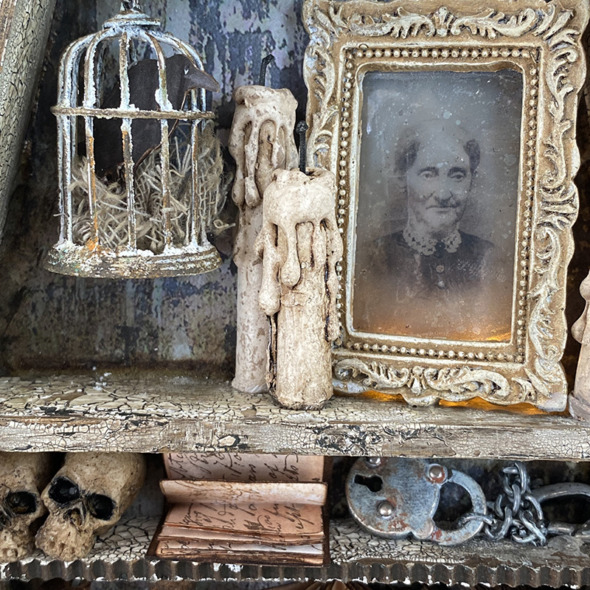
    I LOVE the new birdcage. I covered this one with distress grit-paste, added a little distress paint here and there, some distress crayon and slid in some mummy cloth and a black crow from the ephemera pack. You have to look carefully to see the crow, but he’s there. I added his eye with a dot from a white posca pen. The drippy candles are as they came. They need nothing doing to them at all, they are simply awesome out of the packet!
    igirlzoe: tim holtz idea-ology halloween 2021 witch
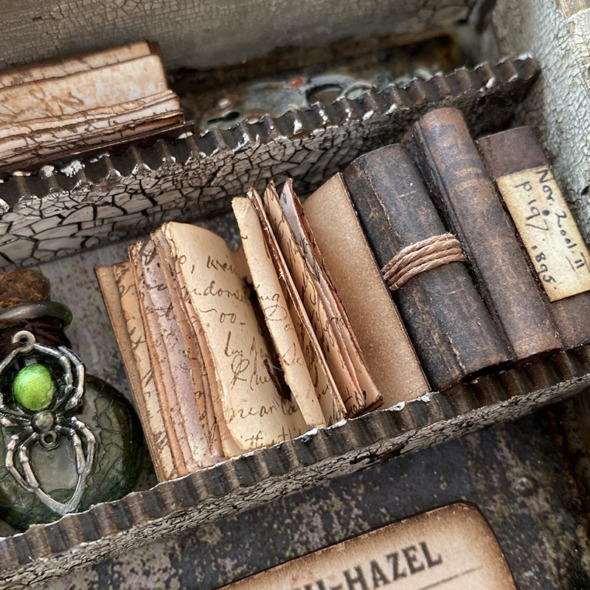
    One of my favourite things from the halloween idea-ology release (and there were many) were these book covers that come in the ephemera pack! Oh my!! I would LOVE LOVE LOVE to have a pack of just book covers… Dear Santa… that would be worth being good for!
    igirlzoe: tim holtz idea-ology halloween 2021 witch
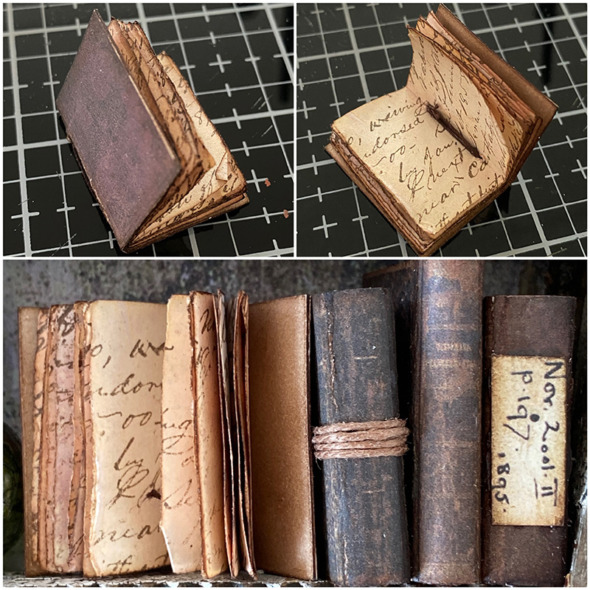
    I sprayed some inexpensive printer paper with tea dye distress spray and water and dried with a heat tool. Cut to fit the book cover and folded in half, pierced 2 holes in the center with a pokey tool and sewed with thick thread. I folded the book cover in half and glued the stitched pages into the spine of the book cover. I used pieces from the ephemera pack on the spine of one of the books and wrapped another with twine. I LOVE them so much.
    igirlzoe: tim holtz idea-ology halloween 2021 witch
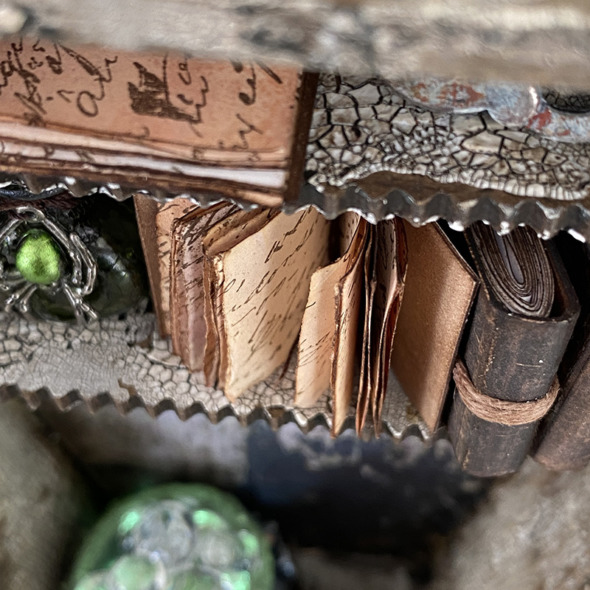
    I added a couple of extra shelves by cutting scallop edged etcetera thickboard trims to size. Adding distress crackle texture paste and gluing into place.
    igirlzoe: tim holtz idea-ology halloween 2021 witch
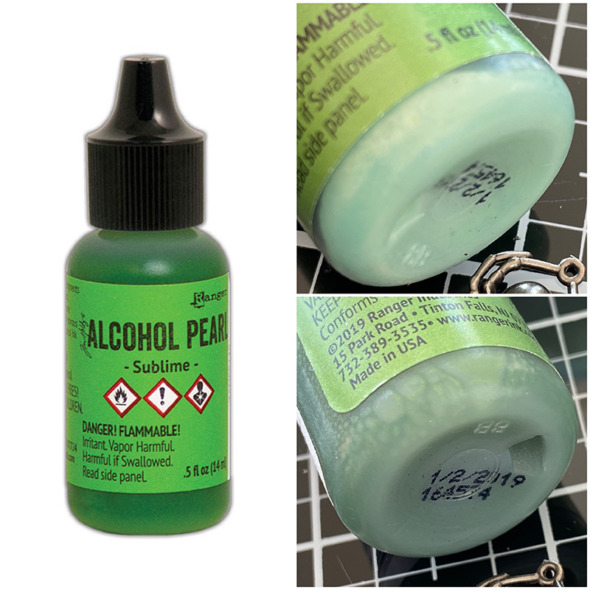
    I used sublime alcohol pearl colour on the back of the spider adornment. You need to give the alcohol pearl bottle a really good shake. I lightly tap the side of the bottle on my desk between shaking to help release the mixing ball which does get stuck to the bottom, especially if your bottle has been sat for a while. Keep tapping lightly and shaking until the mixing ball is released (you’ll hear when it happens) and then shake until the bottom of the bottle is clear of settled pearl as above.
    igirlzoe: tim holtz idea-ology halloween 2021 witch
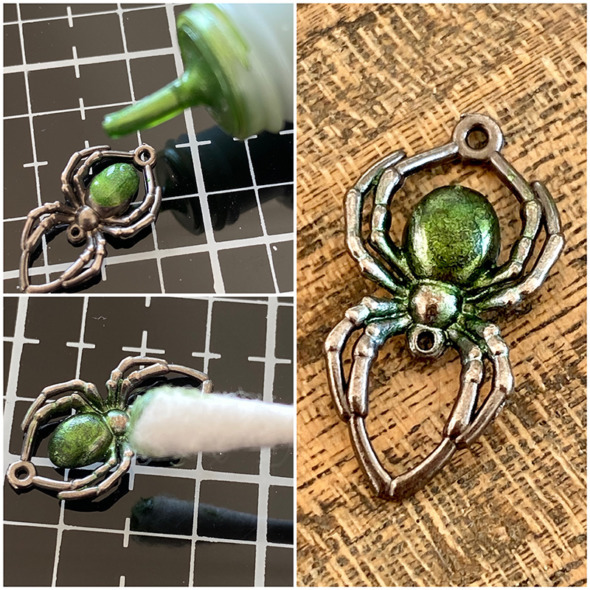
    Drop a single drop of sublime** alcohol pearl onto an adornment spider from the skull and spider adornments pack. If you cover any other part of the spider, add a drop of alcohol blending solution to a cotton bud and wipe away.

    ** the alcohol pearl shown above is “envy” the pearl shown below and on the actual make is “sublime” I chose the wrong pearl when I was recreating the step out for someone in the Tim Holtz Addicts group.
    igirlzoe: tim holtz idea-ology halloween 2021 witch
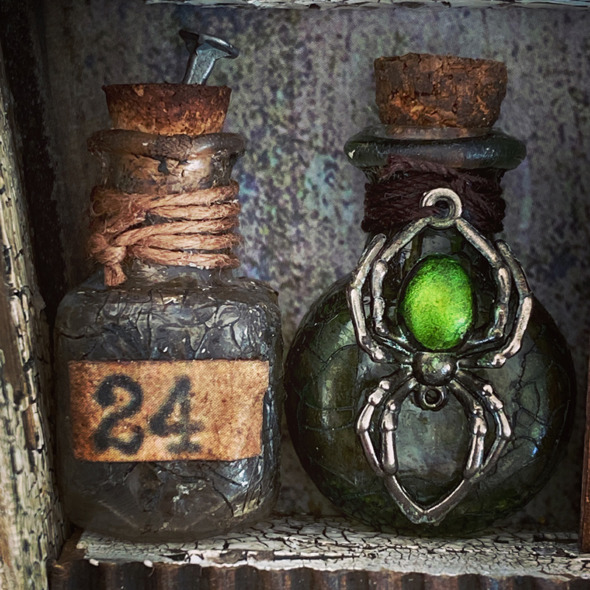
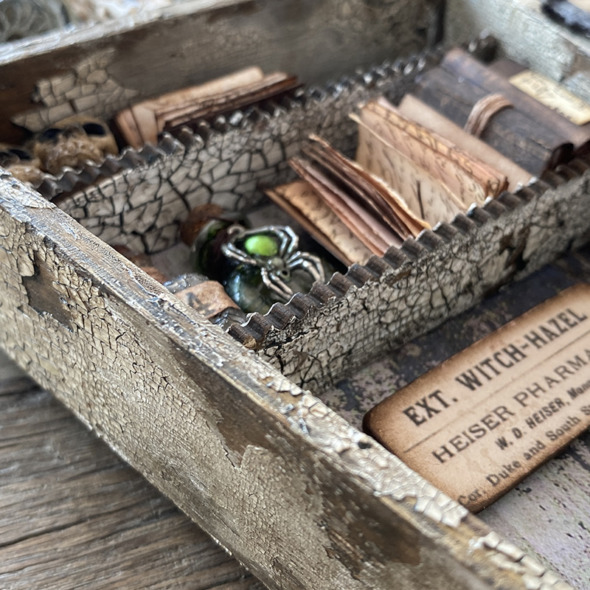
    I have not used any filter or editing for that spider. The sublime alcohol pearl is really that vibrant! It’s wicked right?! I added a couple of tiny corked vials and a label from the ephemera pack. I added a stake from the vignette hardware pack. I LOVE these, they’re so vampire! The bottles are covered in distress rock candy crackle paint. You can see how on my pumpkin pumpkin post.
    igirlzoe: tim holtz idea-ology halloween 2021 witch
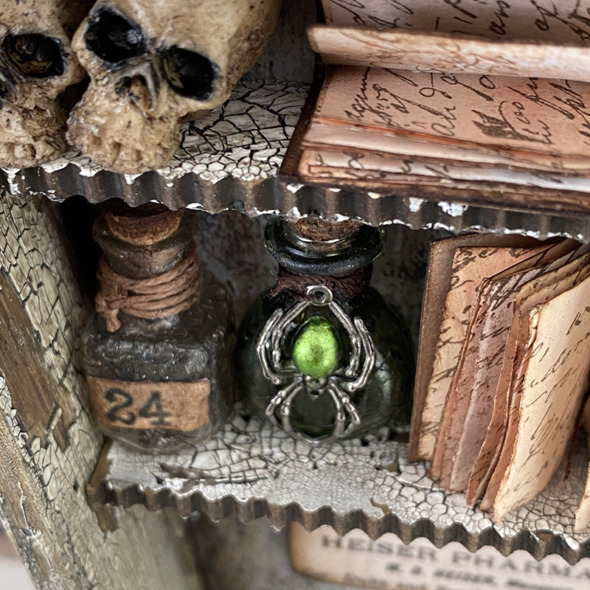
    I love these shelves to add trinkets to, and of course a couple of skulls from the skull and pumpkin pack, with a little black soot distress paint brushed into the eye sockets.
    igirlzoe: tim holtz idea-ology halloween 2021 witch
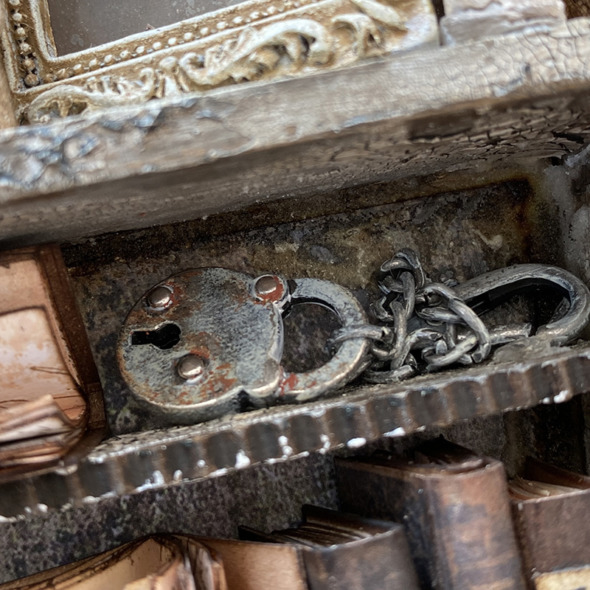
    I grunged up a lock from the lock and keys adornments pack by adding distress grit paste and crackling campfire distress paint and a little white gesso. Attached to the chain of a hook clasp, glued to the shelf.
    igirlzoe: tim holtz idea-ology halloween 2021 witch
    igirlzoe: tim holtz idea-ology halloween 2021 witch
    igirlzoe: tim holtz idea-ology halloween 2021 witch
    igirlzoe: tim holtz idea-ology halloween 2021 witch
    I hope you’ve enjoyed this walk through of my witchy vignette coffin. I think you’ll agree that Tim designed the most EPIC idea-ology Halloween line. A huge thanks to Tim, Mario and Paula for all their support and encouragement. It was a lot of fun making this and they gave me some great tips and advice and you couldn’t ask for a better cheer squad.

    Thanks so much to you for joining me this week and I hope you are enjoying making in whichever season your heart desires.

    If you haven’t seen, Tim has announced his Holiday 2021 demo series. Join Tim on his YouTube channel every Saturday in November! I can’t wait.

    Zoe


    affiliate links used at no cost to you


  9. The Grave Digger

    3rd November, 2021 by iGirlZoe

    igirlzoe: tim holtz idea-ology halloween 2021

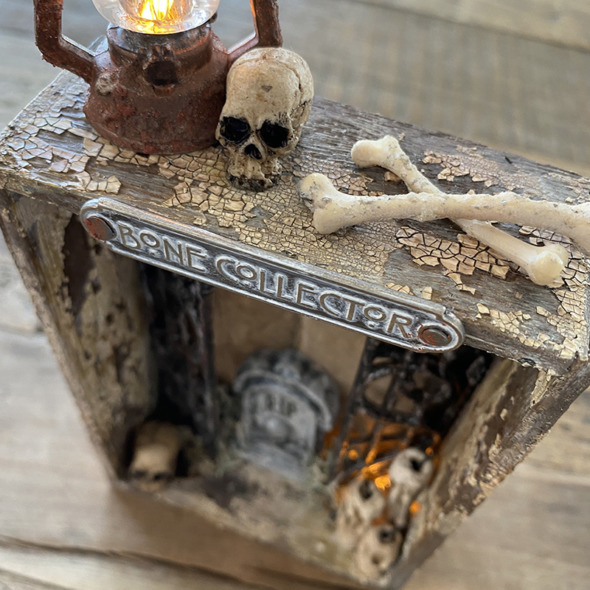
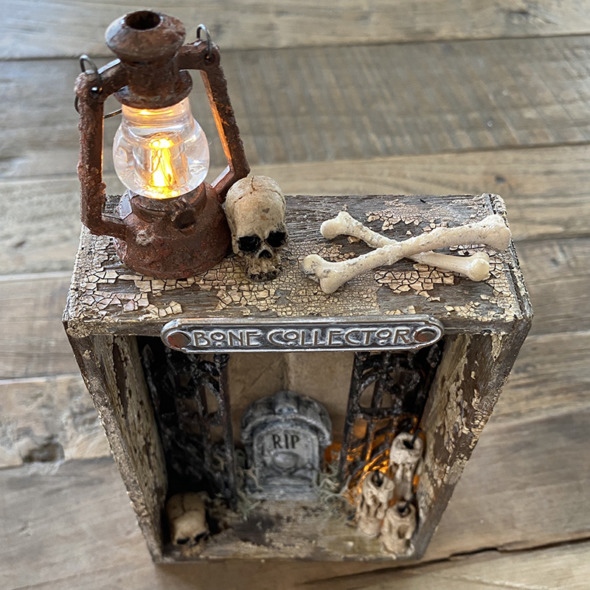
    Hello friends. Sill with me on this Halloween train? Day 3 and it’s getting dark… Fortunately the new idea-ology lantern has thrown some light on the situation. If you want to see the AWESOME (I’m still happy dancing over how freaking good it is), Halloween idea-ology, head over to Halloween Town on Tim Holtz Blog… beware the grave digger!

    igirlzoe: tim holtz idea-ology halloween 2021
    I know that because of the global shipping situation, seasonal products are still arriving. There is no reason for you not to use and enjoy them now, next month, next year! I made this in July when it was 90 degrees and nothing like Halloween outside. Remember, the creativity is in you, not in the season! Makers gonna make! 😉

    igirlzoe: tim holtz idea-ology halloween 2021
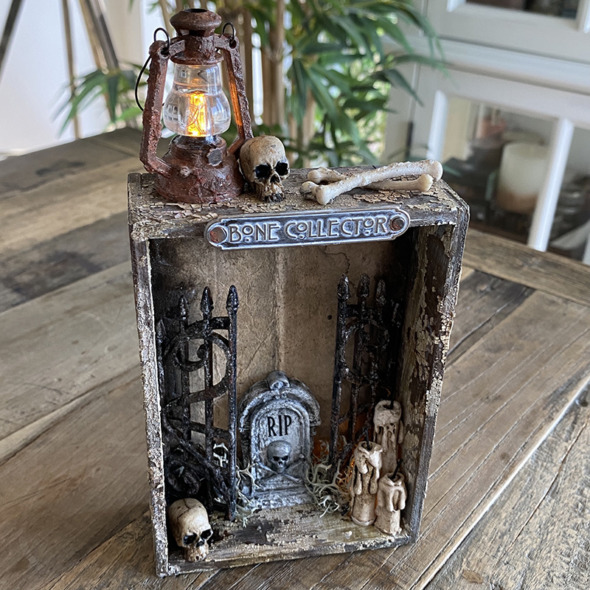
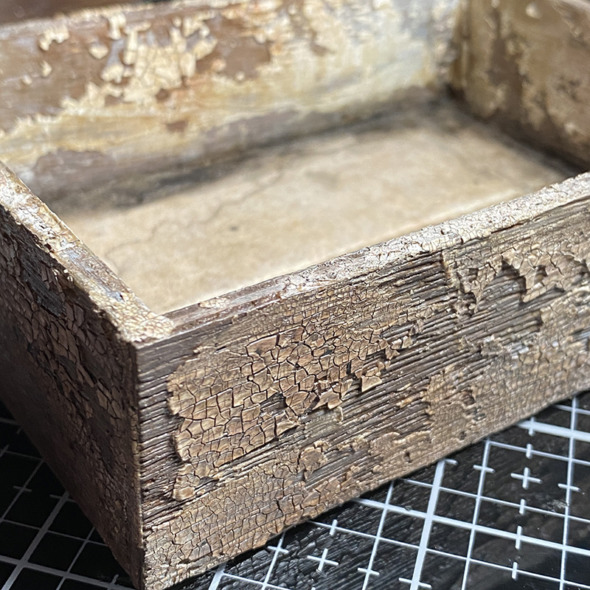
    Take the largest vignette box from the idea-ology vignette box pack and cover with a watered down layer of frayed burlap distress paint. Once dry, cover in distress crackle texture paste and set aside to dry and crack. Spray with antique linen and frayed burlap distress oxide sprays and once dry cover with a layer of vintage distress collage medium.

    igirlzoe: tim holtz idea-ology halloween 2021
    I covered a halloween word plaque with picket fence distress crayon and mounted with stakes from the idea-0l0gy vignette hardware pack which I hammered in! I actually added this last so I was hammering very very carefully!! I LOVE the maker adrenaline rush!

    igirlzoe: tim holtz idea-ology halloween 2021
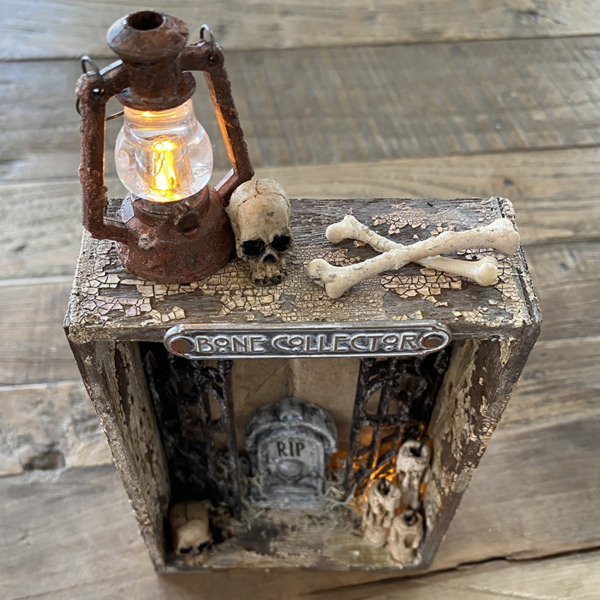
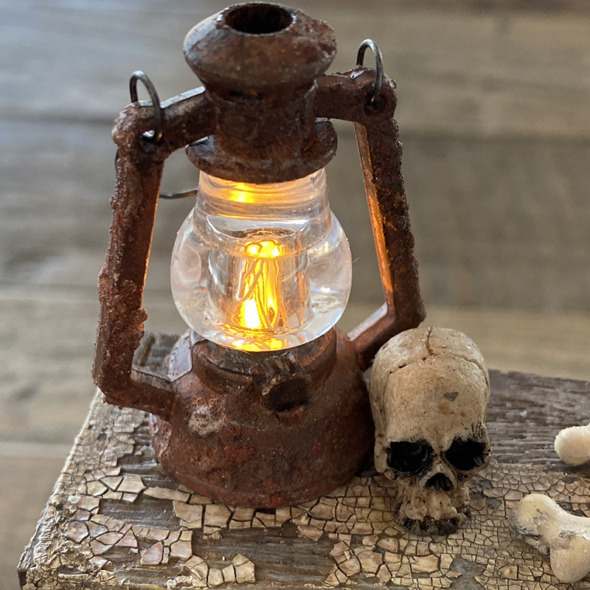
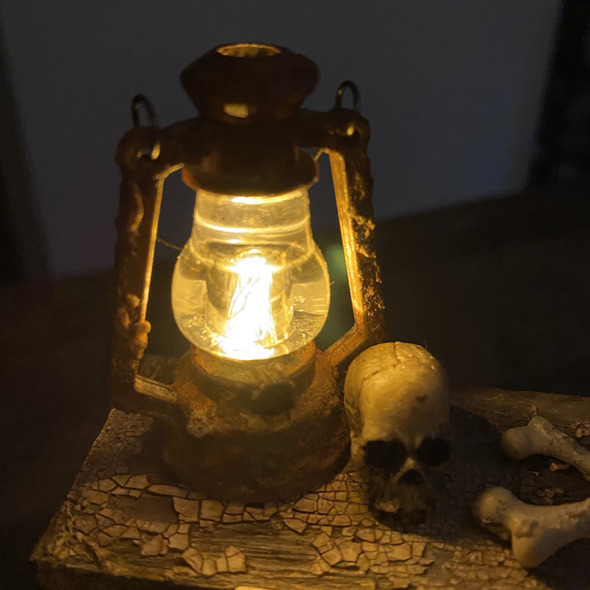
    The new idea-ology lantern was one of those products that made me gasp when Tim showed it to us all during the makers call. Of course I had to rust mine up using the usual suspects… distress grit-paste, crackling campfire and ground espresso distress paint and distress crayons.

    igirlzoe: tim holtz idea-ology halloween 2021
    The lantern has a notch in the back for the tiny light wires to fit under. I only used 2 lights in the lantern so ran the lights down the back of the vignette box and in through a hole I drilled in the back near the base to light the inside. Tim showed how to put the tiny lights into the lantern during the LIVE. To see it, skip forward to the 57 minute mark.

    igirlzoe: tim holtz idea-ology halloween 2021
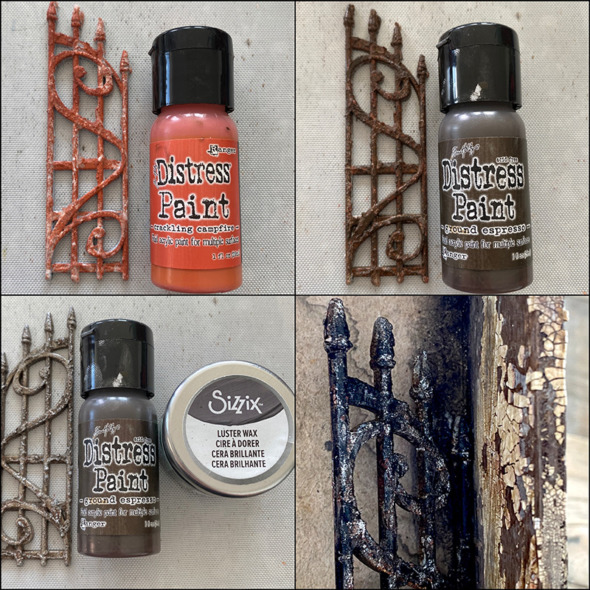
    I wanted to grunge up the new halloween ornate metal gates. I covered with a layer of distress grit-paste (not pictured) and once dry, added crackling campfire distress paint and then ground espresso distress paint, drying between layers. Finally I added a little luster wax from Sizzix which they kindly sent me to try. I like it, but I’m going to be honest, they added an orange smell and I hate it, but I wanted to give it a go and it added something to the weathered gate effect. I added a layer of black gesso over the top and rubbed off in places.

    igirlzoe: tim holtz idea-ology halloween 2021
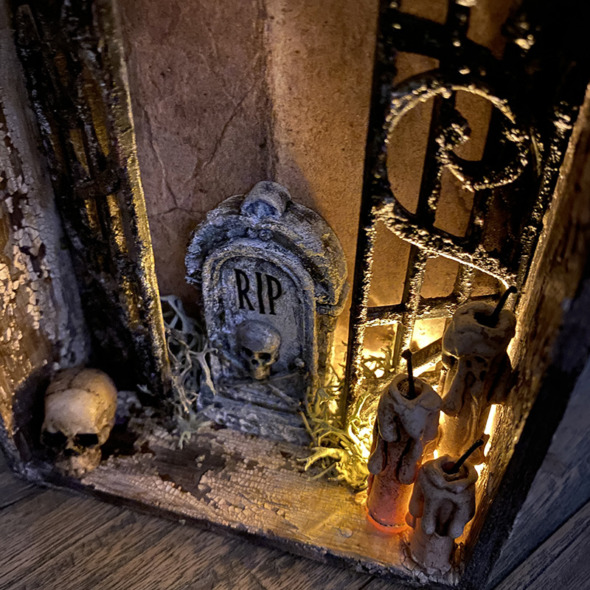
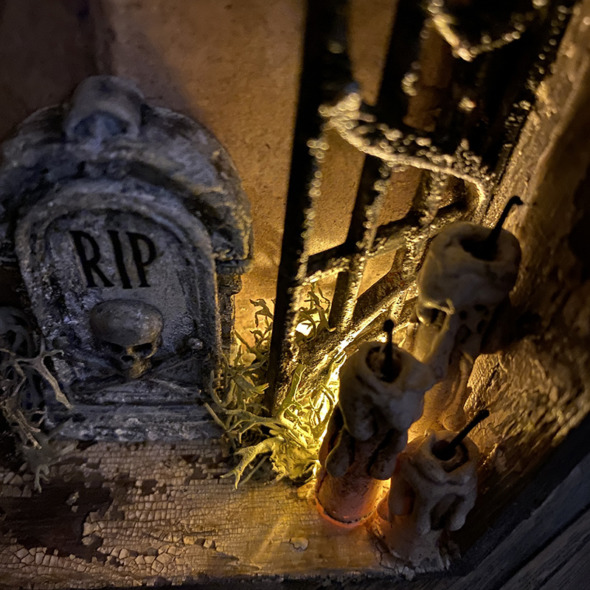
    I mounted the gates using distress collage medium. Don’t use too much and walk away and let it dry. DO NOT WIGGLE TO SEE IF IT’S STUCK DOWN! LOL You can see the extra tiny lights that I fed in through the back of the vignette. I used some mummy cloth soaked in frayed burlap distress oxide spray and creepy moss to hide the lights and wire. They gave a nice glow to the idea-ology drippy candles that I added. I LOVE THESE! I desperately hope they come back next year.

    igirlzoe: tim holtz idea-ology halloween 2021
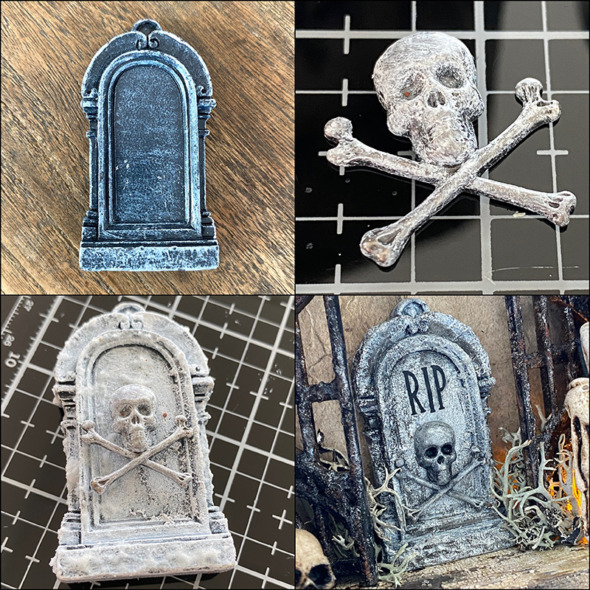
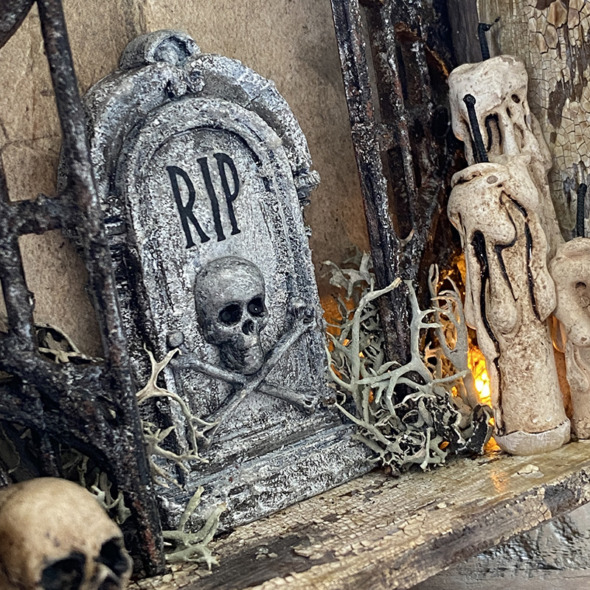
    I altered one of the new idea-ology tombstones and I was really pleased with the result. I covered a tombstone and skull from the skulls and spiders adornments kit with white gesso and once dry with distress opaque grit-paste. I glued the skull to the tombstone, it fits like it was made to! So clever Tim!! I painted all over with hickory smoke distress paint. Dried and added cypt paste and dry brushed parts with black gesso. Once dry, I repeated this with white gesso.

    Beginner Tip: Dry brushing is an almost dry paint free brush. Add a little paint to a dry paint brush and remove the excess with a paper towel. Repeat, building the colour slowly to add highlight but not a thick layer of paint.

    igirlzoe: tim holtz idea-ology halloween 2021
    I added black gesso to the skull eye sockets and nose and rubbed on some retired remnant rubs. You could add small die cut letters or cut vinyl and add that. Another option is to stamp on plain collage paper and add with collage medium. If you don’t have something, improvise, that’s always the fun and creative part for me.

    igirlzoe: tim holtz idea-ology halloween 2021
    igirlzoe: tim holtz idea-ology halloween 2021
    Thanks for stopping by and let me know if you have any questions.

    Zoe


    affiliate links used at no cost to you


  10. Pumpkin Pumpkin

    31st August, 2021 by iGirlZoe

    igirlzoe: tim holtz idea-ology halloween 2021 jack-o-lantern candy

    Hello friends. Happy last day of August. Tomorrow is the first day of my favourite quarter of the year. I’m so excited for pumpkins, chilly mornings, candles, hot chocolate, more pumpkins and lots of seasonal making. If you’ve been watching the weekly LIVES over on Tim Holtz YouTube channel, I’m sure you’re either already way down in Halloween town or planning your visit.

    igirlzoe: tim holtz idea-ology halloween 2021 jack-o-lantern candy
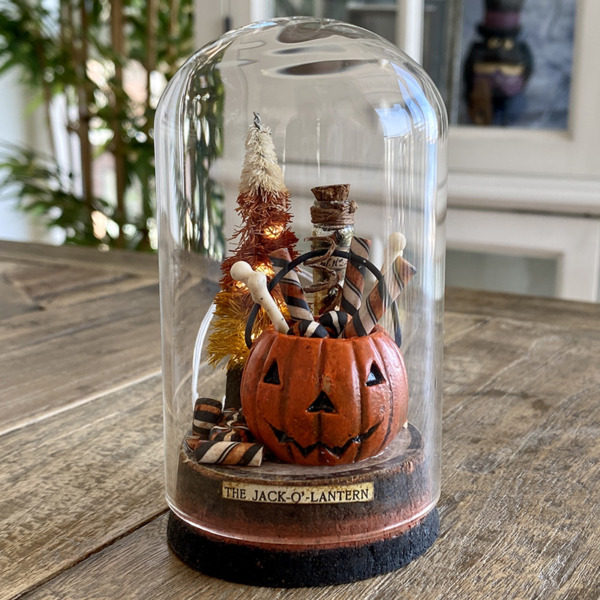
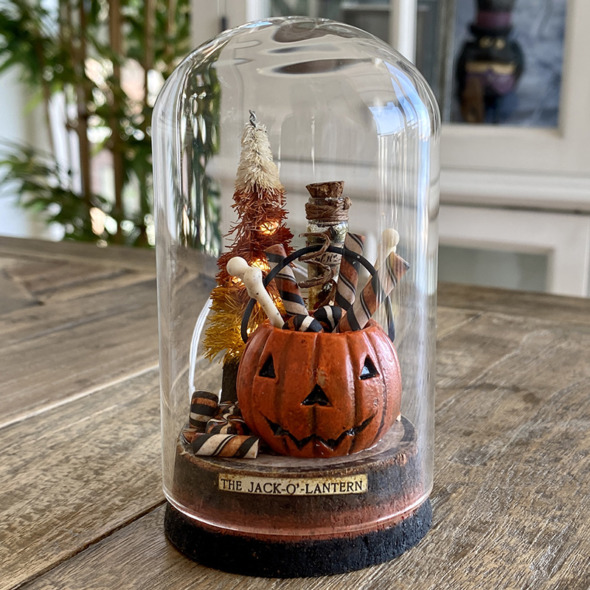
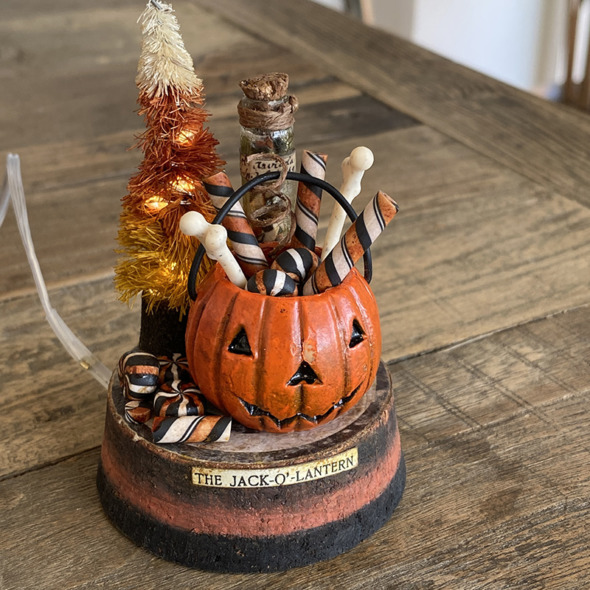
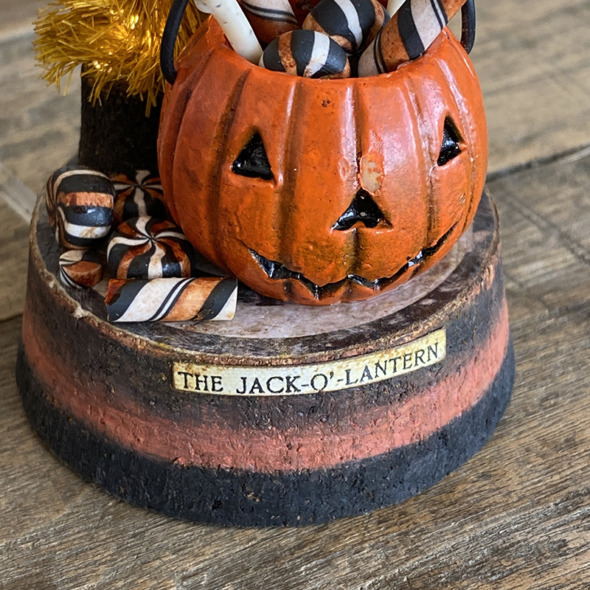
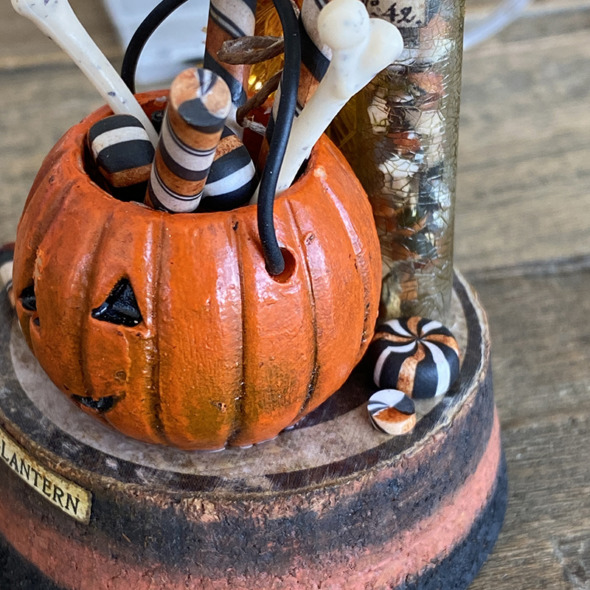
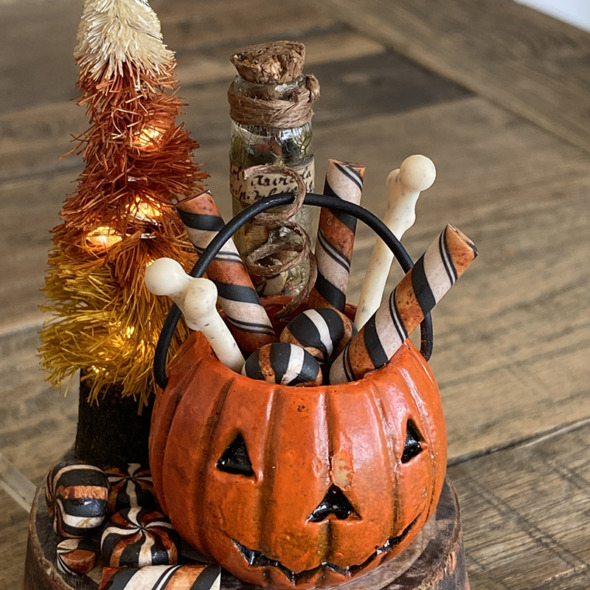
    I made this display dome for the Tim Holtz idea-ology Halloween LIVE. It was such a fun party and the products are incredible! This was my favourite ever Halloween idea-ology release and this jack-o-lantern candy bucket is hands down my favourite piece. The colour, the face, the detail, it’s heavy in your hand, you can remove the handle or have it up or down and it’s thick wire so it just stays in place. I LOVE him and I chose the display dome because I wanted to make it all about him. Scroll on for more details…
    igirlzoe: tim holtz idea-ology halloween 2021 jack-o-lantern candy
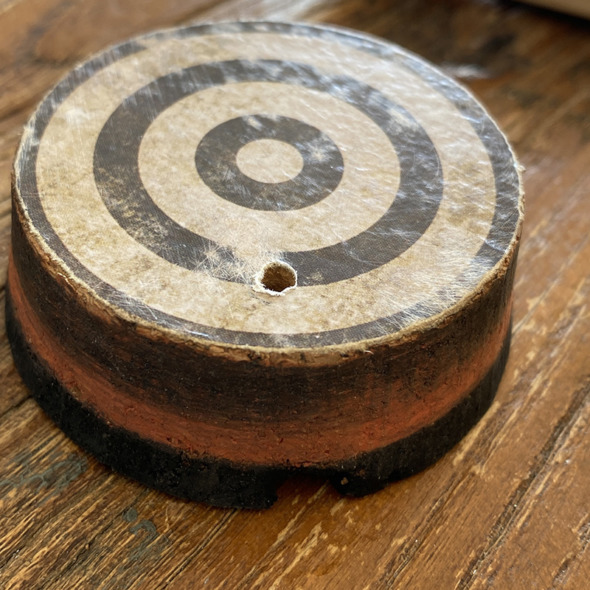
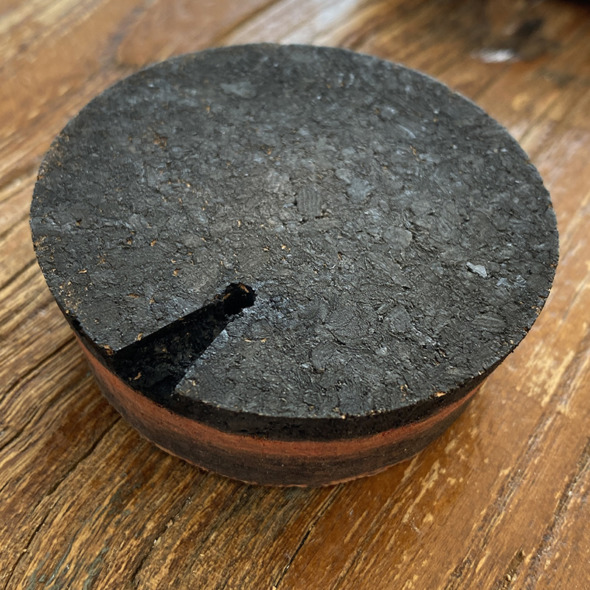
    Take a cork base from the idea-ology display dome and paint with black soot and crackling campfire distress paints. I added a piece from the idea-ology halloween baseboards pack, it was a little thicker than I wanted so peeled away a couple of layers of cardboard and stuck down with distress collage medium. Trim and sand the edges and top. Make a hole in the base big enough to thread tiny lights through. I use a dremel micro with the drill attachment.

    igirlzoe: tim holtz idea-ology halloween 2021 jack-o-lantern candy
    Using the Tim Holtz Tonic craft knife I cut a wedge from the hole to the edge for the tiny lights wire so the dome will stand flat. Add a little hot glue to hold them in place, being careful not to get hot glue on the bulbs as it can short out your lights.

    igirlzoe: tim holtz idea-ology halloween 2021 jack-o-lantern candy
    I thread the tiny lights up through the candy corn tree and cut the excess off. When I add tiny lights I always have them switched on as it helps to see where you’re putting them. The candy corn tree is an awesome idea of Tim’s from way back. You can see the step out on Tim’s blog. I used fossilized amber and rusty hinge distress sprays on mine and I skipped the glitter, because NO! My tree looks bedraggled and wonky, which is totally the look I was going for! Honest! LOL

    igirlzoe: tim holtz idea-ology halloween 2021 jack-o-lantern candy
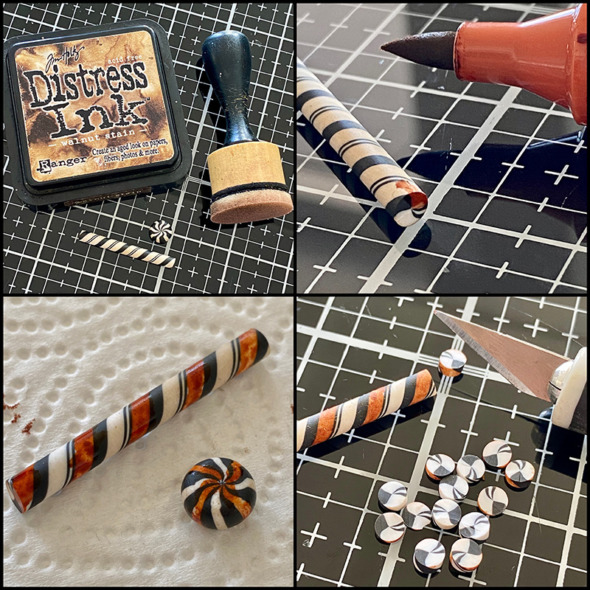
    The new idea-ology halloween confections pieces are so cool! I blended in some walnut stain distress ink and used a faber castell pitt pen (sanguine) to colour. I had planned to use alcohol inks with a blending pen but I couldn’t find my pen so I grabbed this and it worked. The ink is quite wet so I rolled it in kitchen paper to blot the excess and then took one of the confections sticks and cut it with my craft knife. It’s very soft and easy to cut. Yes I cut directly onto my glass media mat. Take a deep breath, it’s ok. 😉

    igirlzoe: tim holtz idea-ology halloween 2021 jack-o-lantern candy
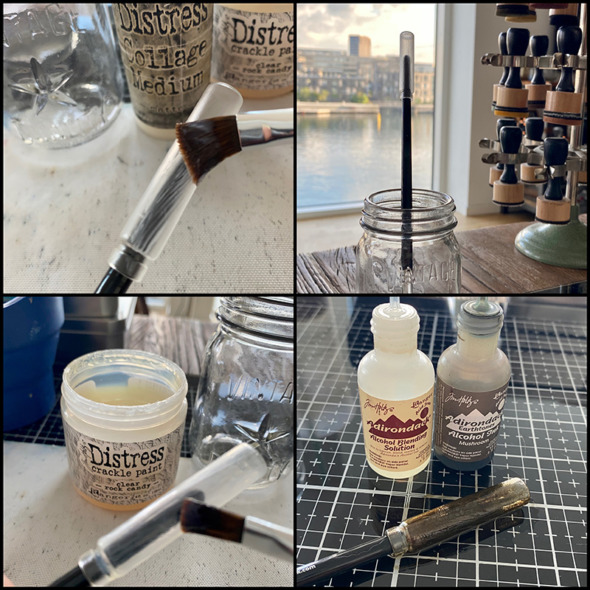
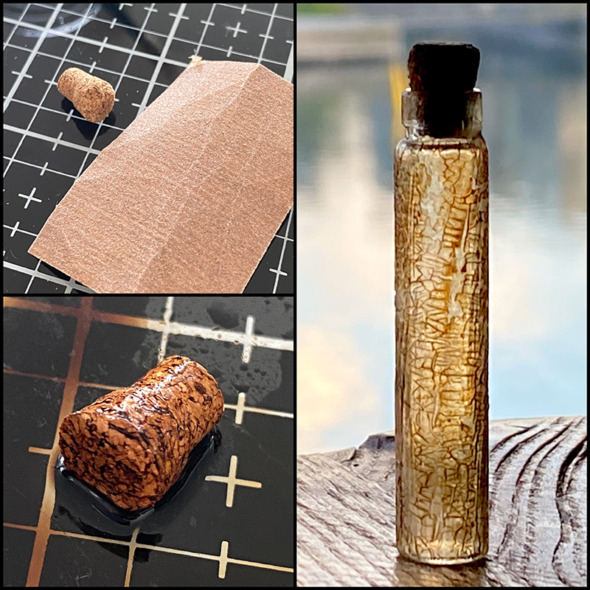
    To make the crackle glass vial for your confections slices, take vial from the idea-ology corked vials pack. Put the vial on the end of a paintbrush to hold in place and using another paintbrush cover with a light layer of distress collage medium. I stand mine in a jar to air dry. Once dry, repeat with a layer of distress clear rock candy crackle paint and set aside to dry again. Finally, add a few drops of mushroom alcohol ink and blending solution to your glass media mat to make a wash and roll the vial in it. You only want a light covering so add more blending solution as needed. Please note that alcohol ink will stain the white non stick mat so use the glass part, unless you don’t care and then go wild.
    igirlzoe: tim holtz idea-ology halloween 2021 jack-o-lantern candy
    Sand the cork and pull bits off to make it look weathered. Add walnut stain distress ink and water to your glass media mat and roll the cork in it and dry.

    igirlzoe: tim holtz idea-ology halloween 2021 jack-o-lantern candy
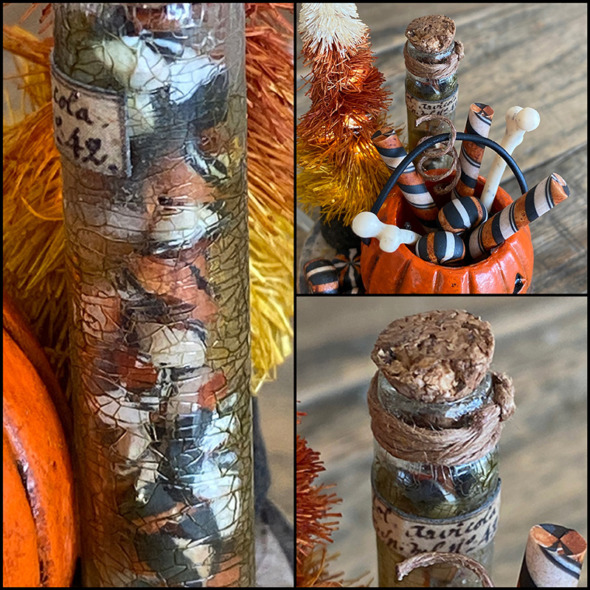
    Add the confections slices to a tall glass vial and add twine and a label from the idea-ology halloween snippets pack. Glue onto the display dome base with distress collage medium.

    igirlzoe: tim holtz idea-ology halloween 2021 jack-o-lantern candy
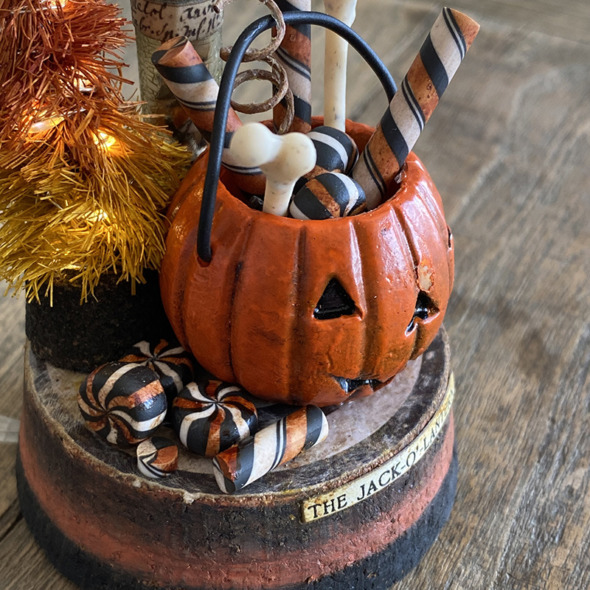
    Add a few of the candy pieces on the base of the display dome next to the jack-o-lantern candy bucket.

    igirlzoe: tim holtz idea-ology halloween 2021 jack-o-lantern candy
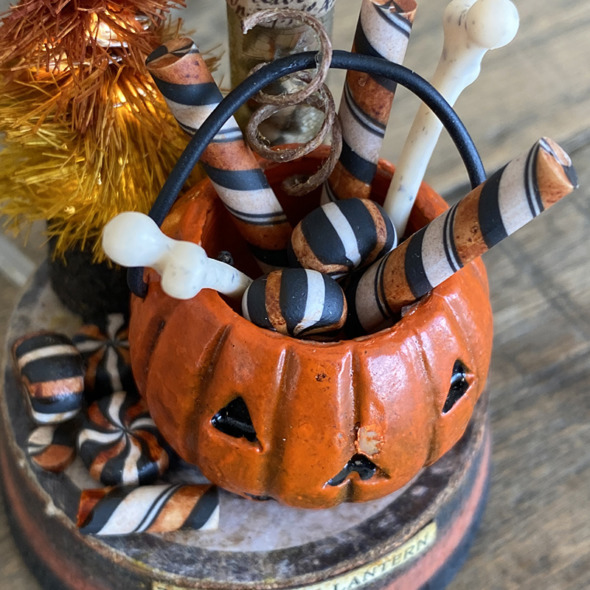
    Add idea-ology boneyard bones and confections pieces to the jack-o-lantern candy bucket and glue into place with distress collage medium.

    igirlzoe: tim holtz idea-ology halloween 2021 jack-o-lantern candy
    This sticker from the idea-ology curiosities sticker book was perfect.

    igirlzoe: tim holtz idea-ology halloween 2021 jack-o-lantern candy
    I added a couple more confections pieces to the other side of the jack-o-lantern candy bucket but wanted the baseboard piece to still show.

    igirlzoe: tim holtz idea-ology halloween 2021 jack-o-lantern candy
    I want to thank Tim, Mario and Paula for all of their encouragement and support. I really found a lot of joy making for this launch and much of it was thanks to them. You will never have a better cheer squad and I am very thankful for them and for all of you who make this community so jack-o-lantern candy bucket filled awesome!
    Thanks for stopping by

    Zoe


    affiliate links used at no cost to you