‘Halloween’ Category

  1. The Grave Digger

    3rd November, 2021 by iGirlZoe

    igirlzoe: tim holtz idea-ology halloween 2021

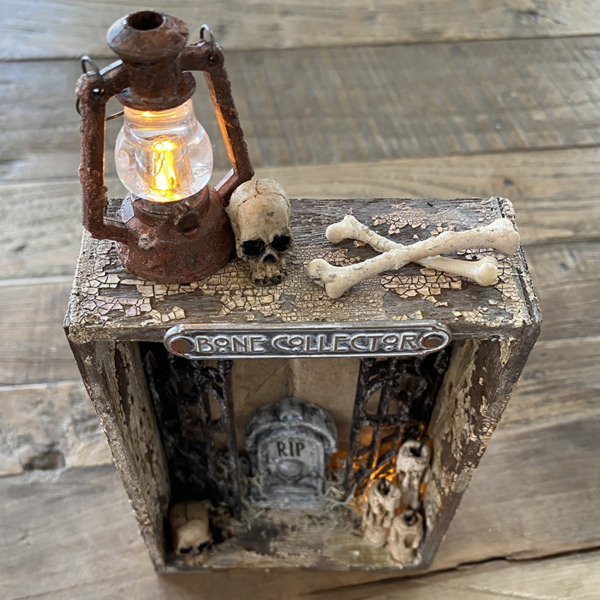
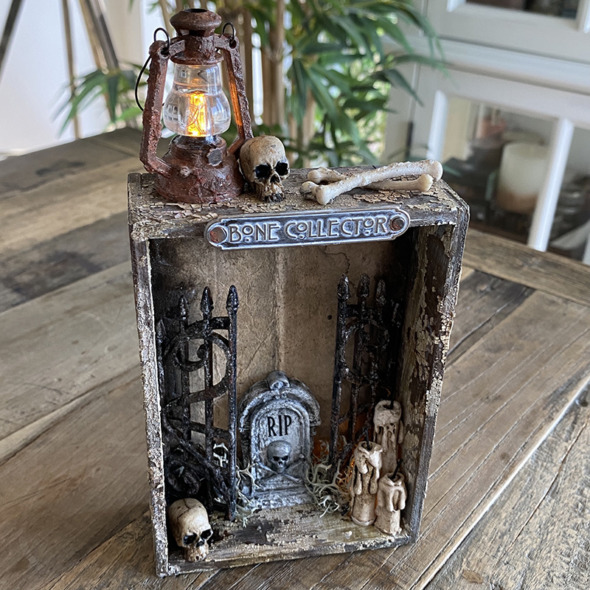
    Hello friends. Sill with me on this Halloween train? Day 3 and it’s getting dark… Fortunately the new idea-ology lantern has thrown some light on the situation. If you want to see the AWESOME (I’m still happy dancing over how freaking good it is), Halloween idea-ology, head over to Halloween Town on Tim Holtz Blog… beware the grave digger!
    igirlzoe: tim holtz idea-ology halloween 2021
    I know that because of the global shipping situation, seasonal products are still arriving. There is no reason for you not to use and enjoy them now, next month, next year! I made this in July when it was 90 degrees and nothing like Halloween outside. Remember, the creativity is in you, not in the season! Makers gonna make! 😉
    igirlzoe: tim holtz idea-ology halloween 2021
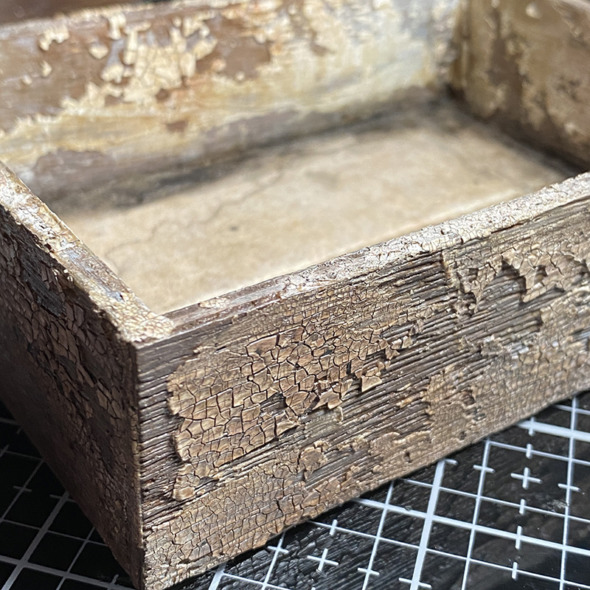
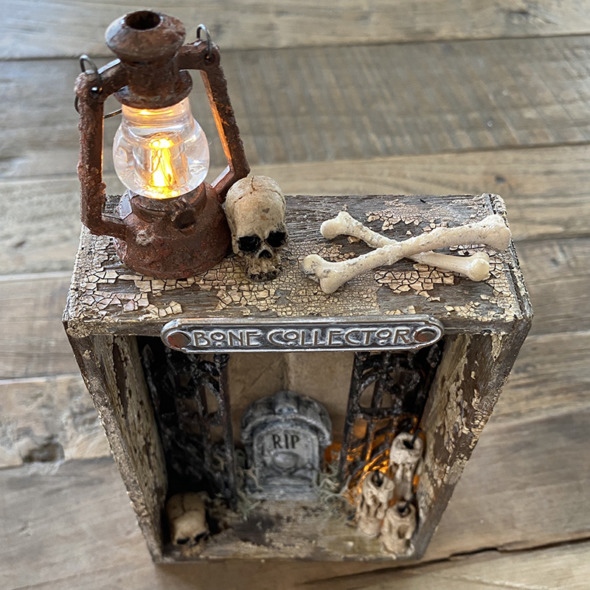
    Take the largest vignette box from the idea-ology vignette box pack and cover with a watered down layer of frayed burlap distress paint. Once dry, cover in distress crackle texture paste and set aside to dry and crack. Spray with antique linen and frayed burlap distress oxide sprays and once dry cover with a layer of vintage distress collage medium.
    igirlzoe: tim holtz idea-ology halloween 2021
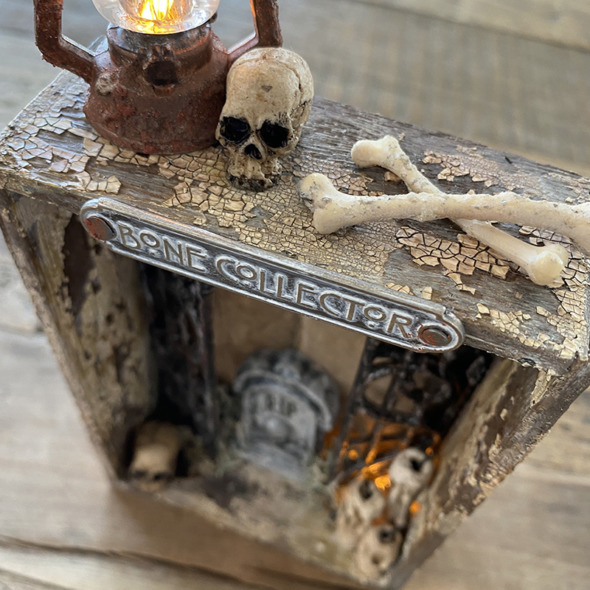
    I covered a halloween word plaque with picket fence distress crayon and mounted with stakes from the idea-0l0gy vignette hardware pack which I hammered in! I actually added this last so I was hammering very very carefully!! I LOVE the maker adrenaline rush!
    igirlzoe: tim holtz idea-ology halloween 2021
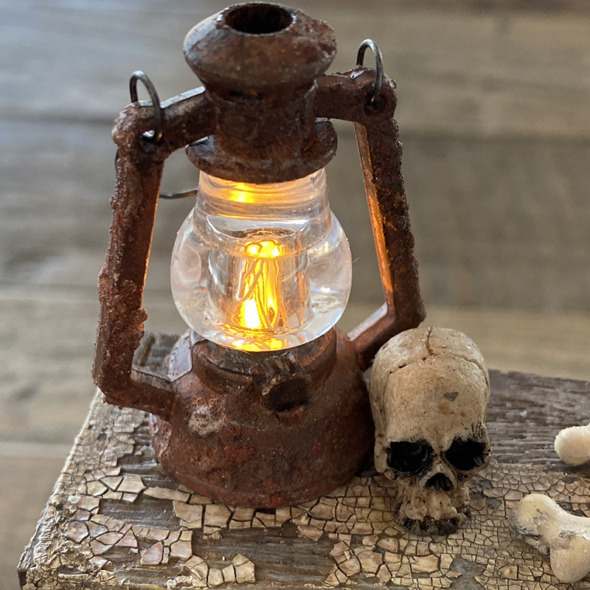
    The new idea-ology lantern was one of those products that made me gasp when Tim showed it to us all during the makers call. Of course I had to rust mine up using the usual suspects… distress grit-paste, crackling campfire and ground espresso distress paint and distress crayons.
    igirlzoe: tim holtz idea-ology halloween 2021
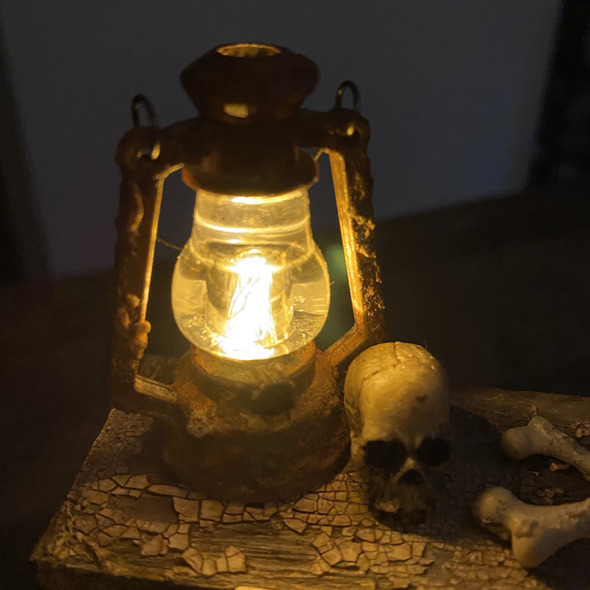
    The lantern has a notch in the back for the tiny light wires to fit under. I only used 2 lights in the lantern so ran the lights down the back of the vignette box and in through a hole I drilled in the back near the base to light the inside. Tim showed how to put the tiny lights into the lantern during the LIVE. To see it, skip forward to the 57 minute mark.
    igirlzoe: tim holtz idea-ology halloween 2021
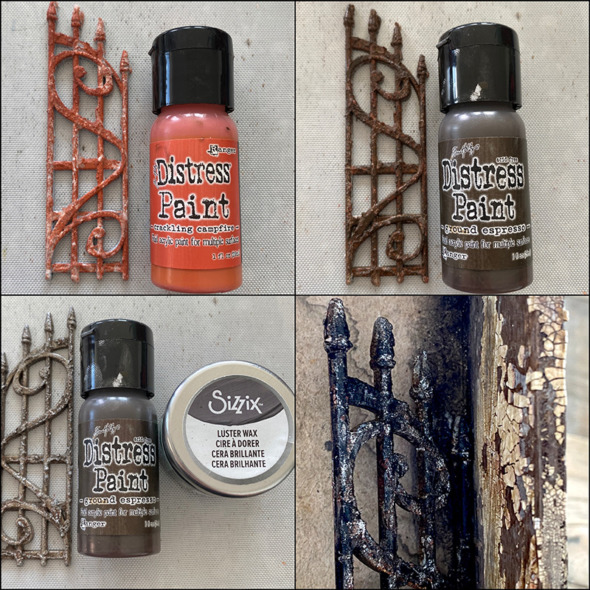
    I wanted to grunge up the new halloween ornate metal gates. I covered with a layer of distress grit-paste (not pictured) and once dry, added crackling campfire distress paint and then ground espresso distress paint, drying between layers. Finally I added a little luster wax from Sizzix which they kindly sent me to try. I like it, but I’m going to be honest, they added an orange smell and I hate it, but I wanted to give it a go and it added something to the weathered gate effect. I added a layer of black gesso over the top and rubbed off in places.
    igirlzoe: tim holtz idea-ology halloween 2021
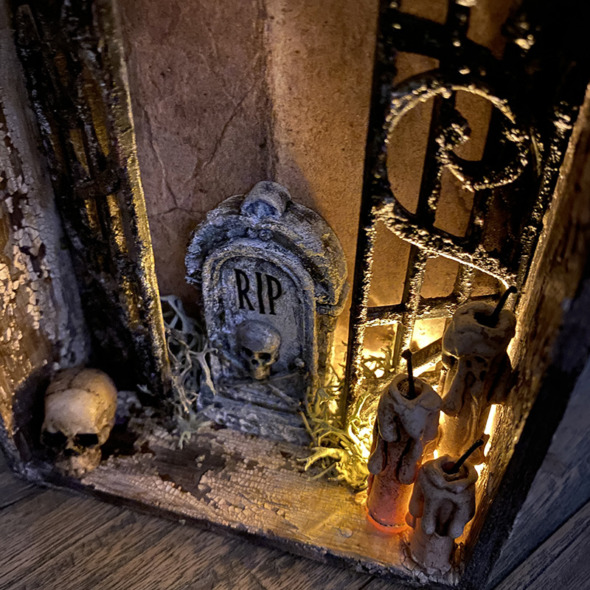
    I mounted the gates using distress collage medium. Don’t use too much and walk away and let it dry. DO NOT WIGGLE TO SEE IF IT’S STUCK DOWN! LOL You can see the extra tiny lights that I fed in through the back of the vignette. I used some mummy cloth soaked in frayed burlap distress oxide spray and creepy moss to hide the lights and wire. They gave a nice glow to the idea-ology drippy candles that I added. I LOVE THESE! I desperately hope they come back next year.
    igirlzoe: tim holtz idea-ology halloween 2021
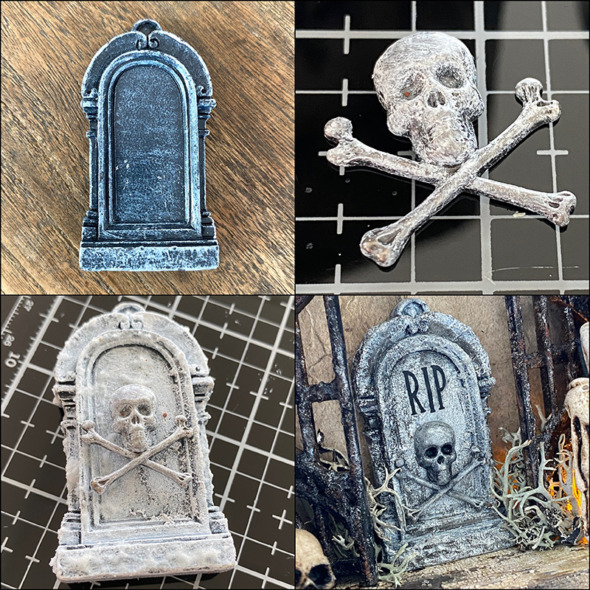
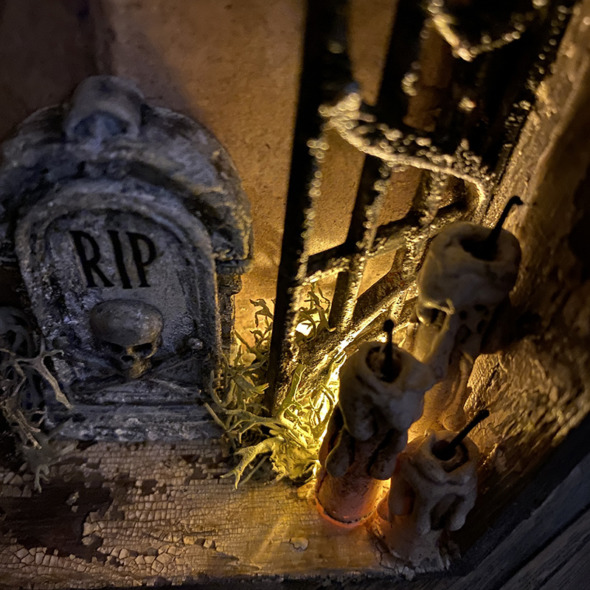
    I altered one of the new idea-ology tombstones and I was really pleased with the result. I covered a tombstone and skull from the skulls and spiders adornments kit with white gesso and once dry with distress opaque grit-paste. I glued the skull to the tombstone, it fits like it was made to! So clever Tim!! I painted all over with hickory smoke distress paint. Dried and added cypt paste and dry brushed parts with black gesso. Once dry, I repeated this with white gesso.

    Beginner Tip: Dry brushing is an almost dry paint free brush. Add a little paint to a dry paint brush and remove the excess with a paper towel. Repeat, building the colour slowly to add highlight but not a thick layer of paint.
    igirlzoe: tim holtz idea-ology halloween 2021
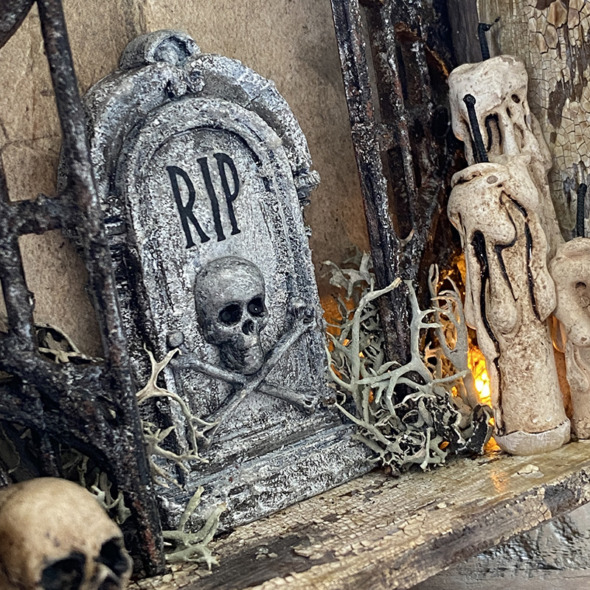
    I added black gesso to the skull eye sockets and nose and rubbed on some retired remnant rubs. You could add small die cut letters or cut vinyl and add that. Another option is to stamp on plain collage paper and add with collage medium. If you don’t have something, improvise, that’s always the fun and creative part for me.
    igirlzoe: tim holtz idea-ology halloween 2021
    igirlzoe: tim holtz idea-ology halloween 2021
    Thanks for stopping by and let me know if you have any questions.

    Zoe

    …
    affiliate links used at no cost to you


  2. The Great Witches Bake Off

    28th October, 2021 by iGirlZoe

    igirlzoe: tim holtz villainous potion distress ranger ink

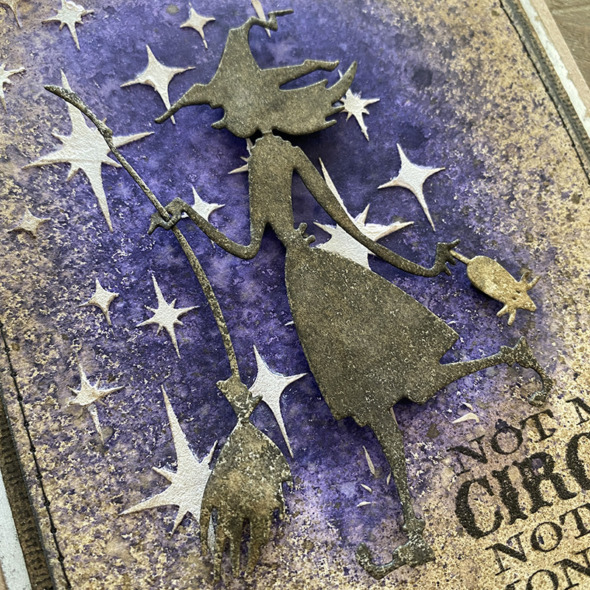
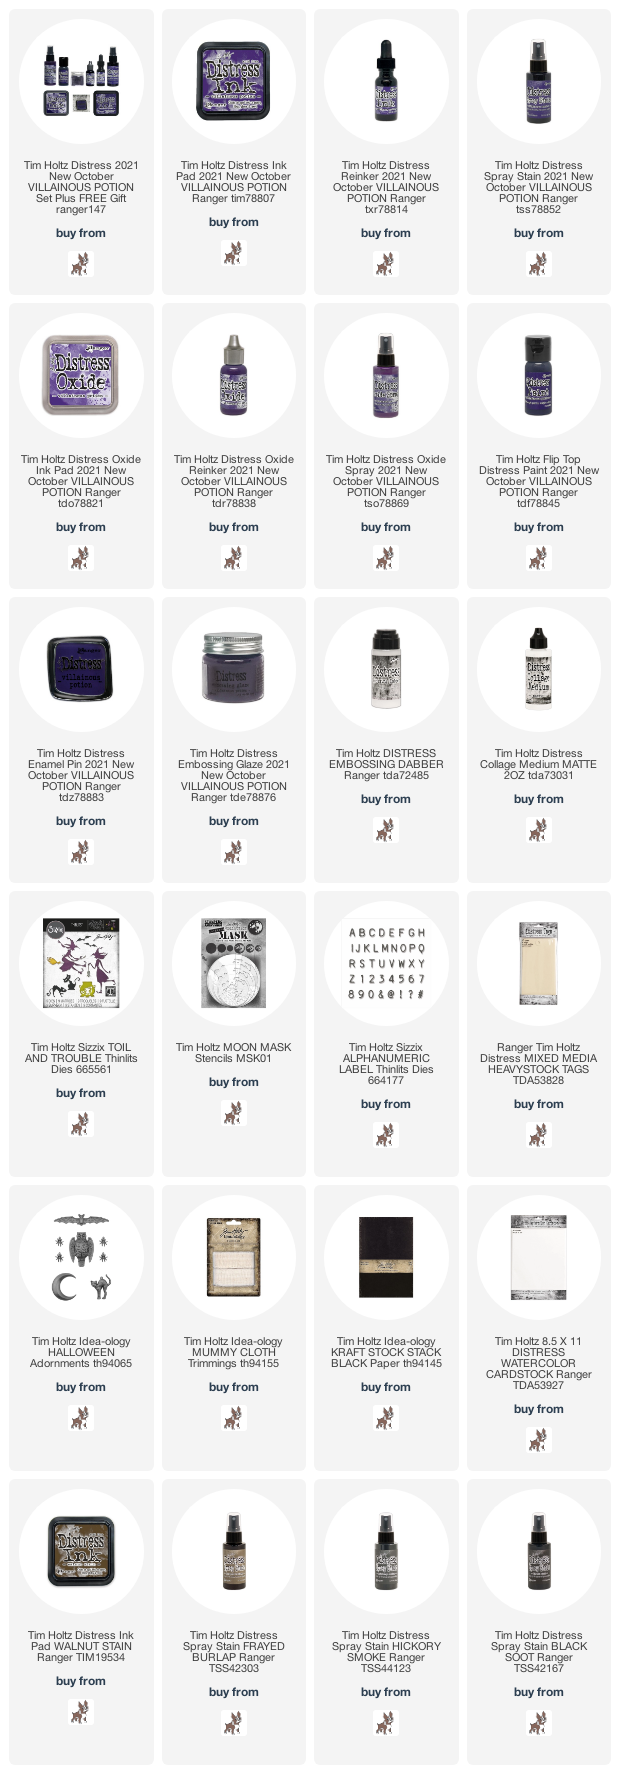
    Hello Friends! Are you doing any baking or making for Halloween? I’m thinking about making some Halloween themed food over the weekend. It definitely won’t be in the same league as The Great Witches Bake off or the moody new member of the distress family, Villainous Potion, who you can meet over on Tim Holtz blog.

    igirlzoe: tim holtz villainous potion distress ranger ink
    I love how the villainous potion distress ink wicks and there’s such a colour variation dependent on how concentrated the ink is. Mixed with a little frayed burlap for that sweet grunged look.

    igirlzoe: tim holtz villainous potion distress ranger ink
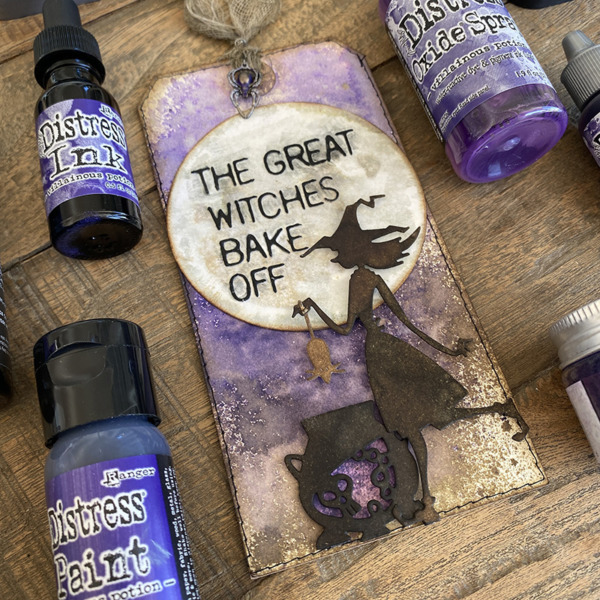
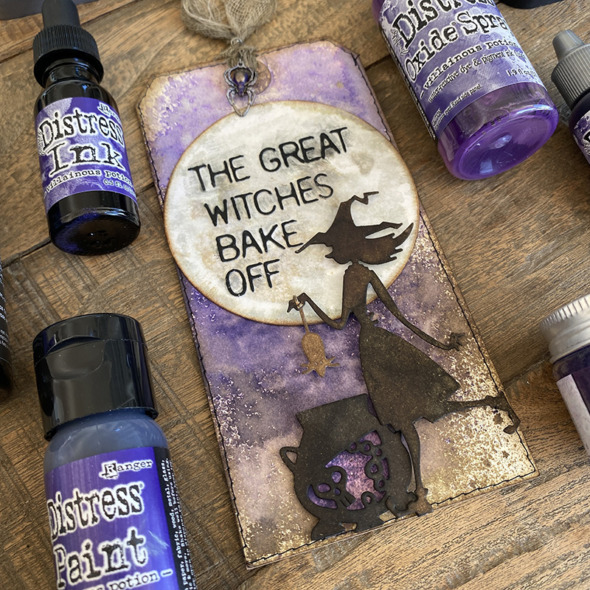
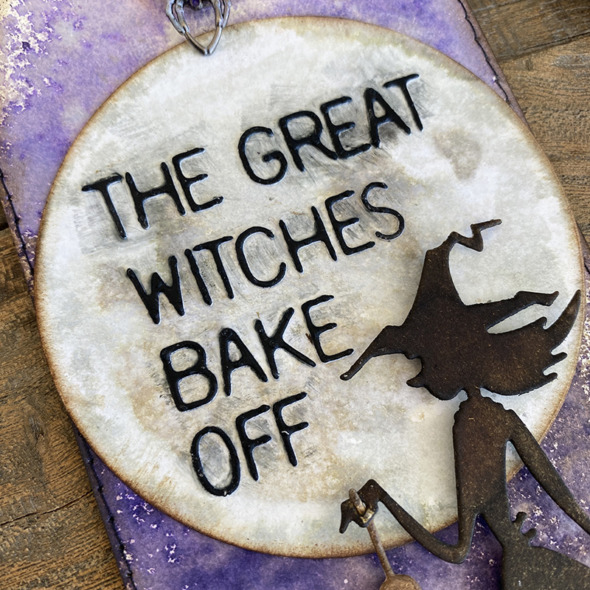
    I LOVE the moon masks that Tim released this year. They come in 3 sizes and I used the largest, along with a sizzix circle die to create a big moon backdrop. I used alphanumeric label dies cut from idea-ology black kraftstock to spell out this fun sentiment inspired by my friend Juli’s excitement in a group chat about The Great British Bake Off TV show.

    igirlzoe: tim holtz villainous potion distress ranger ink
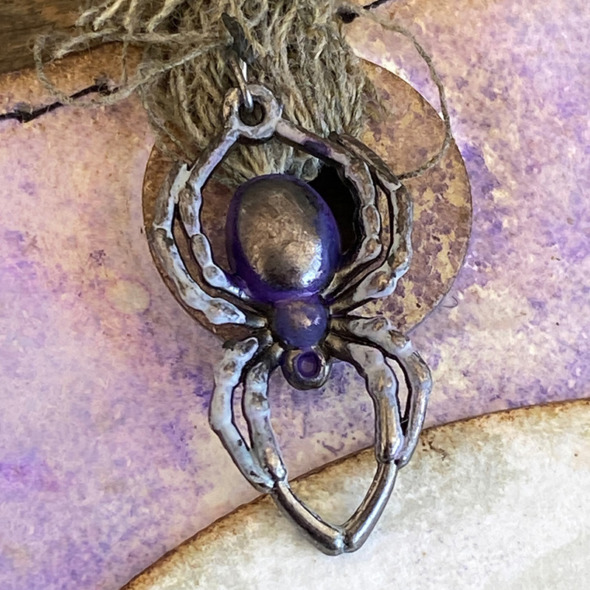
    I took the spider from the idea-ology halloween adornments set, used the distress embossing dabber to add embossing ink and covered in villainous potion distress embossing glaze and melted with a heat embossing tool.

    igirlzoe: tim holtz villainous potion distress ranger ink
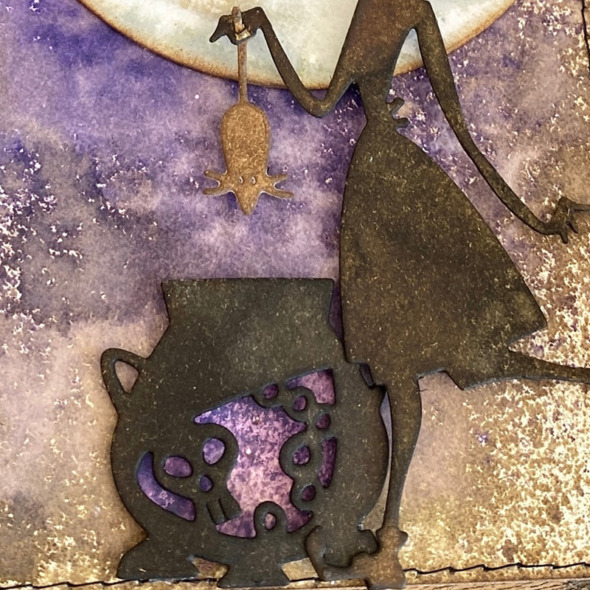
    I love all the cool details of the toil and trouble thinlits dies. The skulls inside the cauldron are so cool and the hole in the witches hand for her to hold a mouse, broom etc is such a clever detail. I die cut the witch and cauldron from distress watercolor cardstock, sprayed with black soot distress spray and once dry, blended in walnut stain distress ink.

    igirlzoe: tim holtz villainous potion distress ranger ink
    I made another card and cut the witches hand to slide the broom handle through and then glued it with a little distress collage medium. The “how to” for the background of this card can be seen here.

    Thanks for stopping by and Happy Halloween making and baking.

    Zoe

    …
    affiliate links used at no cost to you


  3. Steampumpkins

    27th October, 2021 by iGirlZoe

    igirlzoe: tim holtz sizzix halloween pumpkin patch

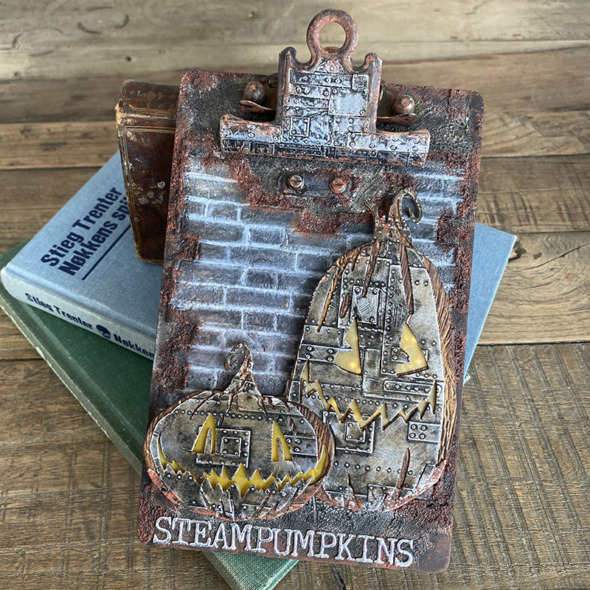
    Hello friends! I’m back today with more pumpkins. These I made for the Tim Holtz Sizzix Halloween LIVE Launch.

    igirlzoe: tim holtz sizzix halloween pumpkin patch
    The pumpkin patch colorize die was another knock out for me. Tim really spoiled us with pumpkins this year and I’m one happy pumpkin farmer!

    igirlzoe: tim holtz sizzix halloween pumpkin patch
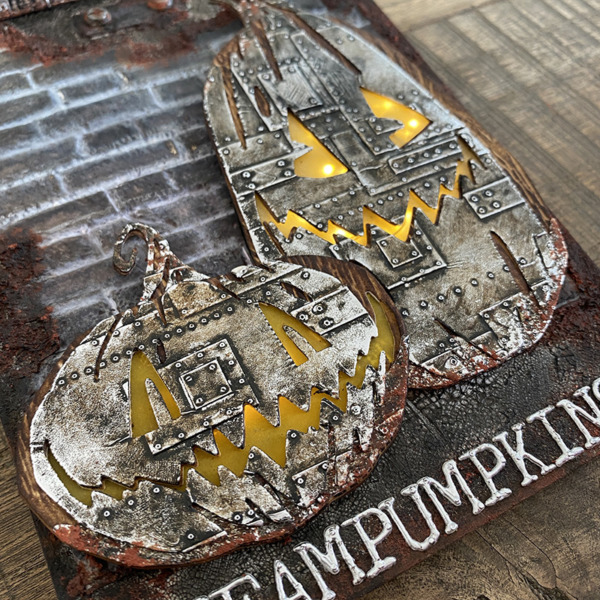
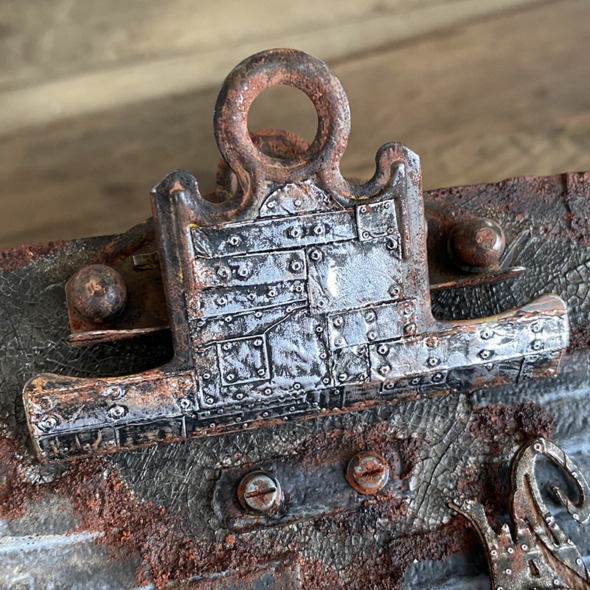
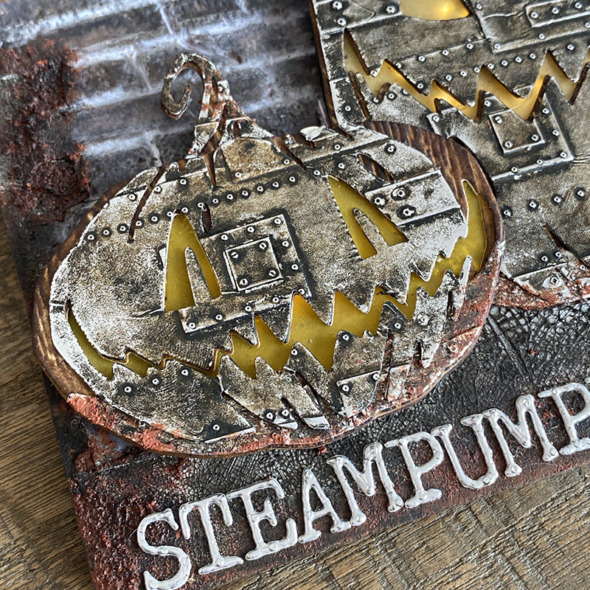
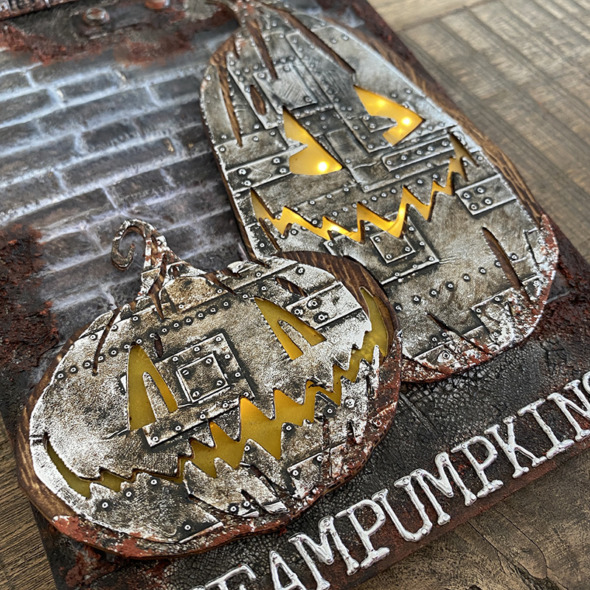
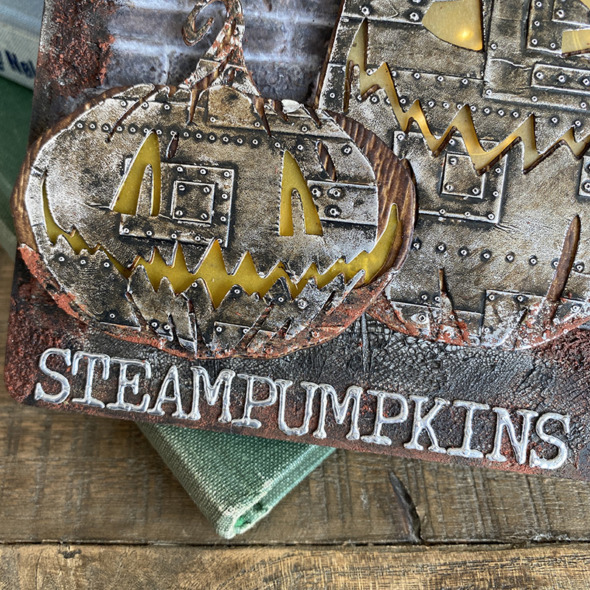
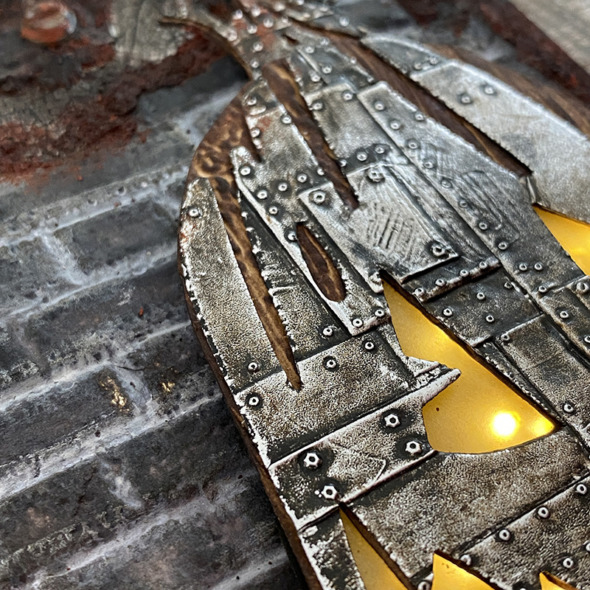
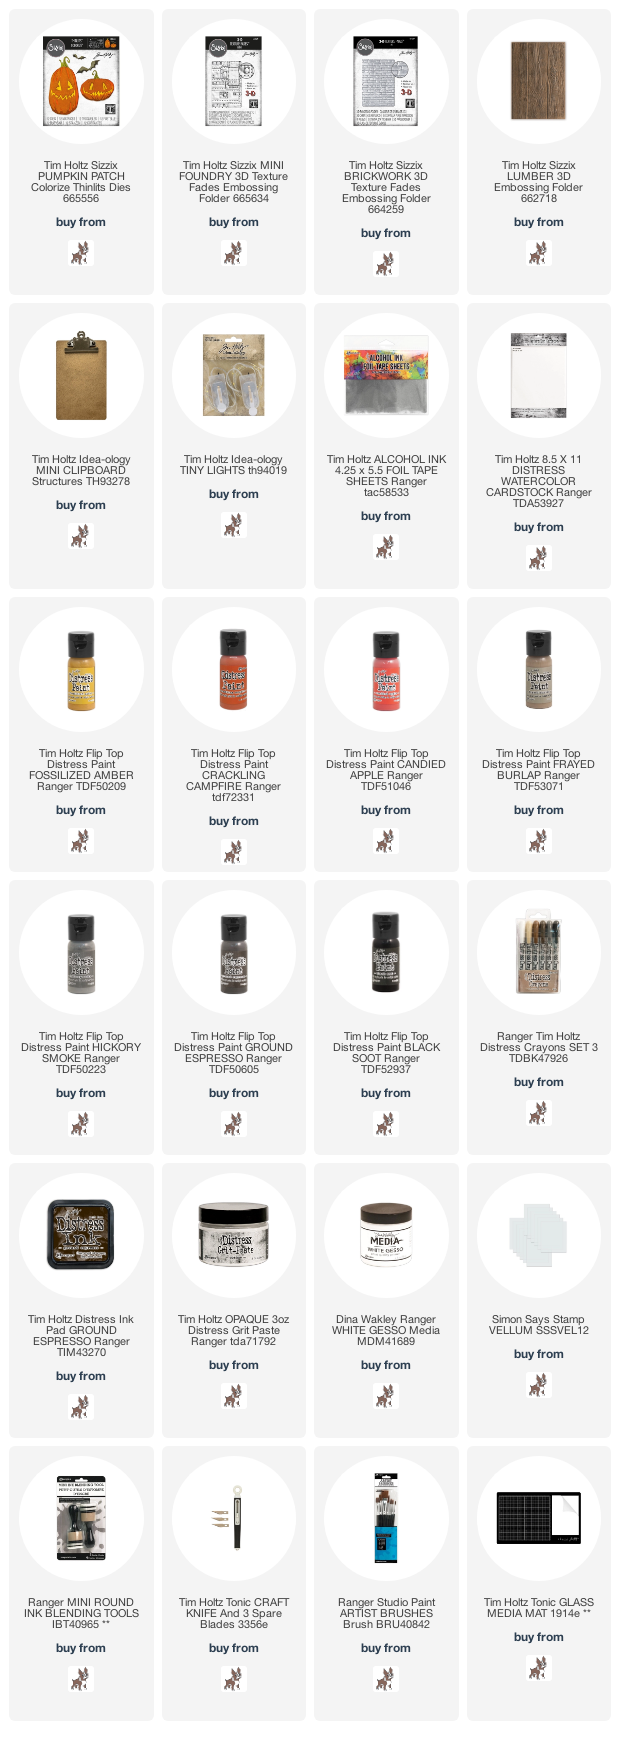
    I started by altering an idea-ology mini clipboard. Covered the background with brickwork (see step out here) and then added distress grit-paste. I used a mixture of crackling campfire, candied apple and ground espresso distress paints over the dried distress grit-paste to create a faux rust effect. I cut alcohol foil tape and embossed with the mini foundry 3D embossing folder and covered with black soot distress paint, wiping away the excess. I cut the foil and added pieces to the clipboard clip until it was covered. I also added a couple of idea-ology hardware heads.

    igirlzoe: tim holtz sizzix halloween pumpkin patch
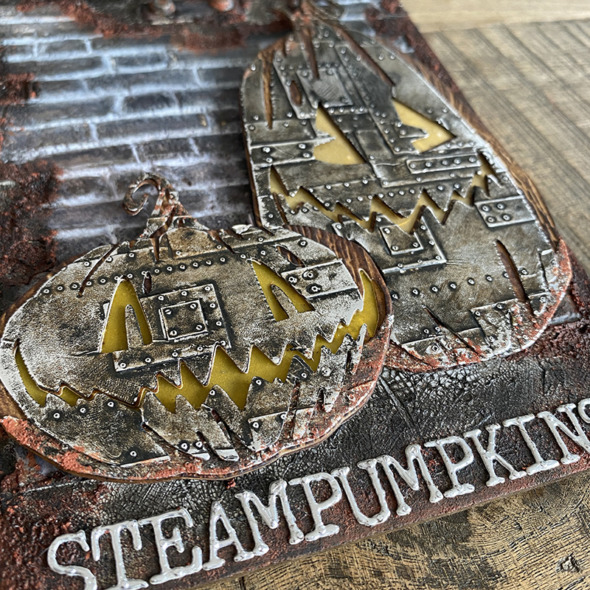
    Using the lumber and mini foundry 3D embossing folders, I embossed the pumpkin patch colorize die cuts. If you haven’t tried colorize before, these are such a great introduction to it. There are only a few pieces and it’s not intricate or fiddly in the least and I think you’ll love the effects you can get with colorize.

    igirlzoe: tim holtz sizzix halloween pumpkin patch
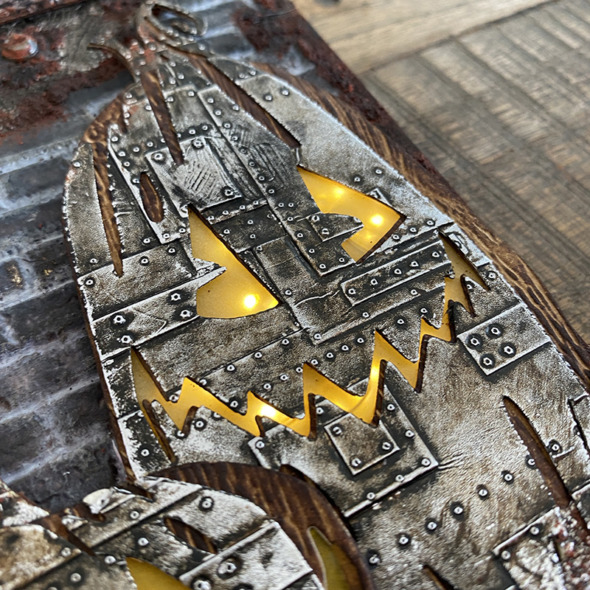
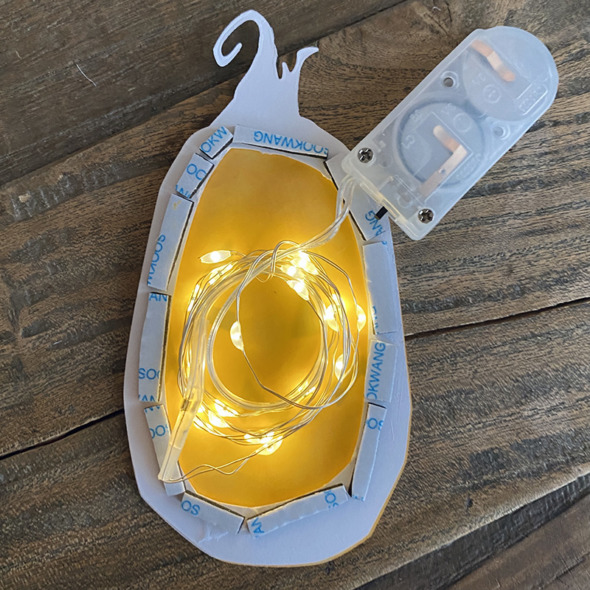
    In order to get the tiny lights to show through from under the vellum, I cut a section in the base die cut and mounted foam around the edges to creat a space for the tiny lights to sit inside. I added vellum painted with fossilized amber distress paint, under the top sections to hide, contain and diffuse the tiny lights. Here’s how…

    igirlzoe: tim holtz sizzix halloween pumpkin patch
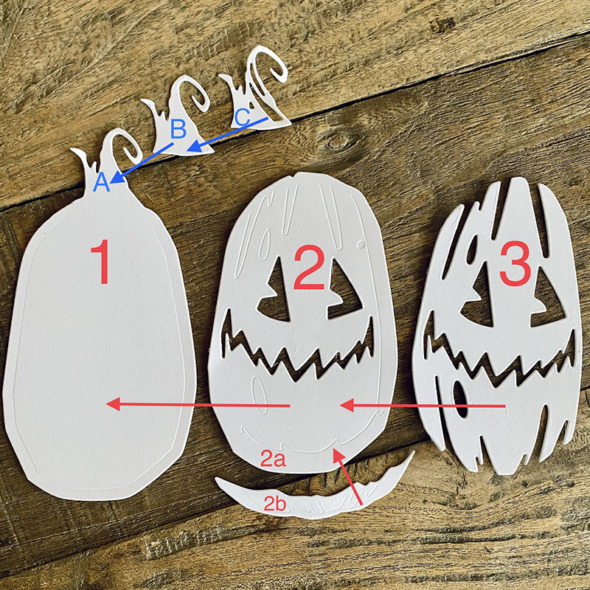
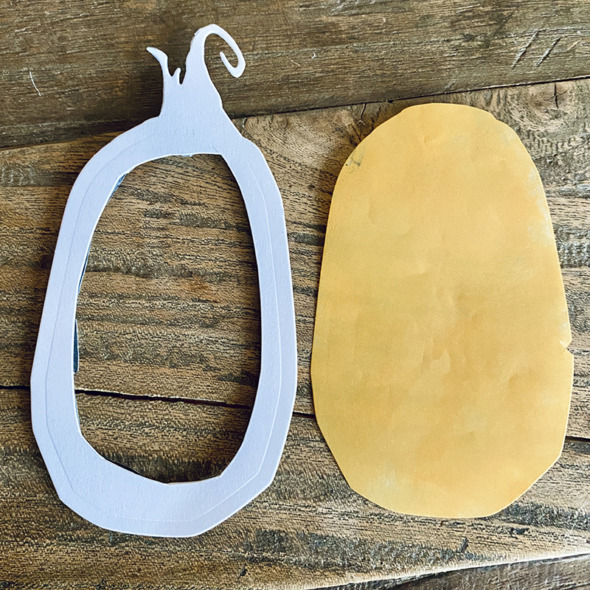
    For step out purposes I have die cut just the larger pumpkin from white cardstock. You will see there are de-bossed lines which show you where to place each piece. I’ve added numbers, letters and arrows to help. 1 is your base. 2 goes on top of 1. 3 goes on top of 2 etc.

    igirlzoe: tim holtz sizzix halloween pumpkin patch
    Using a craft knife, cut a circle in the center of the base of the pumpkin die cut leaving enough around the edge to add adhesive foam. Cut a piece of vellum using the base pumpkin piece, cut off the stalk and paint with distress paint.

    igirlzoe: tim holtz sizzix halloween pumpkin patch
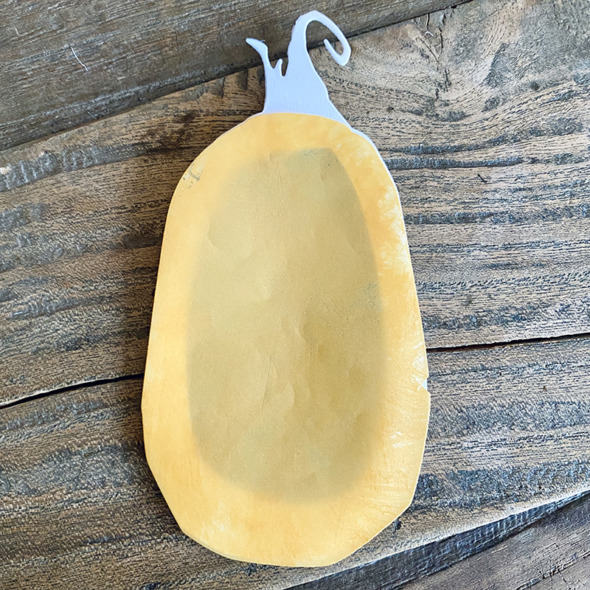
    Glue the vellum on top of the base piece.

    igirlzoe: tim holtz sizzix halloween pumpkin patch
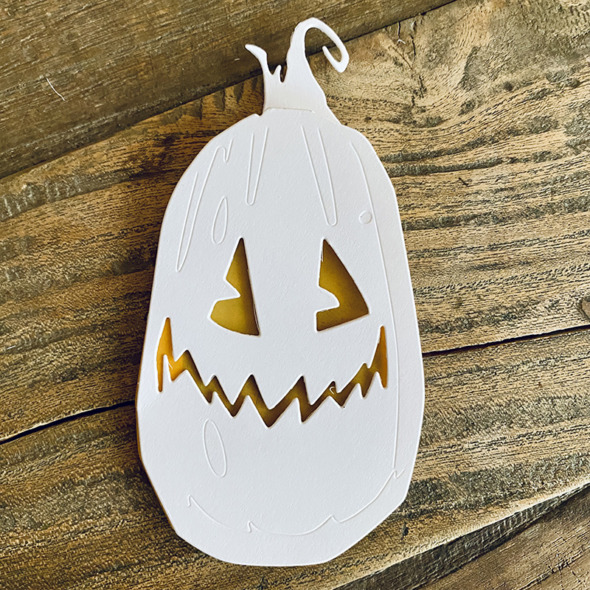
    Add the next die cut piece over the top.

    igirlzoe: tim holtz sizzix halloween pumpkin patch
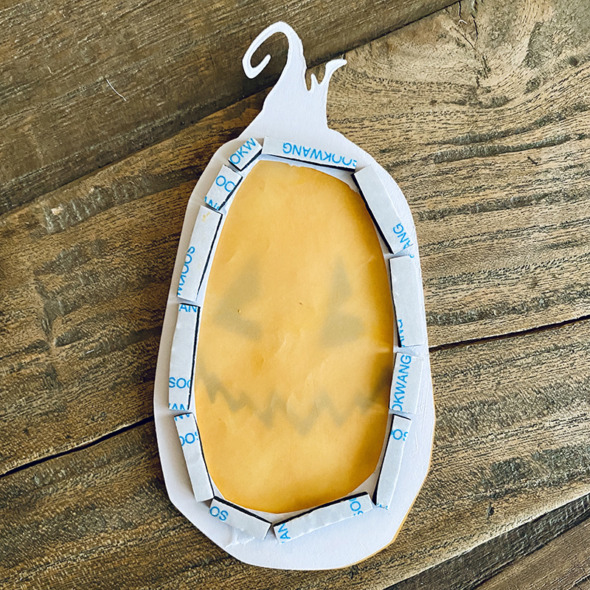
    I flipped the pumpkin over and ran adhesive foam around the underside edge of the base piece.

    igirlzoe: tim holtz sizzix halloween pumpkin patch
    Add idea-ology tiny lights into the back of the pumpkin and secure with glue, if you leave a gap in the adhesive foam you can run the lights behind the smaller pumpkin too, (not pictured).

    igirlzoe: tim holtz sizzix halloween pumpkin patch
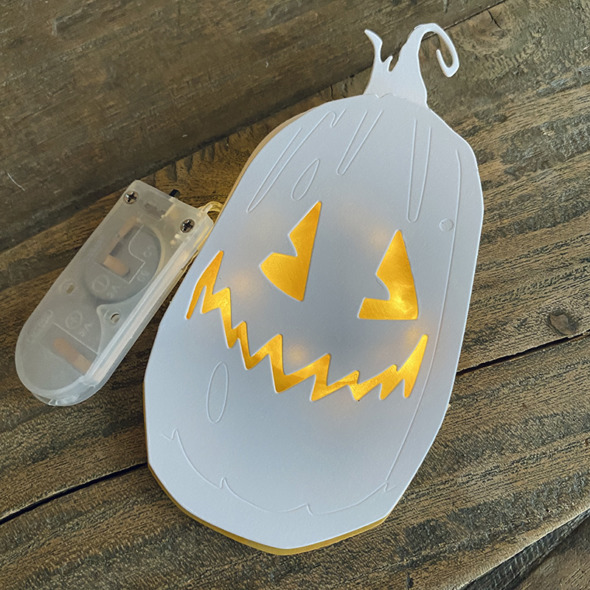
    How the pumpkin looks with the lights behind it. On my project, I threaded the lights through the back of the idea-ology mini clipboard first and the switch was attached to the back of the clipboard.

    igirlzoe: tim holtz sizzix halloween pumpkin patch
    Tiny lights OFF.

    igirlzoe: tim holtz sizzix halloween pumpkin patch
    Tiny lights ON.

    igirlzoe: tim holtz sizzix halloween pumpkin patch
    Using some leftover alcohol foil tape I used the alphanumeric tiny upper dies to cut steampumpkins.

    igirlzoe: tim holtz sizzix halloween pumpkin patch
    Seriously! How cool is this pumpkin patch die? Tim rocked it!!

    My pumpkin making adventures continue through November, so there’s more pumpkins to come…

    Thanks for stopping by.

    Zoe

    …
    affiliate links used at no cost to you


  4. Jack

    26th October, 2021 by iGirlZoe

    igirlzoe: tim holtz sizzix halloween pumpkinhead

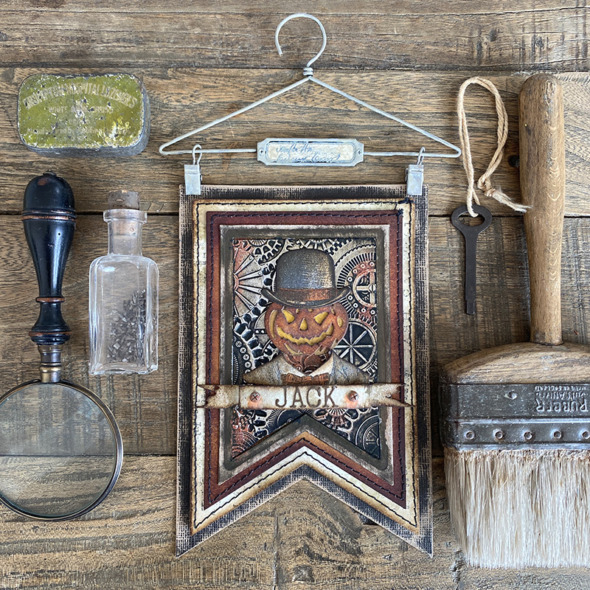
    Happy National Pumpkin Day. No better way to celebrate this very special day than to make and share pumpkin everything. I’m starting with a banner panel shared during the Tim Holtz Sizzix Halloween launch.

    igirlzoe: tim holtz sizzix halloween pumpkinhead
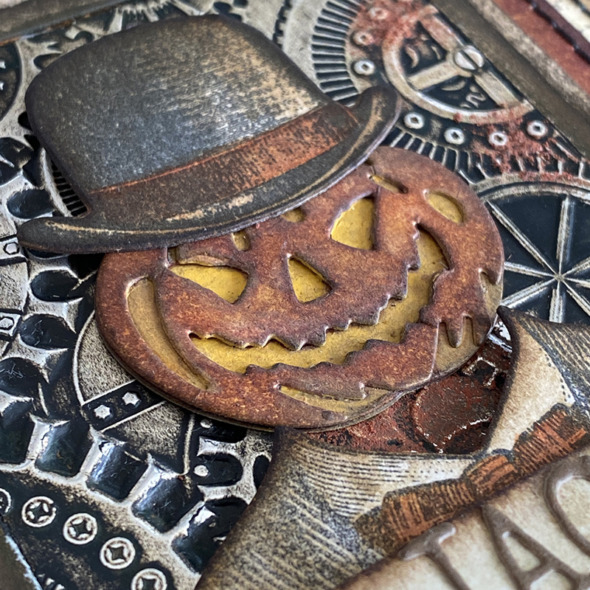
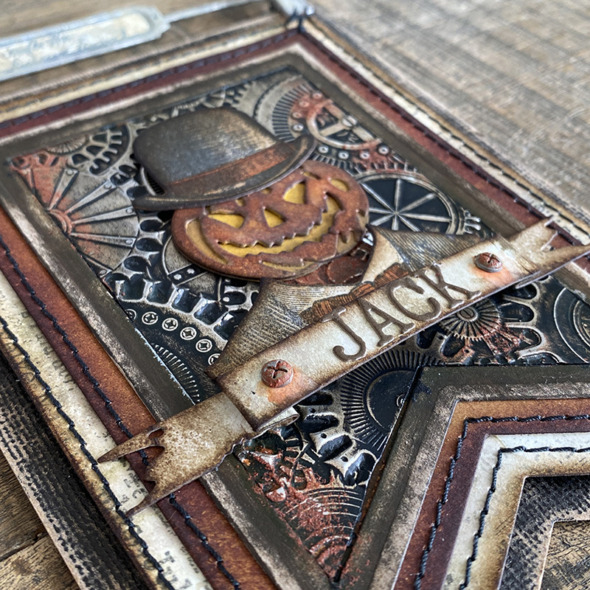
    I lost my head when I saw the pumpkinhead die set! 😉 The JACK-o-lantern is perfectly sized for the hat and coat from the distinguished stamp set, thanks Tim!

    igirlzoe: tim holtz sizzix halloween pumpkinhead
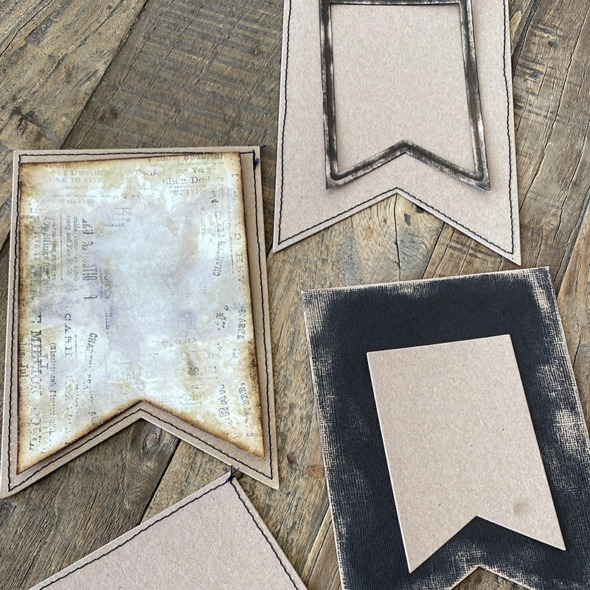
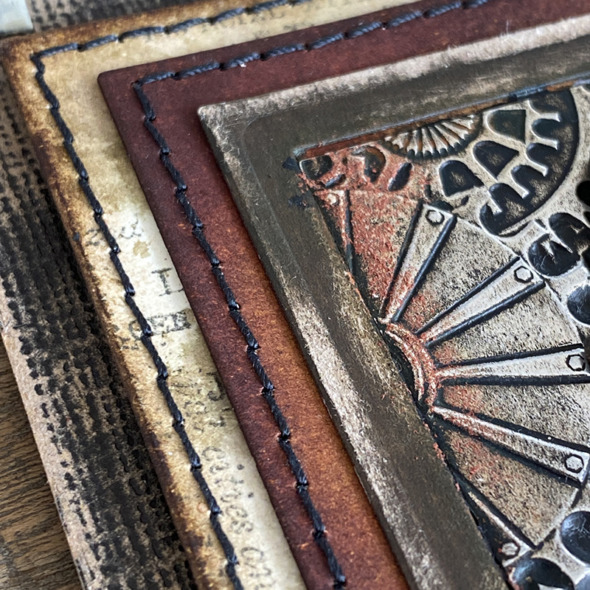
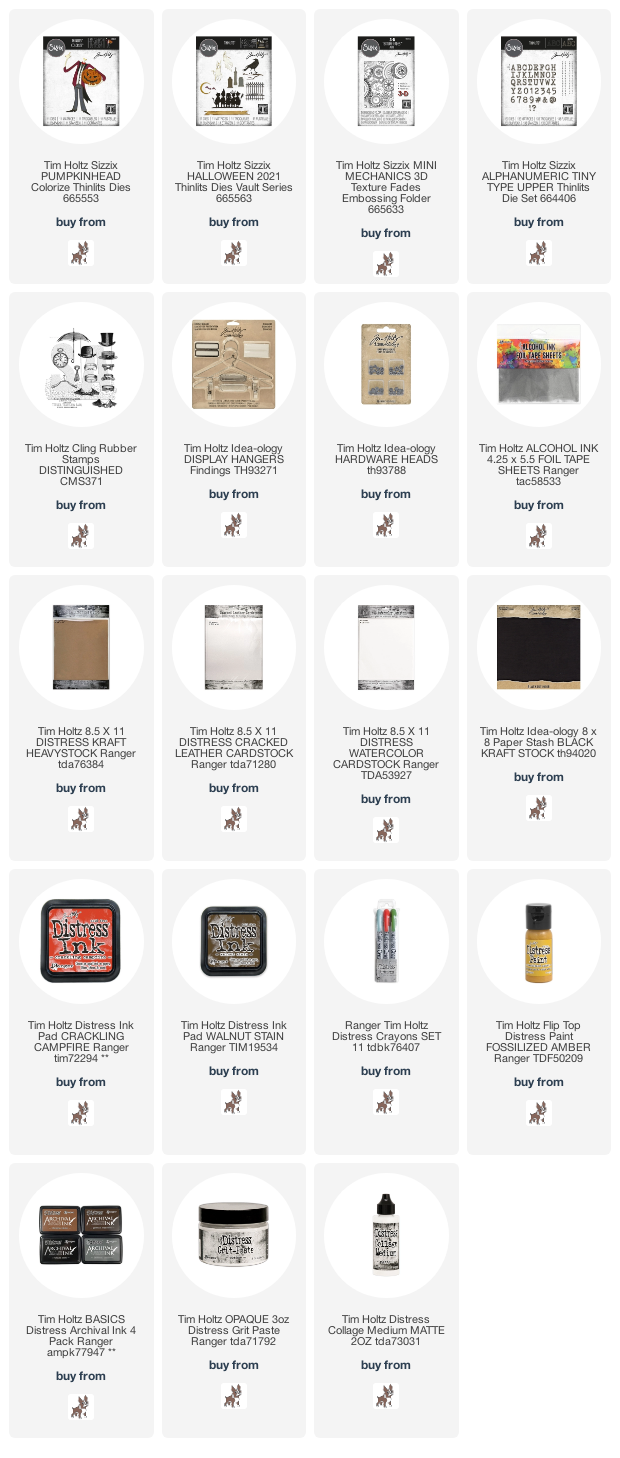
    I cut and stitched my banner panels first. I use the retired Sizzix banners #3 dies (561152), die cutting distress kraft heavystock, distress cracked leather cardstock, distress watercolor cardstock and idea-ology black kraftstock.

    igirlzoe: tim holtz sizzix halloween pumpkinhead
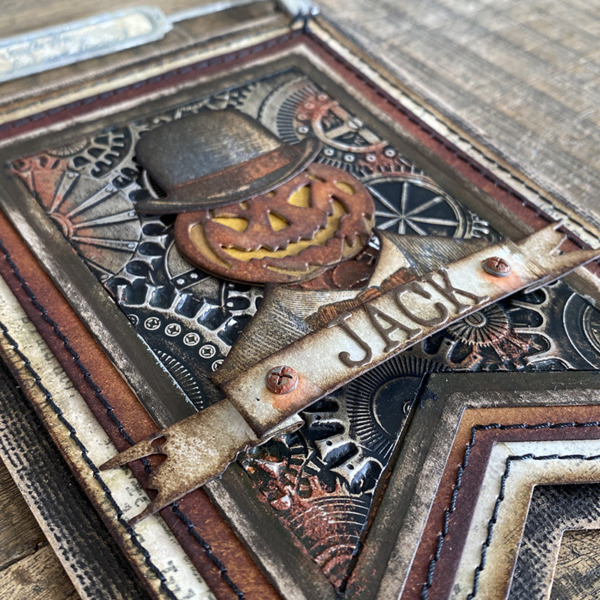
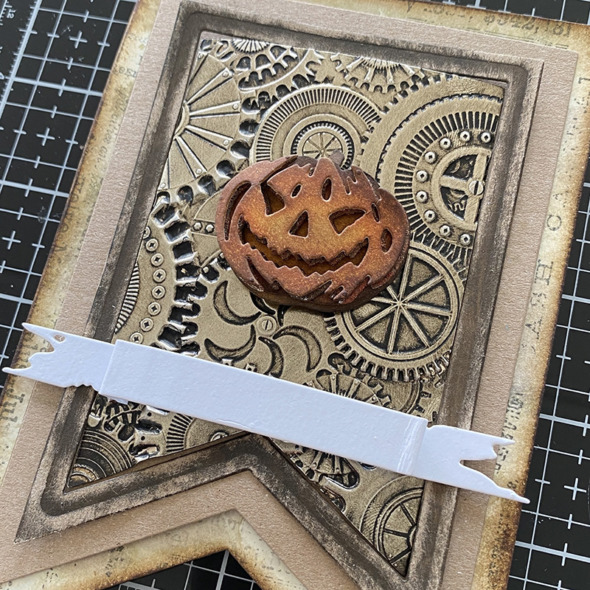
    Using the new mini mechanics 3D embossing folder, I embossed alcohol ink foil tape backed with kraft heavystock.

    igirlzoe: tim holtz sizzix halloween pumpkinhead
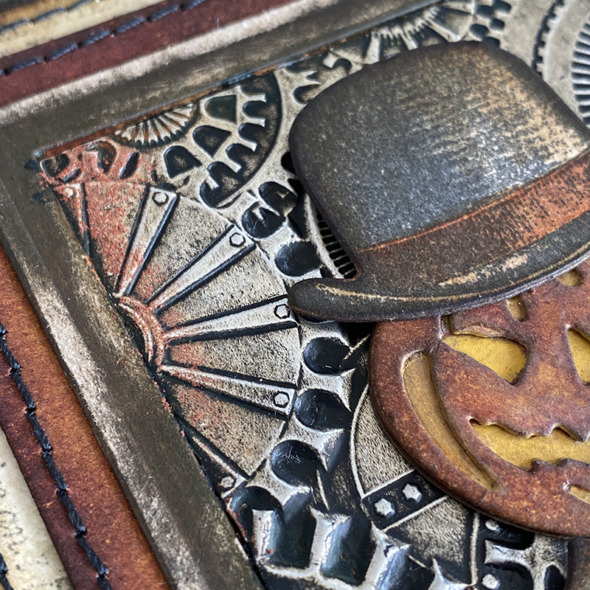
    I added black soot distress paint to the embossed background, wiping away the excess.

    igirlzoe: tim holtz sizzix halloween pumpkinhead
    I die cut the jack-o-lantern from the pumpkin head thinlits die set. I painted the base piece with fossilized amber distress paint and covered the top with crackling campfire and walnut stain distress inks. I LOVE this die SO MUCH and of course he’s so dapper in his hat and coat, both from distinguished CMS371 stamp set.

    igirlzoe: tim holtz sizzix halloween pumpkinhead
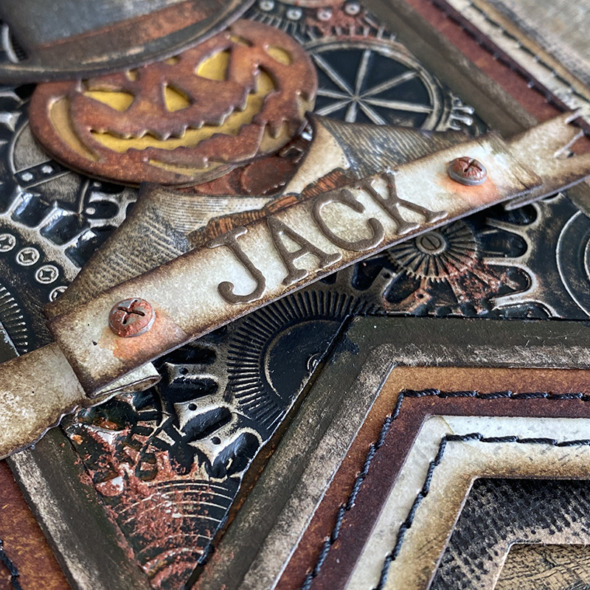
    The banner strip from the Halloween vault series die set worked perfectly. This is probably my favourite die set from the release. I’ve used so many die cuts from it across my halloween makes. I added JACK with the alphanumeric tiny type upper dies.

    igirlzoe: tim holtz sizzix halloween pumpkinhead
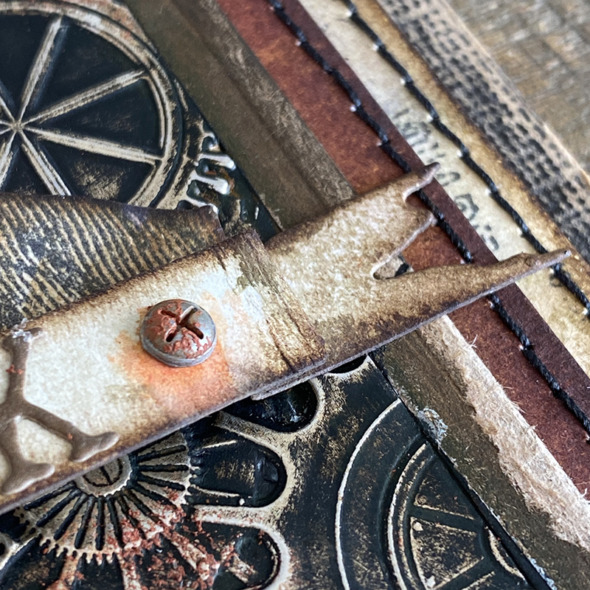
    Adding a hardware head each side of the banner with a little distress grit-paste and crackling campfire distress crayon to create a faux rust effect. Using a paintbrush to pull some of the distress onto the card like rust dripping.

    igirlzoe: tim holtz sizzix halloween pumpkinhead
    I use a singer heavy duty sewing machine to stitch and I stitch before assembling.

    igirlzoe: tim holtz sizzix halloween pumpkinhead
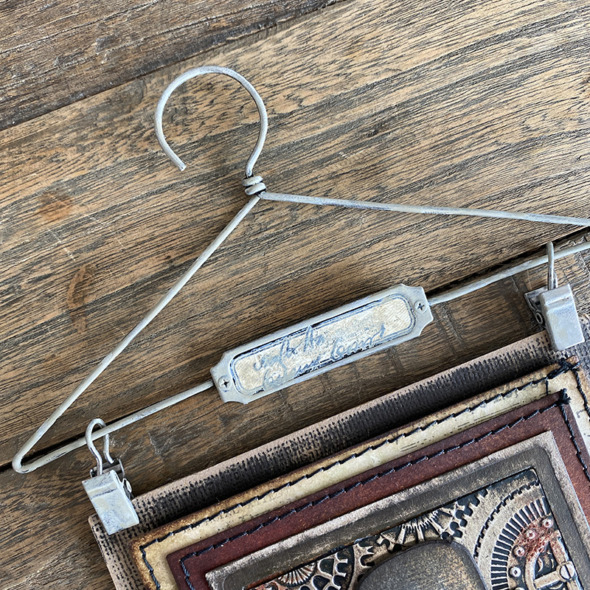
    I added an idea-ology display hanger to hang this banner panel.

    igirlzoe: tim holtz sizzix halloween pumpkinhead
    Thanks for stopping by. I will be back in a bit with some more pumpkins…

    Zoe

    …
    affiliate links used at no cost to you


  5. Jack-O-Lantern by Candlelight

    2nd September, 2021 by iGirlZoe

    igirlzoe: tim holtz sizzix candlelight pumpkinhead

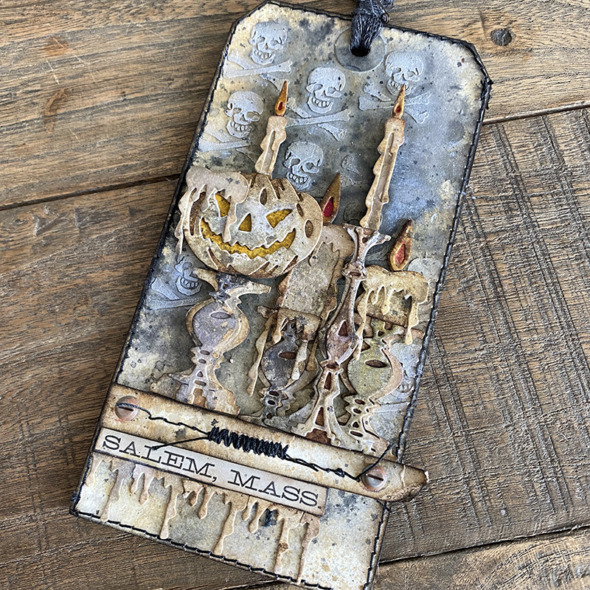
    Hello friends. Happy second day of September. I am so ready to get my Halloween on and today I’m sharing this tag I made for the Tim Holtz Sizzix Halloween LIVE launch.

    igirlzoe: tim holtz sizzix candlelight pumpkinhead
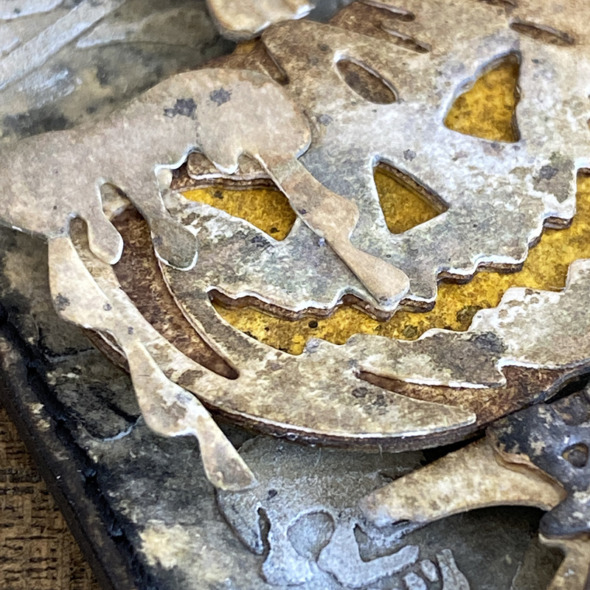
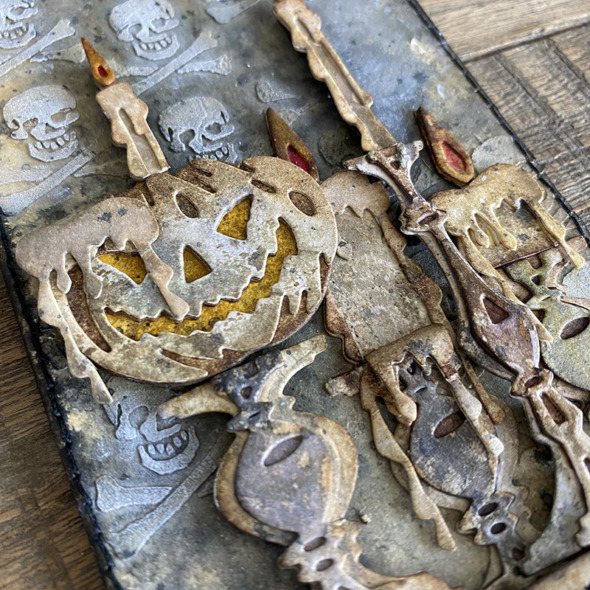
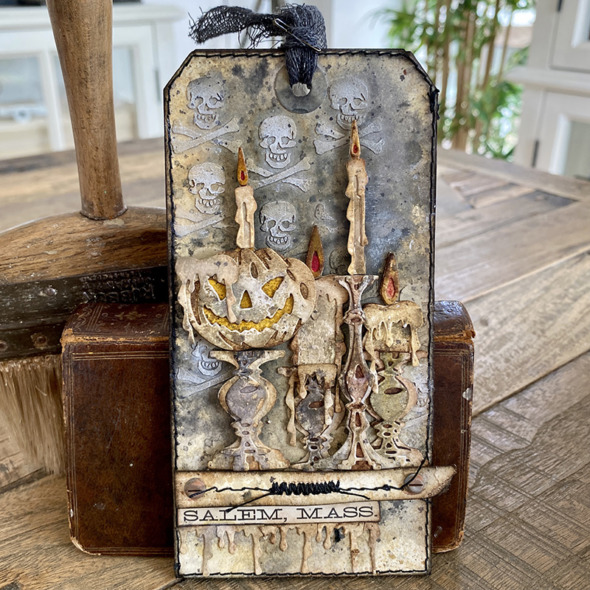
    I was invited to take part in an industry virtual event where Tim showcased his seasonal dies; during the demo he put the pumpkin from the pumpkinhead die set onto a candlestick from the candlelight die set and that inspired this tag. Jack-O-Lantern candles…? YES PLEASE!!

    igirlzoe: tim holtz sizzix candlelight pumpkinhead
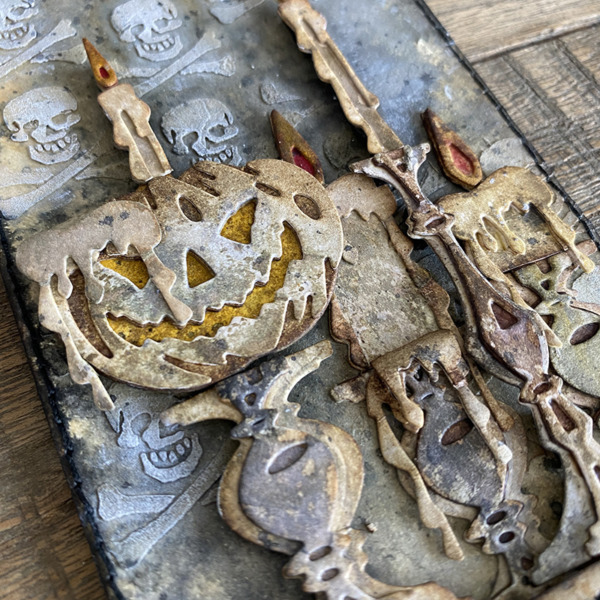
    I LOVE this pumpkinhead, he’s such a troublemaker, you can tell! I added a drippy candle die cut piece over his eye, it reminds me of the poisoned apple from Disney’s Snow White and the Seven Dwarfs. You should check out the brilliant make that Tami B (playswellwithpaper) did for the Halloween idea-ology LIVE with a Disney poisoned apple! I can’t wait for that blog post!

    igirlzoe: tim holtz sizzix candlelight pumpkinhead
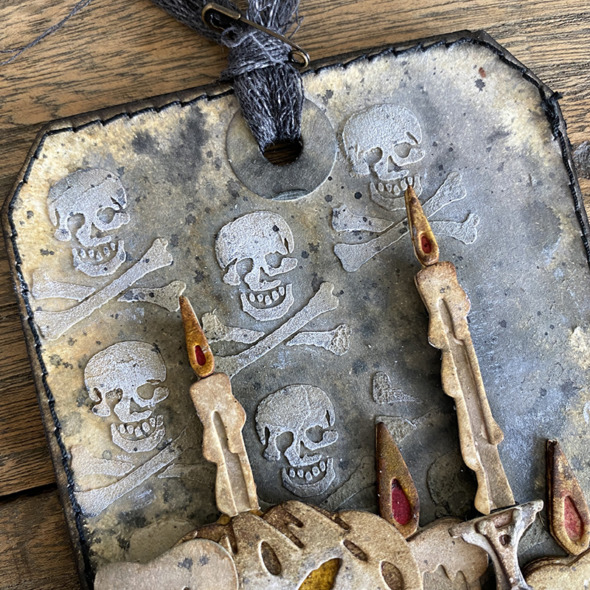
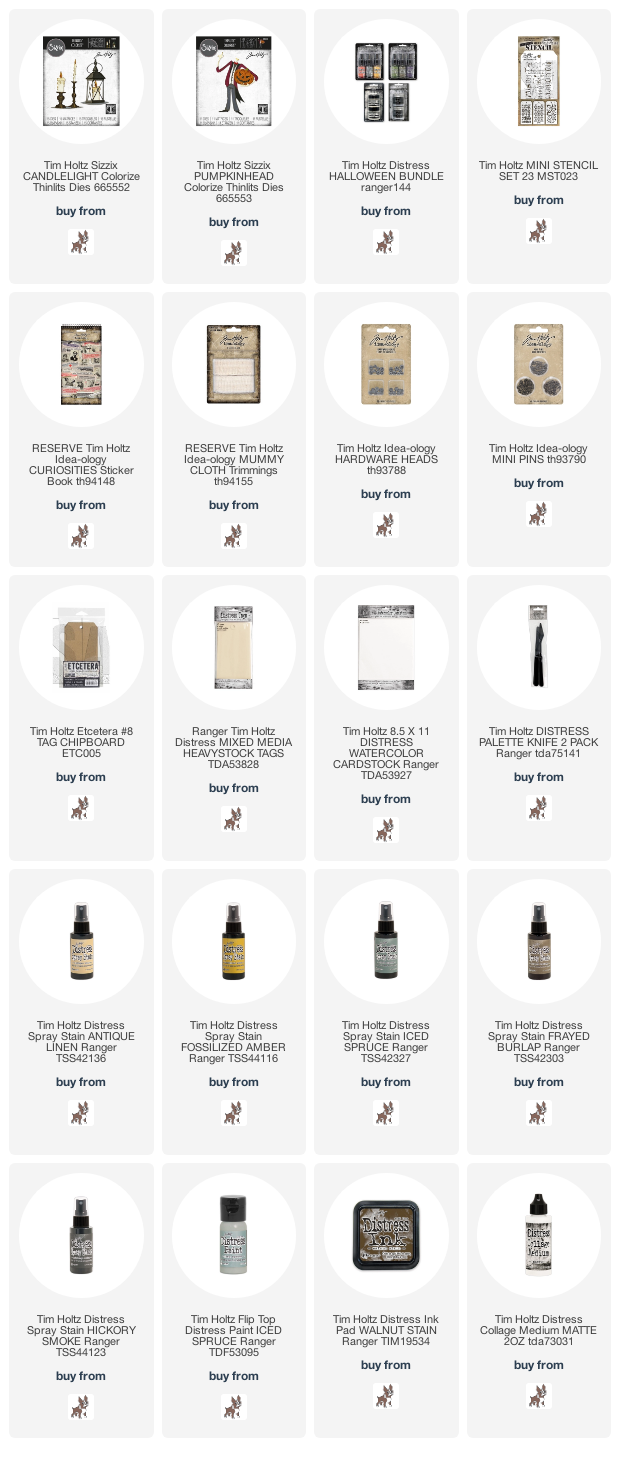
    Using a distress heavystock #8 tag, I added antique linen and hickory smoke distress sprays and dried. I spread distress grave texture paste from the Halloween distress paste set through the skull stencil from mini stencil set 23 with a palette knife. How freaking cool is this paste? I have a couple of extra pots, thanks to a very thoughtful friend.

    igirlzoe: tim holtz sizzix candlelight pumpkinhead
    I’m in love with the new candlelight die set. They may have been released with the Halloween dies, but they are going to rock Christmas and I’ll be using them all year. They are so simple to put together.

    igirlzoe: tim holtz sizzix candlelight pumpkinhead
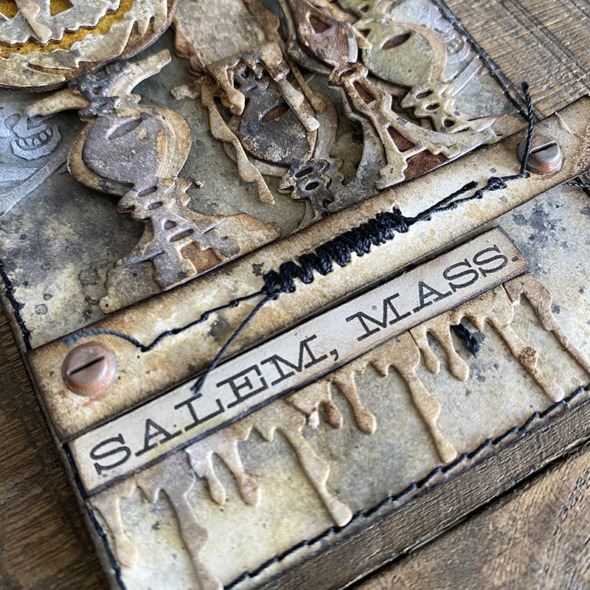
    I was practicing a zig zag stitch with my sewing machine on scrap card and got it so on point that I trimmed it off the scrap card, inked it, added a hardware head to each end and used it as a ledge for the candle sticks to sit on and under. I added a sticker from the idea-ology curiosities sticker book and die cut drips underneath.

    igirlzoe: tim holtz sizzix candlelight pumpkinhead
    I stitched the tag and then mounted it onto a #8 etctera thickboard tag to give it stability. To finish, I dyed a piece of mummy cloth with distress spray and thread it through the tag and secured in place with an idea-ology mini pin.

    I really wish I had added tiny lights to this tag and I would have done, but I was out of time and racing the clock. Mario very kindly dipped out during the LIVE to collect this from the local Fedex depot and this isn’t the first time he has done this for a maker. Very grateful to Tim and Mario, who always go the extra mile.

    Thanks for stopping by.

    Zoe

    …
    affiliate links used at no cost to you


  6. Pumpkin Pumpkin

    31st August, 2021 by iGirlZoe

    igirlzoe: tim holtz idea-ology halloween 2021 jack-o-lantern candy

    Hello friends. Happy last day of August. Tomorrow is the first day of my favourite quarter of the year. I’m so excited for pumpkins, chilly mornings, candles, hot chocolate, more pumpkins and lots of seasonal making. If you’ve been watching the weekly LIVES over on Tim Holtz YouTube channel, I’m sure you’re either already way down in Halloween town or planning your visit.

    igirlzoe: tim holtz idea-ology halloween 2021 jack-o-lantern candy
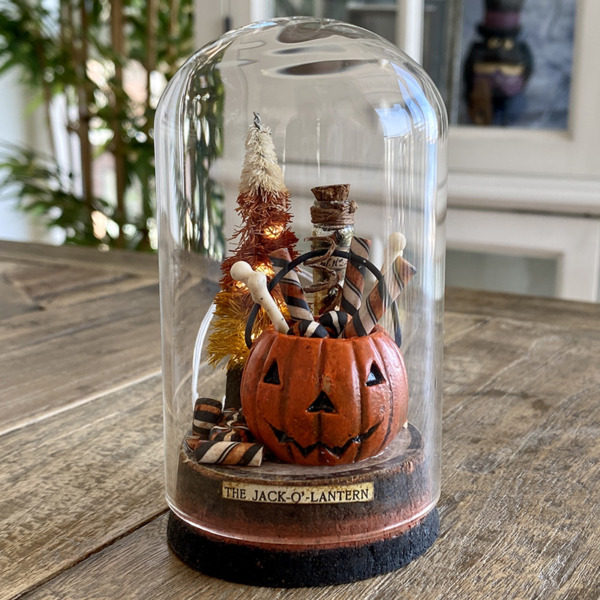
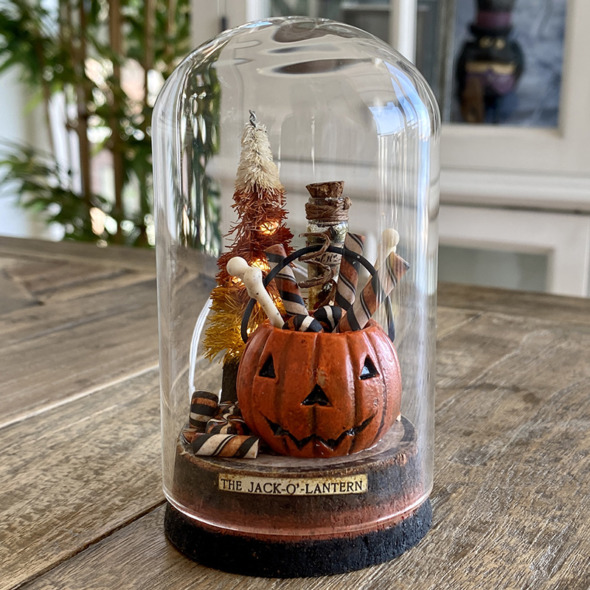
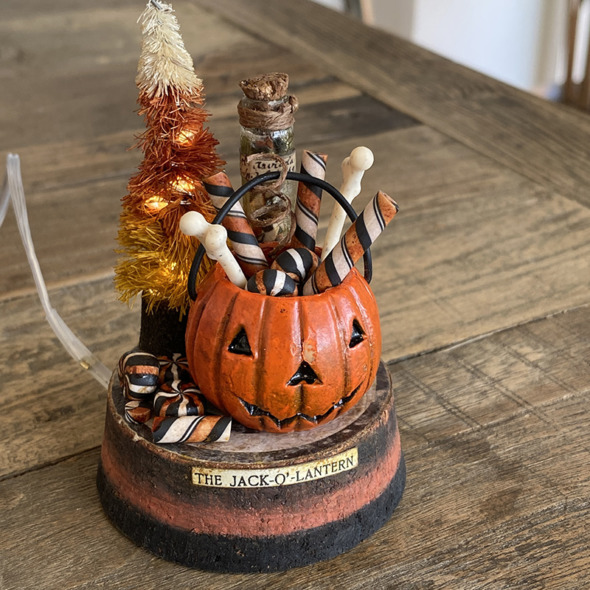
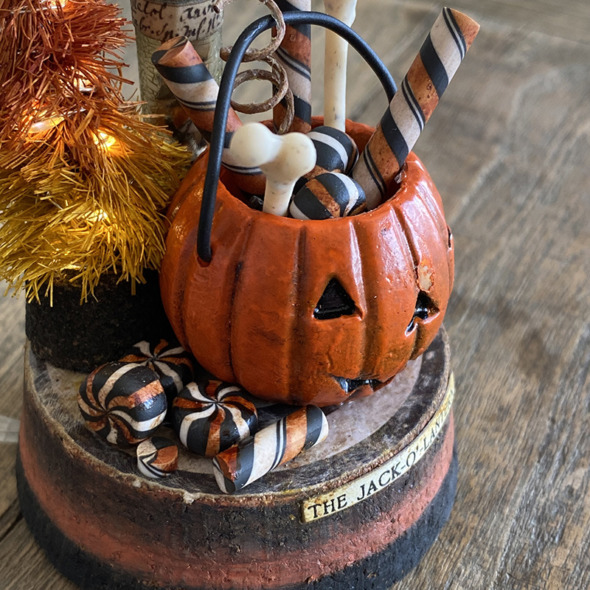
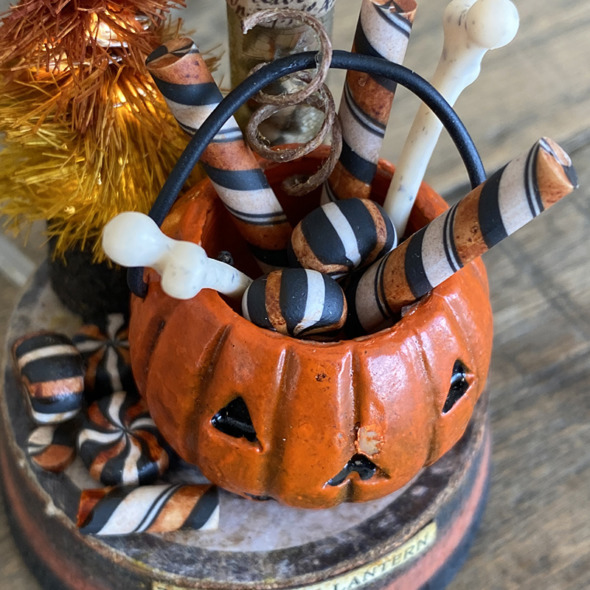
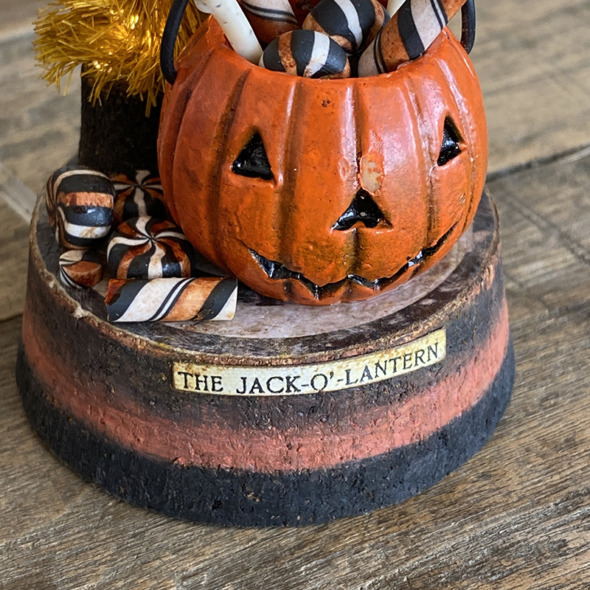
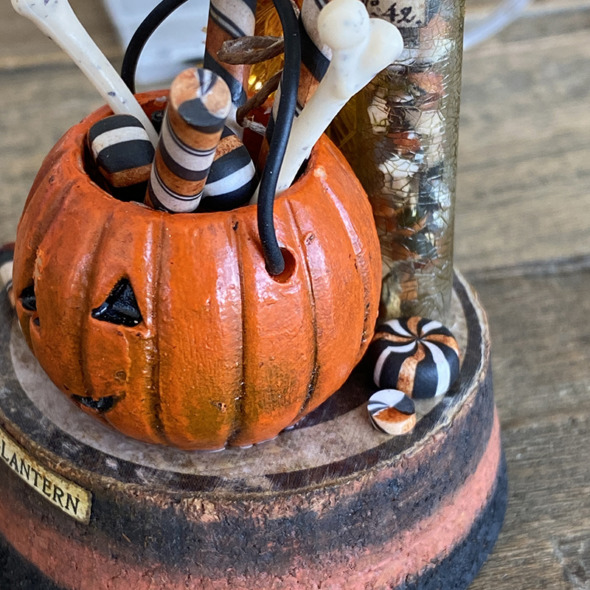
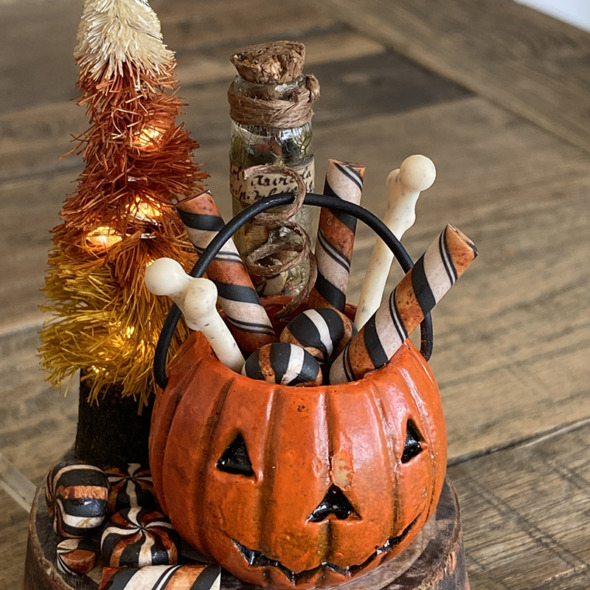
    I made this display dome for the Tim Holtz idea-ology Halloween LIVE. It was such a fun party and the products are incredible! This was my favourite ever Halloween idea-ology release and this jack-o-lantern candy bucket is hands down my favourite piece. The colour, the face, the detail, it’s heavy in your hand, you can remove the handle or have it up or down and it’s thick wire so it just stays in place. I LOVE him and I chose the display dome because I wanted to make it all about him. Scroll on for more details…

    igirlzoe: tim holtz idea-ology halloween 2021 jack-o-lantern candy
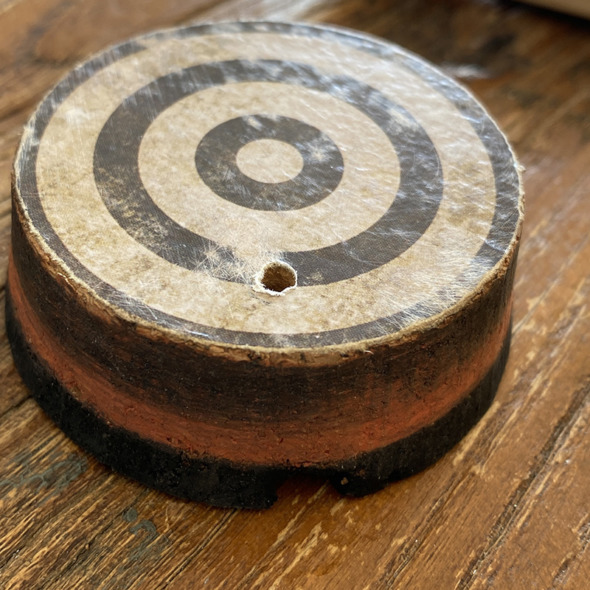
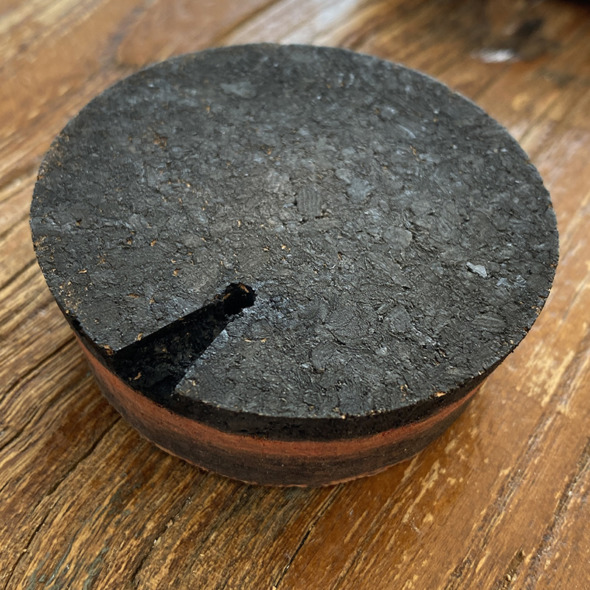
    Take a cork base from the idea-ology display dome and paint with black soot and crackling campfire distress paints. I added a piece from the idea-ology halloween baseboards pack, it was a little thicker than I wanted so peeled away a couple of layers of cardboard and stuck down with distress collage medium. Trim and sand the edges and top. Make a hole in the base big enough to thread tiny lights through. I use a dremel micro with the drill attachment.

    igirlzoe: tim holtz idea-ology halloween 2021 jack-o-lantern candy
    Using the Tim Holtz Tonic craft knife I cut a wedge from the hole to the edge for the tiny lights wire so the dome will stand flat. Add a little hot glue to hold them in place, being careful not to get hot glue on the bulbs as it can short out your lights.

    igirlzoe: tim holtz idea-ology halloween 2021 jack-o-lantern candy
    I thread the tiny lights up through the candy corn tree and cut the excess off. When I add tiny lights I always have them switched on as it helps to see where you’re putting them. The candy corn tree is an awesome idea of Tim’s from way back. You can see the step out on Tim’s blog. I used fossilized amber and rusty hinge distress sprays on mine and I skipped the glitter, because NO! My tree looks bedraggled and wonky, which is totally the look I was going for! Honest! LOL

    igirlzoe: tim holtz idea-ology halloween 2021 jack-o-lantern candy
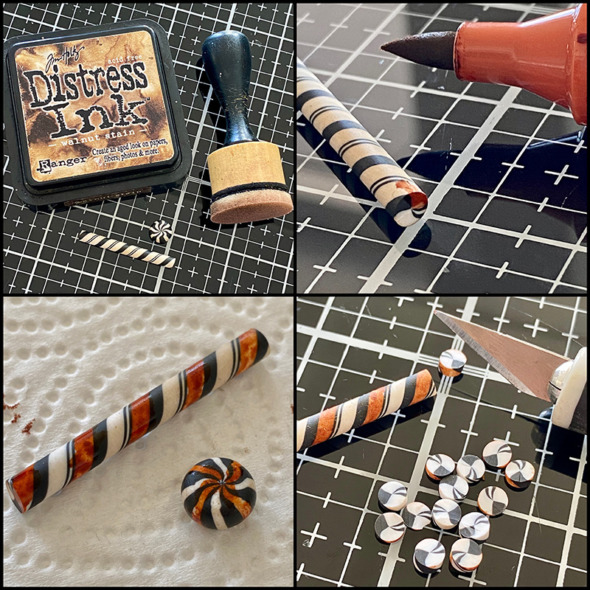
    The new idea-ology halloween confections pieces are so cool! I blended in some walnut stain distress ink and used a faber castell pitt pen (sanguine) to colour. I had planned to use alcohol inks with a blending pen but I couldn’t find my pen so I grabbed this and it worked. The ink is quite wet so I rolled it in kitchen paper to blot the excess and then took one of the confections sticks and cut it with my craft knife. It’s very soft and easy to cut. Yes I cut directly onto my glass media mat. Take a deep breath, it’s ok. 😉

    igirlzoe: tim holtz idea-ology halloween 2021 jack-o-lantern candy
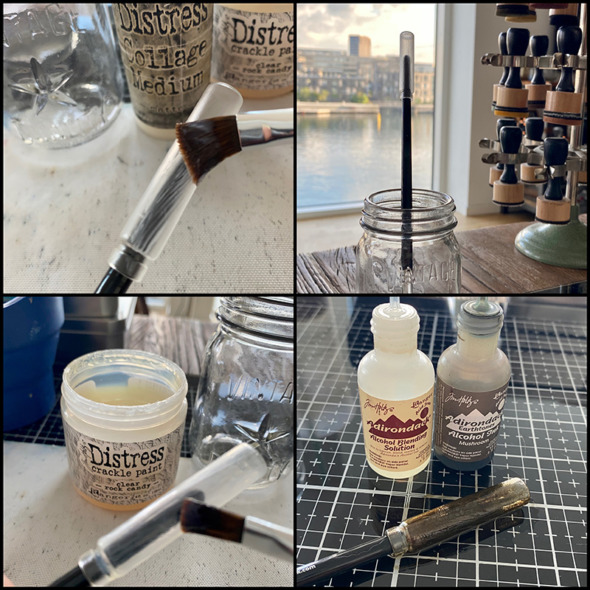
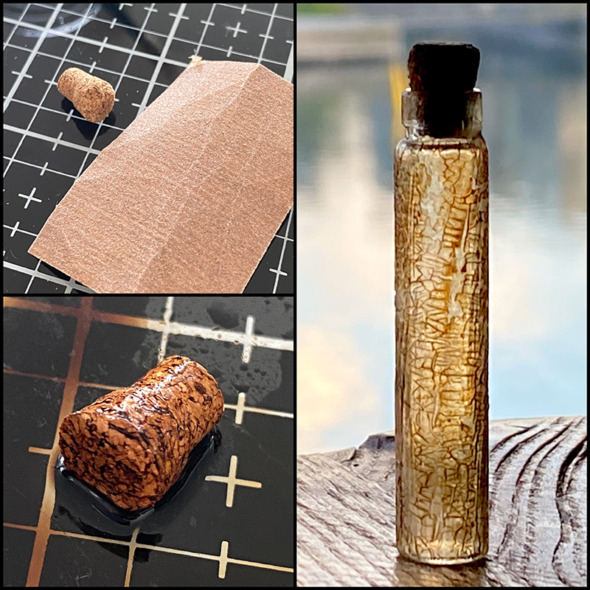
    To make the crackle glass vial for your confections slices, take vial from the idea-ology corked vials pack. Put the vial on the end of a paintbrush to hold in place and using another paintbrush cover with a light layer of distress collage medium. I stand mine in a jar to air dry. Once dry, repeat with a layer of distress clear rock candy crackle paint and set aside to dry again. Finally, add a few drops of mushroom alcohol ink and blending solution to your glass media mat to make a wash and roll the vial in it. You only want a light covering so add more blending solution as needed. Please note that alcohol ink will stain the white non stick mat so use the glass part, unless you don’t care and then go wild.

    igirlzoe: tim holtz idea-ology halloween 2021 jack-o-lantern candy
    Sand the cork and pull bits off to make it look weathered. Add walnut stain distress ink and water to your glass media mat and roll the cork in it and dry.

    igirlzoe: tim holtz idea-ology halloween 2021 jack-o-lantern candy
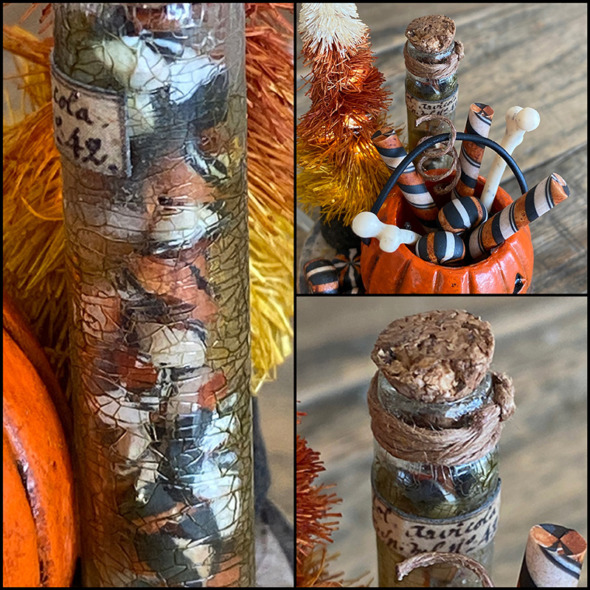
    Add the confections slices to a tall glass vial and add twine and a label from the idea-ology halloween snippets pack. Glue onto the display dome base with distress collage medium.

    igirlzoe: tim holtz idea-ology halloween 2021 jack-o-lantern candy
    Add a few of the candy pieces on the base of the display dome next to the jack-o-lantern candy bucket.

    igirlzoe: tim holtz idea-ology halloween 2021 jack-o-lantern candy
    Add idea-ology boneyard bones and confections pieces to the jack-o-lantern candy bucket and glue into place with distress collage medium.

    igirlzoe: tim holtz idea-ology halloween 2021 jack-o-lantern candy
    This sticker from the idea-ology curiosities sticker book was perfect.

    igirlzoe: tim holtz idea-ology halloween 2021 jack-o-lantern candy
    I added a couple more confections pieces to the other side of the jack-o-lantern candy bucket but wanted the baseboard piece to still show.

    igirlzoe: tim holtz idea-ology halloween 2021 jack-o-lantern candy
    I want to thank Tim, Mario and Paula for all of their encouragement and support. I really found a lot of joy making for this launch and much of it was thanks to them. You will never have a better cheer squad and I am very thankful for them and for all of you who make this community so jack-o-lantern candy bucket filled awesome!

    Thanks for stopping by

    Zoe

    …
    affiliate links used at no cost to you


  7. Makers Gonna Make

    17th October, 2020 by iGirlZoe

    igirlzoe: tim holtz halloween part 2

    Hello Friends. I had the best of intentions to share a post each day with samples I’ve made for the Tim Holtz seasonal releases. 3 days in and I’ve come unstuck (maker joke)! 😉

    igirlzoe: tim holtz halloween part 2
    I was gathering supplies for the LIVE “watch and make” that Tim Holtz is hosting on his facebook page later today and it gave me an idea which fueled my desire to change my plans and make for me, for Halloween and because I love to make.

    igirlzoe: tim holtz halloween part 2
    For the supply list and to learn how to make these beauties during the LIVE later today, go to the Tim Holtz Facebook Page and remember to like the page and turn on notifications so you don’t miss a thing.
    igirlzoe: tim holtz halloween part 2
    I’ve had really positive feedback for sharing more detailed step outs and tips for each project. I’d like to do this more where needed, which of course takes time and is now in direct competition with my wish to celebrate Halloween and make for the current season. I’m sure you can relate that, as makers, we often make “out of season” and miss being in the current one. As this is my favourite season, I want to take a couple of weeks to be “in it” and make for Halloween and put out pumpkins.
    igirlzoe: tim holtz halloween part 2
    I will begin posting my Christmas makes on November 2nd. I hope you can join me then and thank you for your patience.
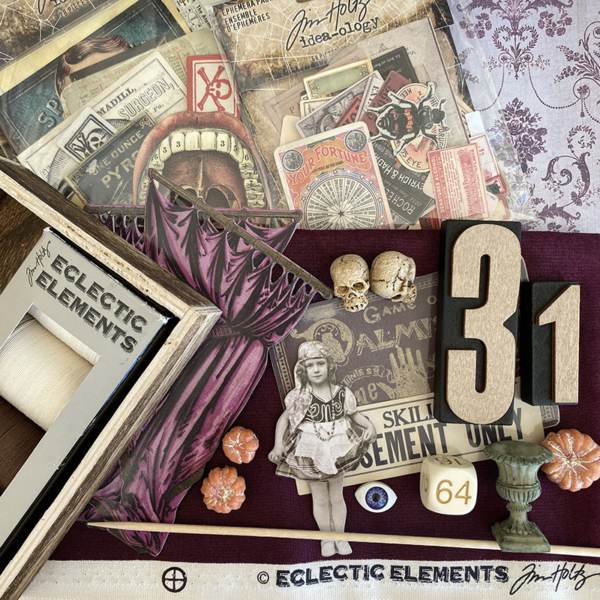
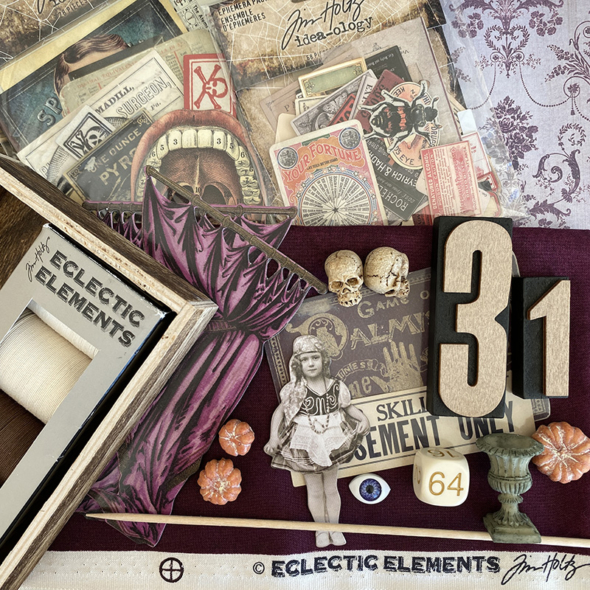
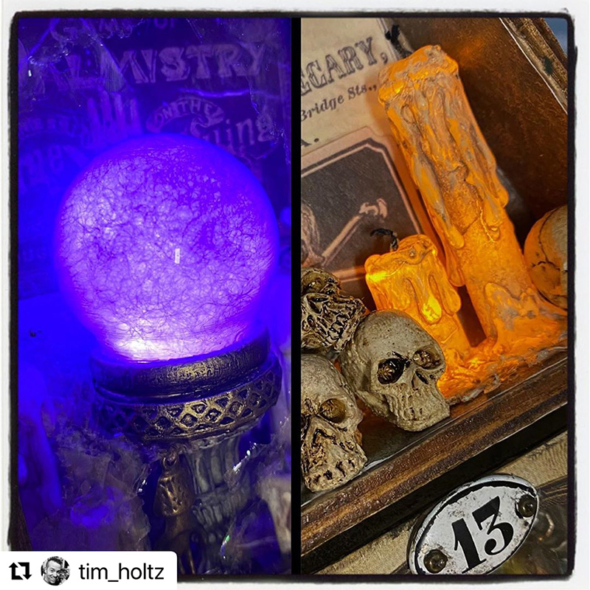
    In the meantime, I gathered the supply list (see pics below) that Tim posted for today’s Halloween Part 2 that is being hosted on the Tim Holtz facebook page, LIVE at 10AM PT (pacific time). I’m so excited to follow and make with Tim, Mario and all the other makers who watch and make LIVE.

    igirlzoe: tim holtz halloween part 2
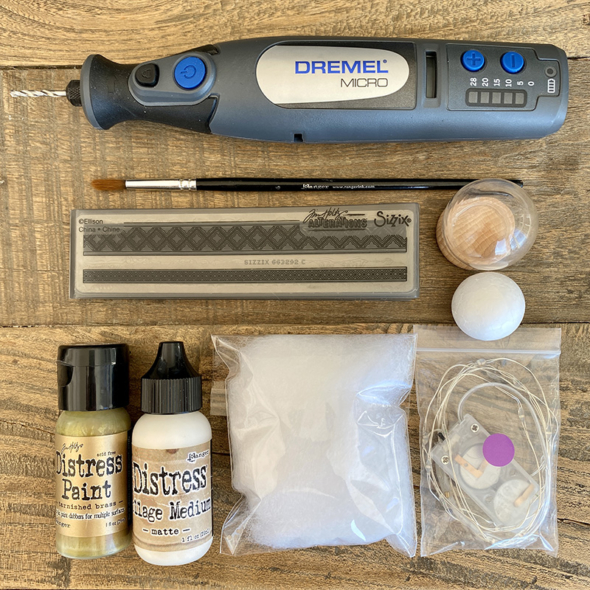
    Crystal Ball supplies.

    igirlzoe: tim holtz halloween part 2
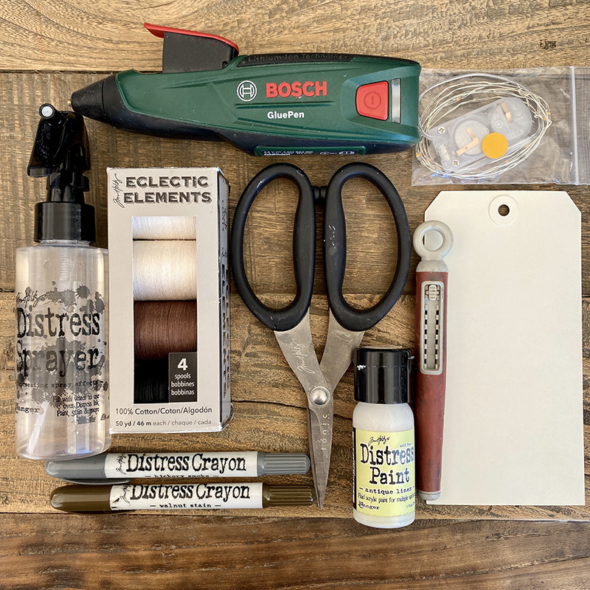
    Candles supplies.

    igirlzoe: tim holtz halloween part 2
    Ready to make…

    Hope to see you there and if you would like to socialise beforehand and share your excitement afterwards, check out the Tim Holtz Addicts group on facebook and bring snacks! 😉
    Have a great weekend and please please take time for yourself and make time to make.

    Zoe


  8. Halloween Street

    16th October, 2020 by iGirlZoe

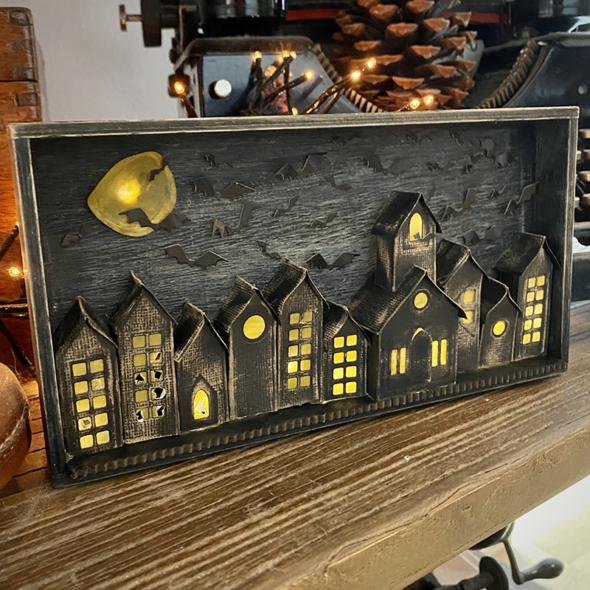
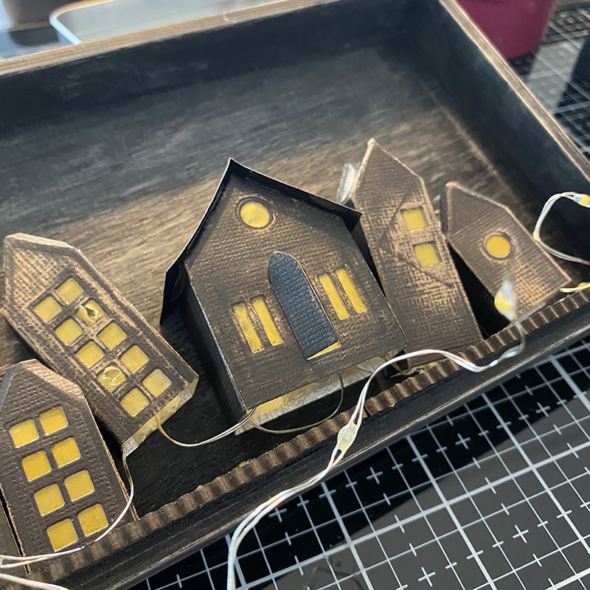
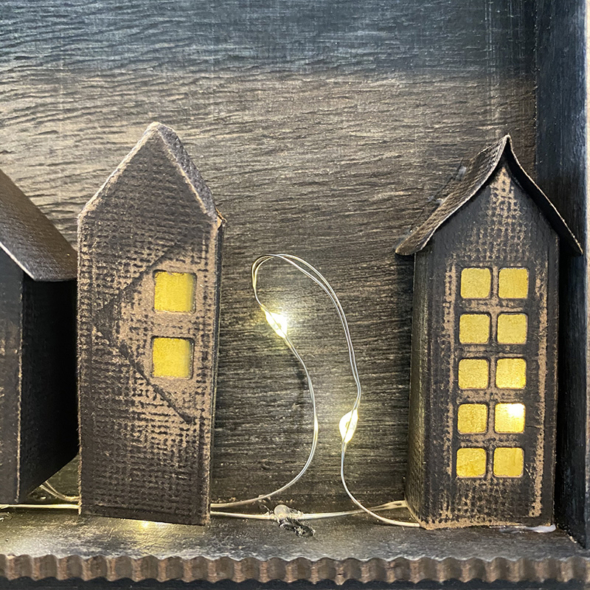
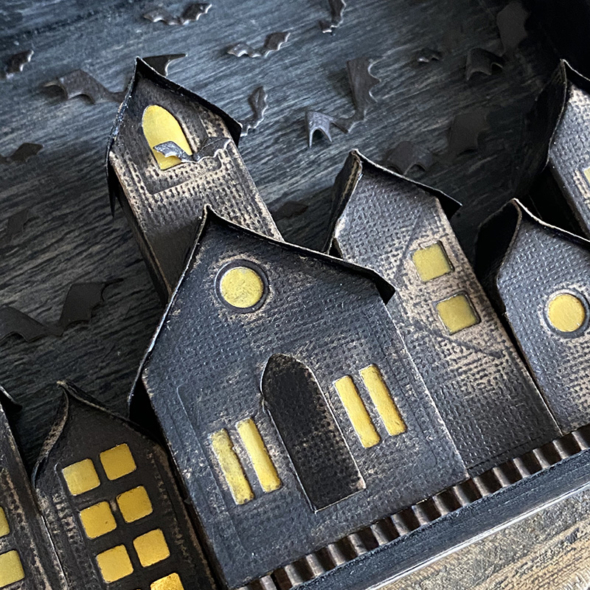
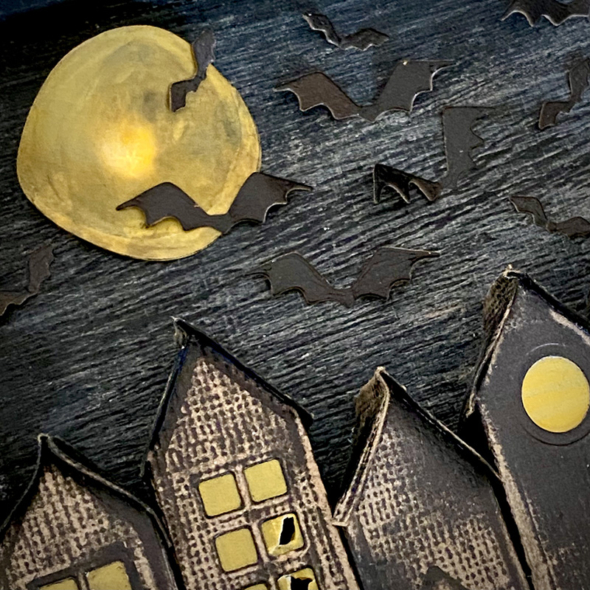
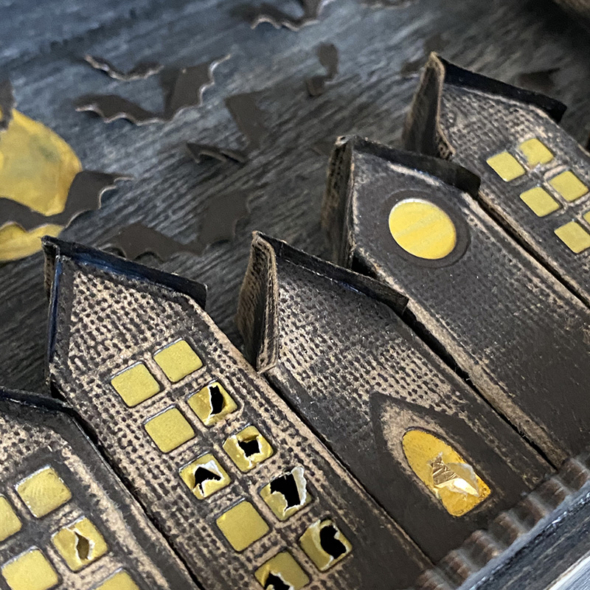
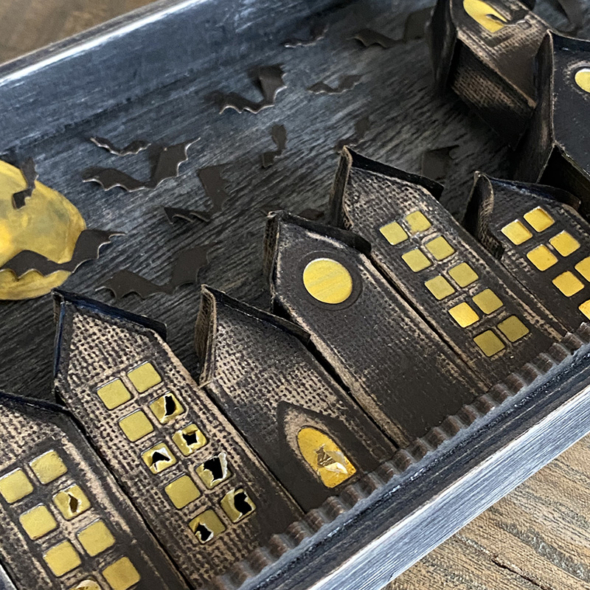
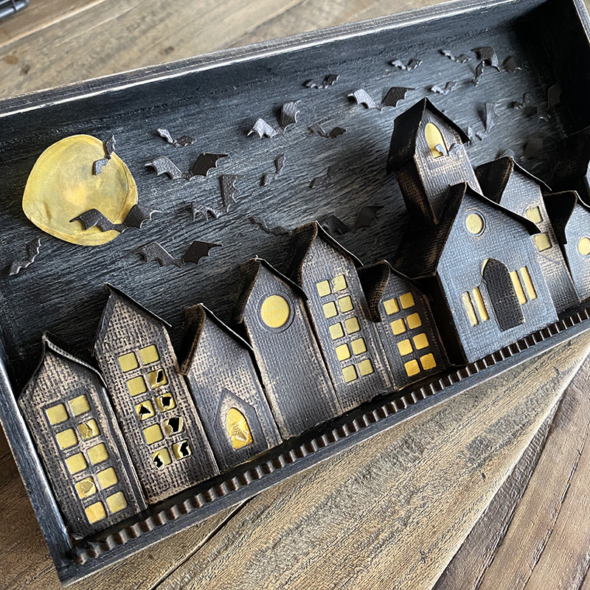
    Hello friends. Firstly I want to say a great big thank you for your kind comments on yesterdays post. I really appreciate the encouragement and I hope that the post will encourage you to make and share something too. I’m back today with a sample I made for the Tim Holtz Sizzix Chapter 4 die release. If you’re ready to get your spook on, take a walk with me down to Halloween street where there are bats in the belfry and something sinister is stirring behind those smashed out windows…

    igirlzoe: tim holtz sizzix chapter 4 paper village thinlits dies
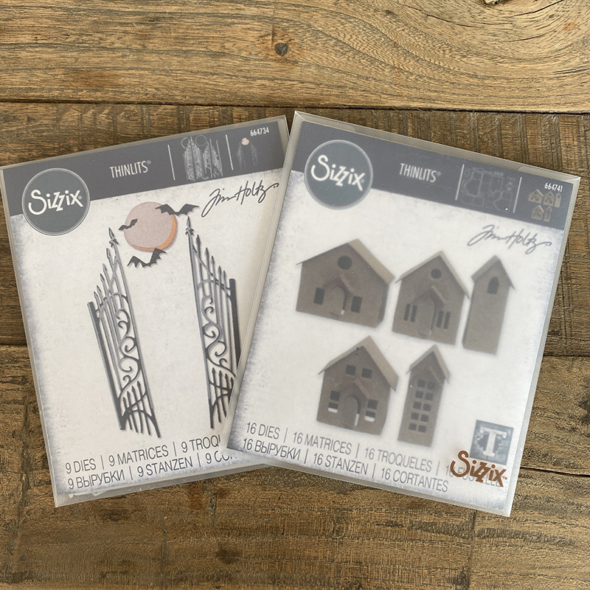
    When I received the chapter 4 dies I confess that I completely overlooked the paper village thinlits dies (664741) . It wasn’t until we had our maker team zoom call with Tim and he showed them built that I “got it” and was hooked! They are so versatile, not only in the way that you can customise and accessorise the buildings, windows, doors and roofs; but that they will be suitable for every season. Plus they make a pretty cute birdhouse. 😉

    igirlzoe: tim holtz sizzix chapter 4 paper village thinlits dies
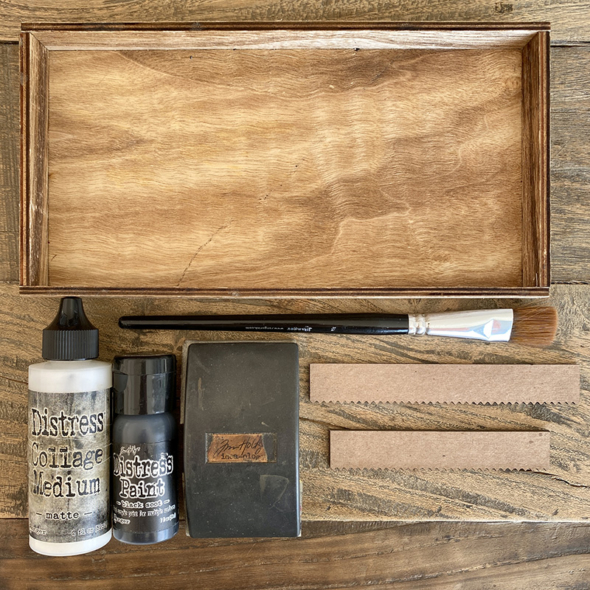
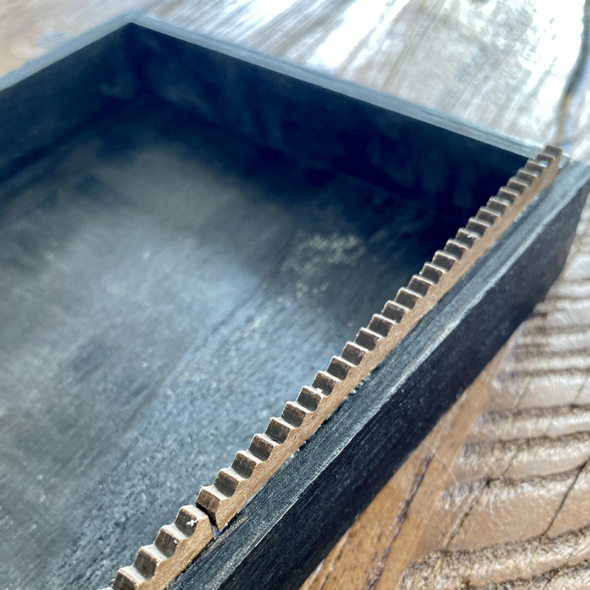
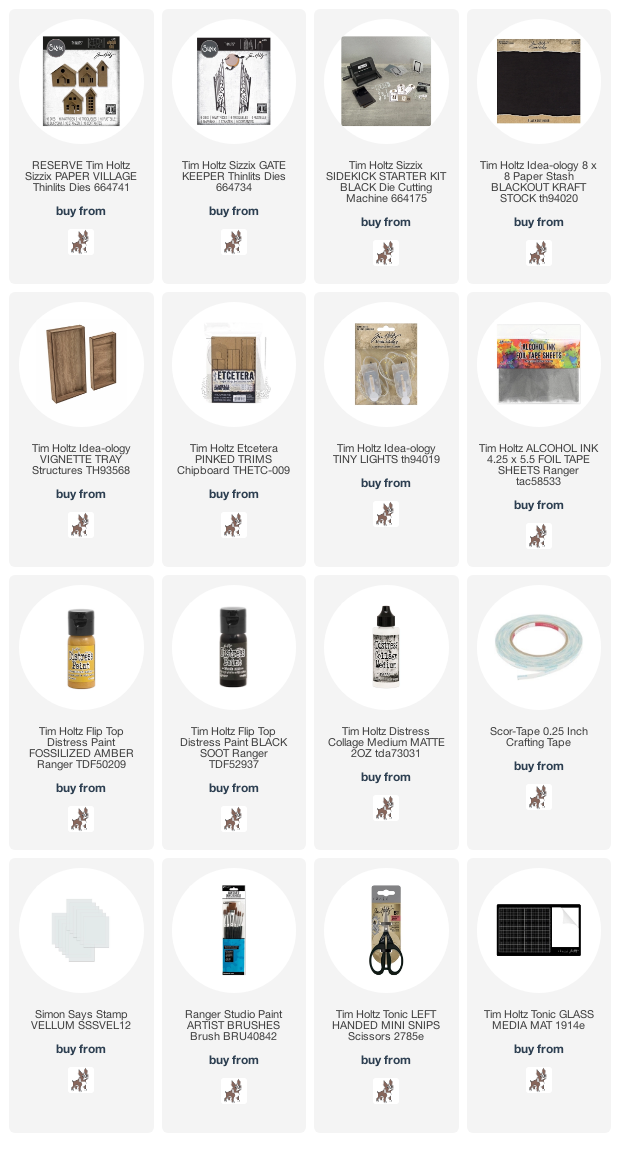
    Gather an idea-ology vignette tray, paintbrush, distress collage medium matte, black soot distress paint, a sanding grip or sandpaper and etcetera thickboard pinked trims.

    igirlzoe: tim holtz sizzix chapter 4 paper village thinlits dies
    Using the paint brush, cover the vignette tray with black soot distress paint and sand the back and edges to give a distressed look.

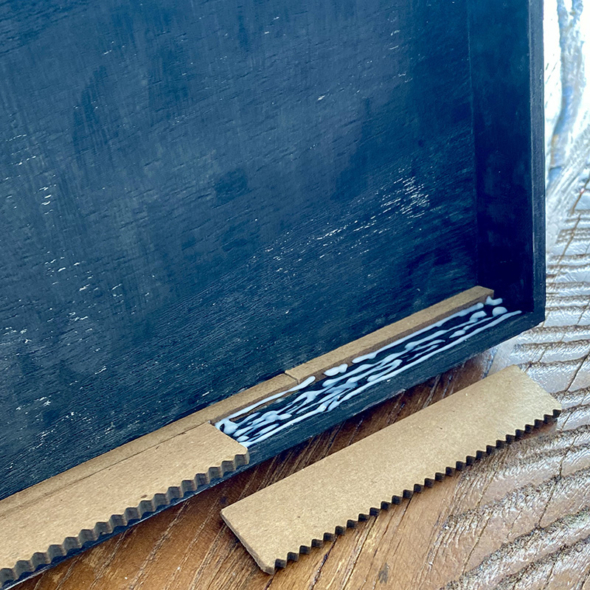
    I wanted to use the small vignette tray as my base but the ledge wasn’t deep enough to seat the largest house that I had planned to make into a church. By overhanging the edge of the vignette you would see the light from the tiny lights and it would spoil the effect of a darkened street, so I came up with a solution… etcetera thickboard pinked trim!

    igirlzoe: tim holtz sizzix chapter 4 paper village thinlits dies
    I used etcetera thickboard pinked trims together with trim from the bat web trims which worked perfectly. Using distress collage medium matte to glue the trim into place, I painted with black soot distress paint to match the vignette.

    igirlzoe: tim holtz sizzix chapter 4 paper village thinlits dies
    I love the pinked trim for this, it works with the creepy vibe of the vignette and gave me the perfect platform for my paper village…

    igirlzoe: tim holtz sizzix chapter 4 paper village thinlits dies
    Next it was time to build my street using the paper village (664741) thinlits dies from Chapter 4 and gate keeper (664734) thinlits dies from Chapter 3… If you’re new to Tim Holtz and or the Sizzix dies, they are released in 4 “Chapters” throughout the year.

    igirlzoe: tim holtz sizzix chapter 4 paper village thinlits dies
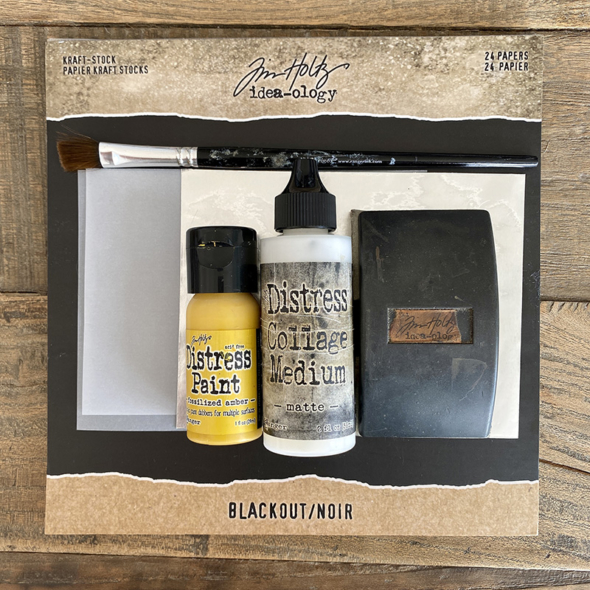
    Gather idea-ology Blackout Kraf-Stock (because it is the BEST), alcohol ink foil tape, vellum, paintbrush, sanding grip or sandpaper, distress collage medium matte (you’ll want the bottle for this) and fosslized amber distress paint.

    igirlzoe: tim holtz sizzix chapter 4 paper village thinlits dies
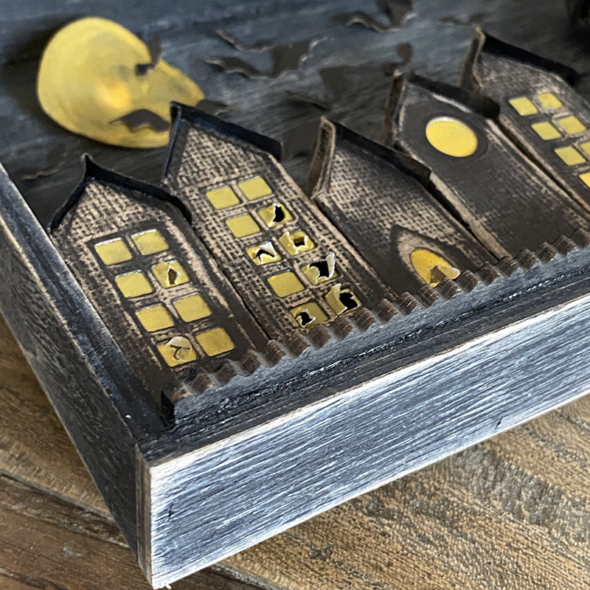
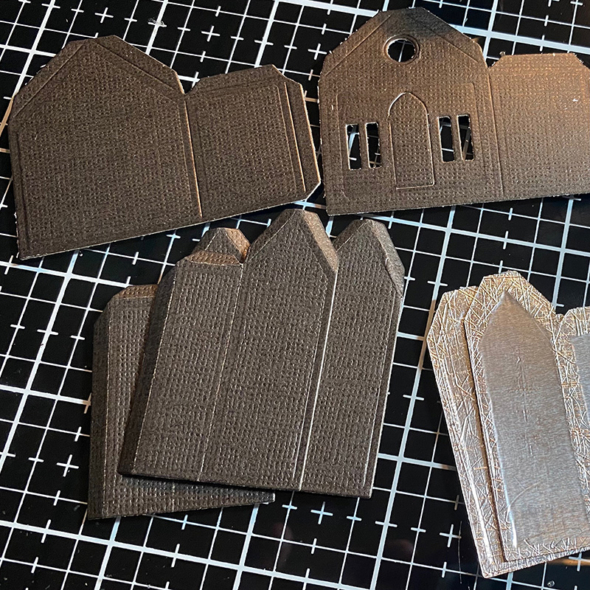
    Die cut your village from the Blackout Kraft-stock and sand, it will reveal the cool kraft core. For the back of the houses, cover the blackout with foil tape before die cutting. You don’t need to do this, but the reason that I did with some of the houses was to reflect the tiny light and give a brighter light compared to those which I didn’t line with foil and painted black inside. I didn’t add lights inside those houses to give the effect that the lights were out.

    igirlzoe: tim holtz sizzix chapter 4 paper village thinlits dies
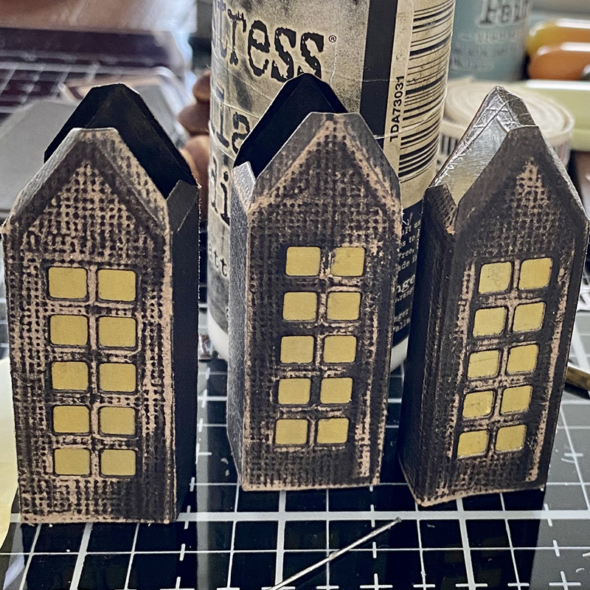
    You can see in the pic above that only the house on the right is foil lined. The other two were painted with black soot distress paint and won’t be lit inside.

    igirlzoe: tim holtz sizzix chapter 4 paper village thinlits dies
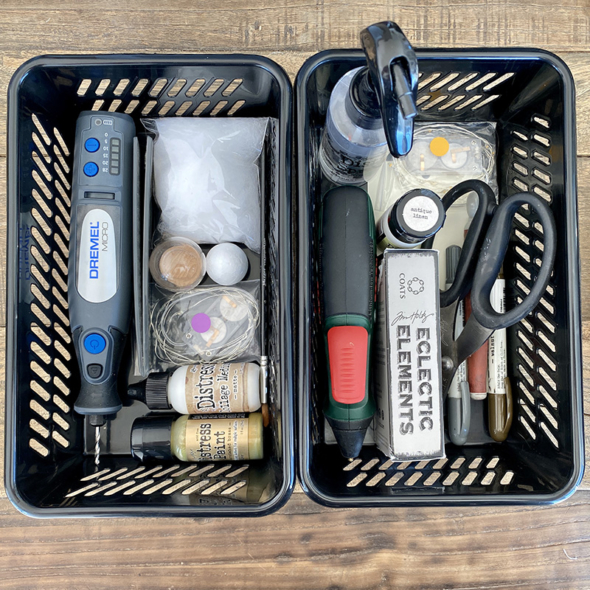
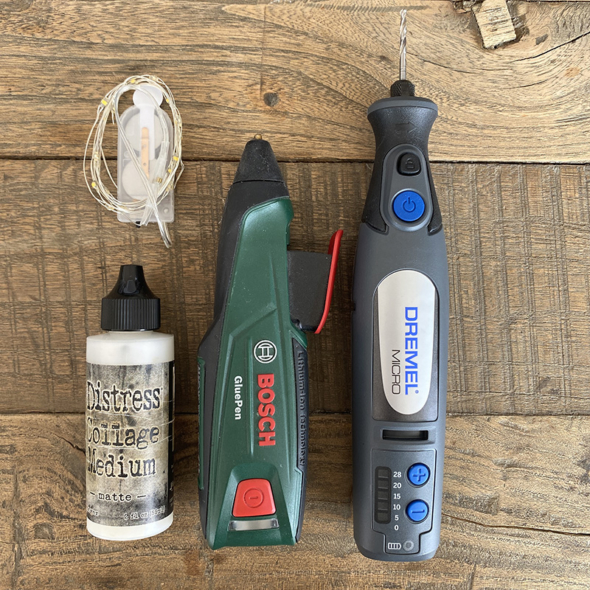
    The tiny lights were fed through a hole in the back of the vignette tray I made using a dremel micro and drill bit. I got this for my birthday and it’s the business. I used a hot glue gun to hold the tiny lights in place before securing them with distress collage medium matte. The hot glue is easier than using tape to hold them in place but I pulled up the hot glue after the Distress collage medium had bonded as the houses won’t sit flush on hot glue. Do not put hot glue on the bulb of the tiny lights, only use it on the wire part or you could damage your lights.

    igirlzoe: tim holtz sizzix chapter 4 paper village thinlits dies
    Place your houses into the vignette tray to see where you want them. You will see from the pic above that apart from the large house that would become the church, none of the houses had the roof on. The reason for this was because I wanted to be able to flatten the houses and trim the bottom using my TH tonic guillotine to vary the height of the houses. I didn’t want to trim them until I could see how they looked stood next to each other. I was tucking the lights in to each house to figure out the placement of these too. I thought this picture might be useful for you…

    igirlzoe: tim holtz sizzix chapter 4 paper village thinlits dies
    Then it was time to assemble the tray. I thread the lights through the hole at the far left end of the vignette box and ran them along the back, keeping the wire taught and securing in place with distress collage medium. When the lights were at the very right hand end of the vignette I turned them back and used the excess to start to tuck into the houses as I glued them down. The tiny lights are really easy because the wire allows you to bend them into shape, allowing you to place the house over the top and secure by running a line of distress collage medium to the base of the house. The glue shrinks as it dries so you won’t be left with residue.
    igirlzoe: tim holtz sizzix chapter 4 paper village thinlits dies
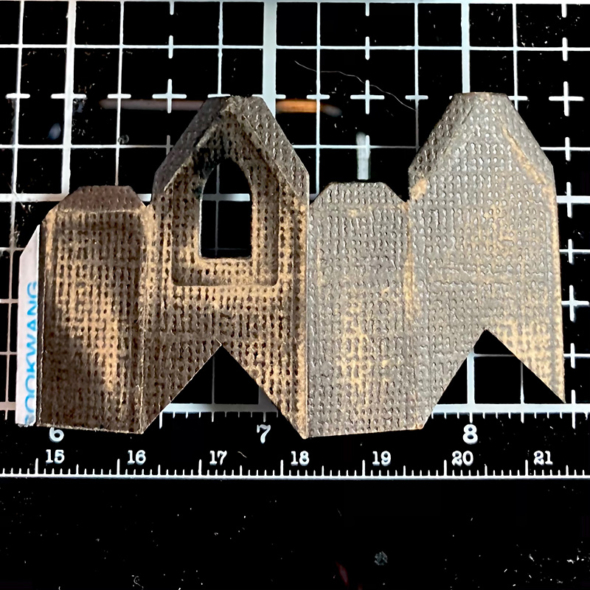
    To create the church spire, I die cut the tall thin house and used one of the doors as a window. I cut a V into the front and back (as pictured above) which allowed it to sit on top of the church roof.

    igirlzoe: tim holtz sizzix chapter 4 paper village thinlits dies
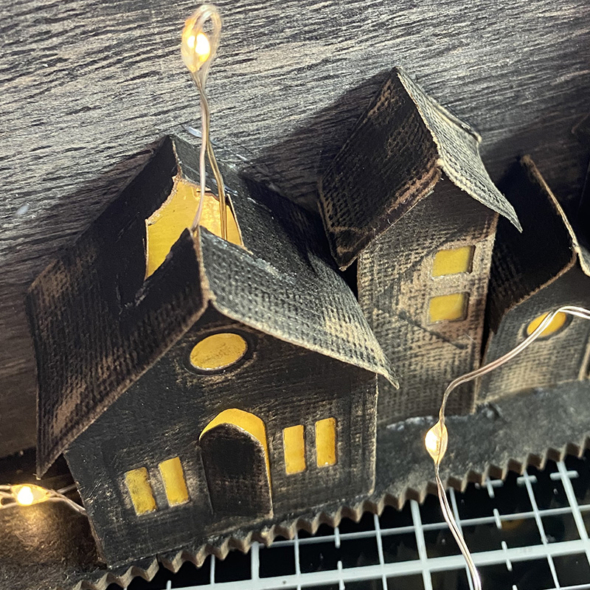
    I cut a hole in the roof to allow the light to be fed up into the spire.

    igirlzoe: tim holtz sizzix chapter 4 paper village thinlits dies
    I definitely tapped into my love of Tim Burton and the movie Beetlejuice when I sat down to make this. I curled the roofs slightly to give it a creepy look. I found it was best to place the roof over the house without glue first and curl the roof. Then add glue and hold into place. If you try to curl it as you stick it down for the first time, it peels back up.
    igirlzoe: tim holtz sizzix chapter 4 paper village thinlits dies
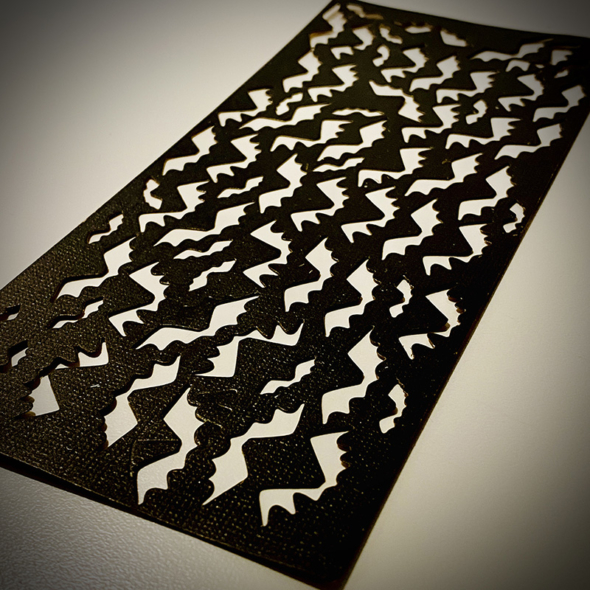
    I die cut the moon from the gate keeper thinlits die (664734) out of vellum which I painted with fossilized amber distress paint. I used this paint covered vellum to line the inside of the front of the houses over the windows. The tiny lights thread back out through the hole on the left of vignette and back in through a hole I drilled behind the moon. It allowed me to just use one set of lights for the entire vignette tray.

    igirlzoe: tim holtz sizzix chapter 4 paper village thinlits dies
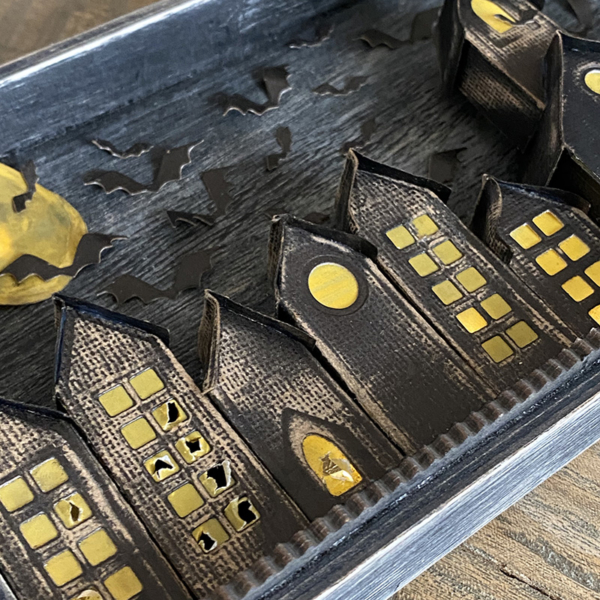
    Using my scissors I poked holes through some of the vellum and used the non brush end of my paintbrush to widen them and make them looked smashed out.


    You can see the houses on the left that were painted black inside and had no tiny lights tucked inside. With smashed out windows and no lights they look abandoned…
    igirlzoe: tim holtz sizzix chapter 4 paper village thinlits dies
    I’m very lucky to have a husband who will help me die cut to meet a deadline. As I was racing the clock to get the houses assembled before FedEx came to collect, my sweet husband die cut all these bats from the gate keeper thinlits die set for me. He’s a keeper.

    igirlzoe: tim holtz sizzix chapter 4 paper village thinlits dies
    If you missed out on the facebook LIVE, you can catch up on all the fun over on Tim’s blog.
    Thanks for stopping by. I will be back tomorrow with more makey makes.
    Zoe


  9. Resting Witch Face & Sisters

    11th September, 2020 by iGirlZoe

    igirlzoe: tim holtz ranger ink crackling campfire distress

    Hello Witches… There have been so many awesome makes with the new crackling campfire distress colour and I was excited to get to making something myself. If you missed the facebook LIVE, grab your snacks, jump on your broomsticks and fly on over to Tim’s blog to catch up on all the fun.

    igirlzoe: tim holtz ranger ink crackling campfire distress
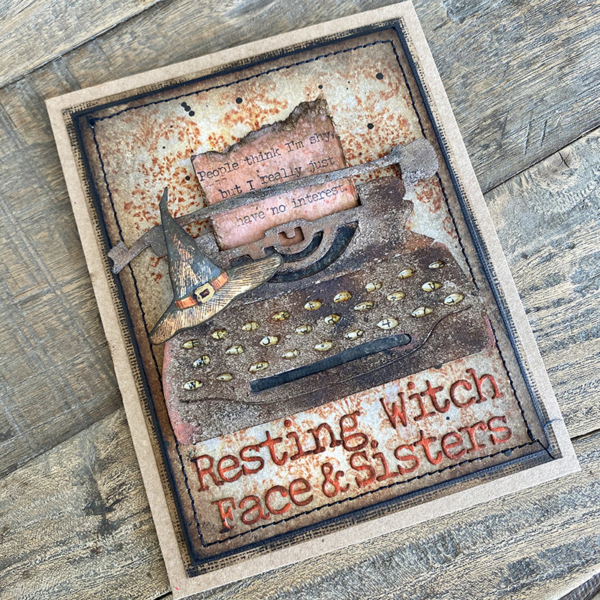
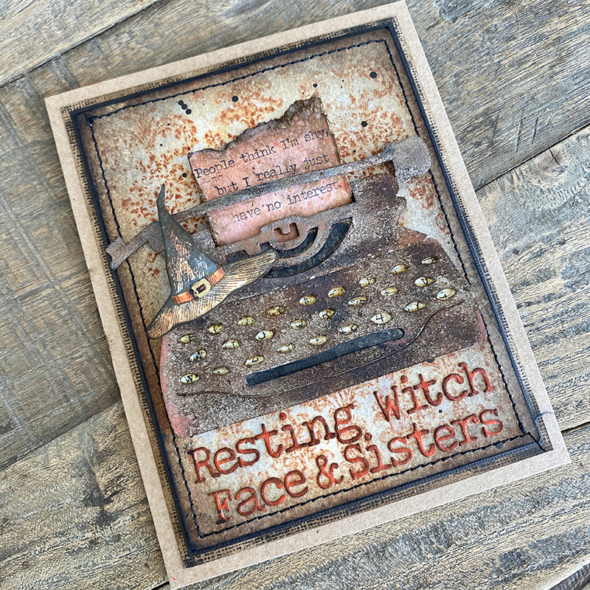
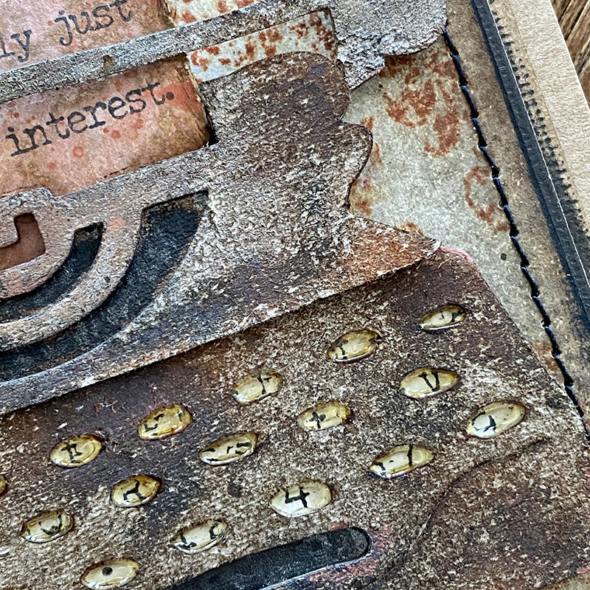
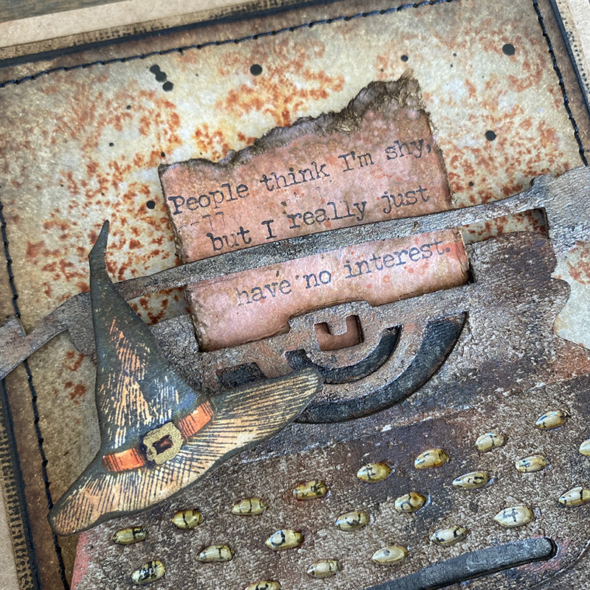
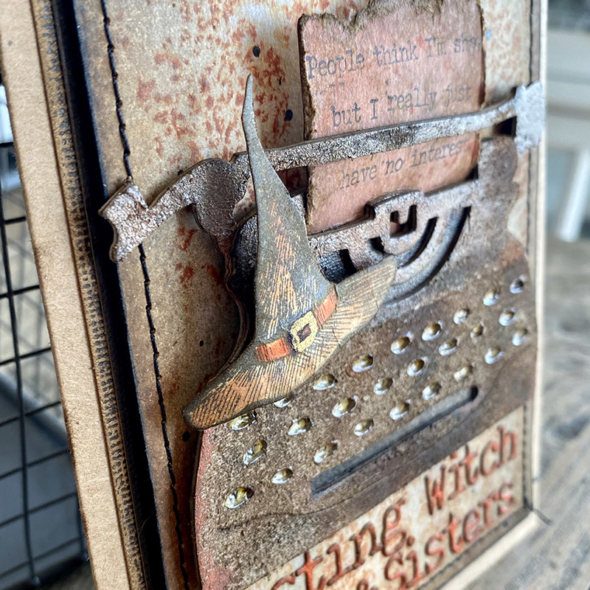
    There’s been some serious story telling going on over at Resting Witch Face & Sisters publishing company! Their witchy typewriters have been clackety clacking away, as they write by the light of the crackling campfire. The full moon seems to make them particularly imaginative and they’ve been cooking up some serious story soup…

    igirlzoe: tim holtz ranger ink crackling campfire distress
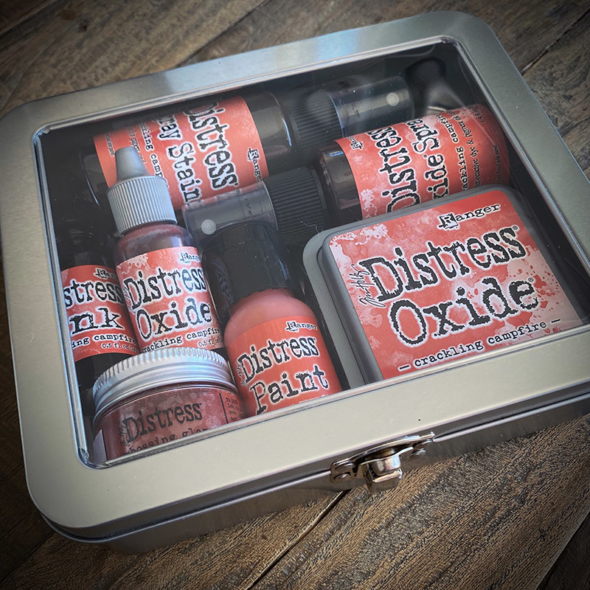
    Much like speckled egg, crackling campfire is a chameleon of the distress family. It’s not one colour, it’s many and this would be one I would travel with now (if we could), because it’s like those retro pens with 4 colours in one. I’ve had yellow, orange, pink and a red tone all from one distress colour! It will sit alongside rusty hinge as my fave in that colour range …once it’s been released from it’s special quarantine tin of course! 😉

    igirlzoe: tim holtz ranger ink crackling campfire distress
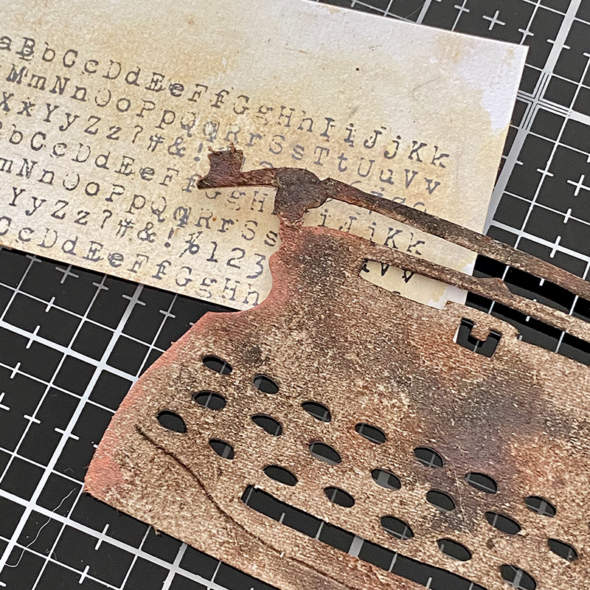
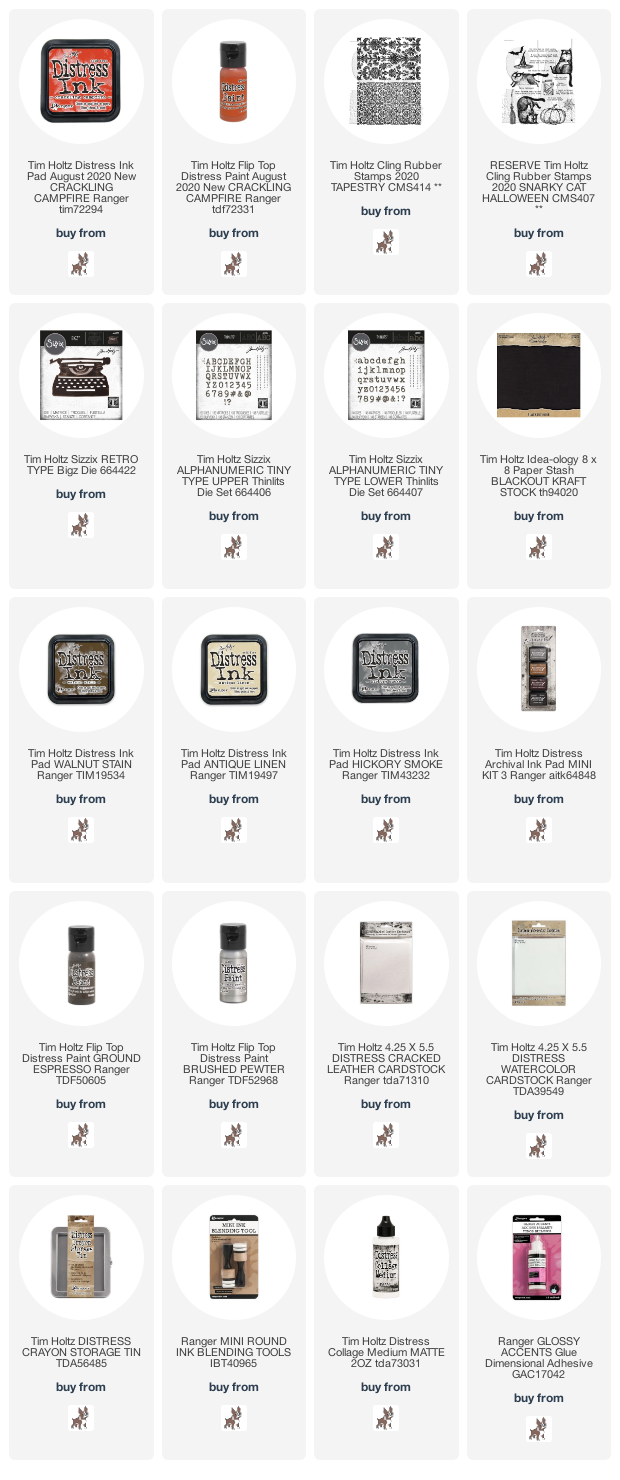
    I used the retro type bigz die from this years Sizzix chapter 1 release to die cut grungeboard. Unfortunately, grungeboard is long retired, but I have a small hoarded stash that I’ve decided to use and enjoy! I sanded the die cut and blended in walnut stain distress ink and added a little crackling campfire distress paint to the edges. I used a stamp from school desk CMS057 stamp. Stampers Anonymous don’t retire Tim’s stamps and if you’re having trouble finding a set, especially an older one, they’re always available direct from Stampers Anonymous.

    igirlzoe: tim holtz ranger ink crackling campfire distress
    The keys fit pretty well over the typed stamp. I filled them with glossy accents, added brushed pewter distress paint to parts of the typewriter and set aside to dry.

    igirlzoe: tim holtz ranger ink crackling campfire distress
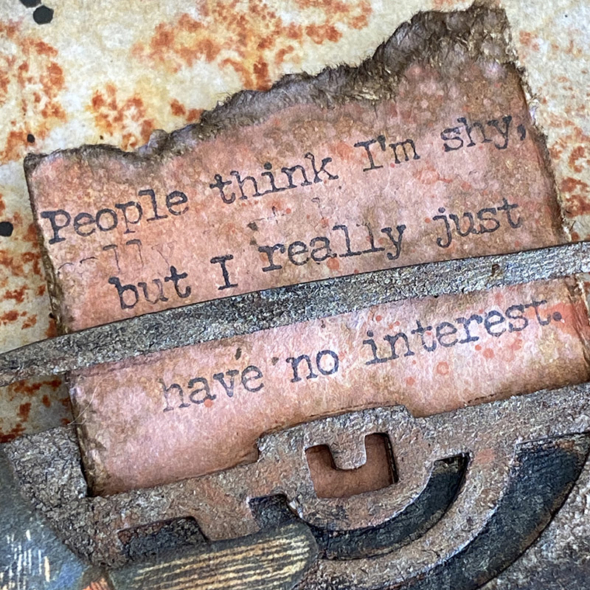
    The card background was made by stamping the new background stamp from tapestry stamp set CMS414 in crackling campfire distress ink, spritzed with water. I blended in antique linen and hickory smoke distress inks and edged with walnut stain. Using the new snarky cats halloween stamp set CMS407 to stamp a sentiment in black soot distress archival ink over the top of cardstock, which was covered with the new crackling campfire distress paint. I also stamped the hat from the same set and used the crackling campfire distress ink to watercolor the band. See all the different tones?

    igirlzoe: tim holtz ranger ink crackling campfire distress
    You can see the dual colours in the paint on the cardstock too. When the paint was mixed with water it took on a pinkish tone and when I picked up the droplets with less water, they remained really orange. Walnut stain distress ink was the perfect match to tone down the brightness, which was perfect for me. You can see where I didn’t quite wipe the ink away when stamping the snarky sentiment on different lines. I was going to do it again but I liked the imperfection of it, it’s like an actual “typo”…

    igirlzoe: tim holtz ranger ink crackling campfire distress
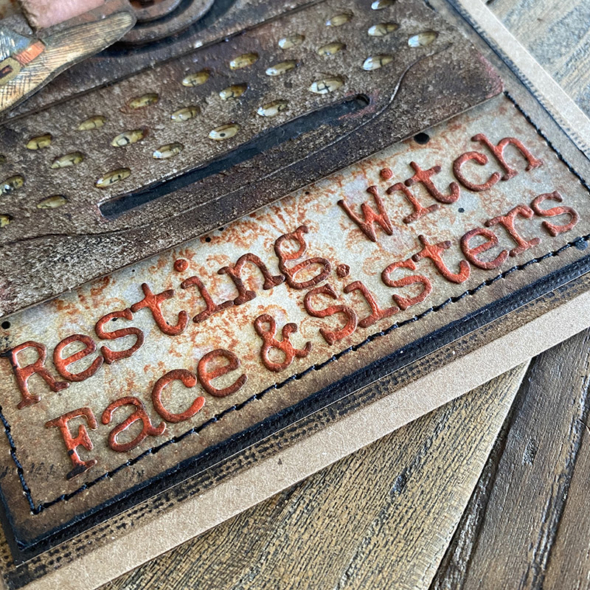
    I used the alphanumeric tiny type upper and lower thinlit die sets from this years Sizzix chapter 1 release to cut my message. Die cut from the new distress cracked leather cardstock and blended crackling campfire distress ink over the top with a blending tool, edging with walnut stain distress ink. I love that it looks burnt like fire. I used distress collage medium (and tweezers) to attach them to the card. I stitched with my sewing machine and mounted onto blackout kraft-stock and sanded the bottom layer but left the middle layer unsanded.

    igirlzoe: tim holtz ranger ink crackling campfire distress
    Thanks for flying by and a big thank you to those who left kind comments, and to those who left the other ones, oh well, thanks for taking time to swing by anyway. Fly safe when you leave, there’s a lot of trees out there and karma is a witch. 😉

    Zoe


  10. Surgeon

    5th September, 2020 by iGirlZoe

    igirlzoe: tim holtz halloween stampers anonymous examination anatomy chart

    Hello friends. Happy Saturday! I’m sharing another card I made with the new Tim Holtz Stampers Anonymous halloween stamps. If you missed the Halloween party on facebook LIVE you can catch up on all the fun on Tim’s blog.

    igirlzoe: tim holtz halloween stampers anonymous examination anatomy chart
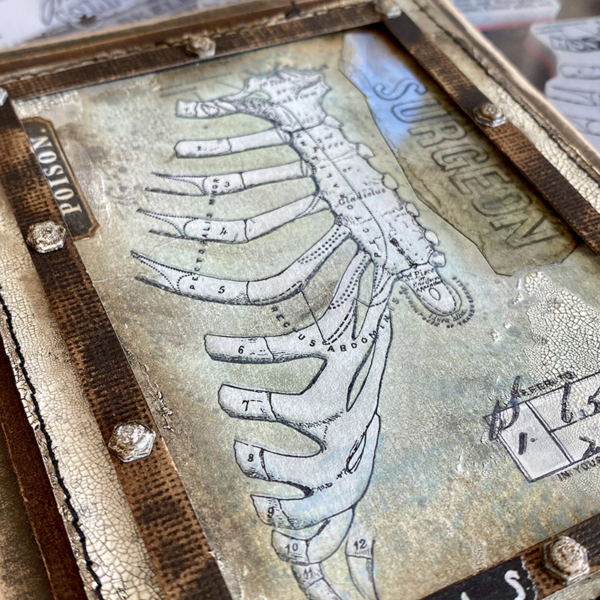
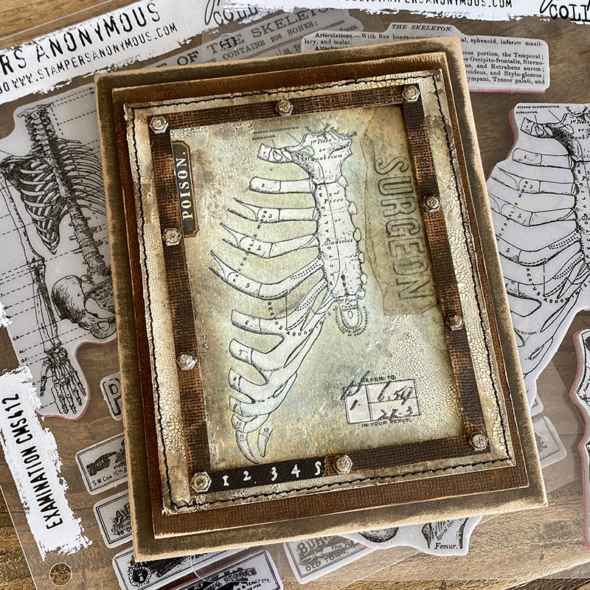
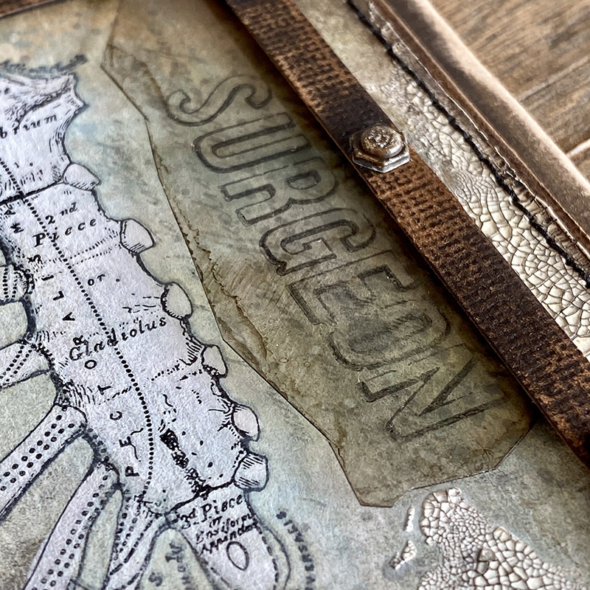
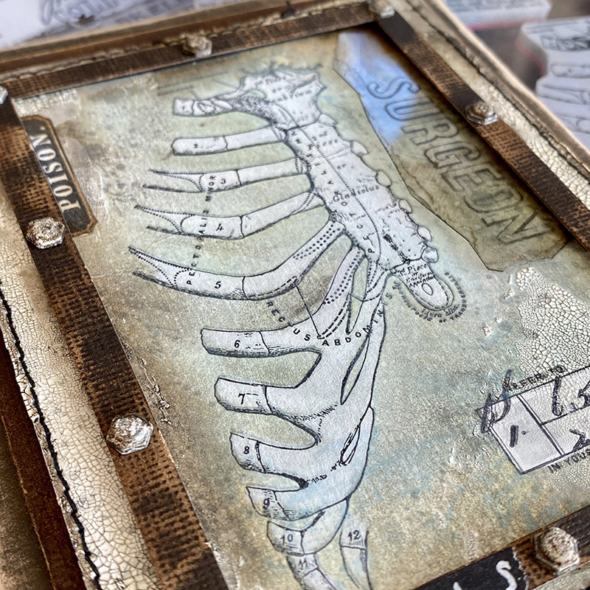
    I love the new Anatomy Chart CMS411 stamp set, the detail on the stamps is incredible and they’re beautifully vintage, which I really love. Here’s how I made the card…

    igirlzoe: tim holtz halloween stampers anonymous examination anatomy chart
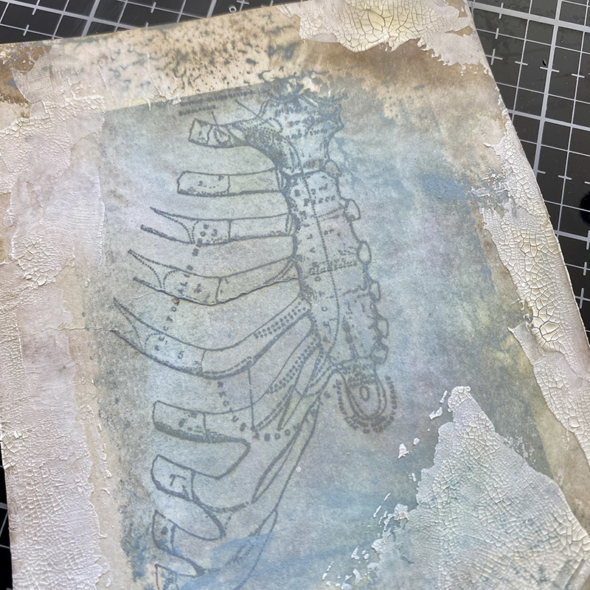
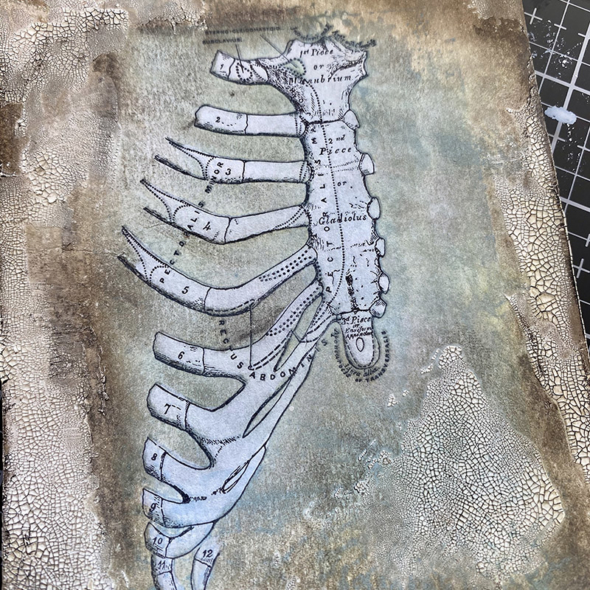
    I squished speckled egg distress oxide and frayed burlap distress ink onto my glass media mat and spritzed with water. I laid a piece of distress watercolor cardstock over the top and pressed down, leaving for a moment for the ink to be absorbed and then lifted. Once dry, I added distress crackle texture paste around the edges and stamped the rib cage from Anatomy Chart CMS411 in hickory smoke distress archival ink using my stamp platform, leaving the stamp in place so it can be stamped a second time later.

    igirlzoe: tim holtz halloween stampers anonymous examination anatomy chart
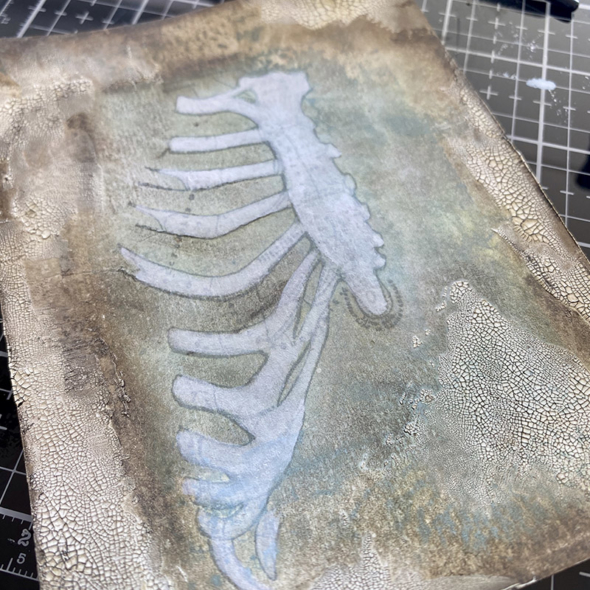
    Mixing gesso and water I painted the rib cage, don’t worry about covering the detail. I used Dina Wakley’s gesso, adding water to get a slightly more translucent look.

    igirlzoe: tim holtz halloween stampers anonymous examination anatomy chart
    Once dry, I placed back onto the stamp platform moving the cardstock ever so slightly and stamping again, this time in black soot distress archival ink.

    igirlzoe: tim holtz halloween stampers anonymous examination anatomy chart
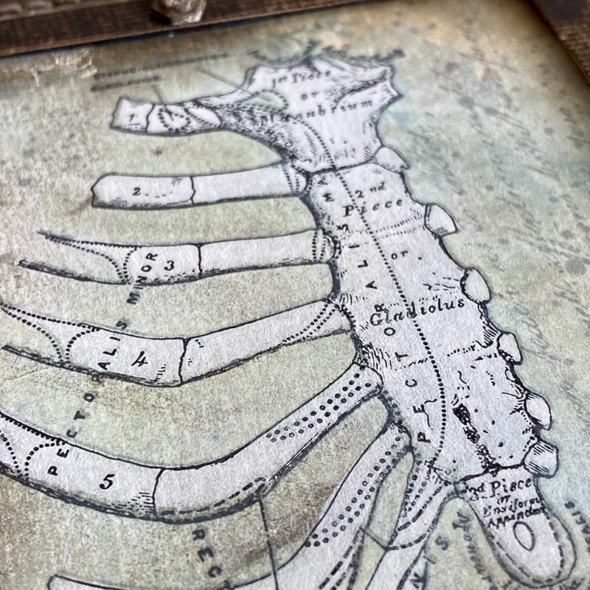
    Check out the detail of this stamp!! You see the nice subtle drop shadow from stamping the first time in hickory smoke distress archival ink.

    igirlzoe: tim holtz halloween stampers anonymous examination anatomy chart
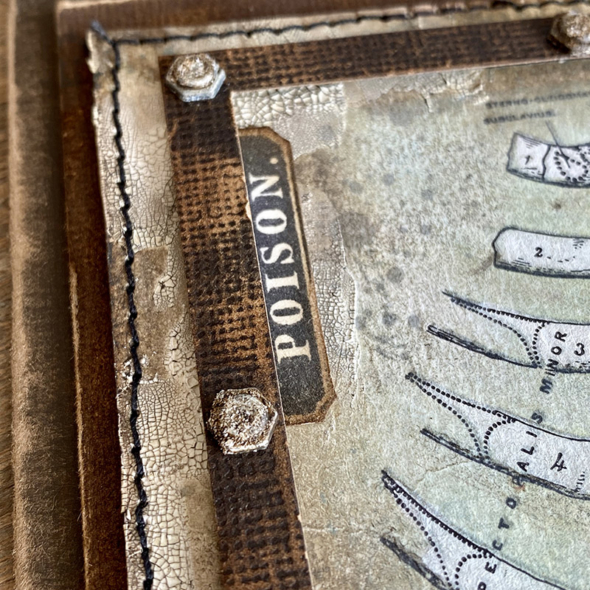
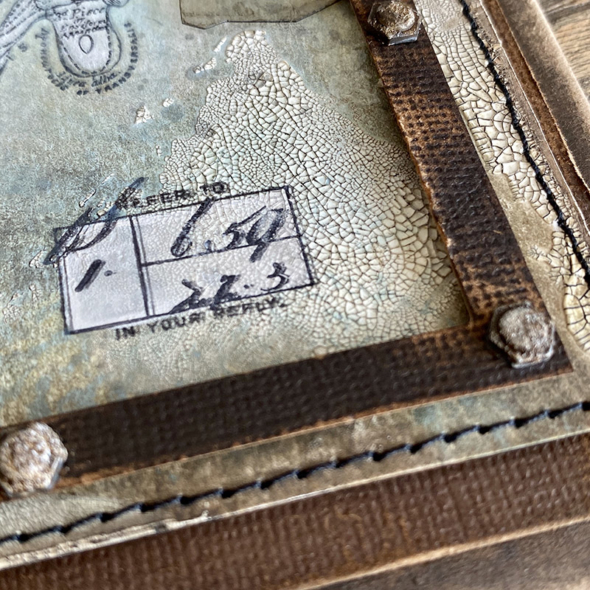
    I pulled out Examination CMS412 stamp set and stamped the awesome poison label. Cutting it in half and sliding it underneath the frame I made using the Tim Holtz Sizzix stitched rectangles thinlits dies (661189). I use these all the time to make frames cut from idea-ology blackout kraft-stock, sanded and blended with walnut stain distress ink.

    igirlzoe: tim holtz halloween stampers anonymous examination anatomy chart
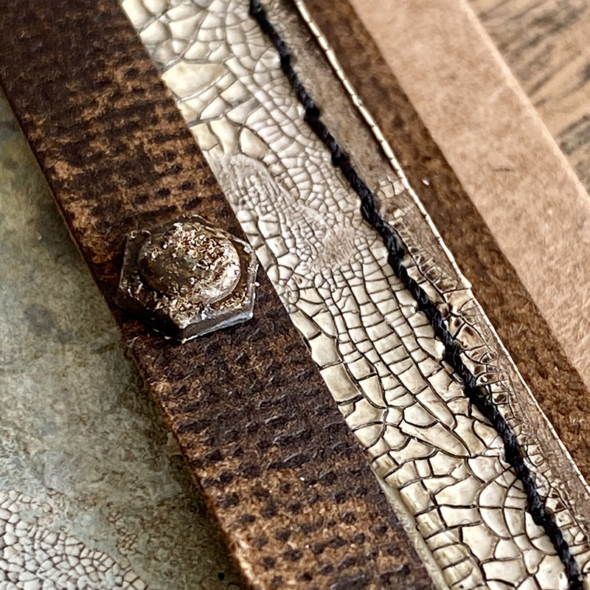
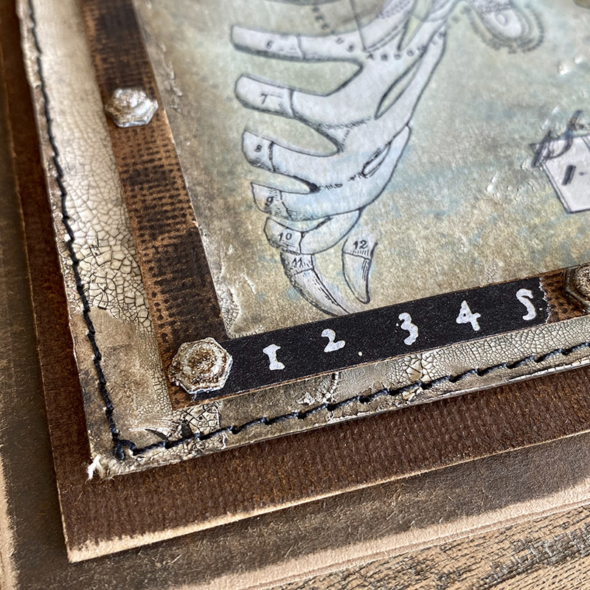
    I added idea-ology hardware heads that I covered in distress grit-paste, iced spruce and ground espresso distress paint. Check out the crackle from the distress crackle texture paste. I blended in walnut stain distress crayon to highlight the crackle. I stitch my cards using a singer heavy duty sewing machine and a sharp needle, I don’t use special needles.

    igirlzoe: tim holtz halloween stampers anonymous examination anatomy chart
    I added a piece of packaging I recycled from a Sizzix bigz die with Surgeon stamped using the Examination CMS412 stamp set which I cut a jagged edge and added mushroom alcohol ink to the back. I glued under the frame at the top and side edge with a tiny line of distress collage medium using the fine tip applicator bottle.

    igirlzoe: tim holtz halloween stampers anonymous examination anatomy chart
    I mounted the card onto more idea-ology blackout kraft-stock and added some idea-ology halloween design tape.

    igirlzoe: tim holtz halloween stampers anonymous examination anatomy chart
    Using the same technique as with the rib cage, I added another stamp from the Examination CMS412 stamp set.I love love love this little stamp.

    igirlzoe: tim holtz halloween stampers anonymous examination anatomy chart
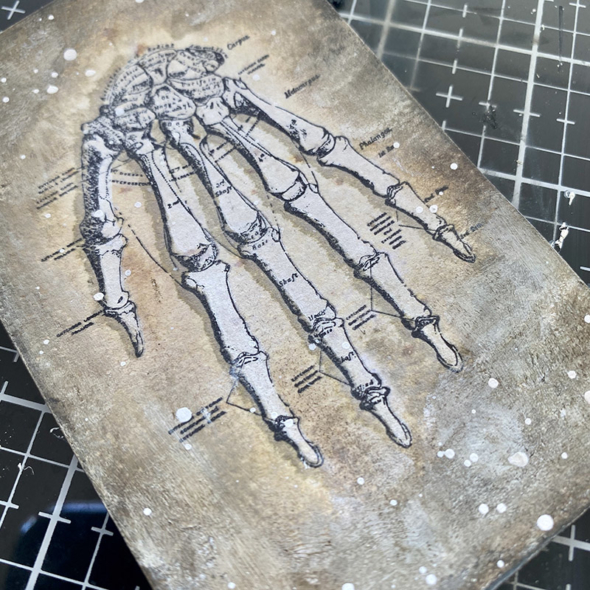
    I used the technique again with the hand stamp. How cool is this?! You’ll see this crop up in a project coming later in the season, there is literally not a surface in my apartment that is free from craft supplies and “in process” projects. I simply love this time of year and it’s definitely my favourite time for making.

    igirlzoe: tim holtz halloween stampers anonymous examination anatomy chart
    Thanks for stopping by. Hope you’re having a great weekend.

    Zoe