1. 2nd October, 2021

    Tim Holtz Village Collection

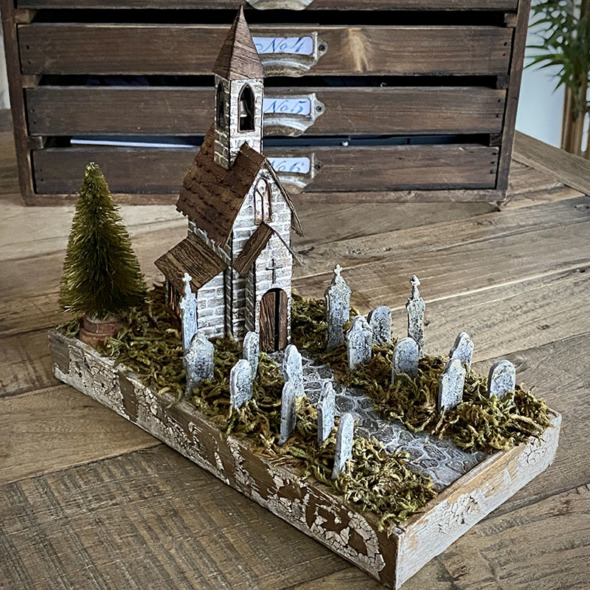
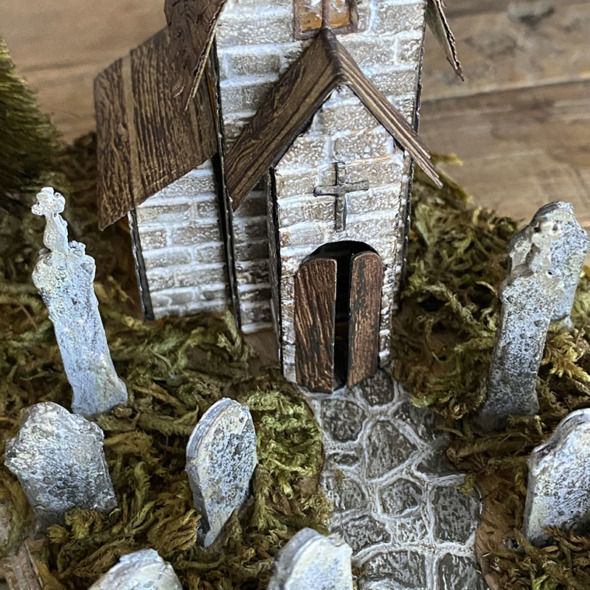
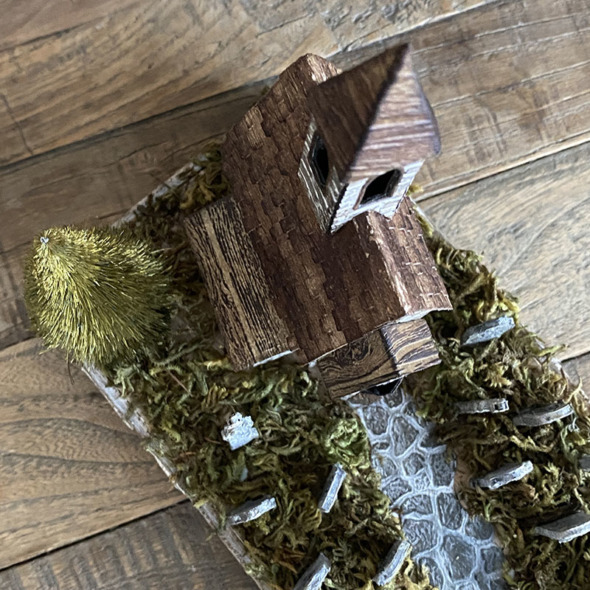
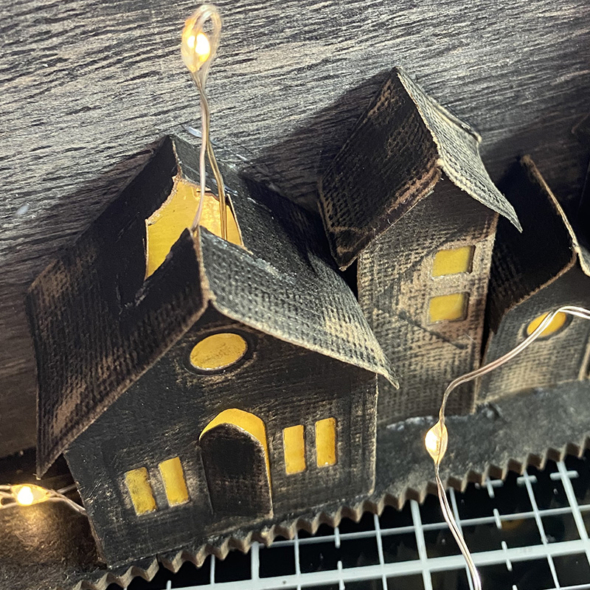
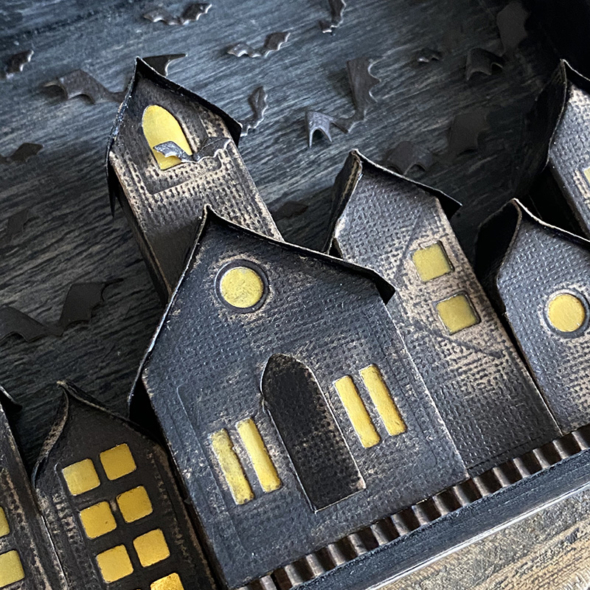
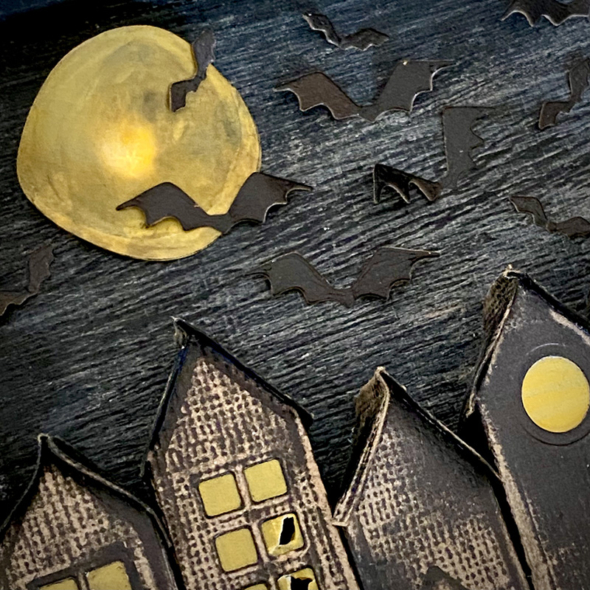
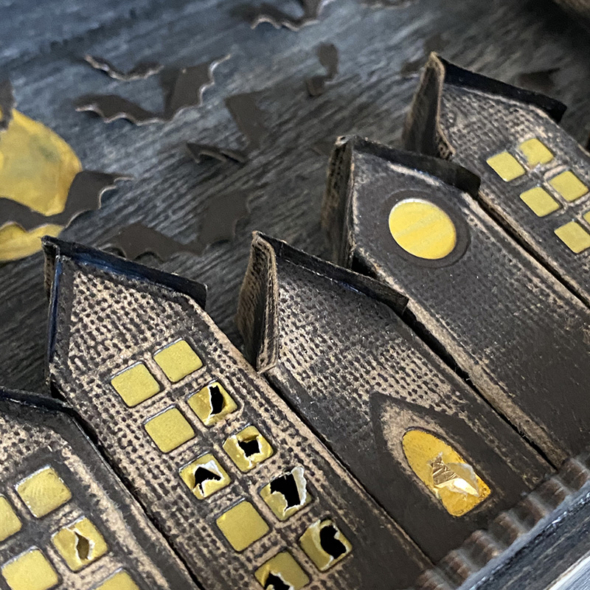
    Hello friends! Did you catch the LIVE launch of the Tim Holtz Village Collection? This is such an exciting day for all the village lovers out there and for those new to the Tim Holtz brand, this is your chance to own your very own set of Village Collection dies.

    Despite the heroic efforts by Mario and his buddy at Fedex, my box didn’t quite make it in time for the LIVE, so Tim came up with a Plan B. I’m very grateful to them both for always looking out for their makers.

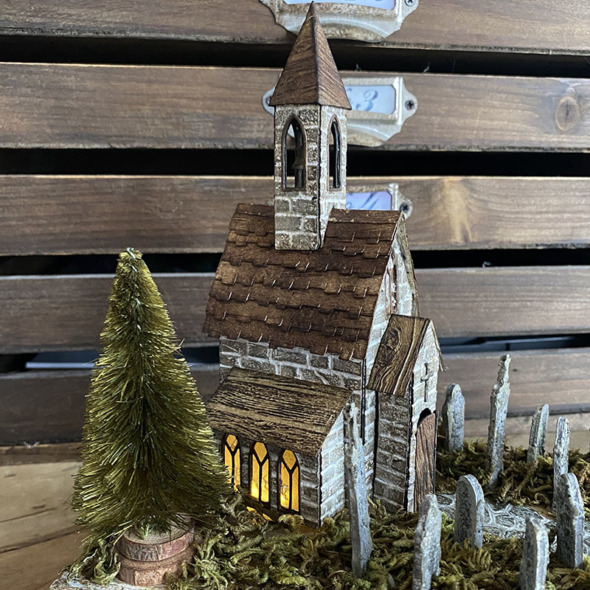
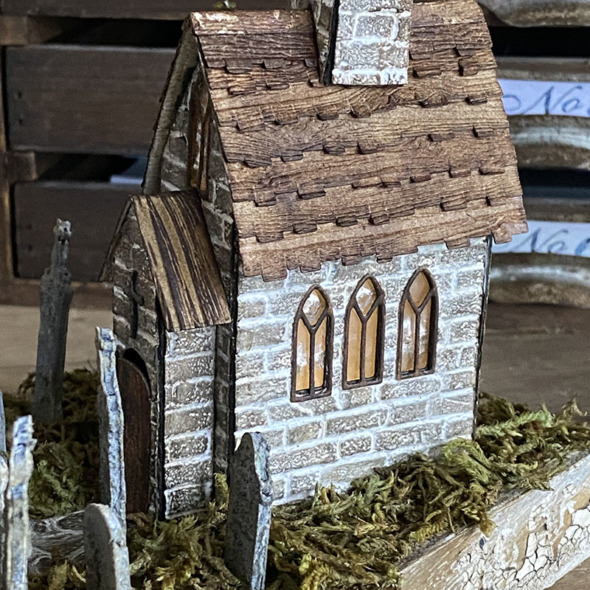
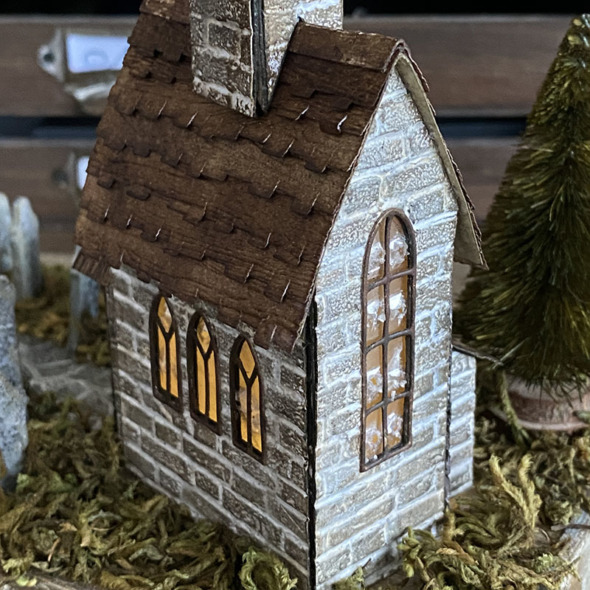
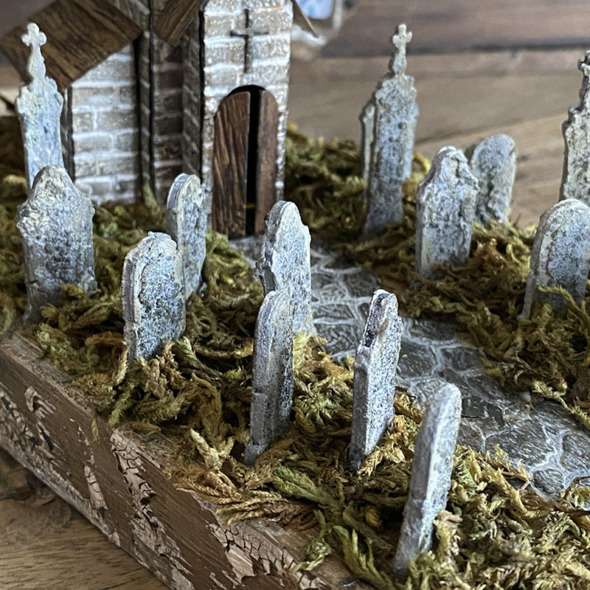
    Today I’m sharing some close ups and if you keep scrolling there’s a storage idea too. In another post I’ll share how I put this together, the mistakes I made and the things I learned as a first time village builder.

    EDIT: You can see my cemetery showcased on Tim’s instagram.

    igirlzoe: tim holtz sizzix village collection
    igirlzoe: tim holtz sizzix village collection
    igirlzoe: tim holtz sizzix village collection
    igirlzoe: tim holtz sizzix village collectionigirlzoe: tim holtz sizzix village collection
    igirlzoe: tim holtz sizzix village collection

    STORAGE

    EDIT: You can see my village collection storage idea showcased on Tim’s instagram.

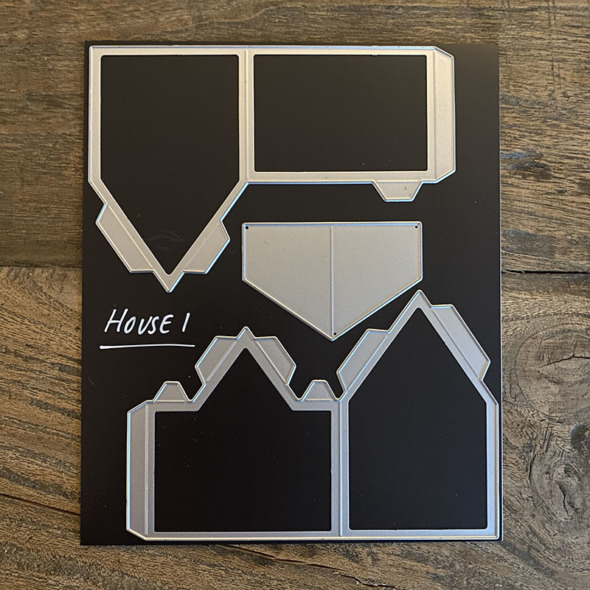
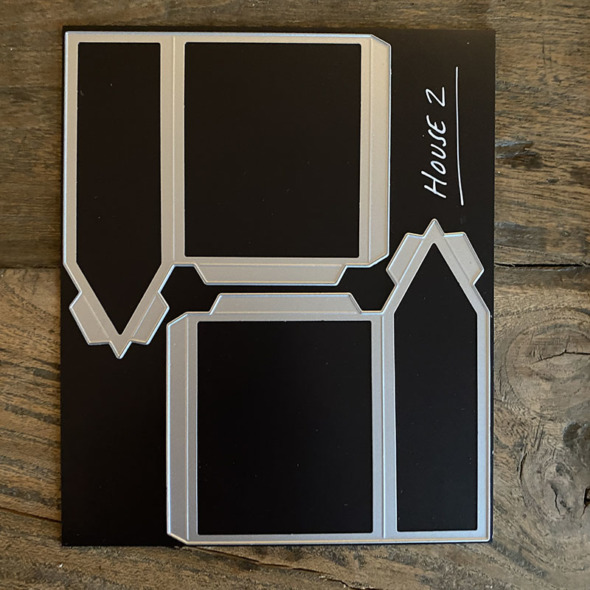
    I wanted to easily see what options I had when building so I used this system to organize and store my dies.

    For the storage I used:
    2x packs of Tim Holtz Sizzix envelopes (+ 2 envelopes from the village collection – totaling 8)
    1x pack Home Depot magnetic vent covers
    2x sheets of Tim Holtz distress white heavystock
    posca pen
    scor-tape

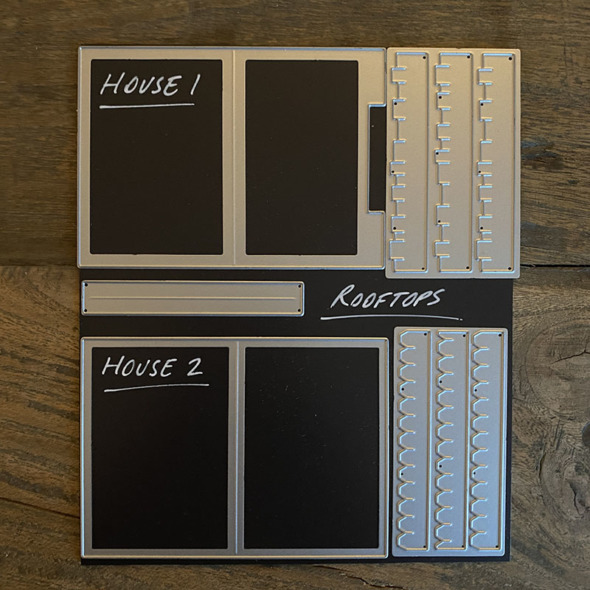
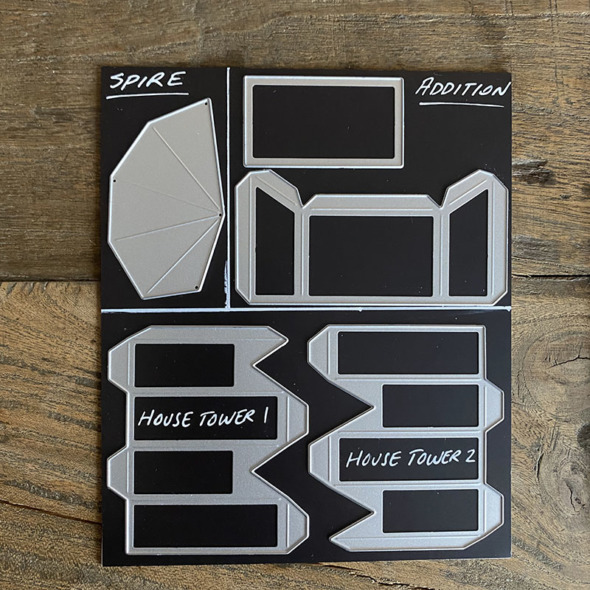
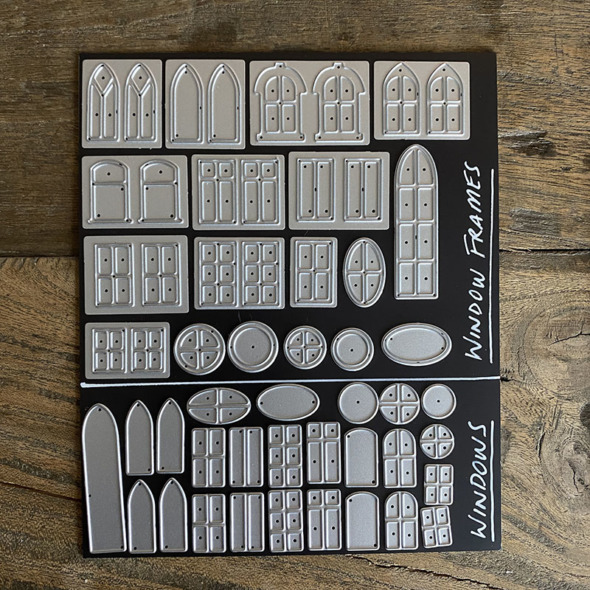
    I cut vent covers to fit the envelopes, mounted onto distress heavystock using scor tape to make the sheet sturdy and used a white posca pen to identify each sheet. The posca pen can be removed with a damp cloth if you make a mistake.

    igirlzoe: tim holtz sizzix village collection
    House 1

    igirlzoe: tim holtz sizzix village collection
    House 2

    igirlzoe: tim holtz sizzix village collection
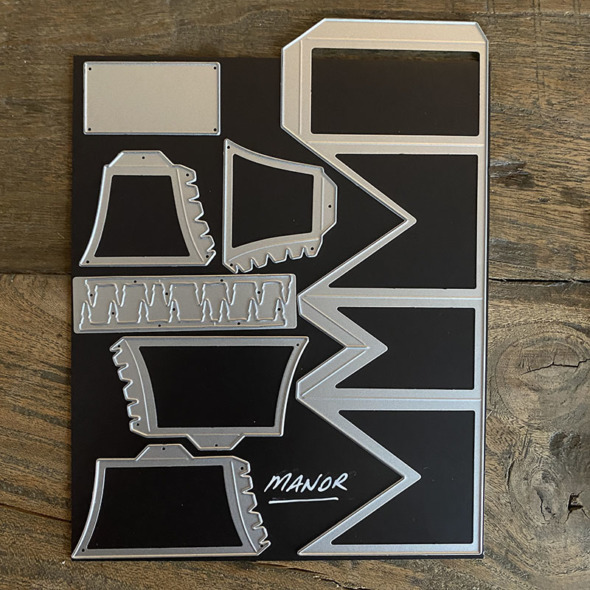
    Manor
    *cut halfway across the envelope flap join to allow the longer die to stick out the top

    igirlzoe: tim holtz sizzix village collection
    Rooftops

    igirlzoe: tim holtz sizzix village collection
    Spire + Addition + Towers

    igirlzoe: tim holtz sizzix village collection
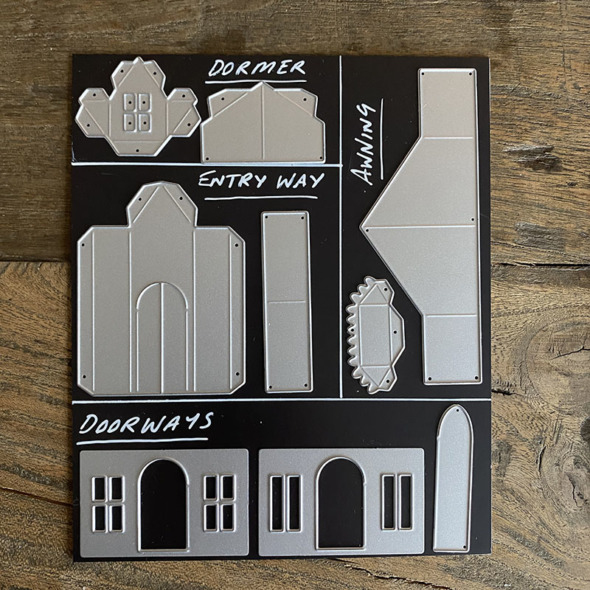
    Dormer + Entry Way + Awning + Doorways

    igirlzoe: tim holtz sizzix village collection
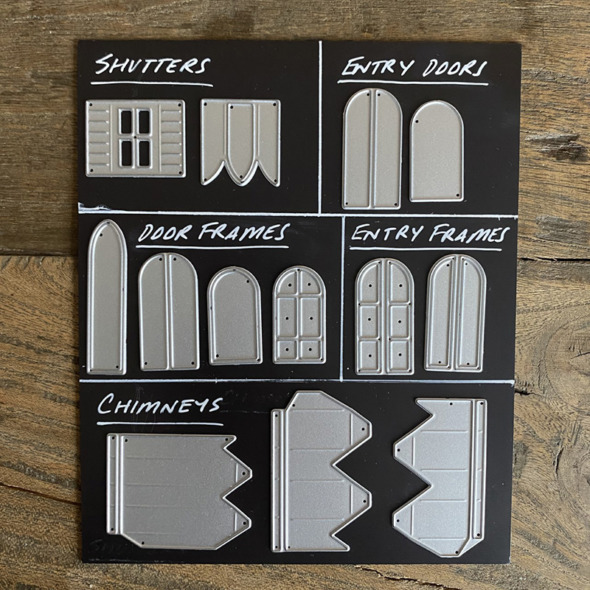
    Shutters + Entry Doors + Door Frames + Entry Frames + Chimneys

    igirlzoe: tim holtz sizzix village collection
    Windows + Window Frames

    Thanks for stopping by. I’ll be back soon with more details of my cemetery and a funny story behind those gravestones.

    Zoe


    affiliate links used at no cost to you


  2. 16th December, 2021

    Christmas Candy Store

    Hello friends! I hope you’re having a wonderful December and finding time to do some fun festive things. I’ve been busy decorating and getting ready for Christmas, but I thought I would take a quick break and pop in and share my Candy Store using the gorgeous new Tim Holtz Christmas idea-ology. You can catch the launch replay and makes over on Tim’s blog.

    igirlzoe: tim holtz idea-ology christmas 2021
    I love candy cane everything and my obsession runs deep (think pumpkins)! I was very excited to see this years Christmas idea-ology release with candy cane stripes appearing in the backdrops, ephemera and the amazing confectionery! This was the starting point for my candy store. So grab a big cup of hot cocoa and a candy cane and let’s get into some of the details…

    igirlzoe: tim holtz idea-ology christmas 2021
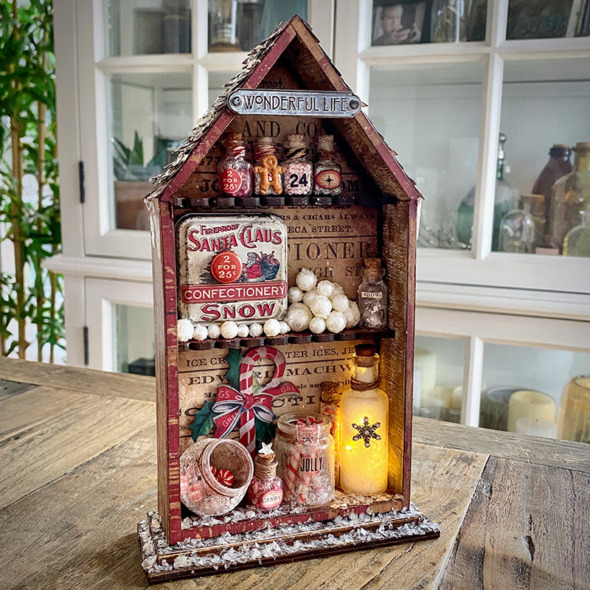
    I covered an idea-0logy vignette shrine with papers from the Christmas backdrops set. I love the size of the backdrop papers and the Christmas selection is simply delicious, you may want to pick up 2 packs, one to use and one to stroke! Just saying!!

    igirlzoe: tim holtz idea-ology christmas 2021
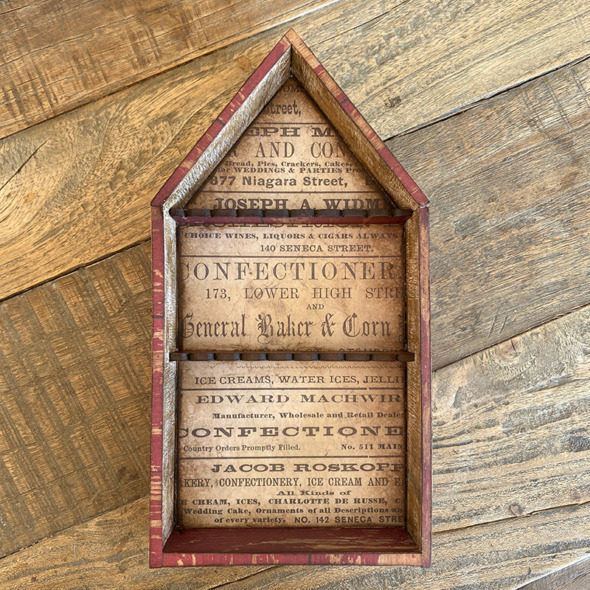
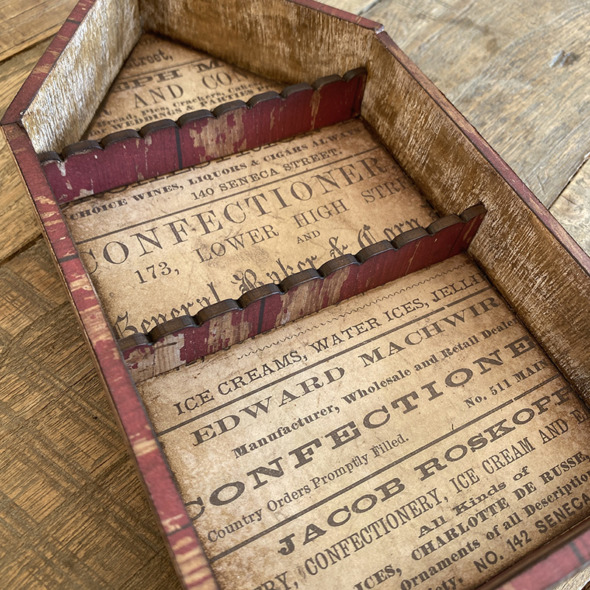
    I created a couple of shelves for my vignette shrine using etcetera thickboard scalloped trims and the matching trims thinlits dies. The trims die set allows me to die cut trims that perfectly cover the thickboard pieces, game changer for me as I used to cut them by hand. Use distress collage medium to glue into place.

    igirlzoe: tim holtz idea-ology christmas 2021
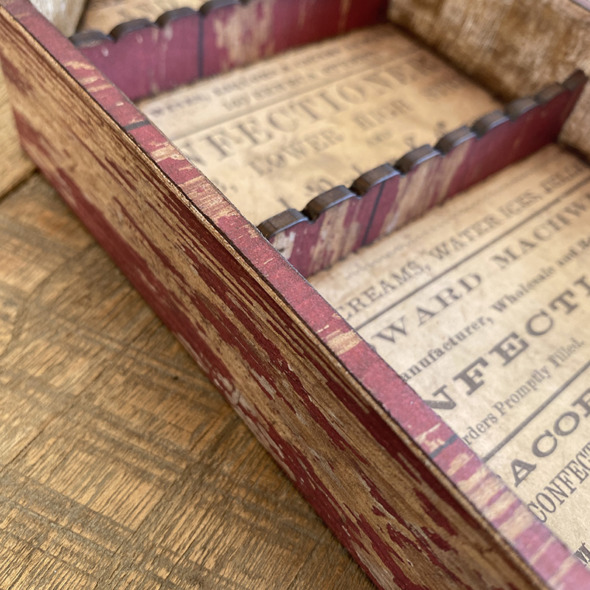
    I covered the side of the vignette shrine in matching paper from the Christmas backdrops pack. I love how weathered the paper looks. YUM!

    igirlzoe: tim holtz idea-ology christmas 2021
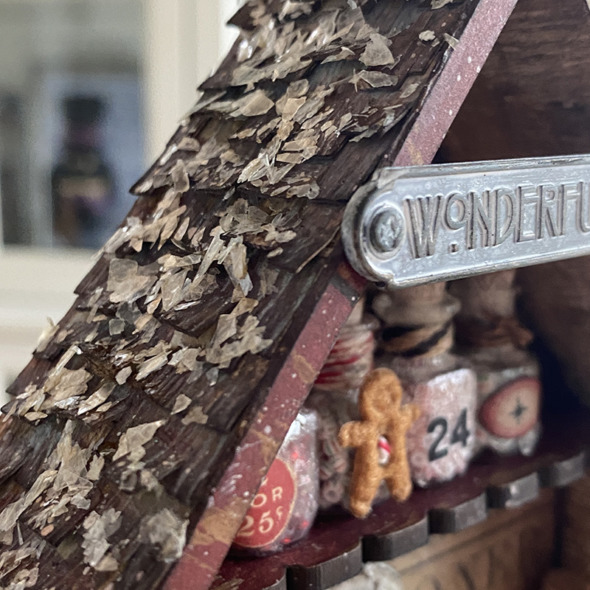
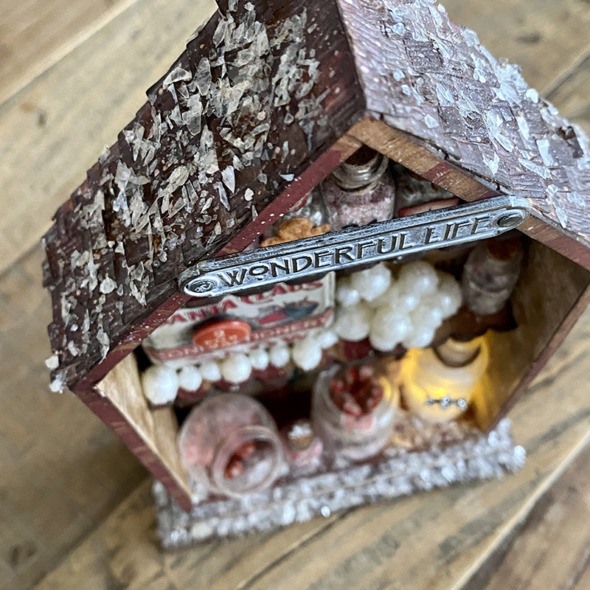
    I covered the roof by die cutting roof panels with a die from the village collection thinlits die set from idea-ology kraft stock and embossing with the lumber 3D folder. Glue into place with distress collage medium and cover with distress mica.

    igirlzoe: tim holtz idea-ology christmas 2021
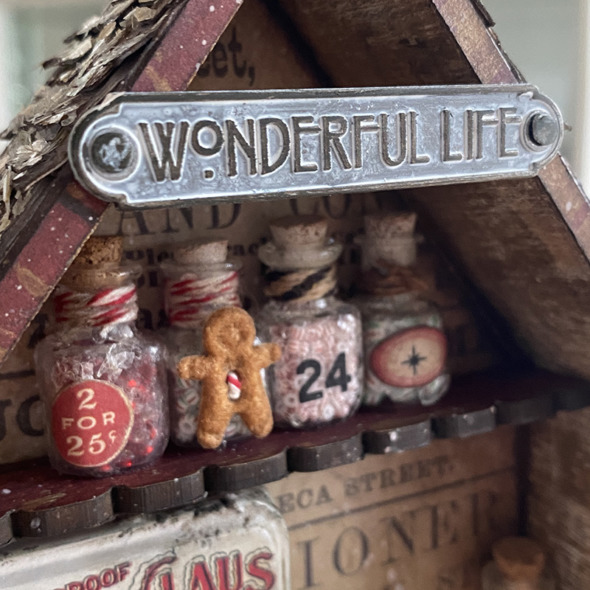
    It truly is a wonderful life and I love this word plaque from the Christmas set which I added to the vignette shrine by hammering in 2 of the stakes from the vignette hardware set. I added a little picket fence distress crayon to the word plaque.

    igirlzoe: tim holtz idea-ology christmas 2021
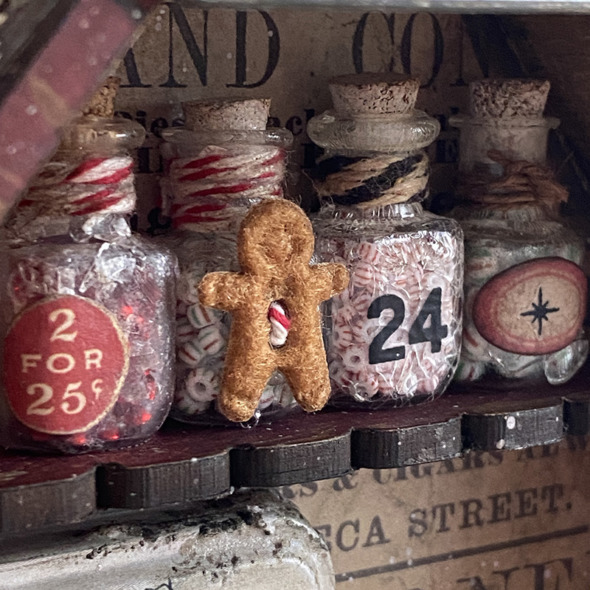
    For the top shelf I added some of the idea-ology tiny vials which I crackled. I have a how to on a previous post, see here (I skipped the alcohol ink step). I added idea-ology ephemera and remnant rubs to the bottles and painted the bottle corks with a picket fence distress paint wash for a wintry twist. I filled the bottles with seed beads, added a little twine and a gingerbread piece, all from my stash.

    igirlzoe: tim holtz idea-ology christmas 2021
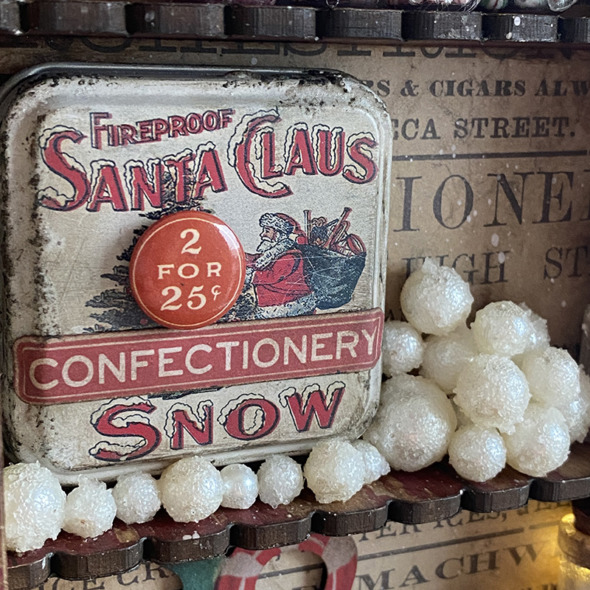
    I added a Christmas tin top and baubles to the middle shelf. To the tin top I added a piece of Christmas mini flair and a piece of ephemera.

    igirlzoe: tim holtz idea-ology christmas 2021
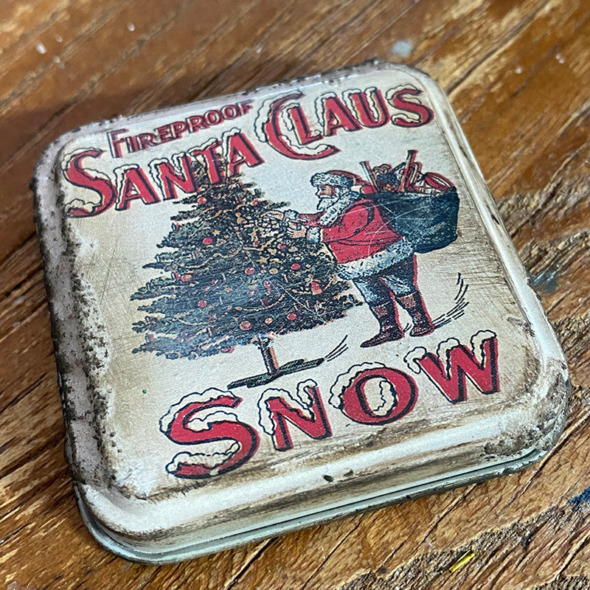
    To grunge up the idea-ology Christmas tin top, I scratched and added a little translucent distress grit-paste and once dry, rubbed in distress crayon which highlights the scratches.

    igirlzoe: tim holtz idea-ology christmas 2021
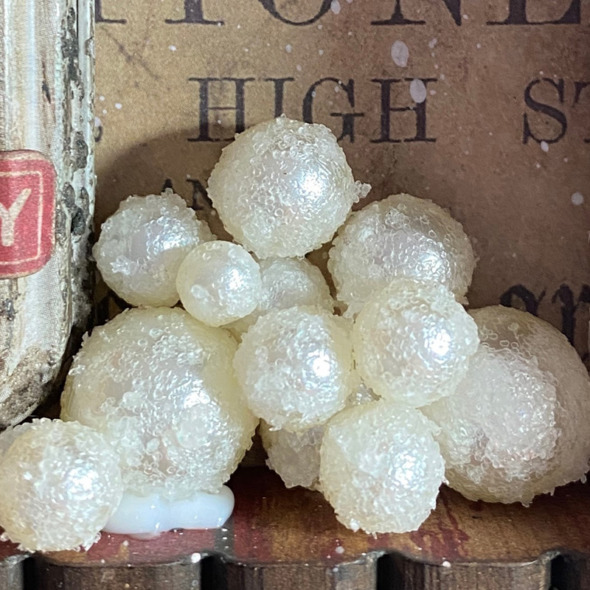
    I rolled idea-ology baubles in the distress snowfall grit-paste from the distress holiday texture set and glued together in a stack with distress collage medium.
    TIP: Make sure your inky fingers are clean to prevent ink transfer.

    igirlzoe: tim holtz idea-ology christmas 2021
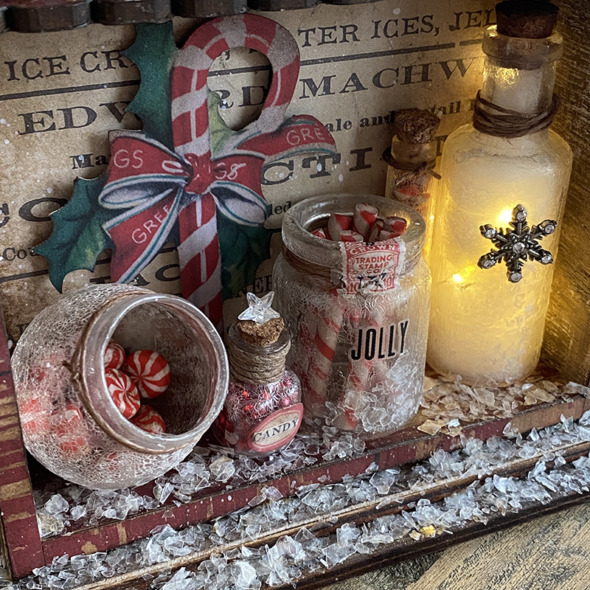
    For the lower shelf I really went to candy cane town and added a candy cane from the ephemera set using adhesive foam to mount it onto the back of the shrine, ready to add the bottles in front of it.

    igirlzoe: tim holtz idea-ology christmas 2021
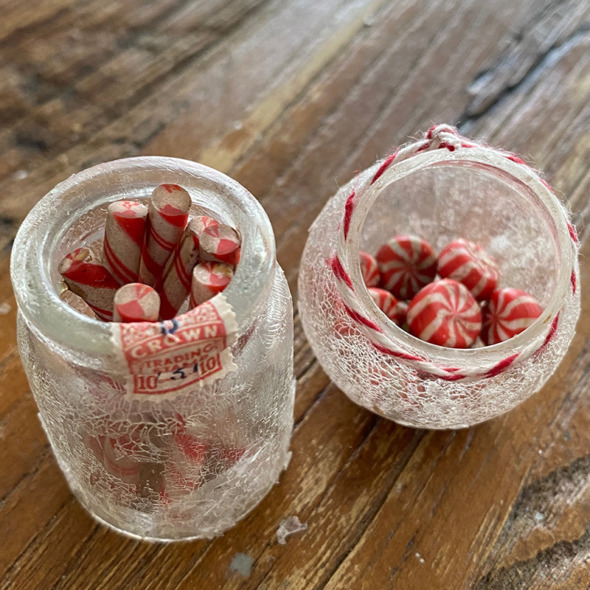
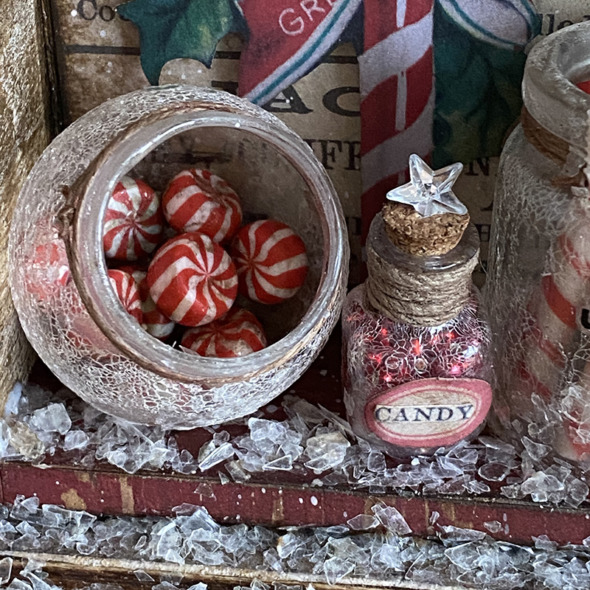
    I crackled a bottle from the idea-ology corked vials set and used the glass dome from the idea-ology snowglobe, turned upside down to create a candy bowl. I added a sticker from the christmas sticker book which I burnished onto the glass using distress collage medium. I added candy cane twine that I saved from some Christmas gifts last year and finally added the gorgeous new idea-ology christmas confections. I grunged them up with distress crayon and glued them into place with distress collage medium.

    igirlzoe: tim holtz idea-ology christmas 2021
    I used one of the vial labels from the new idea-ology snippets ephemera set which I completely swooned over! I LOVE labels! I added some red seed beads I had in my stash to the bottle and cut a sticker with candy down to size and added on top of the label. Finally I pushed a star from the idea-ology mirrored stars set into the cork and covered everything with distress mica, held in place with a little brush of distress collage medium first.

    igirlzoe: tim holtz idea-ology christmas 2021
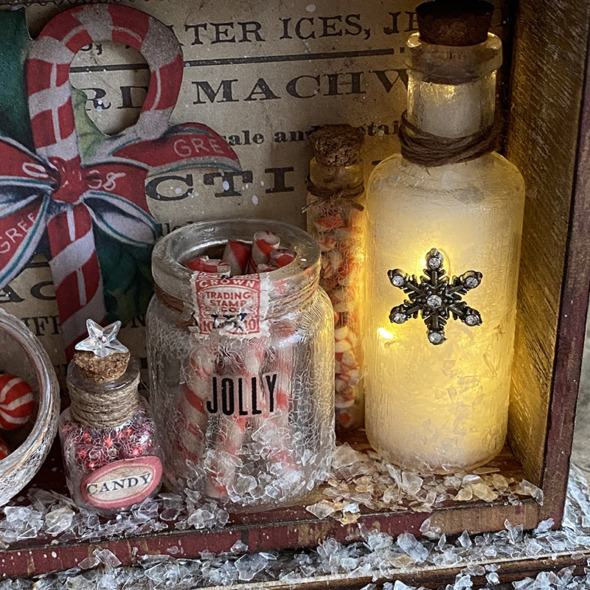
    Everything is better with lights… so I covered a bottle in distress collage medium and once dry, distress crackle paint. I filled the bottle with tiny lights and then used the end of a paintbrush to push stuffing filler into the bottle to diffuse the lights. This was an idea I got from Tim last year when he did that awesome crystal ball, see Tim’s Blog for details. I didn’t use anything to wrap my tiny lights around like Tim did, I simply thread them through a hole I made in the back of the vignette shrine and up into the bottle. I attached the battery pack to the back of the shrine and the wire is hidden behind he back of the bottle. I cut the loop off the snowflake with wire cutters and glued it onto the front. I love this light diffusing idea, thanks Tim!

    igirlzoe: tim holtz idea-ology christmas 2021
    I’m going to carry on decorating for Christmas. This year I’m making my own garlands and trying to get the kind of lights I want for them is proving rather tricky, but I’m persevering because it’s all about that perfect twinkle! 😉

    Thanks for stopping by.

    Zoe


    affiliate links used at no cost to you


  3. 17th November, 2021

    Mountain Pass

    Hello friends and welcome to Day 3 of my week of Christmas makes. Today we are up in the mountains with the tall pine trees and charming chalets with the help of these amazing dies that Tim Holtz designed for his Sizzix holiday release. You can see the launch replay and all of the inspiration makes over on Tim’s blog.

    igirlzoe: tim holtz sizzix mountain top tall pines paper village 2 thinlits dies
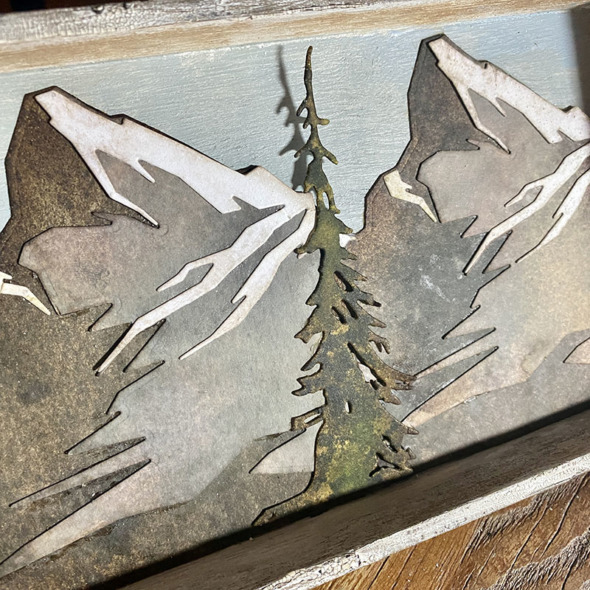
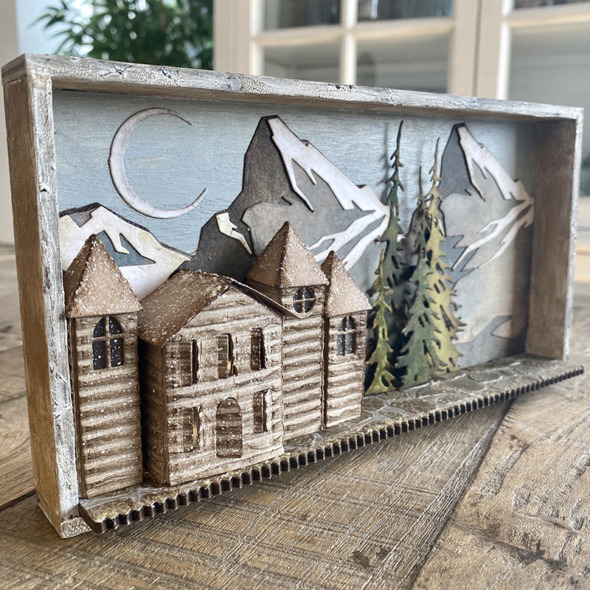
    The mountain top and tall pines dies made me think of winters spent in the snow capped Swiss mountains. We would drive up nearly every weekend and had the most incredible views. I decided to create a scene inspired by those memories. I really loved making this piece, here’s how…

    igirlzoe: tim holtz sizzix mountain top tall pines paper village 2 thinlits dies
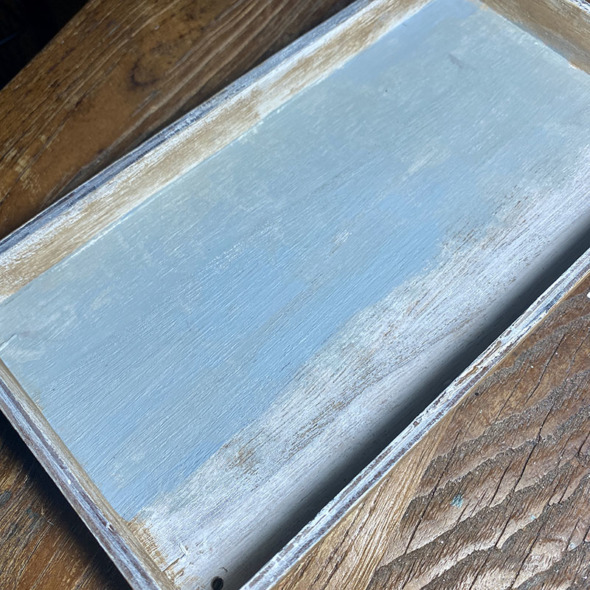
    I took a small idea-ology vignette tray and covered it with a thin layer of gesso. Once dry I covered the inside back panel with speckled egg distress paint. I dry brushed the sides, inside and out with vintage photo distress paint. I covered the outside and front edges with distress crackle texture paste and once dry, rubbed distress crayon into the cracks.

    igirlzoe: tim holtz sizzix mountain top tall pines paper village 2 thinlits dies
    I die cut the pieces from the mountain top thinlits die set from distress watercolor cardstock. I sprayed the pieces with hickory smoke and frayed burlap distress spray and blended walnut stain distress ink into the edges and then assembled using distress collage medium.

    igirlzoe: tim holtz sizzix mountain top tall pines paper village 2 thinlits dies
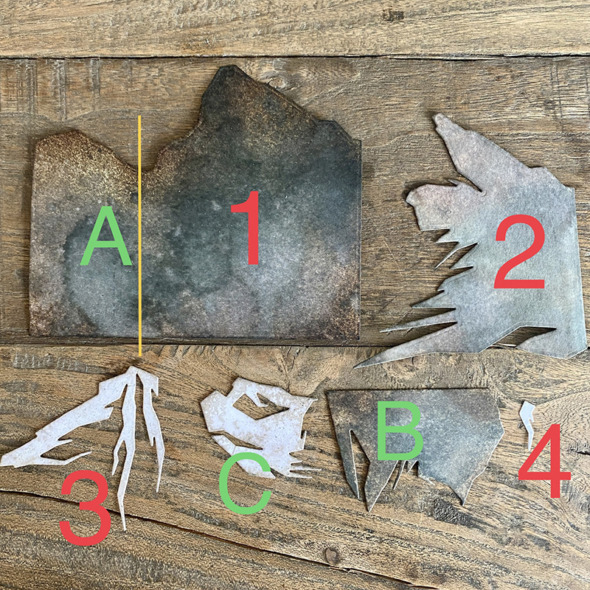
    I posted this in the Tim Holtz Addicts group to help a couple of Addicts with their first time builds. In case it helps you… Working up from the base A and 1.

    igirlzoe: tim holtz sizzix mountain top tall pines paper village 2 thinlits dies
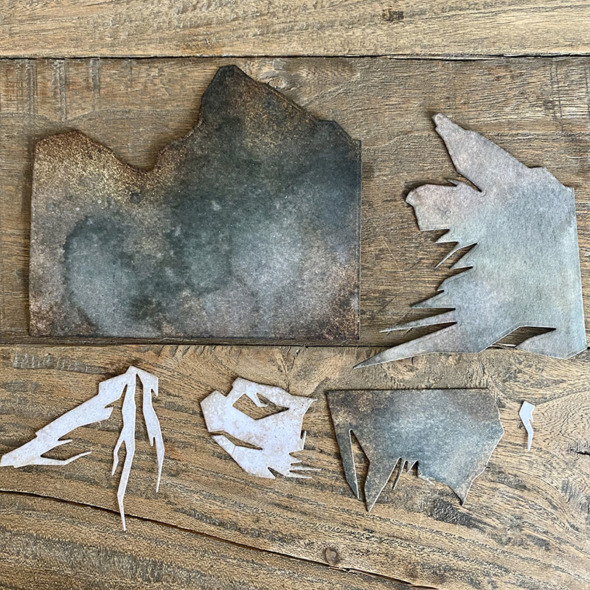
    This is the finished puzzle taken from the packaging because I didn’t have a photo of the assembled piece!

    igirlzoe: tim holtz sizzix mountain top tall pines paper village 2 thinlits dies
    Once you have assembled your mountains, add to the back of the vignette tray with distress collage medium.

    igirlzoe: tim holtz sizzix mountain top tall pines paper village 2 thinlits dies
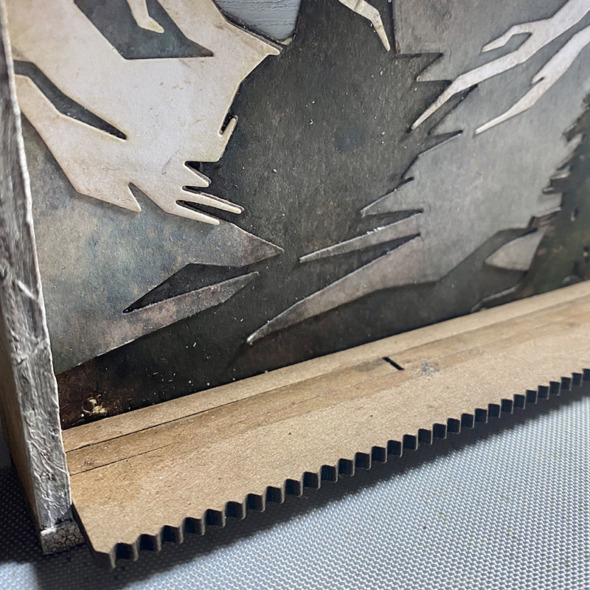
    To extend the base of the vignette tray I added thickboard etcetera trims. I used the thin trims from the bat web trims set and a wider trim at the front from the pinking trims set. Using distress collage medium to attach them. It doesn’t have to be pretty, you’re going to cover them.

    igirlzoe: tim holtz sizzix mountain top tall pines paper village 2 thinlits dies
    I used the new decorative trims dies to cut pieces of distress watercolor cardstock. In order to get the correct depth I hung the decorative die straight cutting edge over the edge of my cutting plates so that it wouldn’t cut and then used my paper trimmer to cut that edge to fit the vignette tray. This is a hack and probably not advised by Sizzix… but look at me going all rogue! LOL

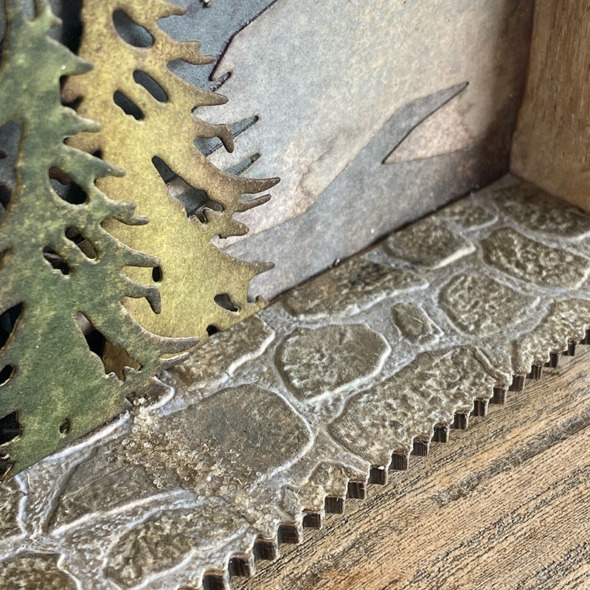
    I ran the strip through the mini 3D cobblestone embossing folder. I had to do one end at a time but it worked. I lined the stones up the best I could. You can see the join line just in front of the pine tree.

    igirlzoe: tim holtz sizzix mountain top tall pines paper village 2 thinlits dies
    I meant to hide the join underneath the paper village buildings! I realised after I had glued the first strip down so I used a little snowfall grit-paste to cover the join and rubbed in a little distress crayon to blend. It worked pretty well but if I had to do it again, I would put the join under the buildings! Also, look at the detail of that cobblestone embossing folder! It’s AMAZING!!

    igirlzoe: tim holtz sizzix mountain top tall pines paper village 2 thinlits dies
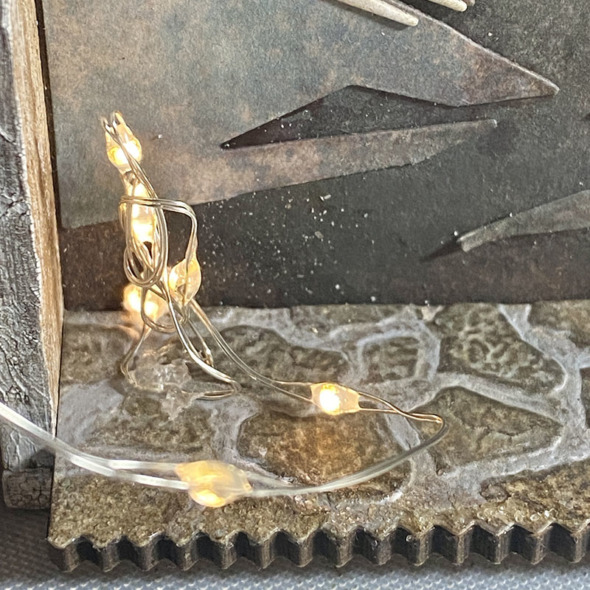
    I drilled a hole in one end of the vignette tray trim to thread tiny lights through, securing the battery pack at the back of the tray. I gathered the lights up into a strip (as pictured) and then ran them under where the next building would be and made another one. This helps to light up each structure.

    I love the decorative trim dies because you get such a perfect clean edge when mounting die cut paper over the thickboard etcetera trims.Total game changer as I used to trace around them, fussy cut, mount and then sand between each point! THANK YOU TIM!!

    igirlzoe: tim holtz sizzix mountain top tall pines paper village 2 thinlits dies
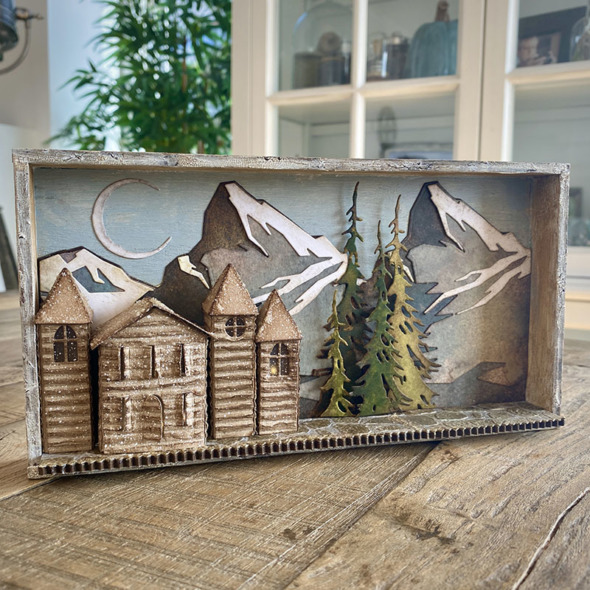
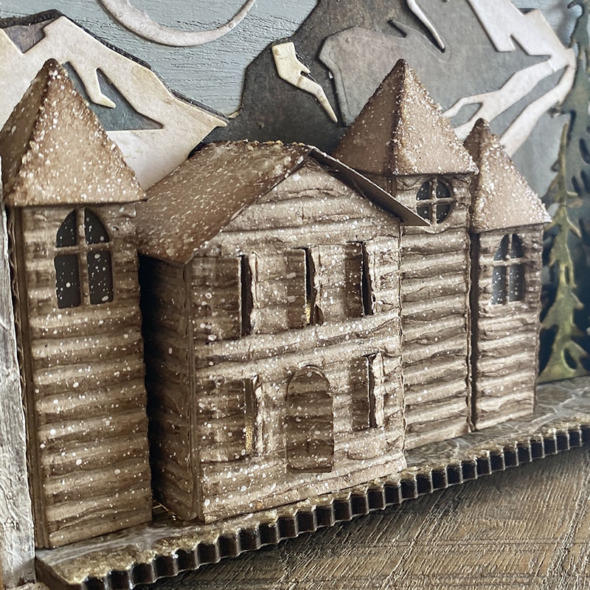
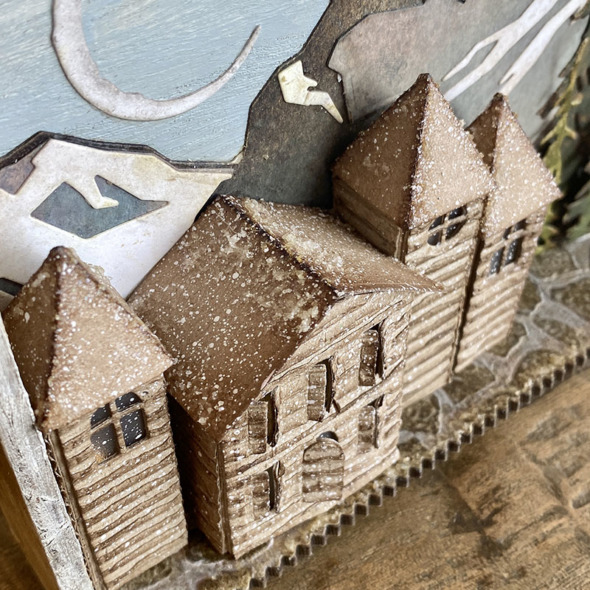
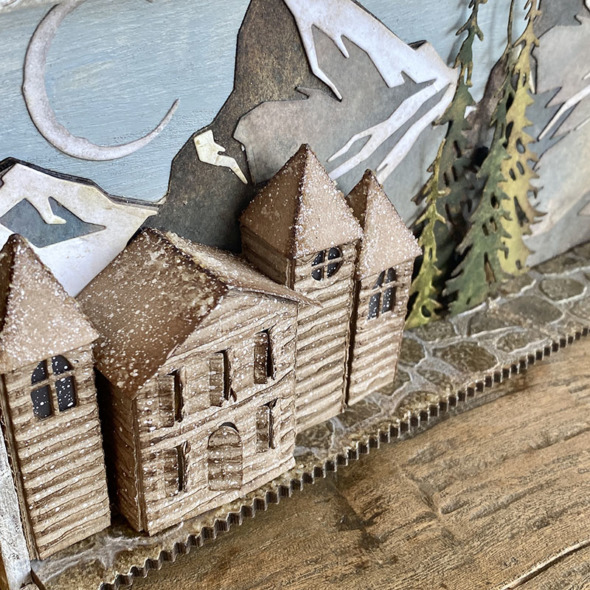
    I used the paper village #2 thinlits die set to create these little faux Swiss chalets. I built each structure out of distress kraft heavystock and then used corrugated cardstock for the sidings. Oh my gosh these windows that open slightly are the cutest! They really look like the shutters on Swiss chalets. LOVE LOVE LOVE.

    igirlzoe: tim holtz sizzix mountain top tall pines paper village 2 thinlits dies
    I added a little snowfall grit-paste to the roofs and splatted with white gesso using a splatter brush.

    igirlzoe: tim holtz sizzix mountain top tall pines paper village 2 thinlits dies
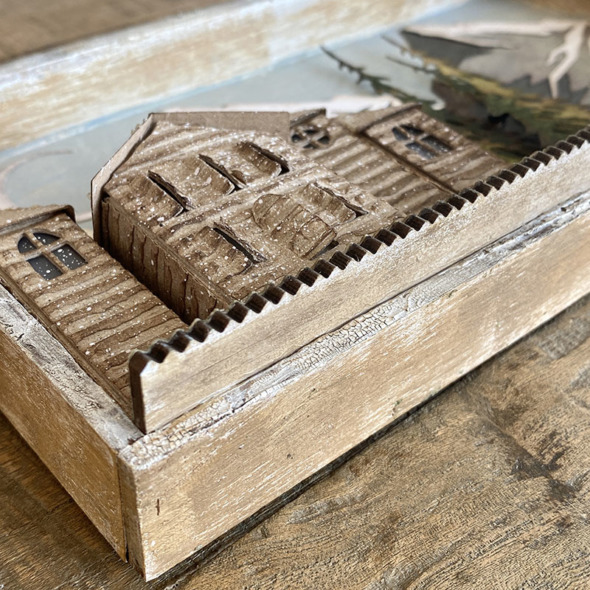
    This is what the underside of the vignette tray looks like with the extended trim platform. You can see the crackle texture paste that I added to the front trim of the vignette tray. You can decorate the underside of the trim, but I didn’t for this.

    igirlzoe: tim holtz sizzix mountain top tall pines paper village 2 thinlits dies
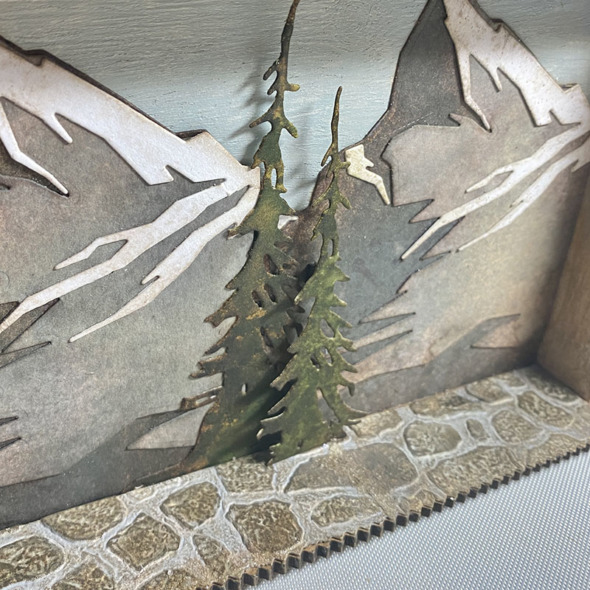
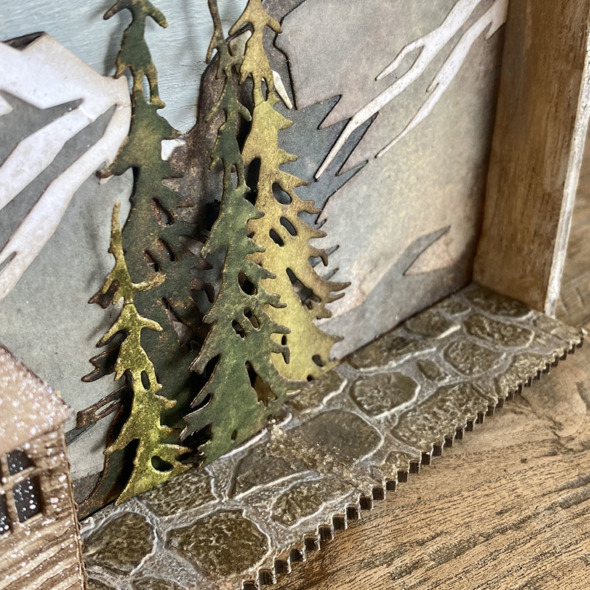
    I die cut trees with the tall pines thinlits die set and sprayed with peeled paint and rustic wilderness distress spray. I used adhesive foam to mount the trees.

    igirlzoe: tim holtz sizzix mountain top tall pines paper village 2 thinlits dies
    This conveniently hides the mountain join and gives some perspective by mounting the smaller trees at the front.

    igirlzoe: tim holtz sizzix mountain top tall pines paper village 2 thinlits dies
    I added the moon from the vault series halloween 2021 thinlits die set. I LOVE this moon and it was perfectly sized for this scene.

    igirlzoe: tim holtz sizzix mountain top tall pines paper village 2 thinlits dies
    igirlzoe: tim holtz sizzix mountain top tall pines paper village 2 thinlits dies
    Thanks for stopping by.

    Zoe


    affiliate links used at no cost to you


  4. 15th October, 2021

    Gravestones

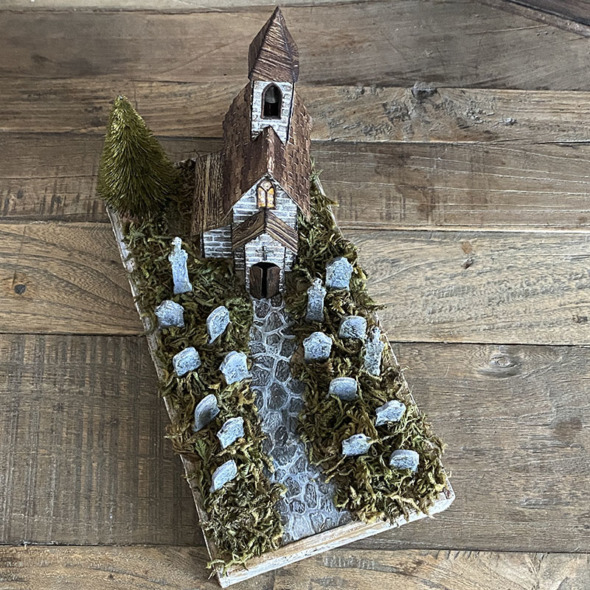
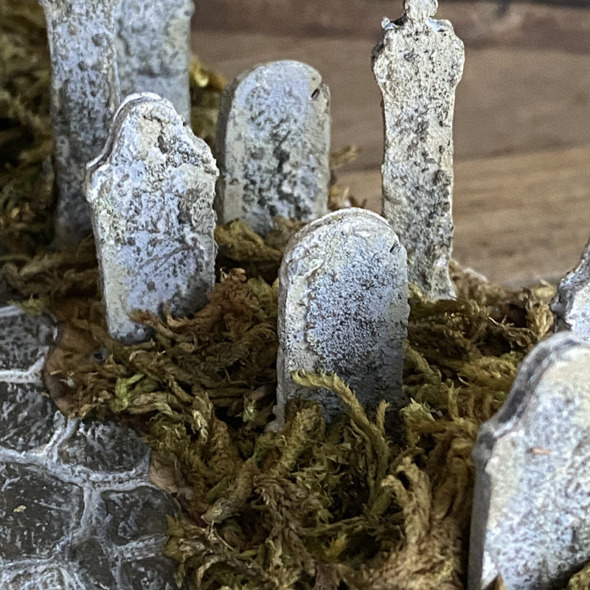
    Hello friends, hope you’re doing well. Today I’m sharing a “how to” for the gravestones I made for a recent village make. You can see my make on Tim’s instagram video, along with a storage idea for the village collection dies. If you missed the LIVE launch you can watch the replay on Tim’s blog and see all the amazing village makes, including one by Tim which will blow your socks off!

    igirlzoe: tim holtz sizzix village collection
    There’s a funny story to these gravestones… I was chatting to Tim and had a maker deadline, so continued to glue together layers and layers AND LAYERS of cardstock to make gravestones as we chatted. Tim watched me for a bit and then asked if I had tried using foam instead of 10 layers of cardstock! I think he laughed as he said “What are you doing and why are you doing that?!” It literally saved ME DAYS! So thank you Tim for this game changing tip and the perfect timing.

    igirlzoe: tim holtz sizzix village collection
    I will be sharing a “how to” for my village build in a later post but for today, it’s all about the gravestones. Let’s get into the how…

    igirlzoe: tim holtz sizzix village collection vault series halloween
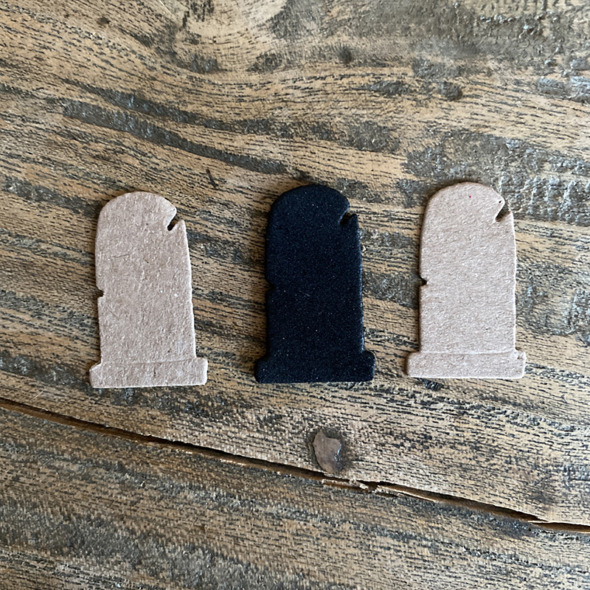
    Using the 2021 Halloween Vault Series dies, cut 2 gravestones from distress kraft heavystock and 1 from fun foam. I used black because that’s what I had but you can use any color or any thickness and add a few more pieces of foam if you want thicker gravestones. Really make it your own.

    igirlzoe: tim holtz sizzix village collection vault series halloween
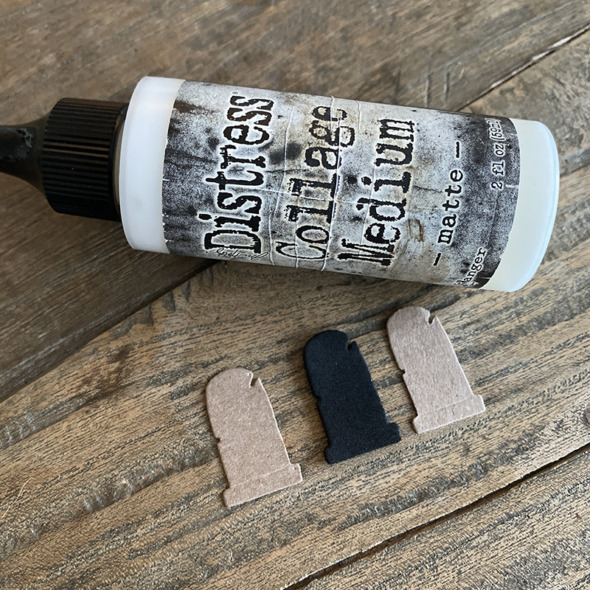
    I glued the layers together with distress collage medium, with the foam in the middle. I did try adding double sided adhesive tape to the foam and then die cutting it but the foam became compacted. You could use adhesive tape on the kraft stock but I found that wet glue works better with all the gesso, paint and paste you’ll add.

    Another great tip that Tim shared with me is to give the foam a quick blast with your heat tool after you’ve die cut it. It reinflates the foam a little after being flattened during die cutting. Seriously! Craft friends are the best!

    igirlzoe: tim holtz sizzix village collection vault series halloween
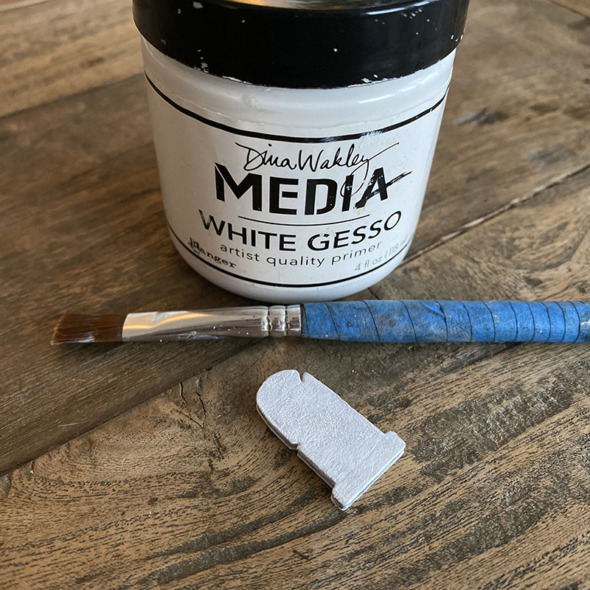
    Next cover the the entire gravestone with white gesso and set aside to dry.

    igirlzoe: tim holtz sizzix village collection vault series halloween
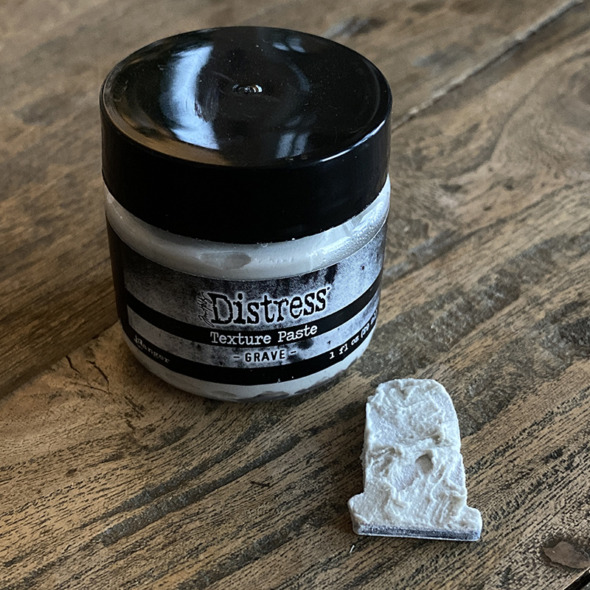
    Apply distress grave texture paste with your finger and set aside to dry.

    igirlzoe: tim holtz sizzix village collection vault series halloween
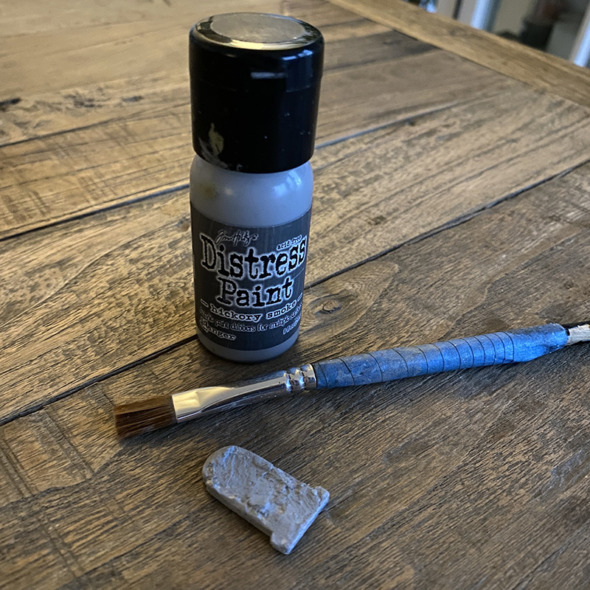
    Paint on a layer of hickory smoke distress paint and set aside to dry.

    igirlzoe: tim holtz sizzix village collection vault series halloween
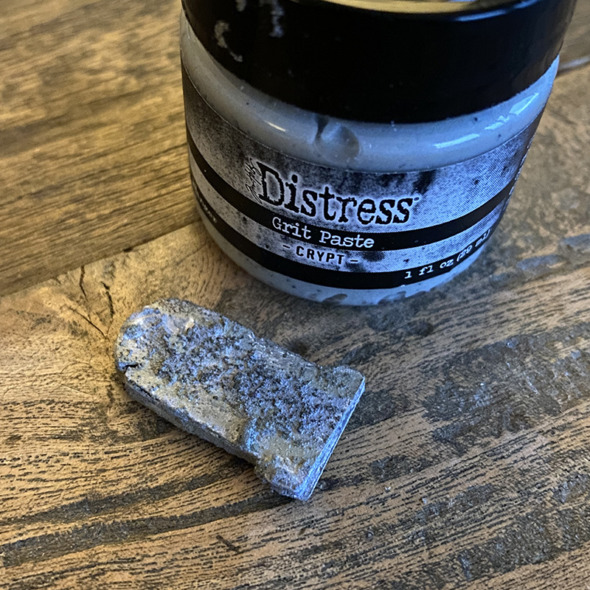
    Finally, apply distress crypt texture paste (crypt-paste) to the gravestone with your finger and set aside to dry.

    igirlzoe: tim holtz sizzix village collection
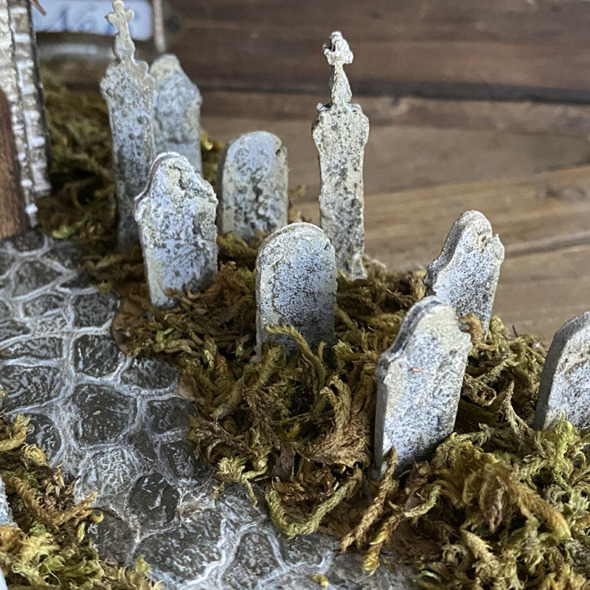
    To attach the gravestones to my upturned idea-ology vignette tray, I ran a line of hot glue along the bottom of the gravestone and pressed down into place. As the moss covers the base of all of the gravestones, you won’t see the hot glue and don’t need to be too tidy with it. If you don’t want to use moss, you could add texture paste to the base of the tombstone and paint with hickory smoke paint to hide the hot glue.

    igirlzoe: tim holtz sizzix village collection
    Tip: I placed all of my gravestones using blue-tack/poster putty and then lifted the gravestone one at a time, removed the putty and put back into place with the hot glue.

    igirlzoe: tim holtz sizzix village collection
    Thanks for stopping by. Don’t forget to set your alarms and plan your snacks for tomorrow’s new distress color launch! I’m so excited. See you there.

    Zoe


    affiliate links used at no cost to you


  5. 3rd November, 2020

    Home Sweet Home

    Hello friends. Have you seen the new Paper Village thinlits dies? I am totally in love with them!! I made this sample for the Tim Holtz facebook LIVE Sizzix chapter 4 release. If you missed the LIVE you can catch up on all the fun over on Tim’s blog.

    igirlzoe: tim holtz sizzix chapter 4 paper village thinlits dies
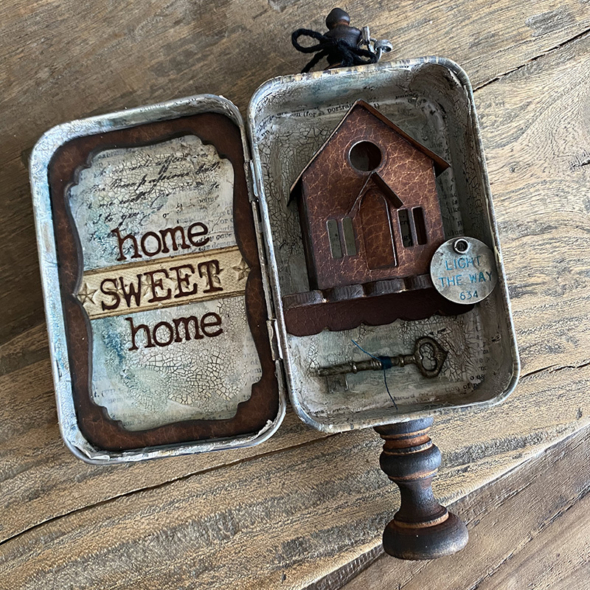
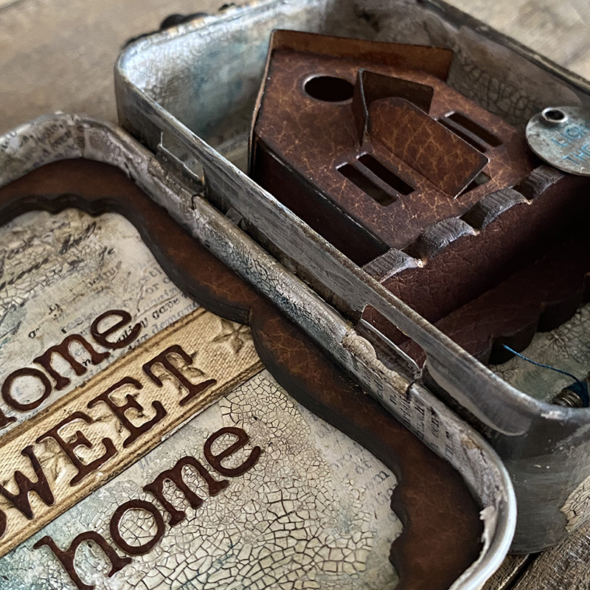
    With many of us staying safe at home this year, home really is sweet. I created a gift tin as an idea for a new home gift using the new Paper Village thinlits dies (664741) and the yummy new distress cracked leather cardstock.

    igirlzoe: tim holtz sizzix chapter 4 paper village thinlits dies
    Here’s how I made it…

    igirlzoe: tim holtz sizzix chapter 4 paper village thinlits dies
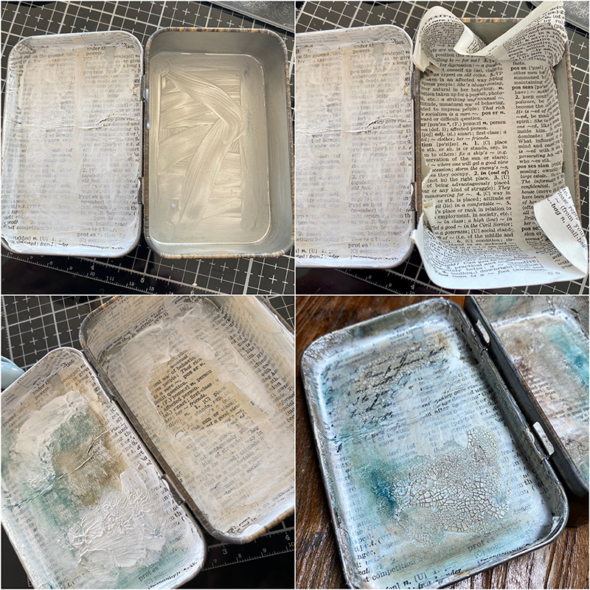
    – Coat the inside of an idea-ology trinket tin with a thin layer of distress collage medium.
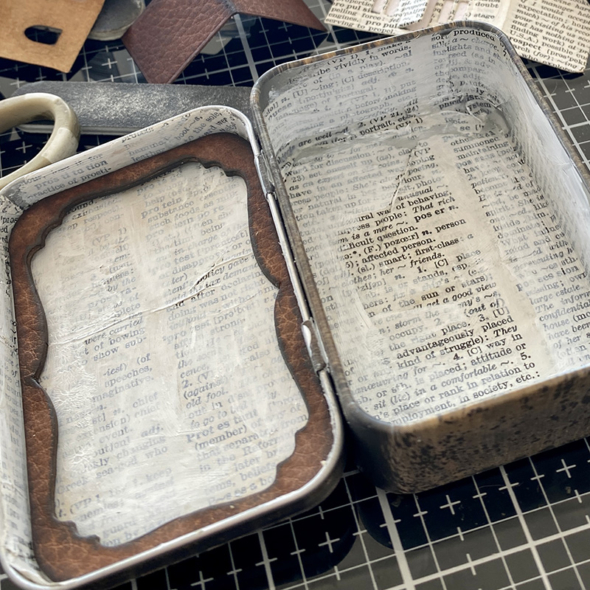
    – I tucked dictionary pages into the tin.
    – Once dry I trimmed the edges and added gesso to parts of the dictionary page using my finger.
    – Allowing to dry between layers, I added distress texture crackle paste and once it had dried and cracked, rubbed distress crayon in with my finger.

    igirlzoe: tim holtz sizzix chapter 4 paper village thinlits dies
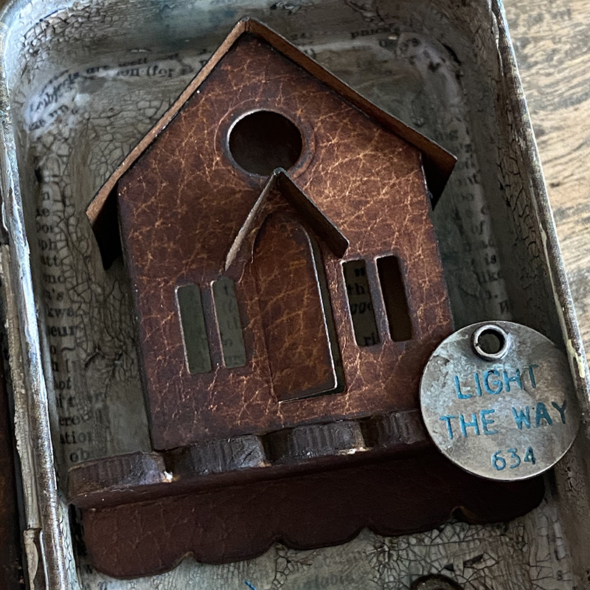
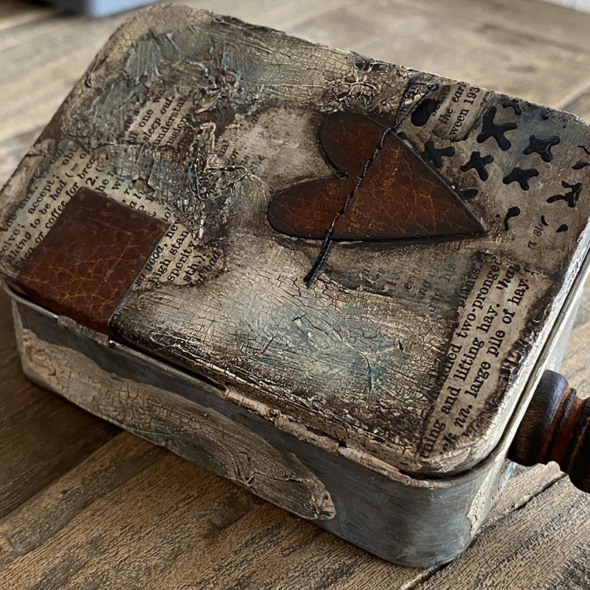
    I die cut a frame using the Trinket Frames Bigz die (664186) from the distress cracked leather cardstock with vintage photo distress ink blended in. I also die cut a piece of chipboard which I mounted under the cracked leather to give the die cut some height. I blended some ground espresso distress ink into the edges and glued it into the lid of the trinket tin. This die is so cool and made to fit both sides of the tin.

    igirlzoe: tim holtz sizzix chapter 4 paper village thinlits dies
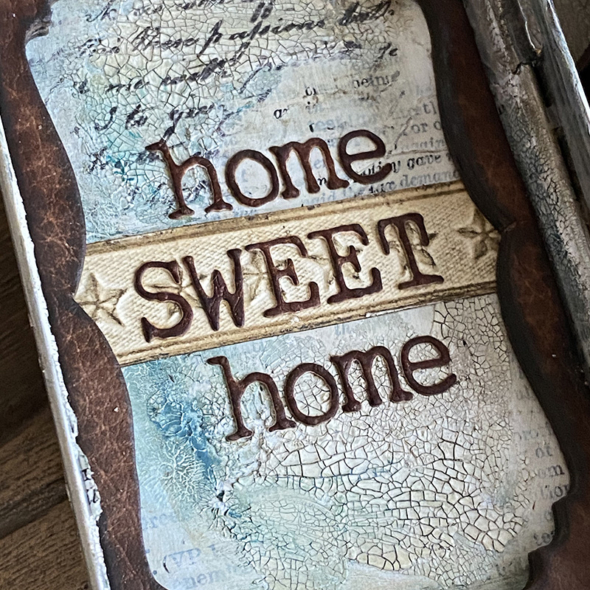
    Using the Alphanumeric Tiny Type Upper (664406) and Lower (664407) thinlits dies, I die cut the distress cracked leather cardstock and added “home sweet home.” The strip of stars was created using the Star Trim impresslits folder (663297).

    igirlzoe: tim holtz sizzix chapter 4 paper village thinlits dies
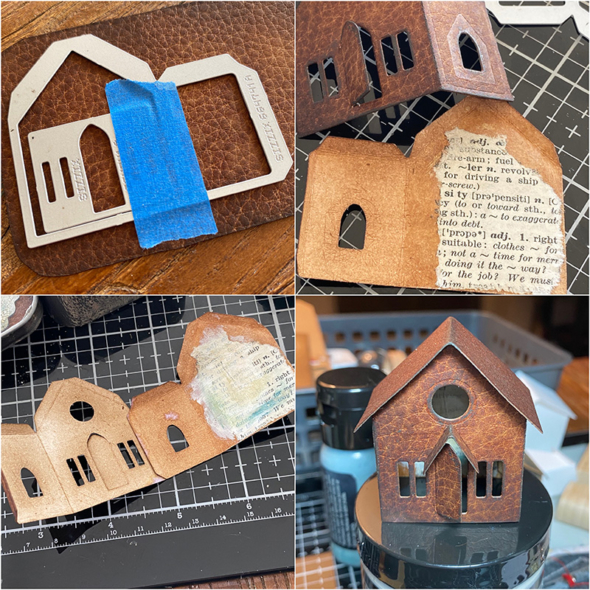
    – To create the house I die cut distress cracked leather cardstock, using painters tape to hold the windows in place as I ran the die cuts through my sidekick.
    – I blended vintage photo distress ink to both sides of the die cut house and added a piece of dictionary page to the back wall of the house as this will be seen through the windows and door.
    – Using scor-tape to attach the front and back pieces of the house.
    – Adding the roof using distress collage medium. I made sure the roof sits forward and is flush with the back of the house so it will sit against the back of the tin.

    igirlzoe: tim holtz sizzix chapter 4 paper village thinlits dies
    Using the etcetera thickboard scalloped trim, I created a shelf for the house to sit on. I covered this with distress cracked leather cardstock, can you tell I LOVE this cardstock? I found the perfect idea-ology thought token that made me think of a porch light being left on to light the way home.

    igirlzoe: tim holtz sizzix chapter 4 paper village thinlits dies
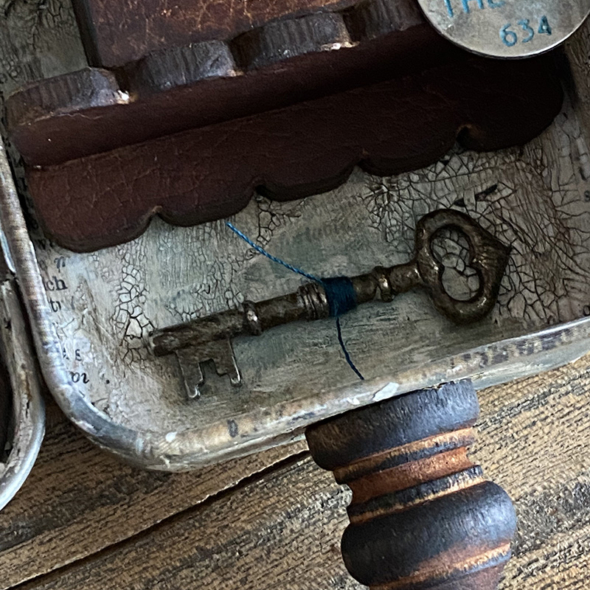
    I added a key from the idea-ology keys adornments, with thread wrapped around it. If you were buying a new home or moving in with someone you could add a real key instead to make it more personal.

    igirlzoe: tim holtz sizzix chapter 4 paper village thinlits dies
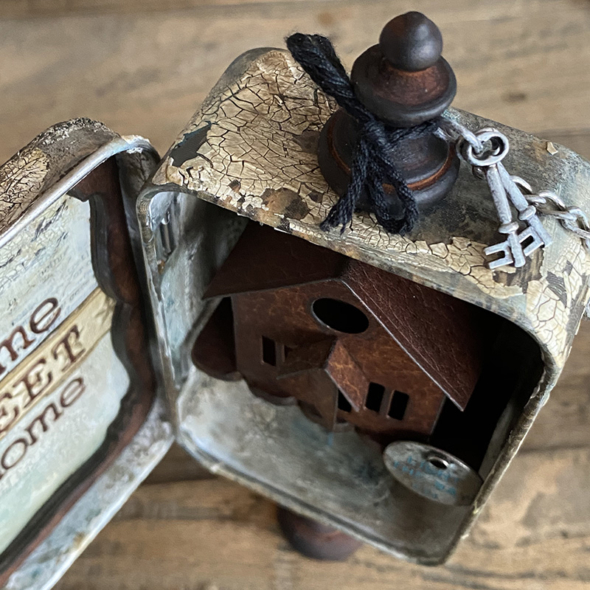
    The outside of the tin was grunged up using scraps of dictionary paper, cracked leather cardstock and gesso, distress crackle texture paste and distress crayons. To stop the crackle texture paste from flaking off the shiny trinket tin, I covered with a layer of distress vintage collage medium. I love the brown tint it gave the gesso and texture paste.

    igirlzoe: tim holtz sizzix chapter 4 paper village thinlits dies
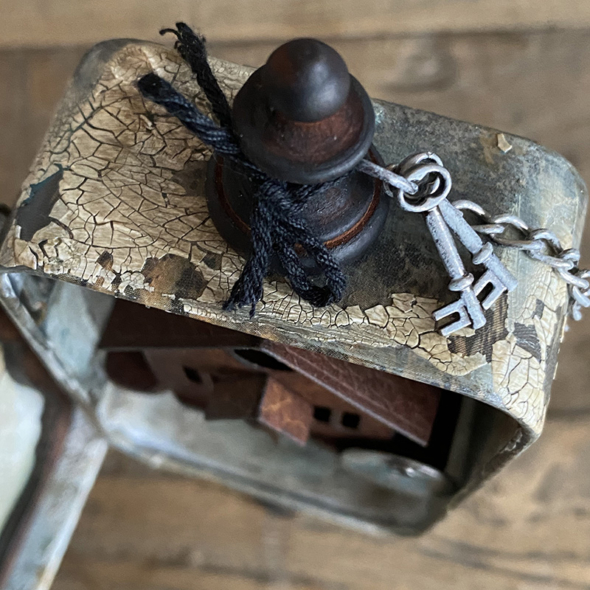
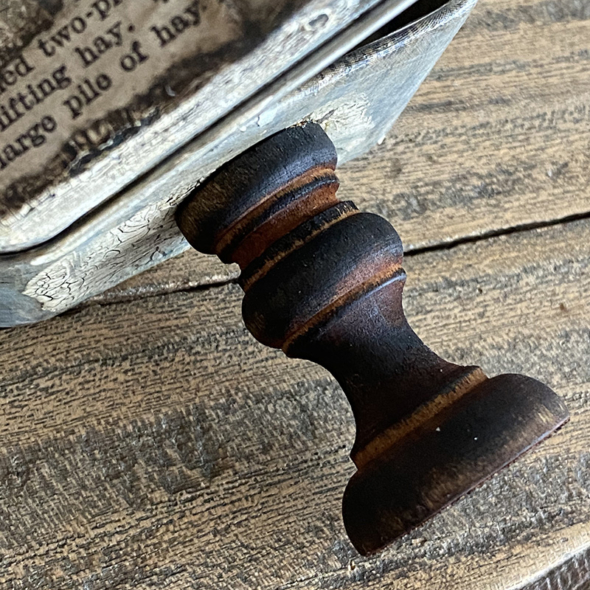
    I dyed an idea-ology finial with vintage photo and ground espresso distress ink and sanded back. I added chain and an o ring from the idea-0l0gy swivel clasps, removing the clasp and adding tiny keys from the keys adornments set. All of which I covered with picket fence distress paint. I added a piece of black thread from the halloween trimmings pack.

    igirlzoe: tim holtz sizzix chapter 4 paper village thinlits dies
    I added an idea-ology finial to the base of the trinket tin using distress collage medium. The trick is to stick it and walk away. The glue shrinks as it dries and creates a really good bond, but you gotta walk away and not come back 10 times to see if you can just move it! LOL

    igirlzoe: tim holtz sizzix chapter 4 paper village thinlits dies
    Thanks for stopping by, I hope you found this useful and it’s inspired you to make something. You could easily add tiny lights through the back of the tin and with a little holly and some mica or glitter it would make a cute Christmas piece.
    Zoe


  6. 2nd November, 2020

    Baggage!

    Hello friends. I hope you had a Happy Halloween. I managed to visit Tivoli for a couple of hours last week, we went late and had the place almost to ourselves. Tivoli have worked really hard to make it a safe guest experience and we can’t wait to go back to see it decked out for Christmas.

    igirlzoe: tim holtz halloween tivoli
    We watched a gigantic pumpkin being carved and they had dressed the annual jack-o-lantern, that hangs over the entrance, with a mask! Inside the park the lights were as beautiful as ever and there was the perfect atmospheric sky with an almost full moon casting a magical light over the pirate ship. So many great memories and so many great pumpkins. 😉

    igirlzoe: tim holtz sizzix chapter 1 baggage bigz die
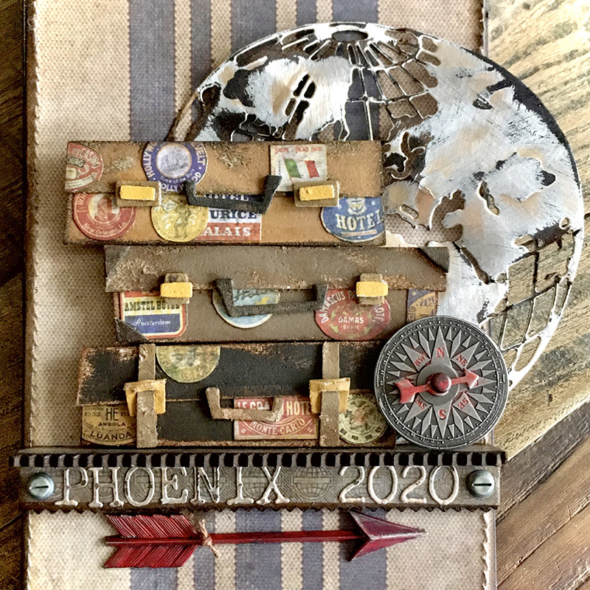
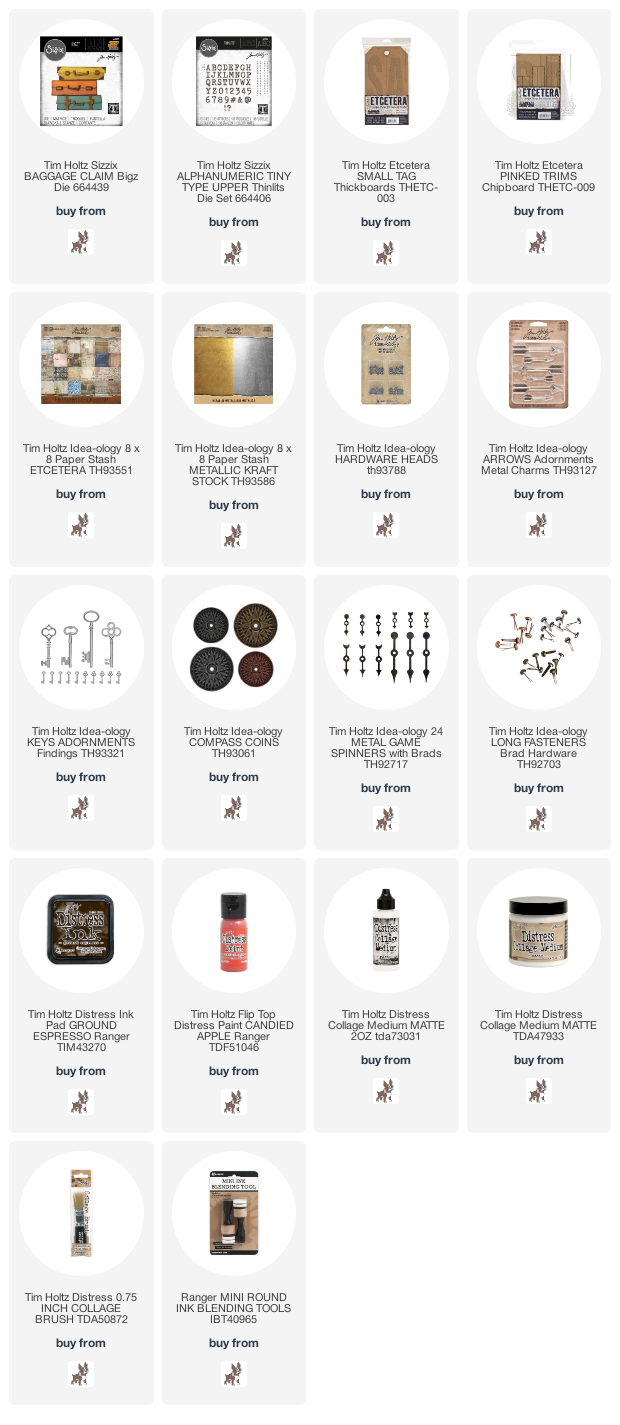
    We have been staying safe at home for so much of this year and truly appreciate the time we do get to enjoy being “in the wild” even for just a few hours. I’m looking forward to packing my bags and traveling again as soon as it’s safe to do so. I wanted to share this sample I made for Creativation using the Baggage Bigz die (664439) from the Tim Holtz Sizzix Chapter 1 release.

    igirlzoe: tim holtz sizzix chapter 1 baggage bigz die
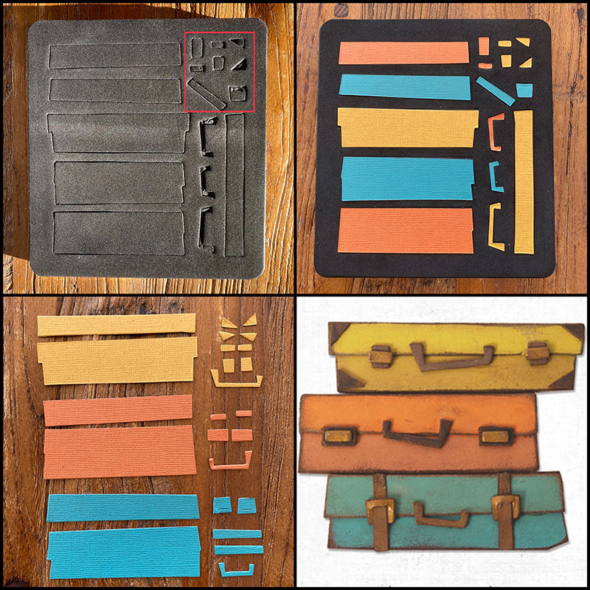
    I created a quick colour coded guide, in case it helps those new to die cutting or needing some “first build” guidance. You can of course customize this anyway that you wish. I added a red box to the first picture to show which portion of the die needs to be cut twice. I mounted the finished versions onto card to keep as it’s a great quick reminder for me when I want to build some more. I plan to make some travel journals from past trips.


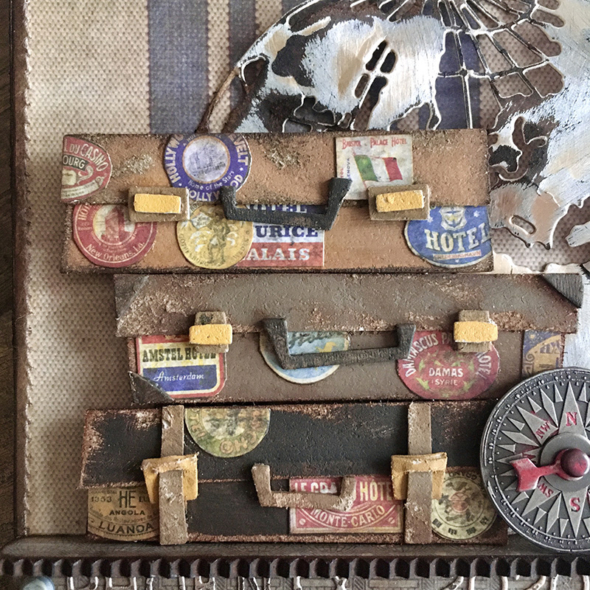
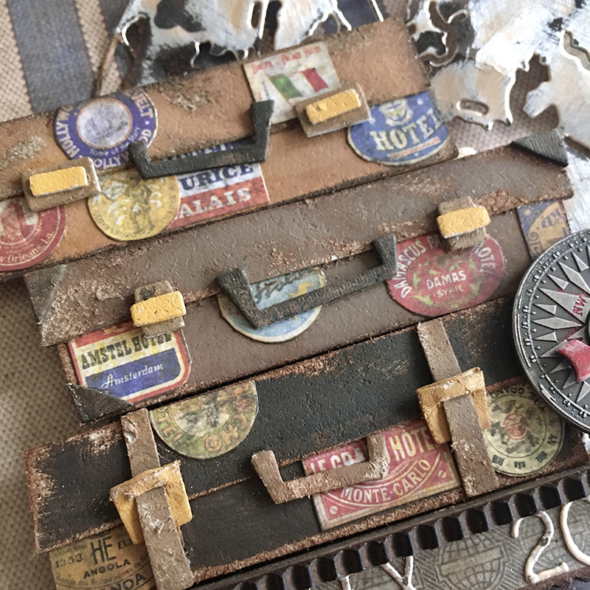
    I used an etcetera thickboard tag as my base and covered with some paper from Tim’s idea-ology paper stash, sanding the edges and blending in distress ink. I die cut the baggage out of grungeboard that I’ve been hoarding. Sanding the edges and blending in a little distress ink. I wanted to create the look of vintage trunks, so added some tiny fussy cut travel labels out of paper from the Tim Holtz paper stash.


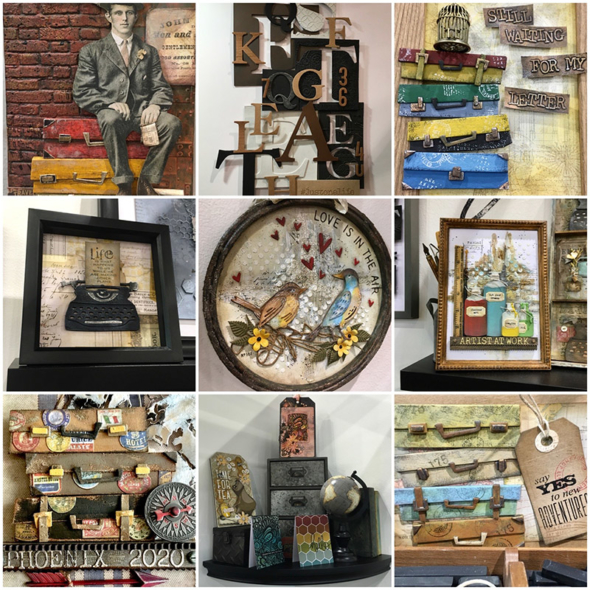
    I added a thickoard trim which I added letters to from the alphanumeric tiny text upper thinlits die set (664406). I added Phoenix as that’s where Creativation was held.


    I also added an idea-ology compass coin and game spinner, plus the year… it’s one we won’t forget in a hurry!

    igirlzoe: tim holtz sizzix chapter 1 baggage bigz die
    I die cut the globe thinlits die (660214) from idea-ology metallic kraft-stock, sanded and blended with ground espresso distress ink. A chippy red painted adornment arrow and a couple of idea-ology hardware heads and my tag was finished.

    Thanks for stopping by, I will be back tomorrow with a project made using the new paper village thinlits dies.
    Zoe


  7. 16th October, 2020

    Halloween Street

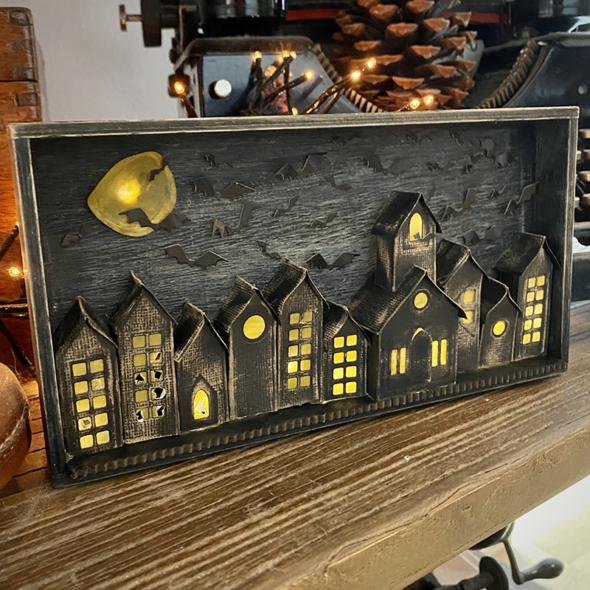
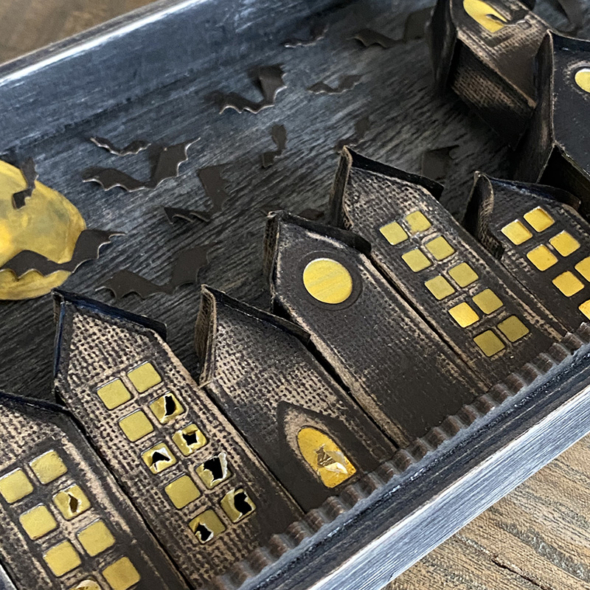
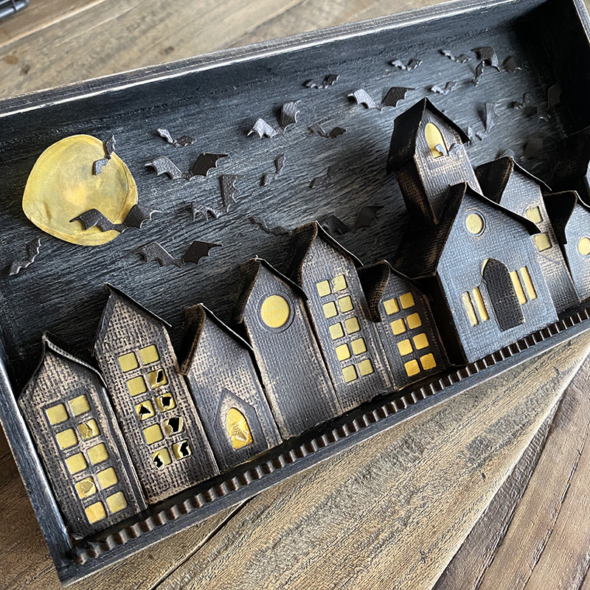
    Hello friends. Firstly I want to say a great big thank you for your kind comments on yesterdays post. I really appreciate the encouragement and I hope that the post will encourage you to make and share something too. I’m back today with a sample I made for the Tim Holtz Sizzix Chapter 4 die release. If you’re ready to get your spook on, take a walk with me down to Halloween street where there are bats in the belfry and something sinister is stirring behind those smashed out windows…

    igirlzoe: tim holtz sizzix chapter 4 paper village thinlits dies
    When I received the chapter 4 dies I confess that I completely overlooked the paper village thinlits dies (664741) . It wasn’t until we had our maker team zoom call with Tim and he showed them built that I “got it” and was hooked! They are so versatile, not only in the way that you can customise and accessorise the buildings, windows, doors and roofs; but that they will be suitable for every season. Plus they make a pretty cute birdhouse. 😉

    igirlzoe: tim holtz sizzix chapter 4 paper village thinlits dies
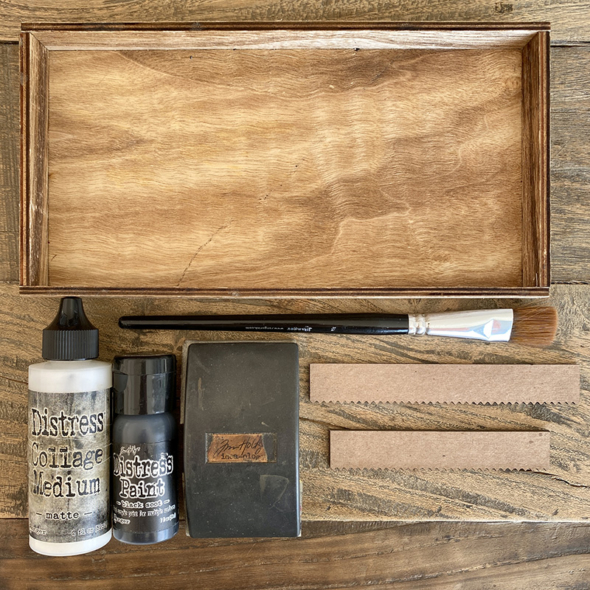
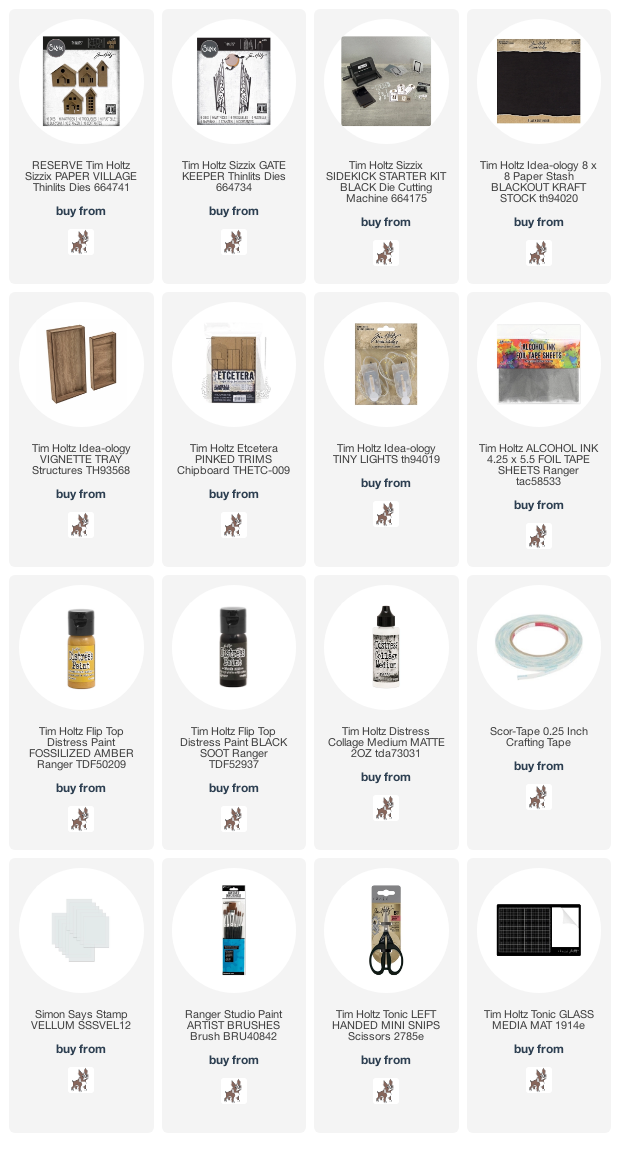
    Gather an idea-ology vignette tray, paintbrush, distress collage medium matte, black soot distress paint, a sanding grip or sandpaper and etcetera thickboard pinked trims.

    igirlzoe: tim holtz sizzix chapter 4 paper village thinlits dies
    Using the paint brush, cover the vignette tray with black soot distress paint and sand the back and edges to give a distressed look.

    I wanted to use the small vignette tray as my base but the ledge wasn’t deep enough to seat the largest house that I had planned to make into a church. By overhanging the edge of the vignette you would see the light from the tiny lights and it would spoil the effect of a darkened street, so I came up with a solution… etcetera thickboard pinked trim!

    igirlzoe: tim holtz sizzix chapter 4 paper village thinlits dies
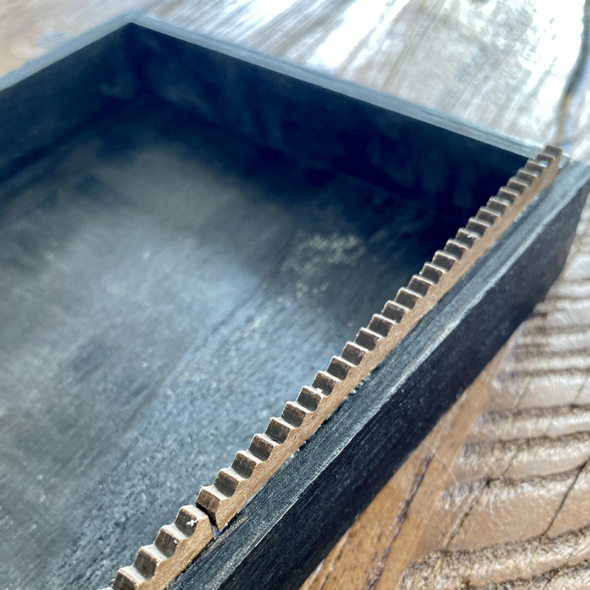
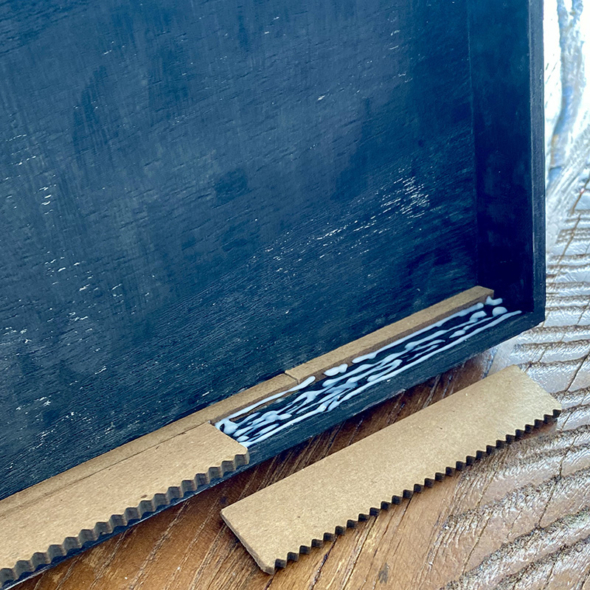
    I used etcetera thickboard pinked trims together with trim from the bat web trims which worked perfectly. Using distress collage medium matte to glue the trim into place, I painted with black soot distress paint to match the vignette.

    igirlzoe: tim holtz sizzix chapter 4 paper village thinlits dies
    I love the pinked trim for this, it works with the creepy vibe of the vignette and gave me the perfect platform for my paper village…

    igirlzoe: tim holtz sizzix chapter 4 paper village thinlits dies
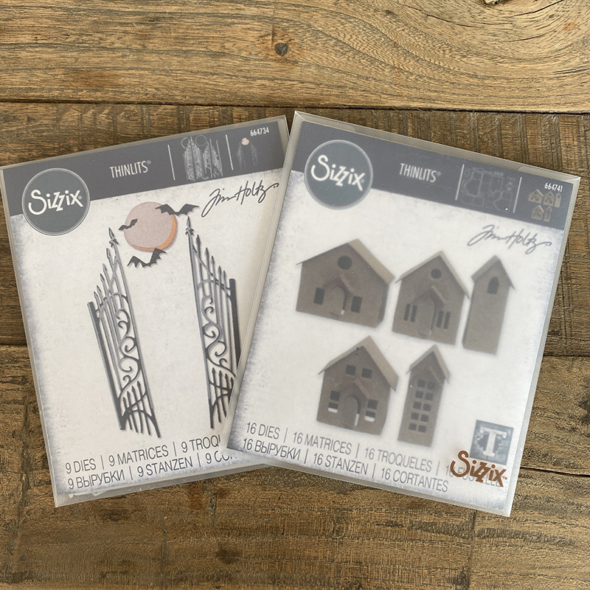
    Next it was time to build my street using the paper village (664741) thinlits dies from Chapter 4 and gate keeper (664734) thinlits dies from Chapter 3… If you’re new to Tim Holtz and or the Sizzix dies, they are released in 4 “Chapters” throughout the year.

    igirlzoe: tim holtz sizzix chapter 4 paper village thinlits dies
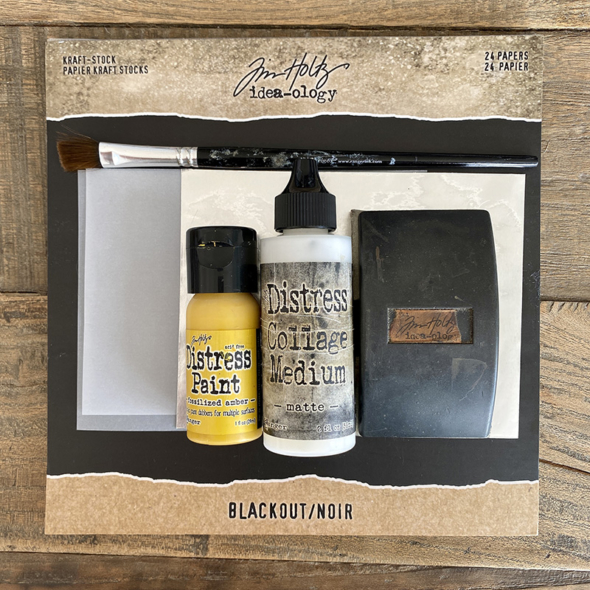
    Gather idea-ology Blackout Kraf-Stock (because it is the BEST), alcohol ink foil tape, vellum, paintbrush, sanding grip or sandpaper, distress collage medium matte (you’ll want the bottle for this) and fosslized amber distress paint.

    igirlzoe: tim holtz sizzix chapter 4 paper village thinlits dies
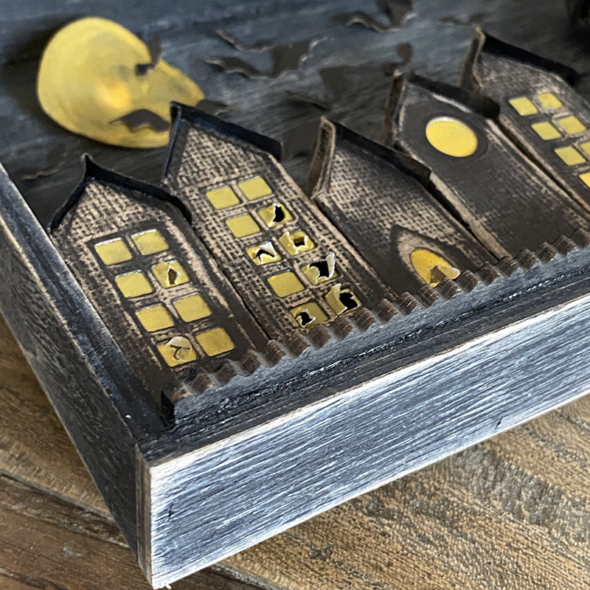
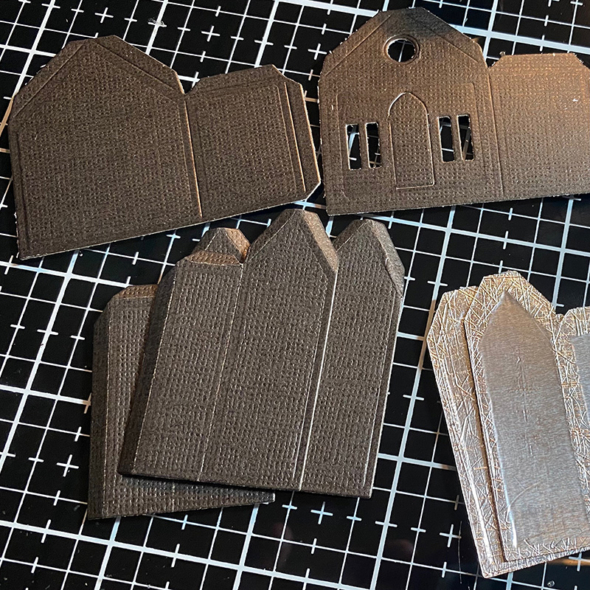
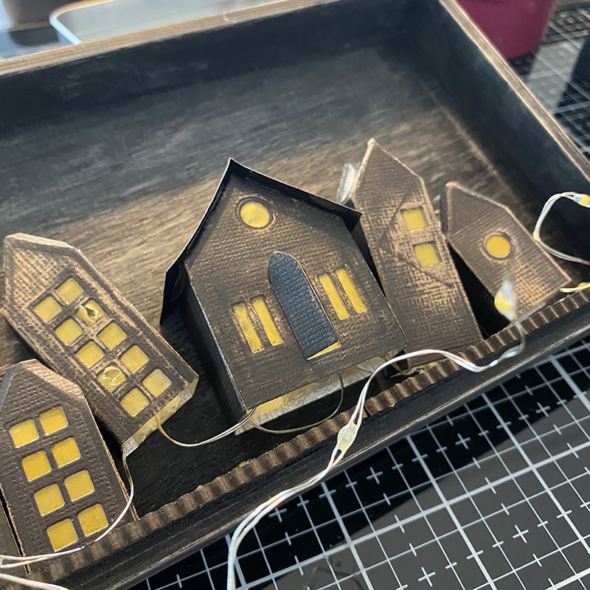
    Die cut your village from the Blackout Kraft-stock and sand, it will reveal the cool kraft core. For the back of the houses, cover the blackout with foil tape before die cutting. You don’t need to do this, but the reason that I did with some of the houses was to reflect the tiny light and give a brighter light compared to those which I didn’t line with foil and painted black inside. I didn’t add lights inside those houses to give the effect that the lights were out.

    igirlzoe: tim holtz sizzix chapter 4 paper village thinlits dies
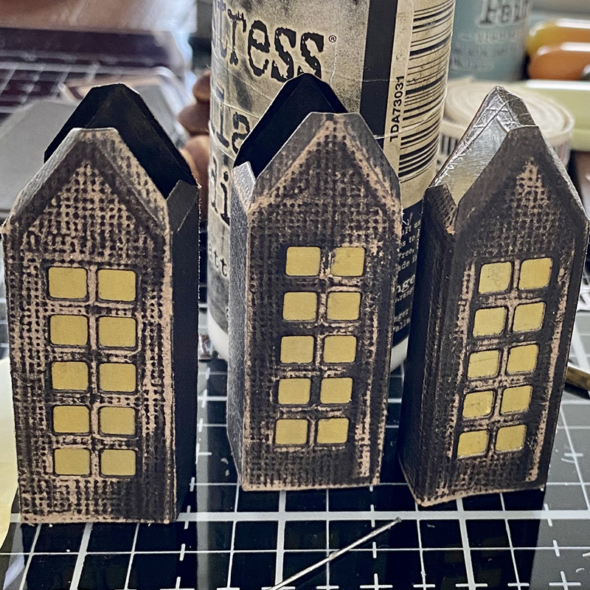
    You can see in the pic above that only the house on the right is foil lined. The other two were painted with black soot distress paint and won’t be lit inside.

    igirlzoe: tim holtz sizzix chapter 4 paper village thinlits dies
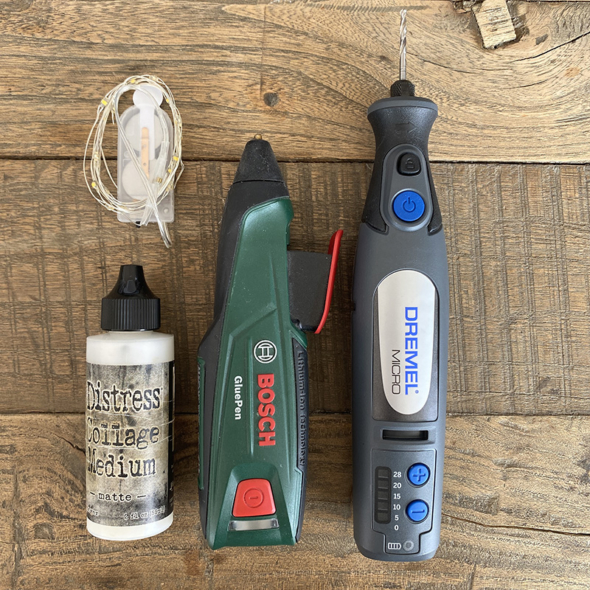
    The tiny lights were fed through a hole in the back of the vignette tray I made using a dremel micro and drill bit. I got this for my birthday and it’s the business. I used a hot glue gun to hold the tiny lights in place before securing them with distress collage medium matte. The hot glue is easier than using tape to hold them in place but I pulled up the hot glue after the Distress collage medium had bonded as the houses won’t sit flush on hot glue. Do not put hot glue on the bulb of the tiny lights, only use it on the wire part or you could damage your lights.

    igirlzoe: tim holtz sizzix chapter 4 paper village thinlits dies
    Place your houses into the vignette tray to see where you want them. You will see from the pic above that apart from the large house that would become the church, none of the houses had the roof on. The reason for this was because I wanted to be able to flatten the houses and trim the bottom using my TH tonic guillotine to vary the height of the houses. I didn’t want to trim them until I could see how they looked stood next to each other. I was tucking the lights in to each house to figure out the placement of these too. I thought this picture might be useful for you…

    igirlzoe: tim holtz sizzix chapter 4 paper village thinlits dies
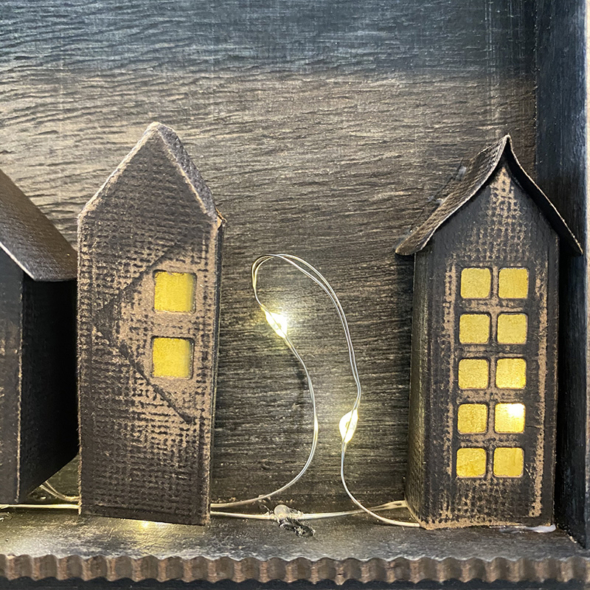
    Then it was time to assemble the tray. I thread the lights through the hole at the far left end of the vignette box and ran them along the back, keeping the wire taught and securing in place with distress collage medium. When the lights were at the very right hand end of the vignette I turned them back and used the excess to start to tuck into the houses as I glued them down. The tiny lights are really easy because the wire allows you to bend them into shape, allowing you to place the house over the top and secure by running a line of distress collage medium to the base of the house. The glue shrinks as it dries so you won’t be left with residue.

    igirlzoe: tim holtz sizzix chapter 4 paper village thinlits dies
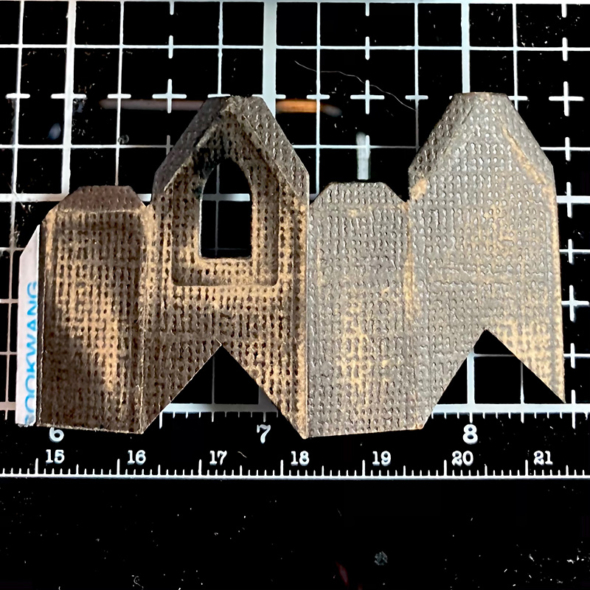
    To create the church spire, I die cut the tall thin house and used one of the doors as a window. I cut a V into the front and back (as pictured above) which allowed it to sit on top of the church roof.

    igirlzoe: tim holtz sizzix chapter 4 paper village thinlits dies
    I cut a hole in the roof to allow the light to be fed up into the spire.

    igirlzoe: tim holtz sizzix chapter 4 paper village thinlits dies
    I definitely tapped into my love of Tim Burton and the movie Beetlejuice when I sat down to make this. I curled the roofs slightly to give it a creepy look. I found it was best to place the roof over the house without glue first and curl the roof. Then add glue and hold into place. If you try to curl it as you stick it down for the first time, it peels back up.

    igirlzoe: tim holtz sizzix chapter 4 paper village thinlits dies
    I die cut the moon from the gate keeper thinlits die (664734) out of vellum which I painted with fossilized amber distress paint. I used this paint covered vellum to line the inside of the front of the houses over the windows. The tiny lights thread back out through the hole on the left of vignette and back in through a hole I drilled behind the moon. It allowed me to just use one set of lights for the entire vignette tray.

    igirlzoe: tim holtz sizzix chapter 4 paper village thinlits dies
    Using my scissors I poked holes through some of the vellum and used the non brush end of my paintbrush to widen them and make them looked smashed out.


    You can see the houses on the left that were painted black inside and had no tiny lights tucked inside. With smashed out windows and no lights they look abandoned…

    igirlzoe: tim holtz sizzix chapter 4 paper village thinlits dies
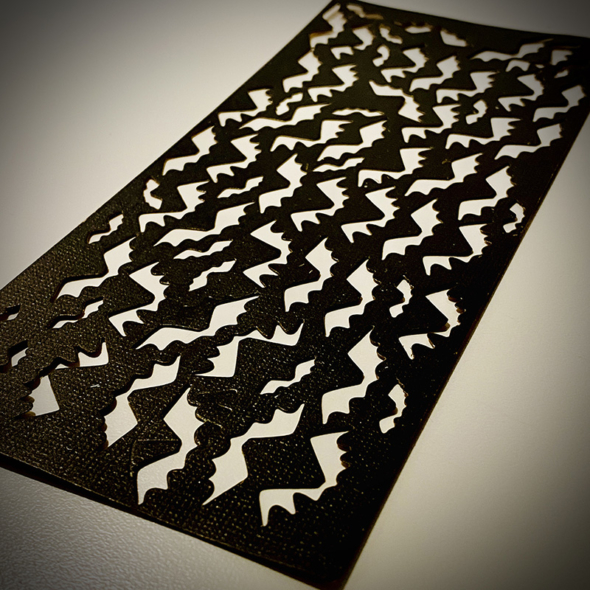
    I’m very lucky to have a husband who will help me die cut to meet a deadline. As I was racing the clock to get the houses assembled before FedEx came to collect, my sweet husband die cut all these bats from the gate keeper thinlits die set for me. He’s a keeper.

    igirlzoe: tim holtz sizzix chapter 4 paper village thinlits dies
    If you missed out on the facebook LIVE, you can catch up on all the fun over on Tim’s blog.

    Thanks for stopping by. I will be back tomorrow with more makey makes.
    Zoe


  8. 15th October, 2020

    Snarky Christmas

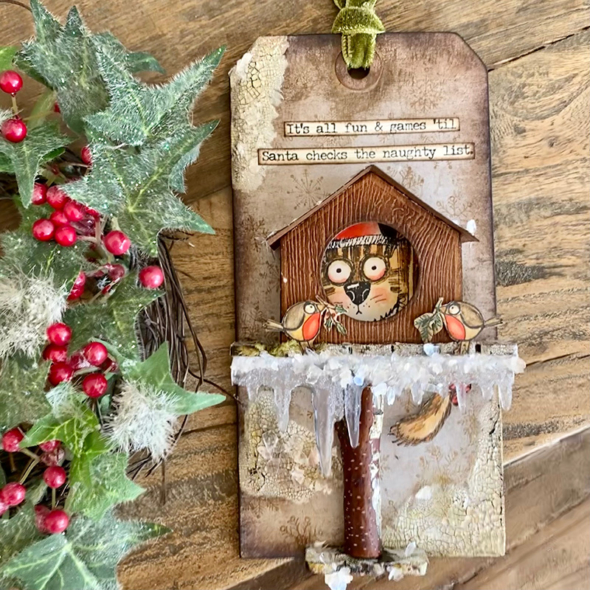
    Hello friends. Thanks for joining me, I hope you have snacks because this is quite a long post. I’ve been quite the makey maker recently and have lots of posts coming. First up is a fun tag I made using the new Snarky Christmas CMS416 stamp set for the Tim Holtz Stampers Anonymous Christmas stamp release. If you missed the facebook LIVE on Saturday you can catch up on all the action on Tim’s blog.
    igirlzoe: tim holtz stampers anonymous snarky christmas stamps sizzix chapter 4 paper village thinlits dies
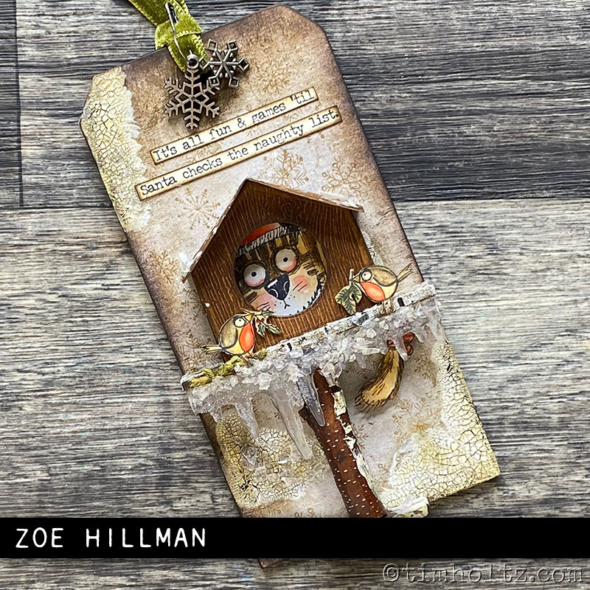
    I’ve added some “how to” steps and hope that this helps you to make your own birdhouse tag. This could be adapted for Valentines with the addition of a heart above the birdhouse or for Spring, Halloween or Easter by just swapping out a few items.
    igirlzoe: tim holtz stampers anonymous snarky christmas stamps sizzix chapter 4 paper village thinlits dies
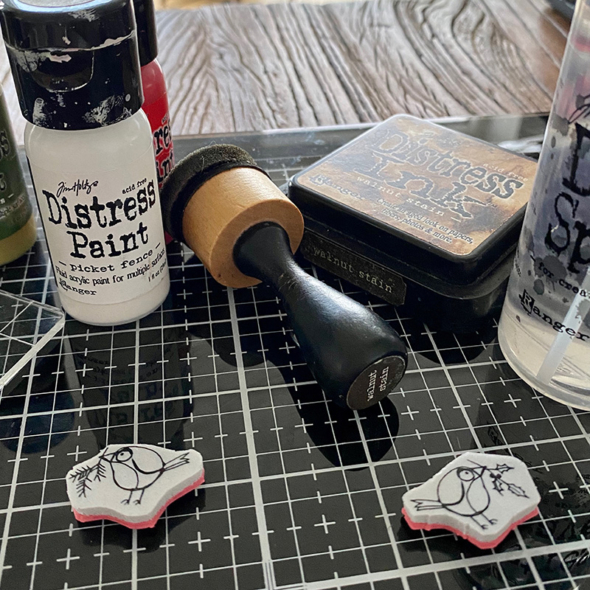
    When the Snarky STAMPtember stamps were released, I was really taken with the tiny bird and I was so excited to see him return, facing in the opposite direction and with different foliage on the snarky christmas set. I wanted to make something that included them both and this was my starting point for this tag.
    igirlzoe: tim holtz stampers anonymous snarky christmas stamps sizzix chapter 4 paper village thinlits dies
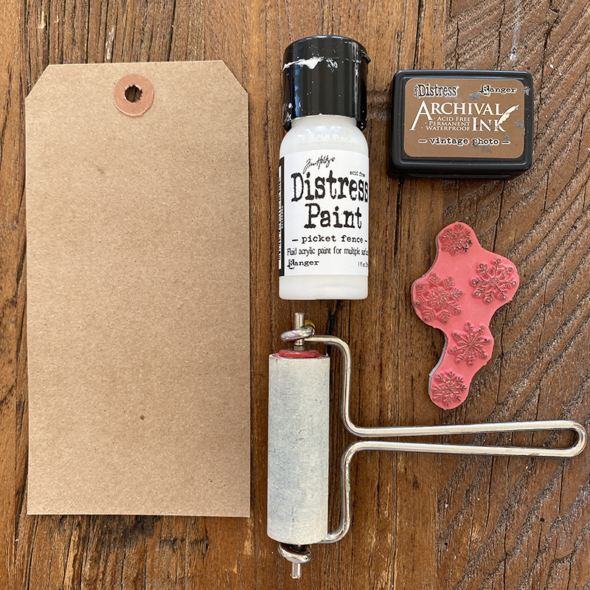
    Gather a #8 kraft tag, mini brayer, picket fence distress paint, vintage photo distress archival ink and the snowflake stamp from the snarky christmas CMS416 stamp set.
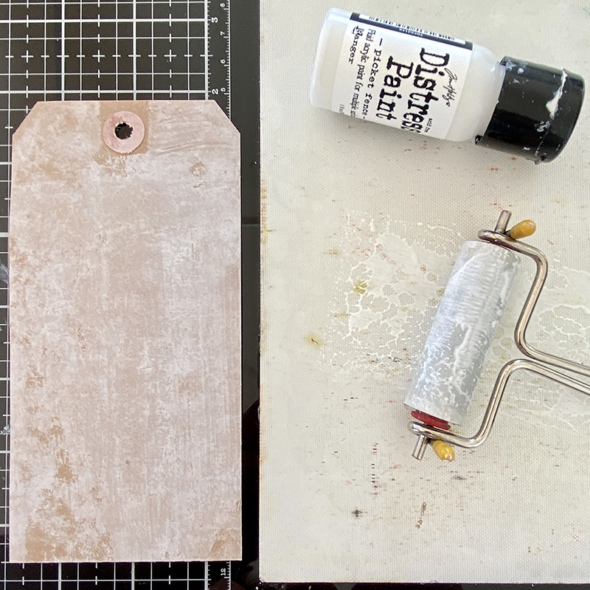
    igirlzoe: tim holtz stampers anonymous snarky christmas stamps sizzix chapter 4 paper village thinlits dies
    Add a few drops of the paint to your glass media mat or non stick surface, roll the brayer in the paint and roll over the kraft tag. Any direction, messy is perfect and don’t go too heavy on the paint. Allow it to air dry.
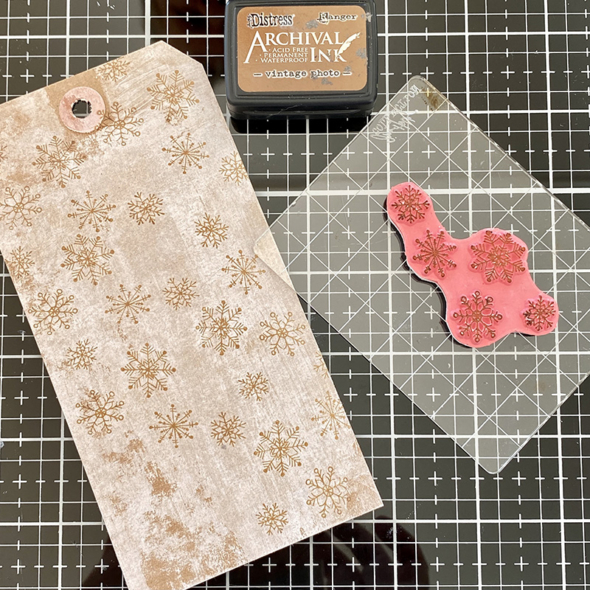
    igirlzoe: tim holtz stampers anonymous snarky christmas stamps sizzix chapter 4 paper village thinlits dies
    Ink up the snowflake stamp with the distress archival ink and stamp several times over the tag. The colour is a great match and gives the illusion of the snowflakes having resisted the paint you brayered on in the last step.
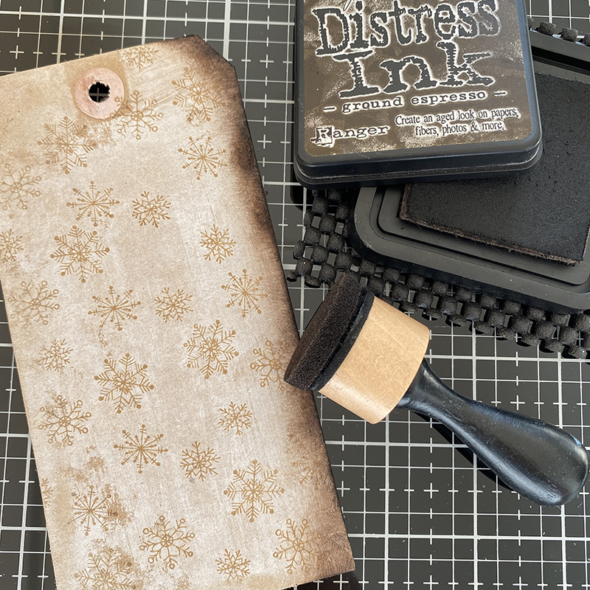
    igirlzoe: tim holtz stampers anonymous snarky christmas stamps sizzix chapter 4 paper village thinlits dies
    Lightly sand the edges of your tag (you can skip this if you like it less grungy). Using a mini blending tool, blend distress ink into the edges. I used ground espresso.
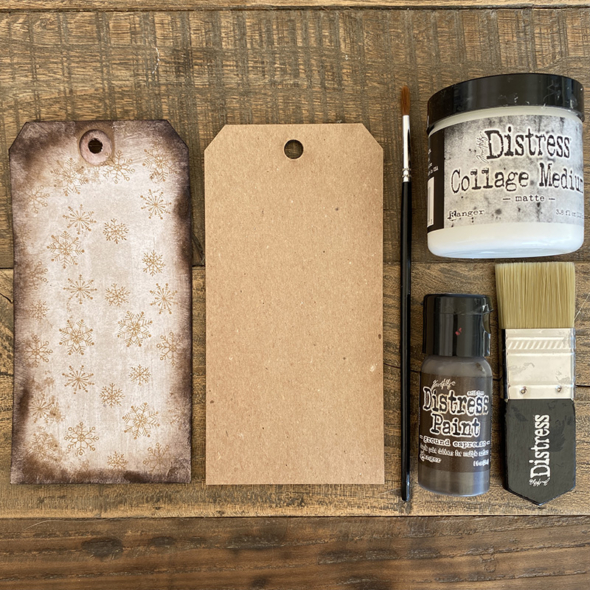
    igirlzoe: tim holtz stampers anonymous snarky christmas stamps sizzix chapter 4 paper village thinlits dies
    Gather your decorated kraft tag, a #8 thickboard etcetera tag, paintbrush, distress brush, distress collage medium and ground espresso distress paint.
    igirlzoe: tim holtz stampers anonymous snarky christmas stamps sizzix chapter 4 paper village thinlits dies
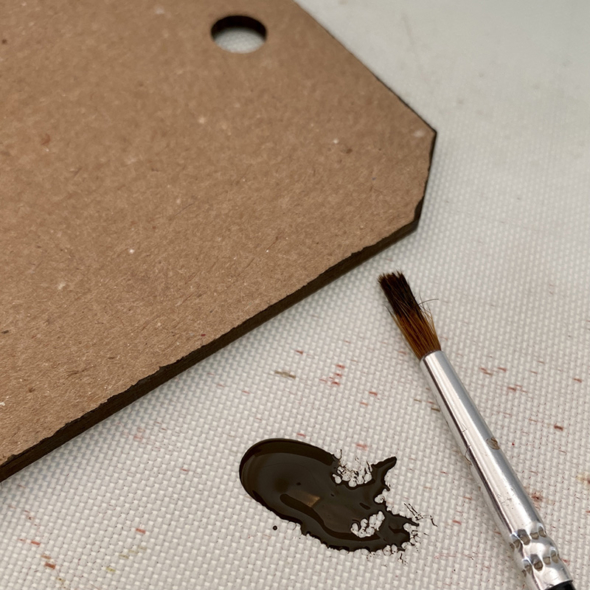
    I like to paint around the edge of the etcetera tags with ground espresso distress paint because it gives it a nice dark edge that looks like burnt wood. You could add distress ink or leave it natural.
    igirlzoe: tim holtz stampers anonymous snarky christmas stamps sizzix chapter 4 paper village thinlits dies
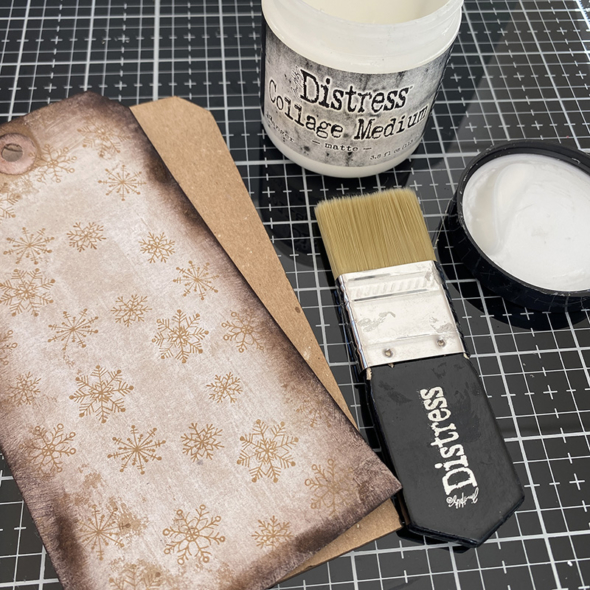
    Using the distress brush, cover the etcetera tag with distress collage medium matte and adhere the kraft tag over the top. Distress collage medium dries fast, so work quickly.
    igirlzoe: tim holtz stampers anonymous snarky christmas stamps sizzix chapter 4 paper village thinlits dies
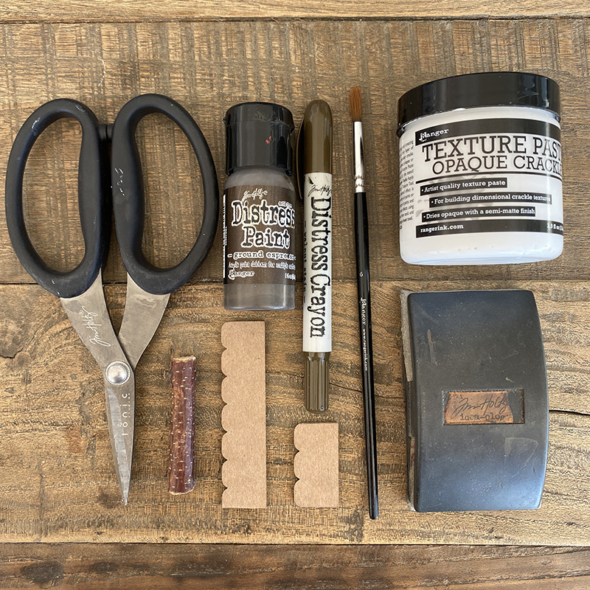
    Gather scissors (you will need heavy duty ones like the Tim Holtz Tonic Snips), etcetera thickboard scallop trim, distress crackle texture paste, paint brush, ground espresso distress paint, walnut stain distress crayon, a stick and a sanding grip or sandpaper.
    igirlzoe: tim holtz stampers anonymous snarky christmas stamps sizzix chapter 4 paper village thinlits dies
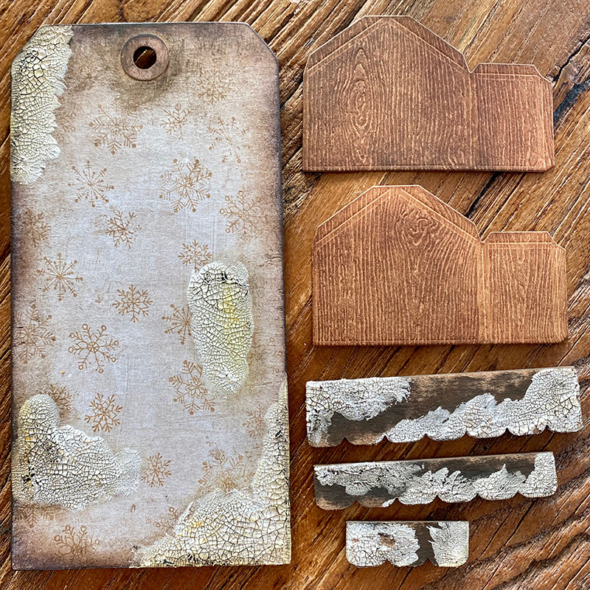
    Cut the etcetera scallop trim to fit the tag and keep the excess. Paint both with ground espresso distress paint and when dry, sand back the edges. Using your finger, add distress crackle texture paste to parts of the tag and parts of the trim and set aside to dry. Once dry, add walnut stain distress crayon and rub in with your finger. Using a babywipe or damp cloth, remove some of the crayon. Set aside whilst you build your birdhouse…
    igirlzoe: tim holtz stampers anonymous snarky christmas stamps sizzix chapter 4 paper village thinlits dies
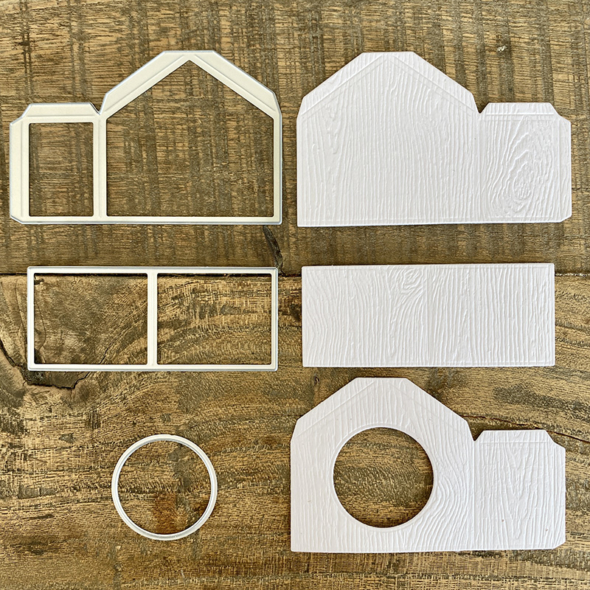
    Using the largest house from the paper village and a circle from the stacked circles thinlits die sets, die cut from distress woodgrain cardstock. The paper village thinlits dies are perfect with the Sizzix sidekick. So easy right?!
    igirlzoe: tim holtz stampers anonymous snarky christmas stamps sizzix chapter 4 paper village thinlits dies
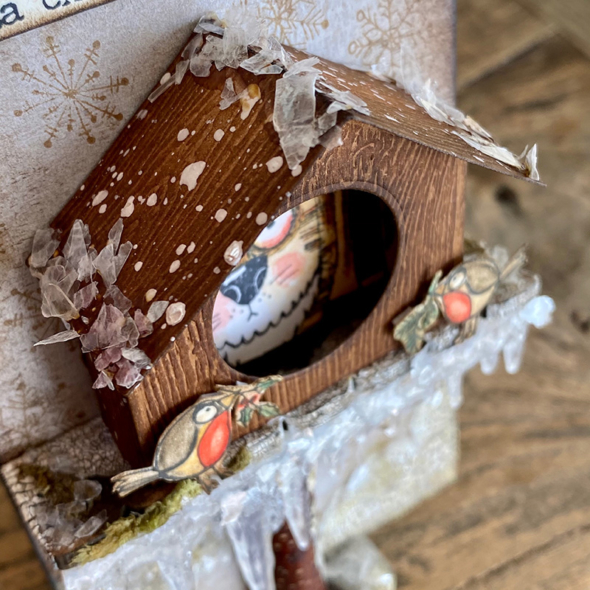
    In order to get the house to sit comfortably on the trim and make the roof seem larger, I altered the die cut. Here’s how…
    igirlzoe: tim holtz stampers anonymous snarky christmas stamps sizzix chapter 4 paper village thinlits dies
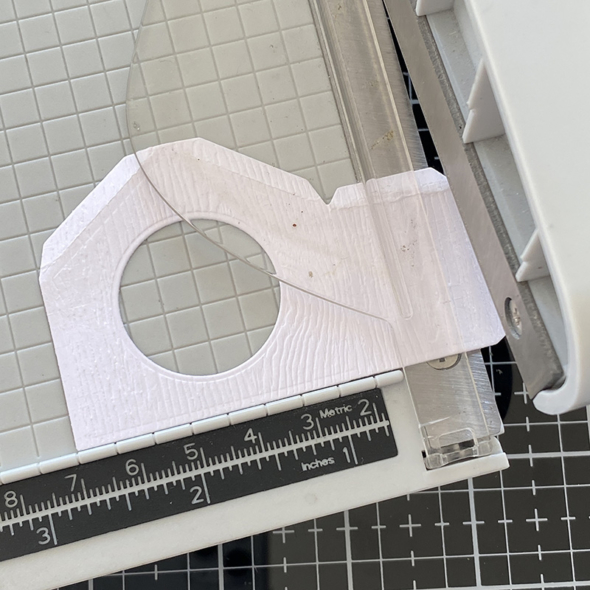
    Using my Tim Holtz Tonic guillotine, I trimmed off a quarter of an inch from the side tab. I repeated this on the other die cut, (the back of the house).
    igirlzoe: tim holtz stampers anonymous snarky christmas stamps sizzix chapter 4 paper village thinlits dies
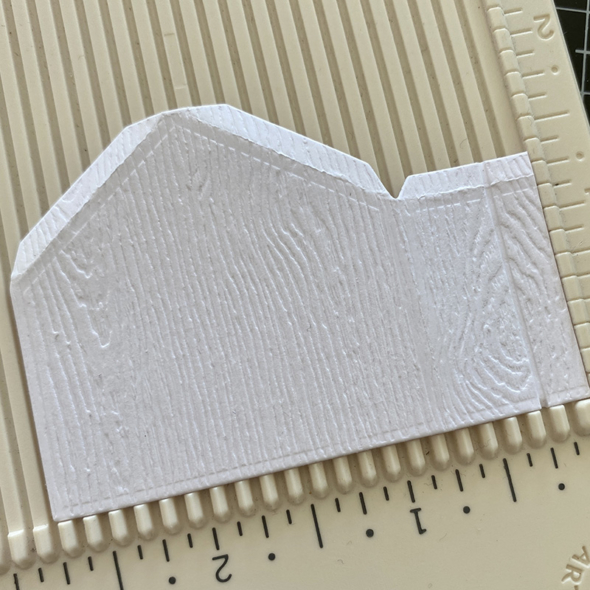
    Using a score board, I created a new tab by scoring a quarter inch in from the edge. I repeated this on the other die cut, (the front of the house).
    igirlzoe: tim holtz stampers anonymous snarky christmas stamps sizzix chapter 4 paper village thinlits dies
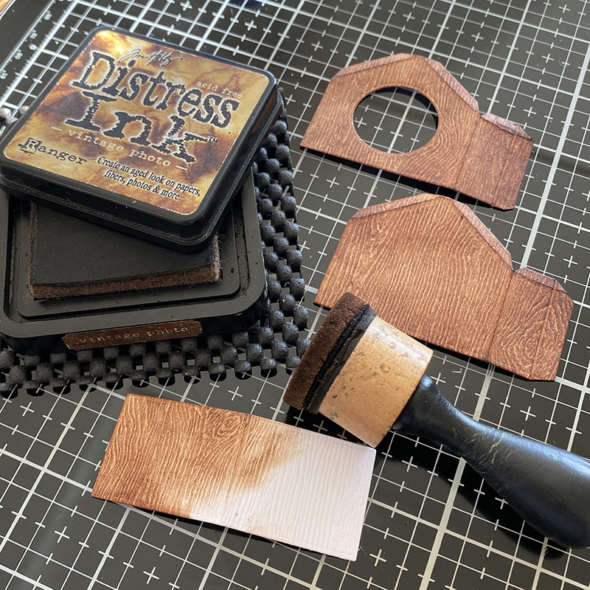
    Using a mini blending tool, blend in vintage photo distress ink. I covered both sides with ink as you will see portions of the underneath of the roof and inside of the birdhouse once it’s assembled.
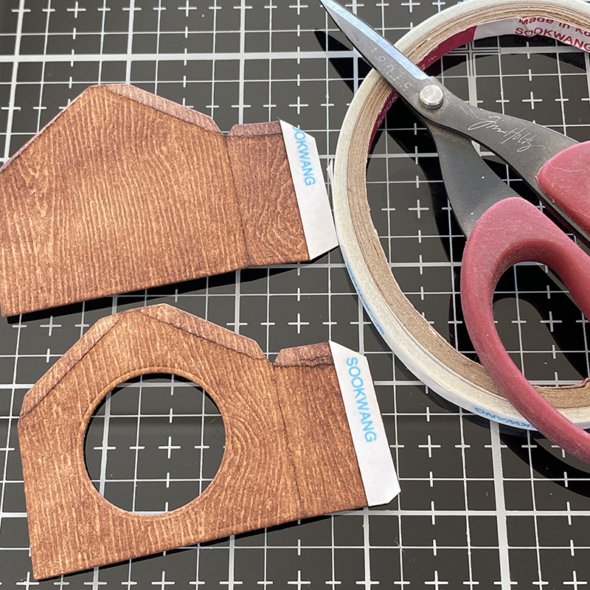

    You can use distress collage medium to put these together and I do for the roof but I find scor-tape is perfect for the side tabs. Cut the top of the tab at a slight angle (see pic above).

    TIP: Make sure the ink is dry before using the scor-tape or it will slide off.
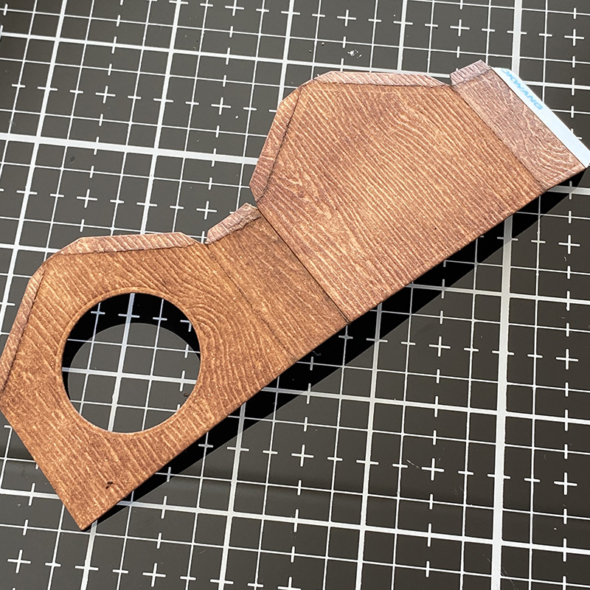
    igirlzoe: tim holtz stampers anonymous snarky christmas stamps sizzix chapter 4 paper village thinlits dies
    Assemble the house by laying the back of the house over the tab on the front of the house (see pic above).
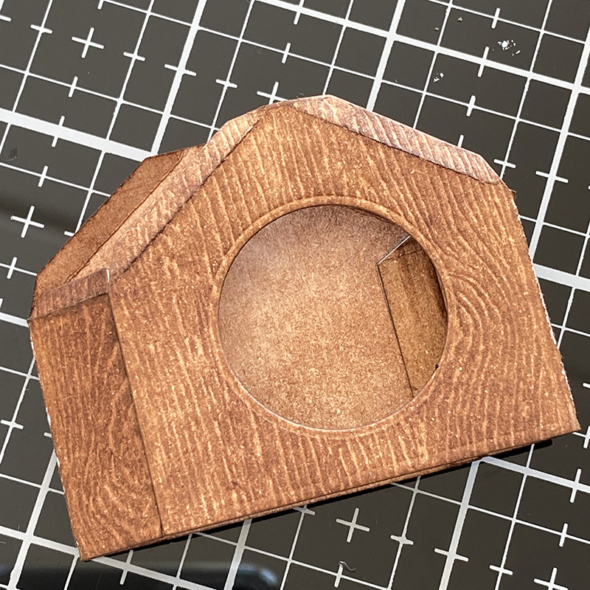
    igirlzoe: tim holtz stampers anonymous snarky christmas stamps sizzix chapter 4 paper village thinlits dies
    Fold the house over (see pic above) and add the second tab in the same way as the first and then press down so the house is flat and the tabs are secure.
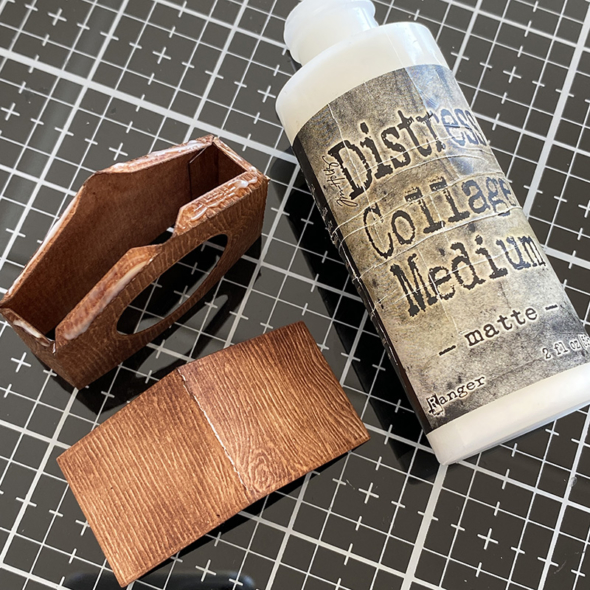
    igirlzoe: tim holtz stampers anonymous snarky christmas stamps sizzix chapter 4 paper village thinlits dies
    Pop the house up and add distress collage medium to the tabs on the top where the roof will sit.
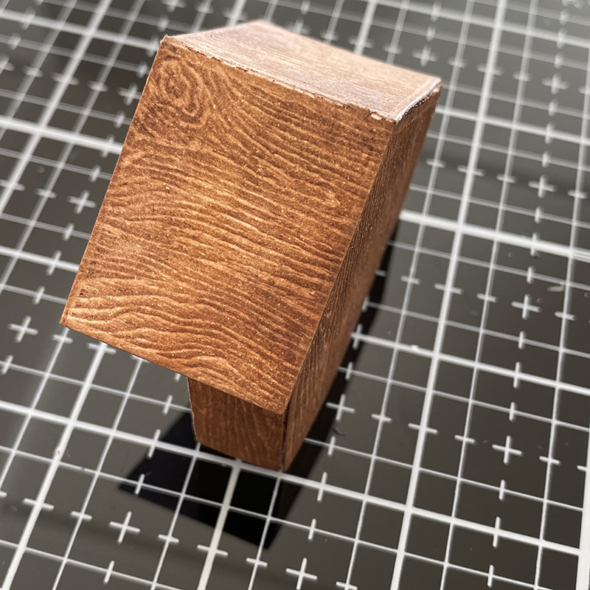
    igirlzoe: tim holtz stampers anonymous snarky christmas stamps sizzix chapter 4 paper village thinlits dies
    Add the roof and hold down with your fingers for a few moments until bonded. I positioned the roof flush with the back of the house so it would sit flush against my tag and give more overhang.
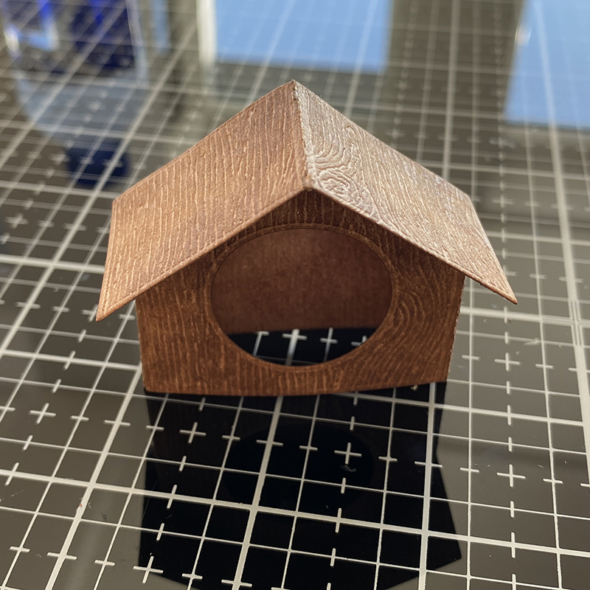
    igirlzoe: tim holtz stampers anonymous snarky christmas stamps sizzix chapter 4 paper village thinlits dies
    Like this…

    igirlzoe: tim holtz stampers anonymous snarky christmas stamps sizzix chapter 4 paper village thinlits dies
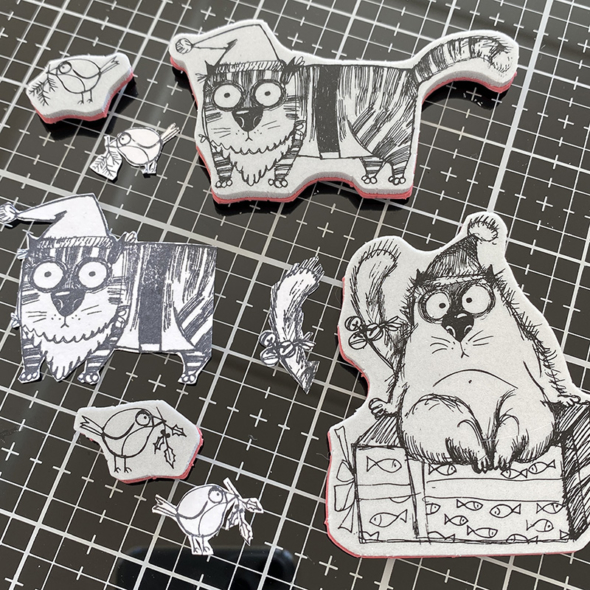
    Using stamps from Snarky Christmas CMS416 set, stamp with distress archival ink onto distress watercolor cardstock (smooth side) and fussy cut. I used a tail from one cat and the body from another (you’ll see why later on). I stamped the tiny bird from this set and the one from the STAMPtember 2020 set.
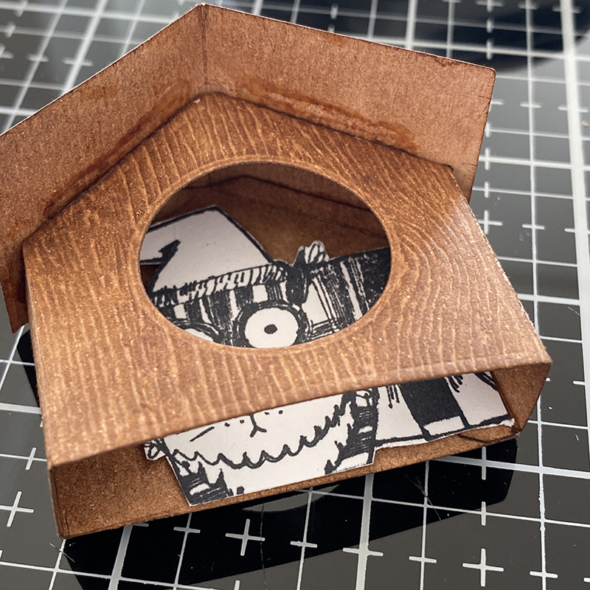
    igirlzoe: tim holtz stampers anonymous snarky christmas stamps sizzix chapter 4 paper village thinlits dies
    Place your fussy cut snarky cat into the back of the birdhouse and trim to fit. Color and then adhere him to the inside with a little 3D foam so he pops forward a little.
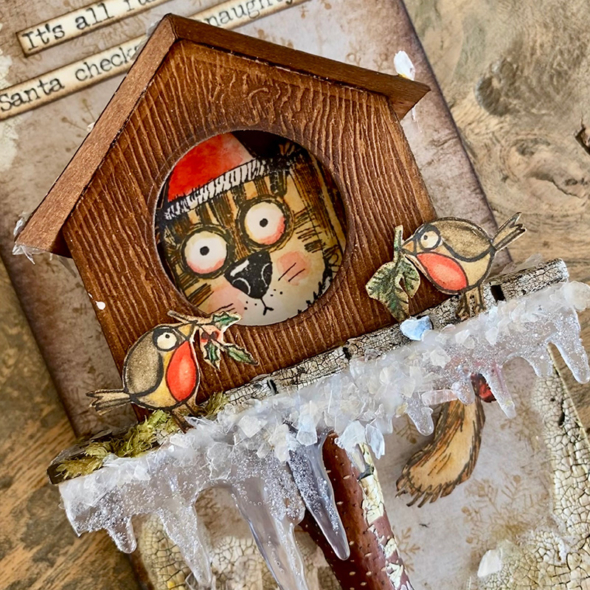
    igirlzoe: tim holtz stampers anonymous snarky christmas stamps sizzix chapter 4 paper village thinlits dies
    Now it’s time to assemble the tag. Using distress collage medium, glue the etcetera thickboard scallop trim across the tag. Once dry, add the stick and base trim underneath and finally the bird house, with the tiny birds in front.
    igirlzoe: tim holtz stampers anonymous snarky christmas stamps sizzix chapter 4 paper village thinlits dies
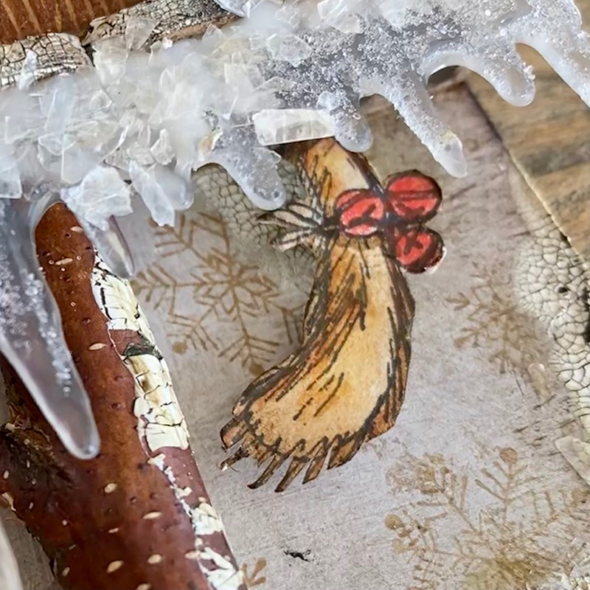
    Using 3D foam, mount the cat tail (from the other snarky cat) under the bottom of the trim, the join will be covered by the icicles.
    igirlzoe: tim holtz stampers anonymous snarky christmas stamps sizzix chapter 4 paper village thinlits dies
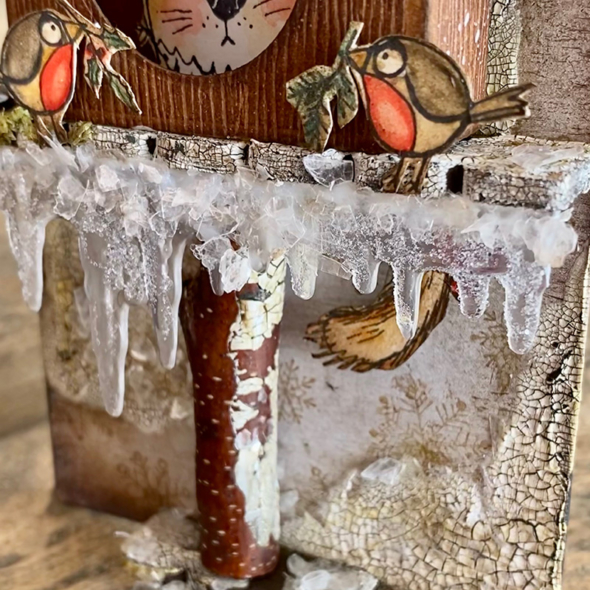
    Add distress collage medium to idea-ology icicles and cover with distress glitter using the glitter duster. I hate glitter, I really do and I have to say that the glitter duster eliminates a lot of escaped glitter. I used a splat box and did the glitter work on my balcony… I wish to apologise to my neighbours! LOL

    I added more distress collage medium and sprinkled with distress mica. I LOVE DISTRESS MICA! It’s not glitter, it’s like shards of vintage sugar glass….
    igirlzoe: tim holtz stampers anonymous snarky christmas stamps sizzix chapter 4 paper village thinlits dies
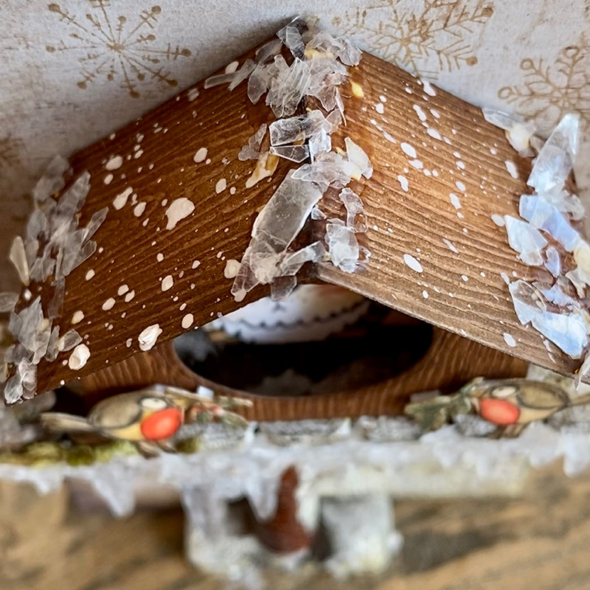
    I added mica to the roof and splatted it with some picket fence distress paint to give the appearance of snow… or bird poop… you decide! 😉
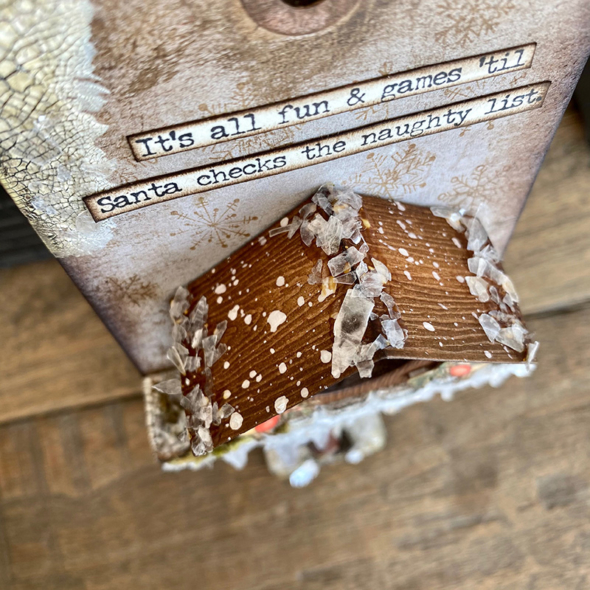
    igirlzoe: tim holtz stampers anonymous snarky christmas stamps sizzix chapter 4 paper village thinlits dies
    As there’s a very naughty snarky cat hiding in the birdhouse, I thought this snarky sentiment from the Snarky Christmas CMS416 set was perfect. I stamped it with distress archival ink onto distress watercolor cardstock, cut with my scissors and edged with a little ground espresso distress ink.
    igirlzoe: tim holtz stampers anonymous snarky christmas stamps sizzix chapter 4 paper village thinlits dies
    Thank you Tim for adding the idea-ology snowflakes adornments with an idea-ology loop pin to hold the GORGEOUS new idea-ology christmas velvet trim in place. I would love to see these trims in shades of brown in the every day line, it’s so nice… stock up!

    A big thank you to Tim Holtz, Mario Rossi and Paula Cheney for all they do for the makers and a big thank you to you for stopping by. If you have any questions, please let me know and I’ll do my best to help.

    If you’re a Tim Holtz Addict looking for a home, check out the Tim Holtz Addicts group on facebook. For an encyclopedia of demos, techniques, tips and tricks, check out the 16 weeks of demo magic on Tim’s blog.

    Have a great Thursday and see you tomorrow for my next project.
    Zoe


  9. 22nd April, 2020

    Curio Box

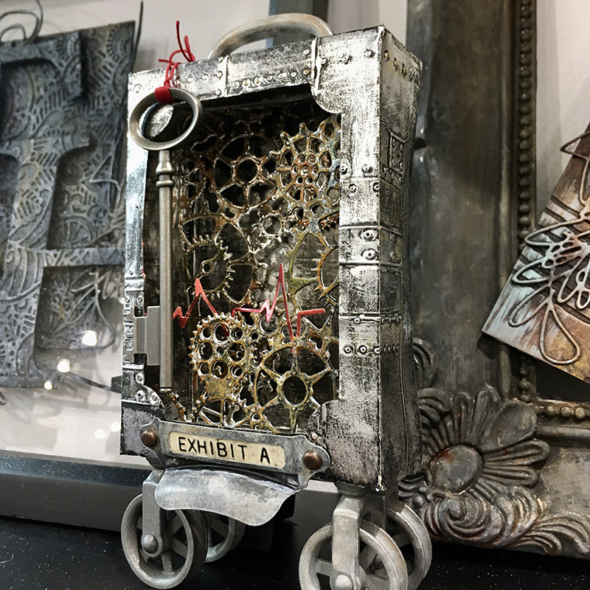
    Hello there. After the Tim Holtz Sizzix facebook LIVE last week and his demo on Saturday, I thought I would share a project that I made for the Sizzix booth using the new Tim Holtz dies for this years Creativation. It feels like a long time ago…

    igirlzoe: Tim Holtz sizzix curio box bigz xl heartbeat thinlits gearheads thinlits 3D foundry distress foil distress crayons
    I love love love the foil embossed technique that Tim showed during last Saturdays demo. It has been a favorite of mine for many years, since seeing Tim demo it during the 12 tags series. Using the new 3D foundry embossing folder takes it to the next level. The deep embossed detail on the 3D dies is mind blowing.

    igirlzoe: Tim Holtz sizzix curio box bigz xl heartbeat thinlits gearheads thinlits 3D foundry distress foil distress crayons
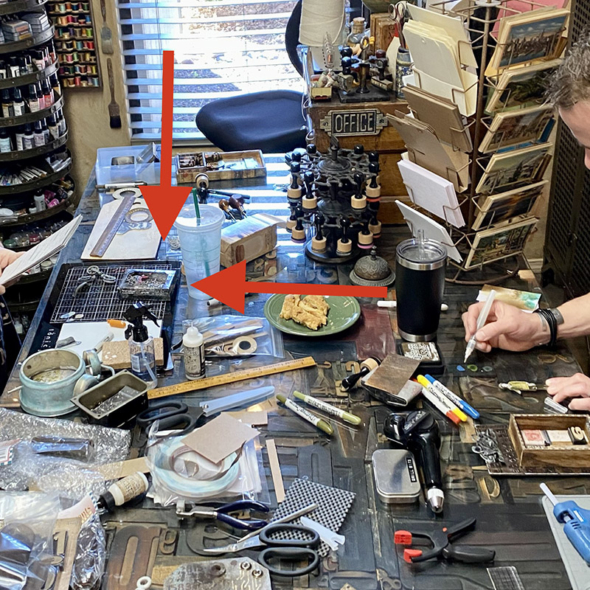
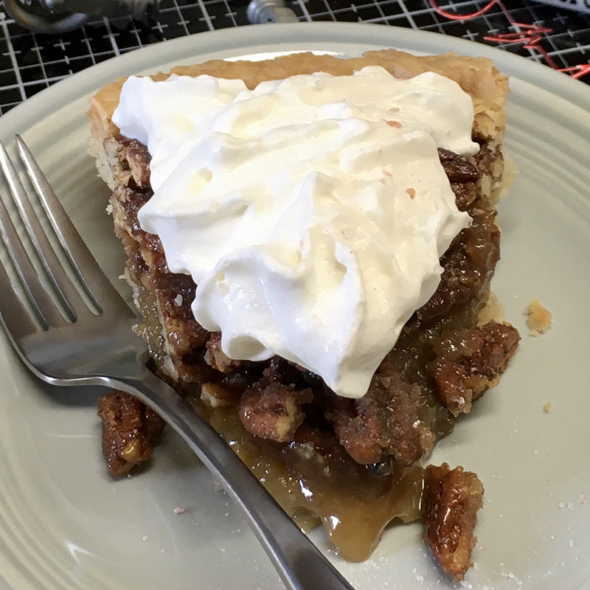
    I don’t have a tutorial for this project because, in truth, I finished it in Tim’s studio with the help of Tim “what do ya need” Holtz, Mario “MacGyver” Rossi and the best piece of pecan pie I’ve ever had. I KNOW you’re not looking at my project in this photo! LOL 😉

    igirlzoe: Tim Holtz sizzix curio box bigz xl heartbeat thinlits gearheads thinlits 3D foundry distress foil distress crayons
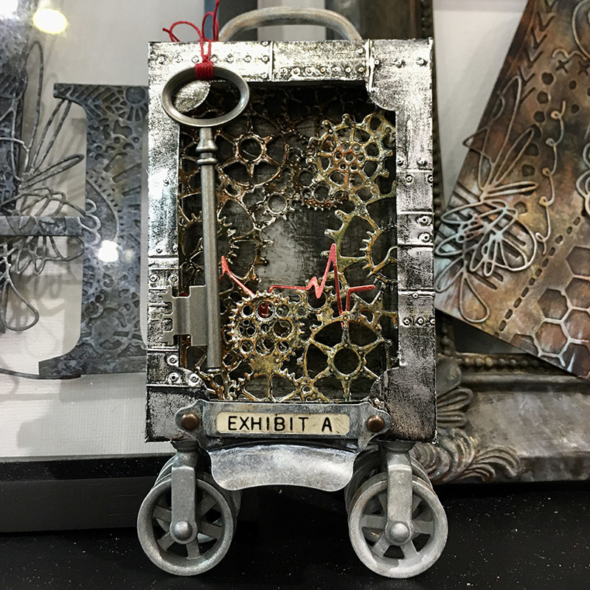
    I have to say that the new die cut the curio box bigz xl die blew my socks off. I die cut it from heavystock covered with metal foil tape. I used the now retired larger sheets of heavystock from Ranger Ink and I beg you to all email Ranger ink and ask them to continue making it. You will NEED the larger sheets of heavystock for projects like this and I know my friend Tami B is mounting a campaign to bring this back to market. If you don’t want to see this disappear forever, please please email Ranger Ink and ask for this. #peoplepower

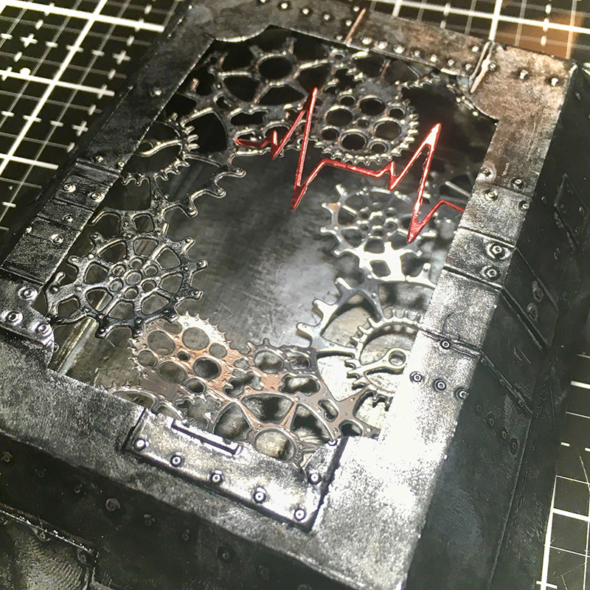
    Ok, so back to the project… once cut I ran the top of the box through my die cutting machine again to cut the frame. You can choose between 2 frames that come with the die, or you could leave the box solid. I then ran it through inside the 3D foundry texture folder. I used distress paint and distress crayons to colour the box and highlight the cool foundry pattern. Check out Tim’s demo to see how.

    igirlzoe: Tim Holtz sizzix curio box bigz xl heartbeat thinlits gearheads thinlits 3D foundry distress foil distress crayons
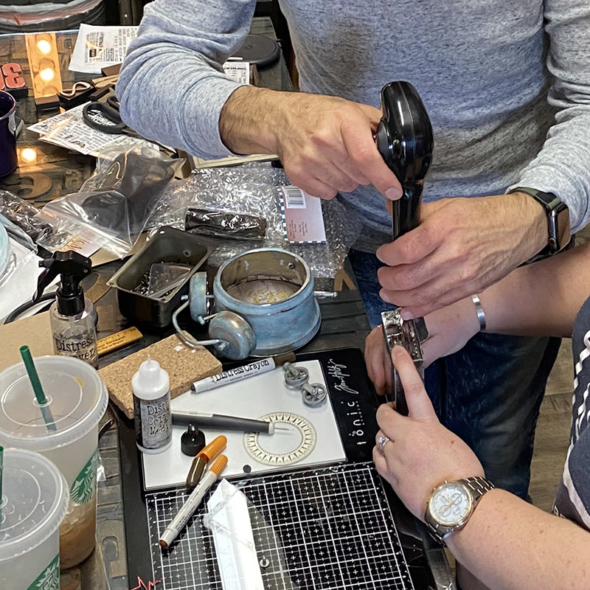
    I added idea-ology pulley wheels, and when I say “I” I mean Mario drilled the holes and Tim took on the uber fiddly task of getting the screws in between the die cut gearheads that I had already glued into the box. He persevered and “we” got it done. Crafting is team sport… it literally takes a village (or studio)! 😉

    igirlzoe: Tim Holtz sizzix curio box bigz xl heartbeat thinlits gearheads thinlits 3D foundry distress foil distress crayons
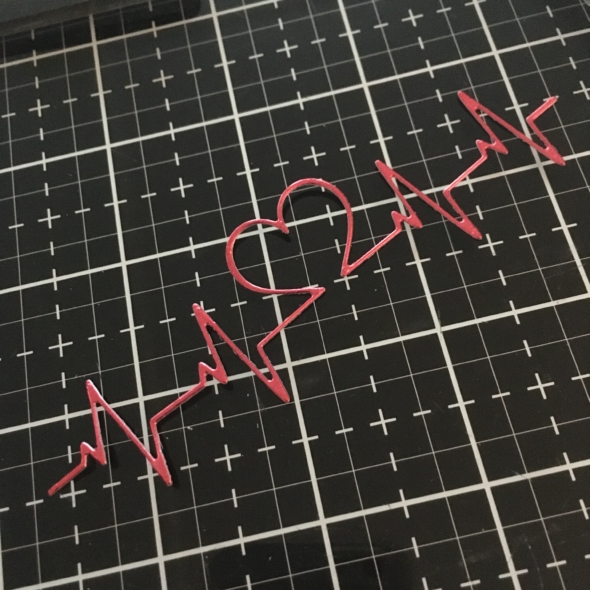
    I used the new heartbeat thinlits die. This die is very close to my heart and was something I knew I wanted to use. I die cut it from a sheet of red idea-ology metallic kraft-stock and added it across the gearhead thinlits die.

    igirlzoe: Tim Holtz sizzix curio box bigz xl heartbeat thinlits gearheads thinlits 3D foundry distress foil distress crayons
    With some idea-ology hardware pulls and remnant rubs added, it was done. I really love the curio box die, it’s one that I will use a lot.


    This is the pie I mentioned and is THE BEST PIE I HAVE EVER HAD! EVER! EVER EVER EVER!

    Hope you’re having a great Wednesday, I’m off to find myself a sweet treat to go with my afternoon coffee as this has made me hungry!

    Zoe

  10. 27th February, 2020

    Creativation 2020 Part 3

    Hello friends. I’m back with the third and final installment of my Creativation adventure. Thanks again for your kind comments, it’s really nice of you to take the time and I’m glad you’ve enjoyed seeing bits from the show. I know I sound like a broken record, but if you get a chance to attend, do it!

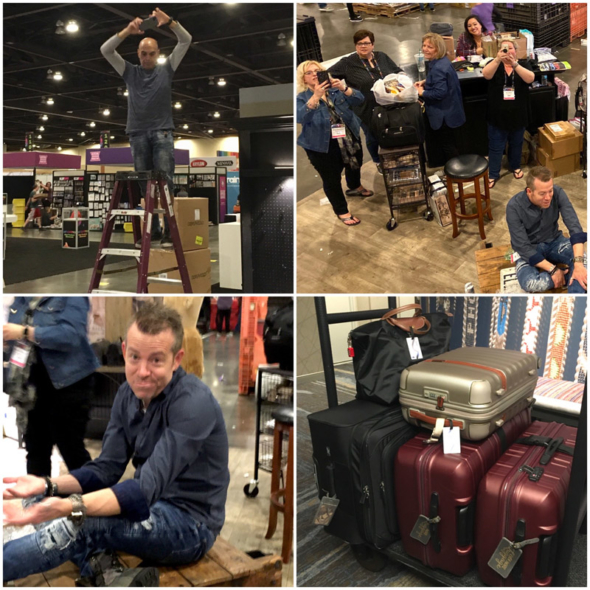
    The show floor goes from complete chaos to complete craft village in just a couple of days. It’s a lot of hard work by the people involved, plus all of the planning that goes into it ahead of the show. I watch with awe at what they do!

    Creativation 2020 Tim Holtz
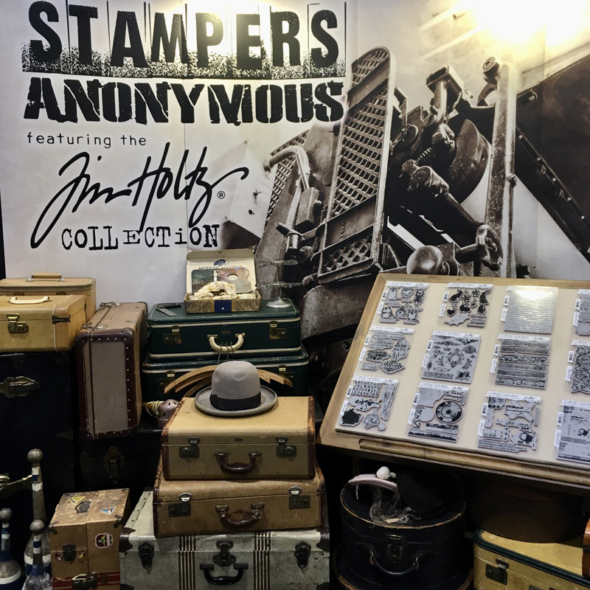
    Stamps are my jam and Stampers Anonymous make the best red rubber in the industry. This is their cool booth! Love all the vintage suitcases and the signage I’d seen for years in photos online before seeing it in person at the show. See the hat? You always need a hat! #justsaying

    Creativation 2020 Tim Holtz
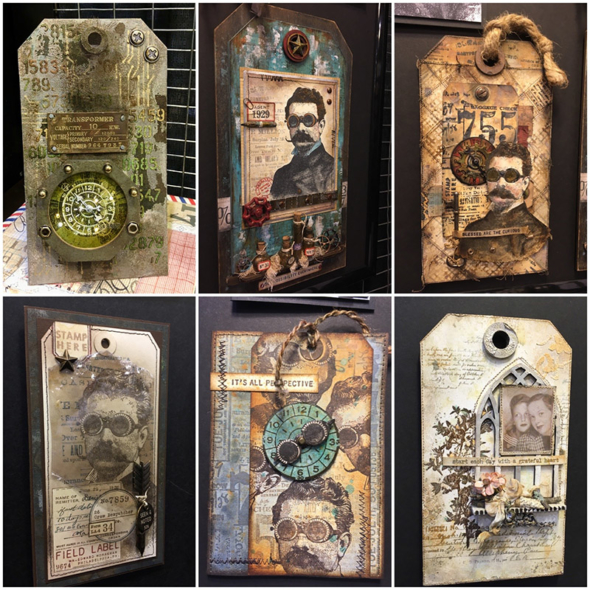
    The etcetera tags from Stampers Anonymous are the perfect base for the new Tim Holtz professor 2 (CMS395) stamp set, he’s bigger and better than ever! The tag (top left) is the one Vicki Evans, (Thelma) nailed to Mario’s table in Creativation part 1.

    Creativation 2020 Tim Holtz
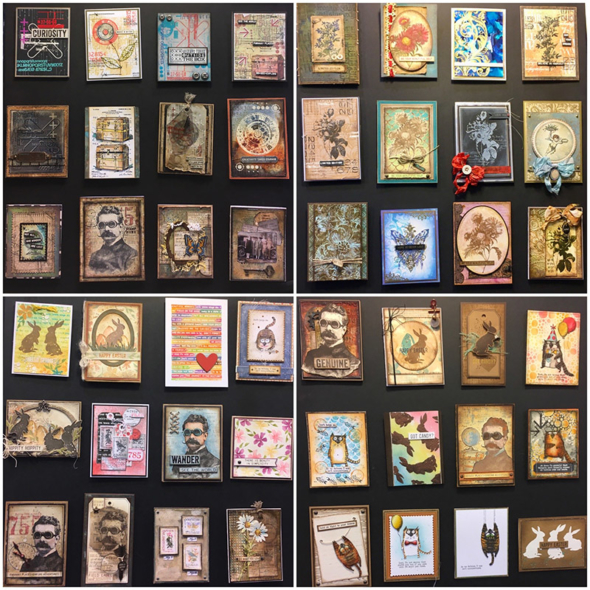
    These are some of the incredible card samples from makers around the world using the new Tim Holtz stamps, hanging in the Stampers Anonymous booth.

    Creativation 2020 Tim Holtz
    Mr Stampers Anonymous! One of the nicest guys in craft and so much fun to hang out with. He tells the best stories!

    Creativation 2020 Tim Holtz
    The Tim Holtz section of this years Sizzix booth. Not going to lie, last years booth was EPIC and I’m not sure anything will ever match it for me, but this was cute, like a small artists studio.

    Creativation 2020 Tim Holtz
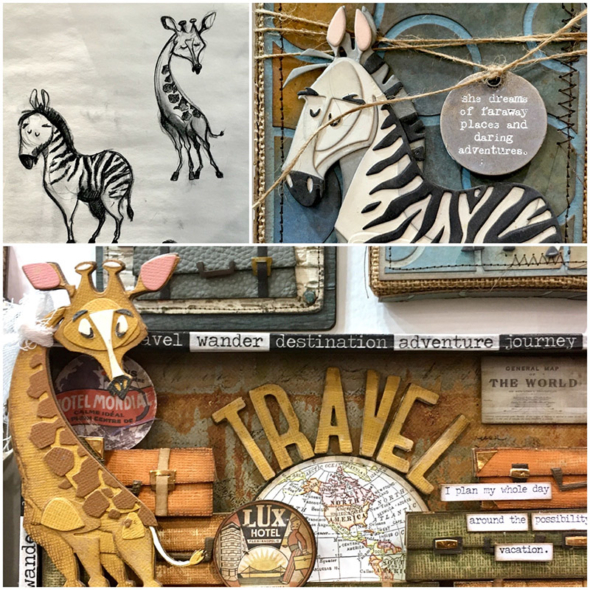
    I don’t know who drew the sketches of the new colorize dies, but they’re amazing. Love these samples using those colorize dies by Kath Stewart and Tami B.

    Creativation 2020 Tim Holtz
    More samples from the Sizzix booth using the new Tim Holtz dies. So much inspiration…

    Creativation 2020 Tim Holtz
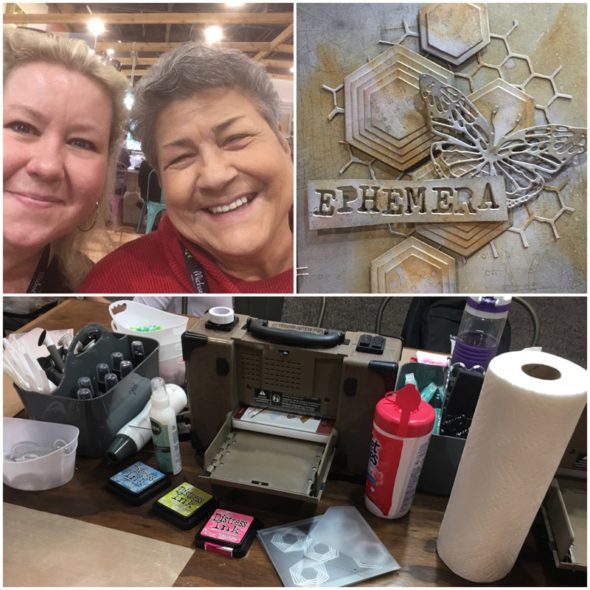
    Monica and I did a make and take together at the Sizzix booth, it was a lot of fun. I think that Bad Monica is rubbing off on me and when they offered us bright distress ink colours I snuck a brown out the cart and started a tiny revolution on the table, sorry not sorry Sizzix. Thanks for suggesting it Monica, had a lot of fun.

    Creativation 2020 Tim Holtz
    Shortly afterwards, Monica was back to misbehaving… 😉

    Creativation 2020 Tim Holtz
    Mario and I ran into Eileen Hull at the Sizzix booth. I really enjoyed getting to meet Eileen and spend some time chatting with her, such a genuinely nice lady.

    One of the things I love best about going to Creativation is the people. It’s a such a pleasure to get to see so many people I adore in one place. Here are some of them…

    Creativation 2020 Tim Holtz
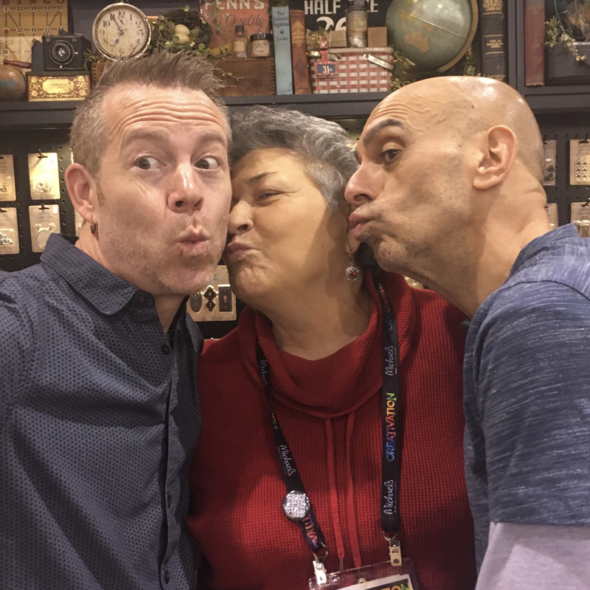
    Tim Holtz and Mario James Rossi are two of my favourite people in the world. They are genuine, kind, thoughtful, hard working, humble and SO much fun. They are both such great company and a total joy to be around and I feel really lucky to have friends like these.

    Creativation 2020 Tim Holtz
    Speaking of a joy to be around, my sister from another mister, Joy Kennedy is joy by name and nature. I love this girl, she is such fun to spend time with and makes me laugh. Beautiful inside and out and the selfie queen! She makes us all look good.

    Creativation 2020 Tim Holtz
    I loved finally getting to meet my sweet friend Stacy Hutchinson in person this year and hang out. She is truly awesome, super talented and even sweeter and we shared so many laughs, dessert and sugartinis.

    Creativation 2020 Tim Holtz
    Thelma and Louise Part 2! I love riding with this girl, she is so easy going and we have so much fun together. We are trying to convince Kaz Hall to come next time… we need a Brad! 😉

    Creativation 2020 Tim Holtz
    Paula Cheney is the Mum of the group and she takes care of us all during Creativation. She is incredible to the team of makers and guides us through with good humor. I love spending time with Paula in person, and she shares her cookies! (photo credit: Joy Kennedy)

    Creativation 2020 Tim Holtz
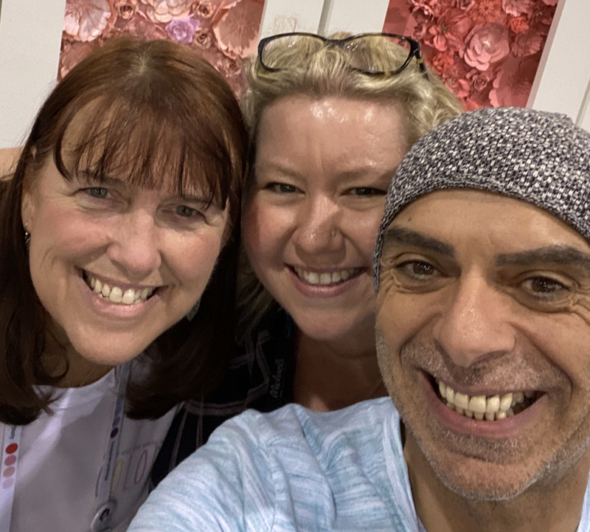
    Last day selfies with my SFAM, Dyan Reaveley, Ben Reaveley (Art from the Heart) and Anita Houston.

    Creativation 2020 Tim Holtz
    How many photo’s does it take to get 4 people to smile, open their eyes and look into the camera? I had to include all of these because they make me laugh! So much silliness. <31

    Creativation 2020 Tim Holtz
    We nailed it!

    Creativation 2020 Tim Holtz
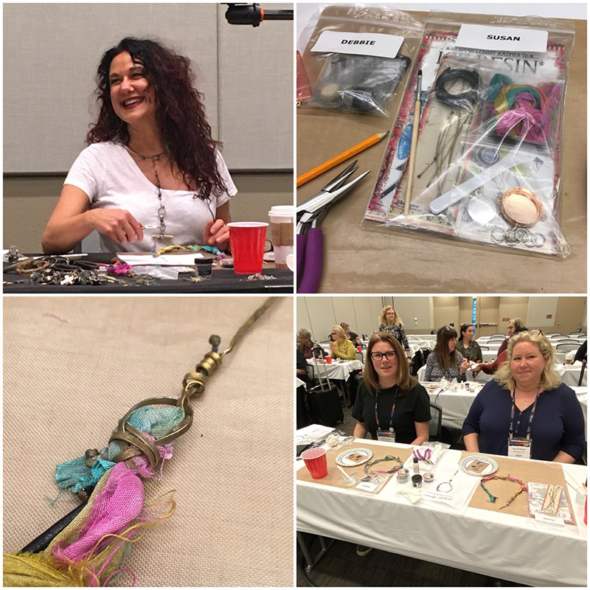
    During the show they run education workshops and seminars. Vicki and I signed up for a jewellery class with Susan Lenart Kazmer. Susan is such a cool and nice person and I really enjoyed talking to her after class.

    Creativation 2020 Tim Holtz
    Susan makes these amazing jewellery pieces. Just in awe!

    Creativation 2020 Tim Holtz
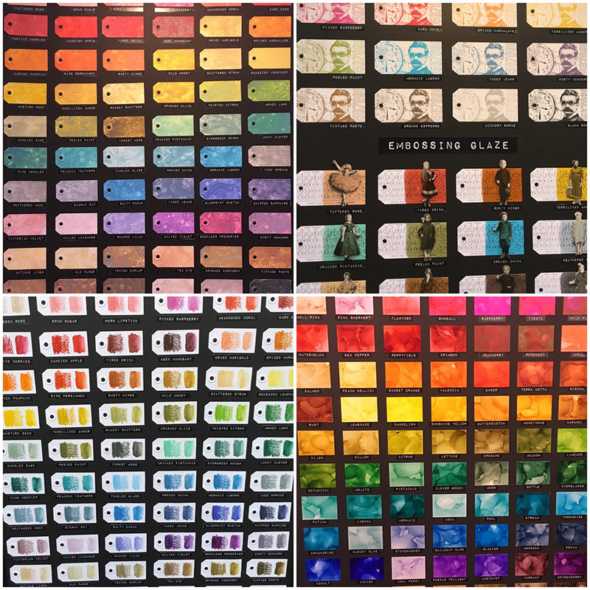
    It’s incredible how many colour swatches have to be made for the show! These were just 4 boards of many that Tim Holtz prepared for the Ranger Ink booth using distress products! It’s a lot of work to get ready for the show, so hats off to all of those who work like crazy in the run up. The displays were awesome!

    Creativation 2020 Tim Holtz
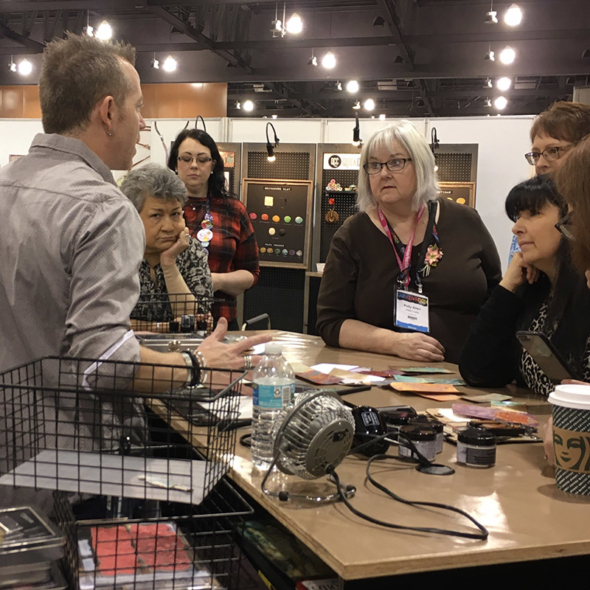
    Shout out to the Tim Holtz Addicts group who I did a couple of facebook LIVES for when Tim demoed on the Ranger ink booth. Stacy Hutchinson was doing a LIVE for the Tim Holtz page. How awesome to have 2 perspectives. Thanks for taking this Mario, I love the photo, the moment and the perspective. (photo credit: Mario James Rossi)

    Creativation 2020 Tim Holtz
    It was a lot of fun to watch Tim demo, he’s an incredible educator and makes learning so much fun.
    (Monica has her eye on me…)

    Creativation 2020 Tim Holtz
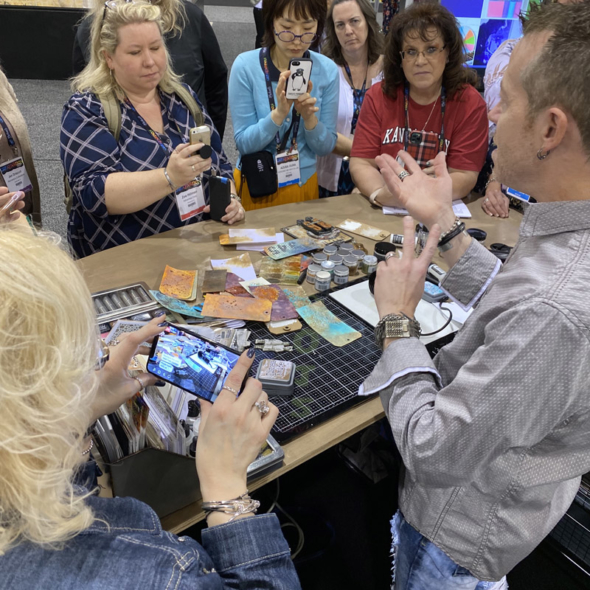
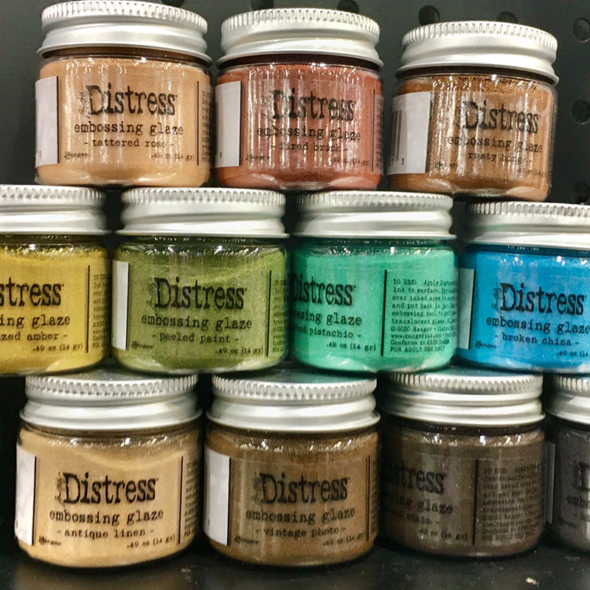
    One of the new products that Tim demoed is the distress embossing glazes! They are so awesome and I was lucky enough to take some home with me to play with! Check out Tim’s facebook LIVE replay or head over to Tim Holtz Addicts group to see the facebook LIVE from the show.

    Creativation 2020 Tim Holtz
    Celebrating Heidi Klausing Crowl from Simon Says Stamp receiving a Creative Retail Award. Cheers!

    Creativation 2020 Tim Holtz
    And just like that it was done for another year! Packed up and heading home…

    Creativation 2020 Tim Holtz
    On my long journey home I got a fever and went down with flu right after the show. When I got home I was overtired and not feeling good, but the sight of this one soon had me smiling again. Missed him.

    Creativation 2020 Tim Holtz
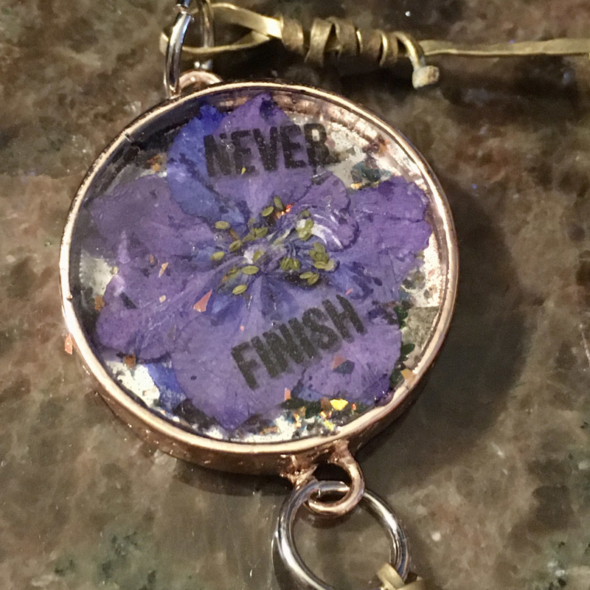
    I want to end with this piece I made in the jewellery class I took. It’s important because of the words I chose. Last year was a really tough one for many reasons and I got through thanks to some really good friends. To see them and hug them after such a scary, happy, sad and introspective year for me personally was so special. And to spend time with these people that I love, surrounded by inspiration and incredible kindness was genuinely what I needed most. Counting the days until we get to do it all again and I get to see all of these amazing people again. Thanks for following along, reading, commenting and mostly for making this creative community such a happy place.

    Much Love

    Zoe x
    Creativation 2020 Tim Holtz
    …oh and come to Creativation, it’s so much fun!!