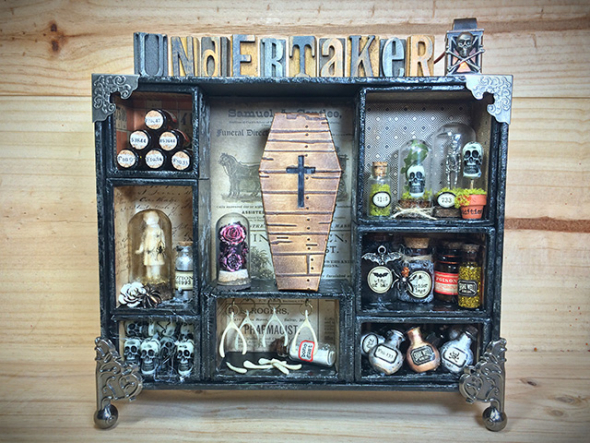
I’m very excited to share my second contribution to the Tim Holtz Halloween Inspiration series using the new seasonal idea-ology from Tim Holtz as well as the new movers and shapers coffin box die, which is TO DIE FOR, (pun intended)!
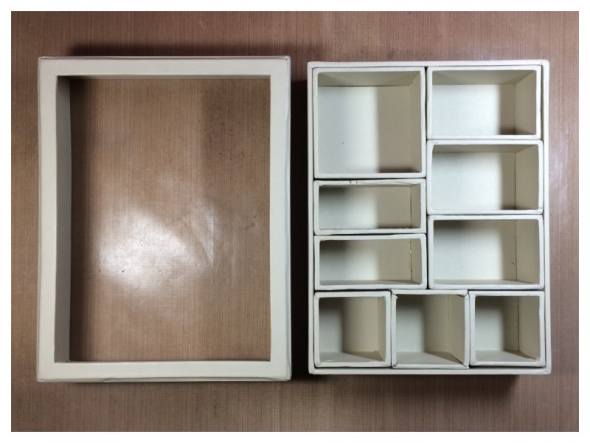
To begin with, take an idea-ology configuration box 6.75″ x 8.75. I used the lid and the insert boxes and put the base box away to use for another project.
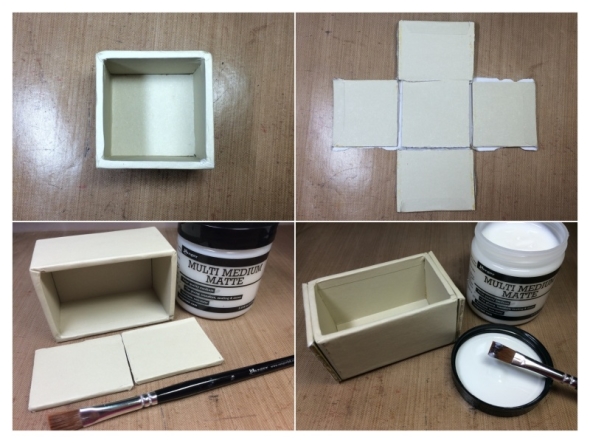
As the lid of the configurations box is a little wider than the base, I used one of the small insert boxes to build up another box so it would fill the space.
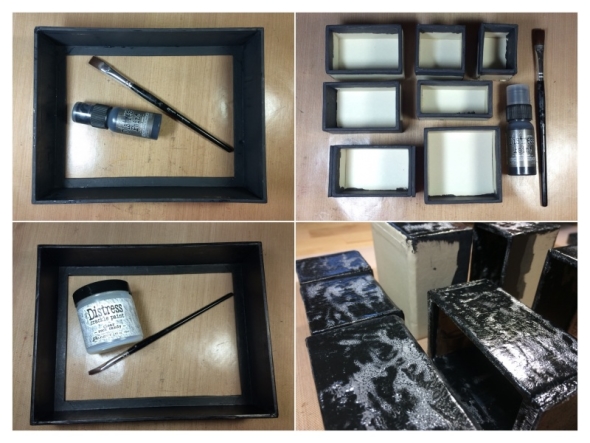
Paint the base box frame and the edges of the insert boxes with black soot distress paint. Once completely dry, cover with a layer of clear rock candy distress crackle paint and allow to air dry.
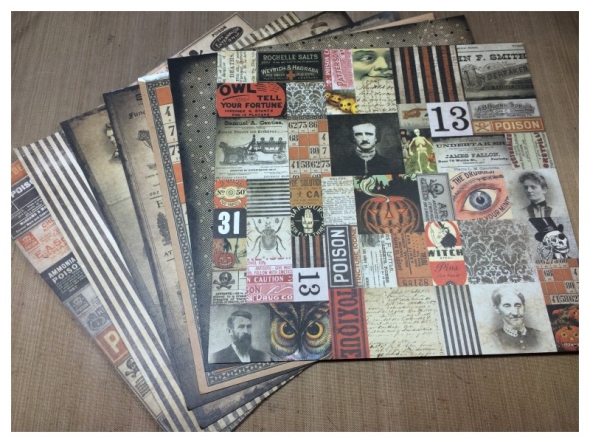
Use a selection of the scrumptious new regions beyond paper stash to line the insert boxes.
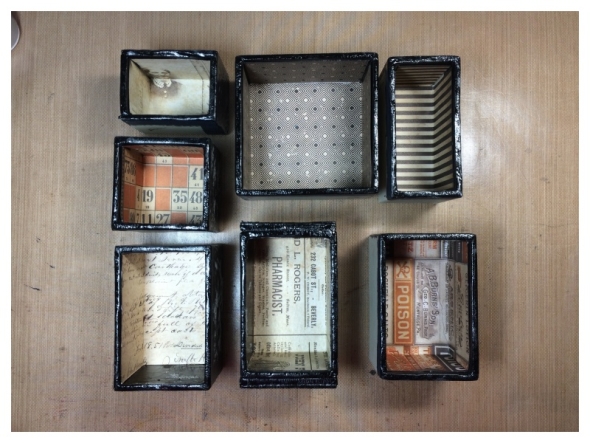
Measure the inside of the boxes, cut and score the paper and adhere with matte multi medium.
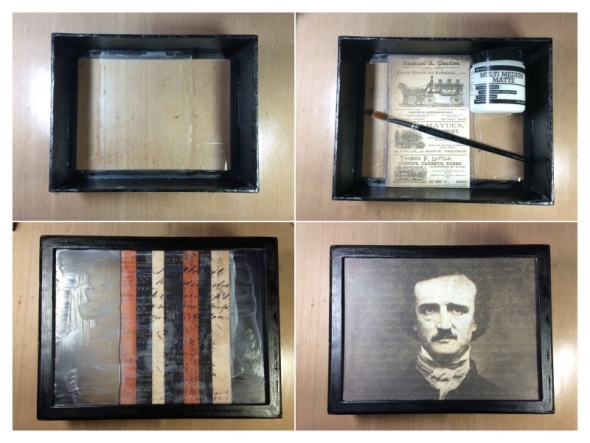
Glue the plastic sheet that comes with the configuration box to the inside of the frame using matte multi medium. Cut and glue a panel of paper for the space where the insert boxes won’t cover. I used the funeral advert from the regions beyond paper stash which fit perfectly with my theme. Turn the box over and cover the plastic with a panel of paper cut to fit inside the frame, again using matte multi medium.
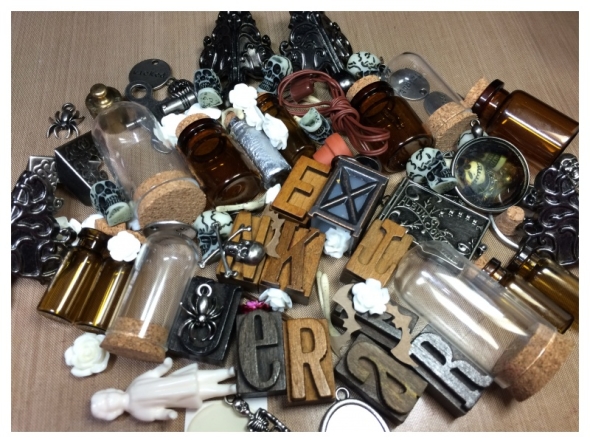
Gather together idea-ology ready to decorate your configuration box.
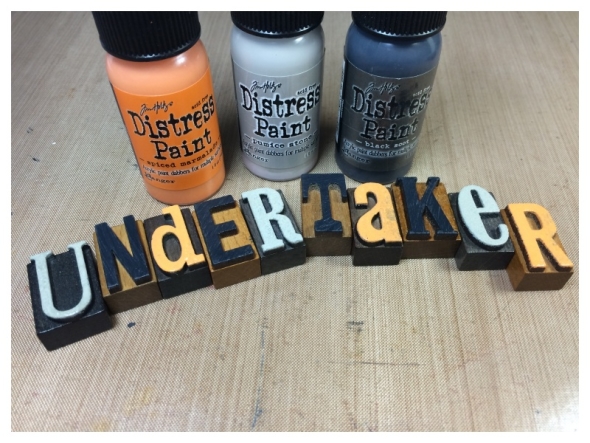
Paint idea-ology letterpress with distress paint and allow to dry. Sand lightly with a sanding grip to give an aged look.
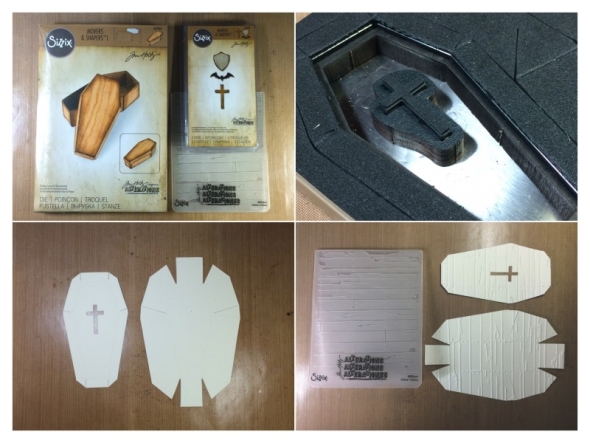
The new movers and shapers coffin box die really is TO DIE FOR, (pun intended again)! There is space to use the co-ordinating tiny bat, shield and cross dies! I cut the coffin box with the tiny cross from Ranger mixed media cardstock and embossed with the wood planks texture fades folder.
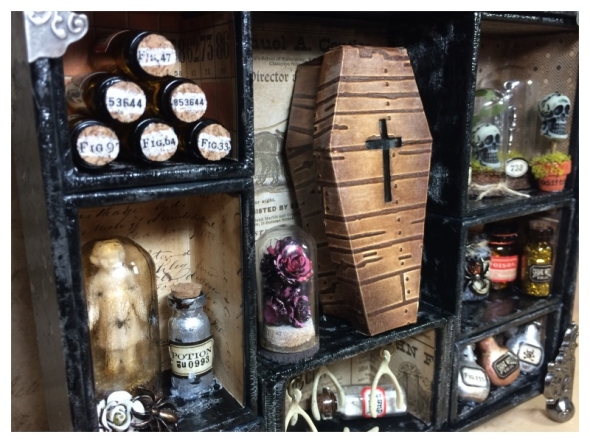
Before assembling, add vintage photo distress ink with a mini ink blending tool and ground espresso distress ink lightly over the top to highlight the embossed parts. Brush over a layer of matte multi medium to seal and give a slight sheen. Mount a small piece of plastic to the under side of the coffin box lid. I glued the lid of the coffin box to the base as I wanted it to stand up in my configuration box without the lid falling off.
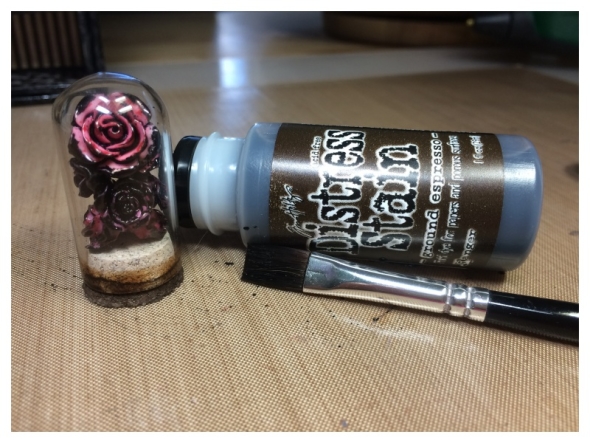
Take an idea-ology corked dome and cover the cork with picket fence distress stain. Once dry paint ground espresso distress stain to the lower portion of the cork. Cover idea-ology heirloom roses with alcohol inks and set aside to dry. Fill the dome with the roses and glue the cork on with glossy accents.
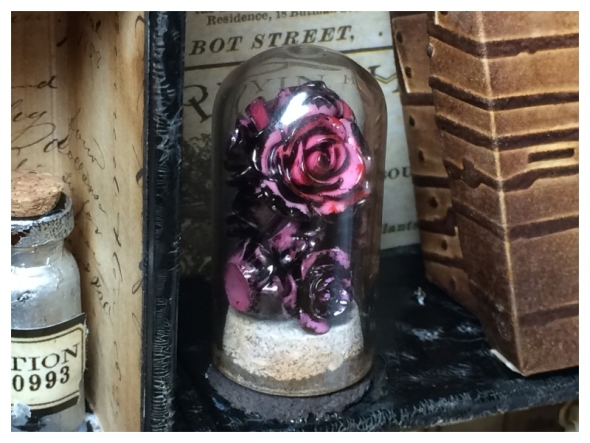
Adhere to the configuration box with a little hot glue.
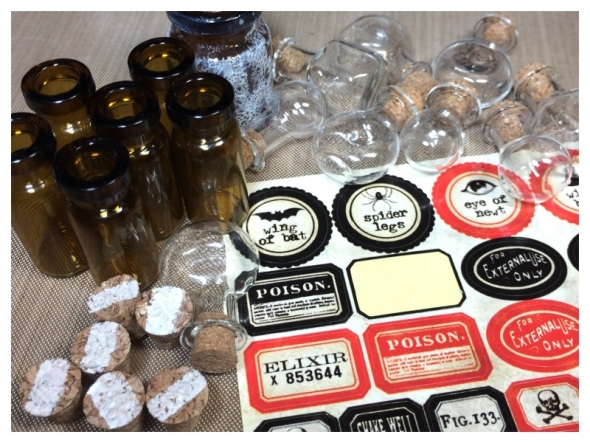
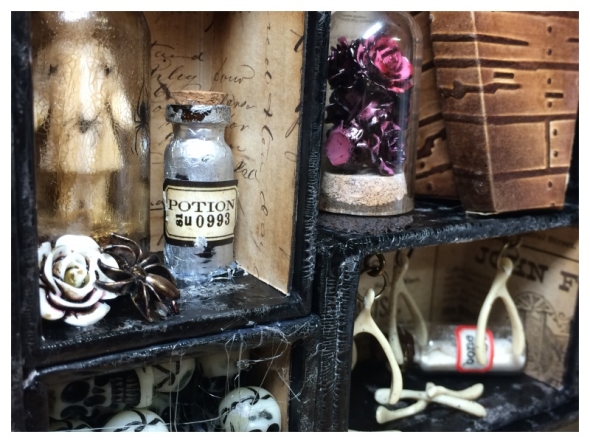
Alter idea-ology apothecary and tiny vials. I LOVE the sheet of labels that comes with the new seasonal idea-ology apothecary vials!
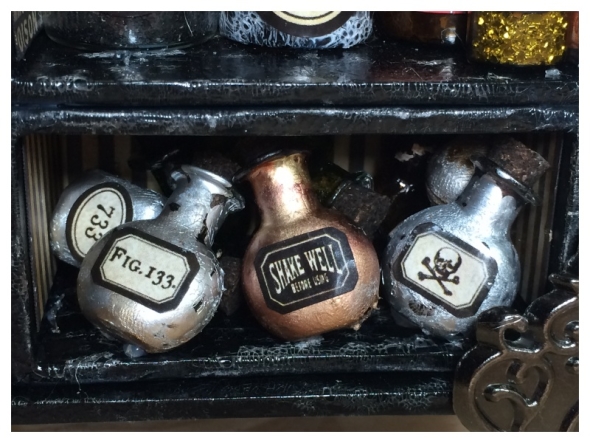
These are idea-ology tiny vials covered with matte multi medium to give the glass “tooth” and then covered in metallic mixatives alcohol inks! The corks are stained with ground espresso distress stain and labels from the idea-ology apothecary vials set.
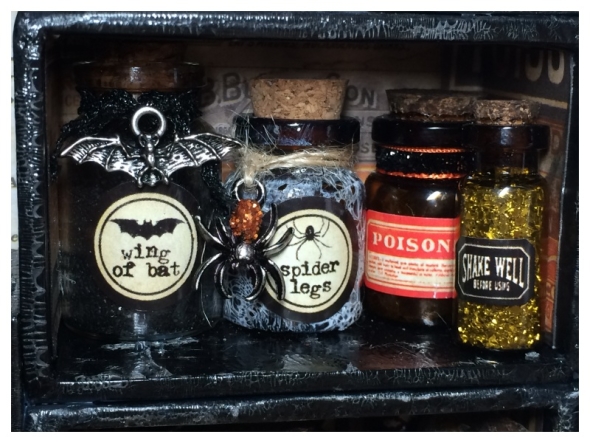
The wing of bat vial is filled with black soot distress glitter and a bat from the idea-ology adornments oddities set hung from the halloween trimmings. The spider legs bottle is covered with matte multi medium and clear rock candy distress crackle paint and once dry, picket fence distress paint brushed over the top and the excess wiped away. It gives an impression of spiders webs stuck to the outside of the vial. I covered a spider from the adornments oddities with glossy accents and rusty hinge distress glitter. All the bottles and labels are from the new idea-ology apothecary vial set.
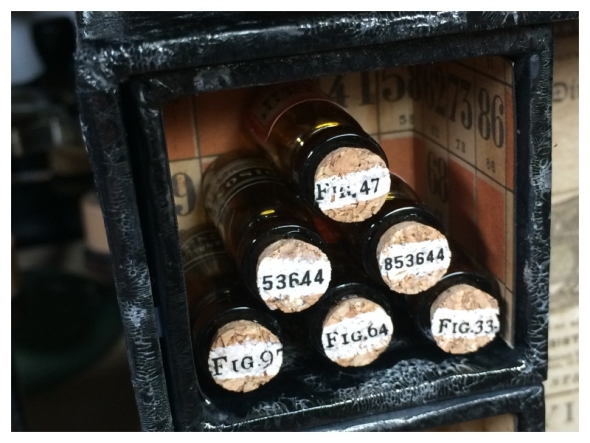
Using more idea-ology apothecary bottles I painted a line of picket fence distress paint to the corks and once dry, rubbed regions beyond remnant rubs over the top.The texture of the cork slightly inhibits the rubs, but I love the distressed and aged effect it gives.
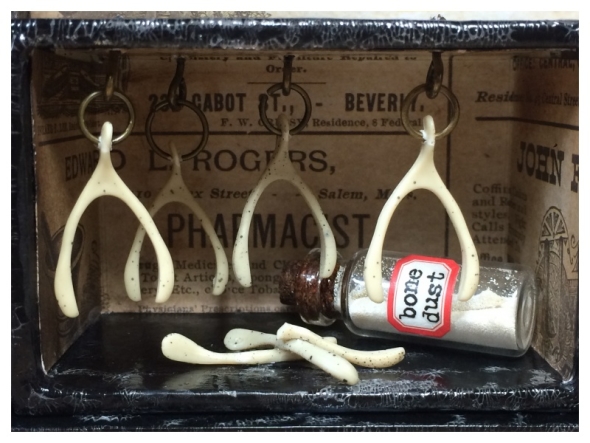
Screw idea-ology screw eyes into the under side of an insert box and hang wishbones from them. Use a pokey tool to gently push a hole through the wishbone. I filled an idea-ology corked vial with Ranger antiquities weathered white embossing powder and a cut up wishbone to look like bones. I rubbed “bone dust” from the regions beyond remnant rubs onto a label from the idea-ology vial labels. I cut up another wishbone and adhered it with glossy accents.
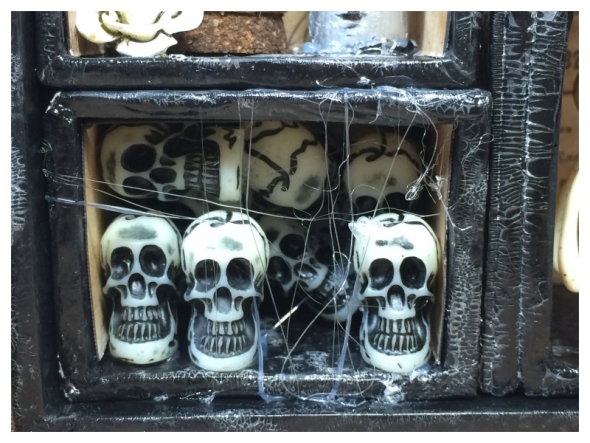
I used a whole pack of the idea-ology boneyard skulls. In fact the name of these, “boneyard,” gave me the idea for the wishbone garden and the skulls all stuffed into the smallest insert box. I left the hot glue trails to give a cobweb effect, (this was a happy accident that happened when I was hot gluing the skulls into the insert box).
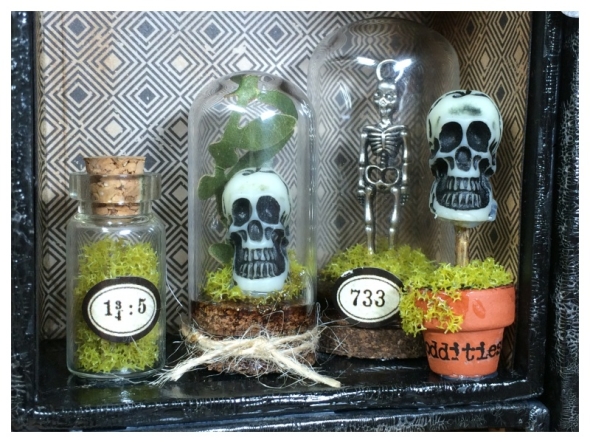
My favourite insert box was this tiny skull garden using idea-ology corked domes, corked bottles, adornments oddities and boneyard skulls. I sprayed a little twisted citron distress stain spray onto some moss and glued onto the dome corks with glossy accents. I decorated with labels from the apothecary vials set and rubbed remnant rubs onto a mini terracotta pot from my craft stash. The terracotta pot is filled with texture paste mixed with ground espresso distress reinker and the boneyard skull is hot glued to a cocktail stick that is set into the texture paste.
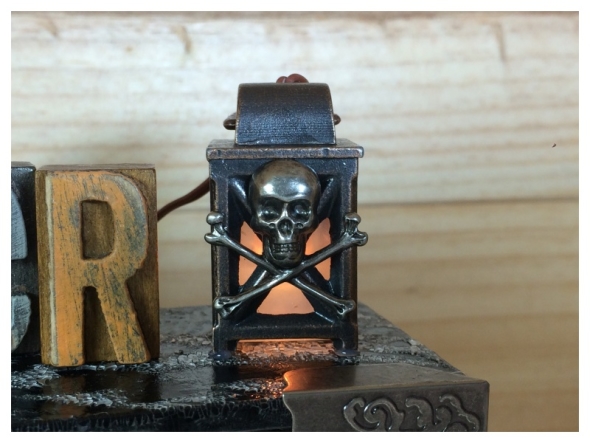
I attached an idea-ology adornments crossbone to a mini lantern with glossy accents.
Thanks for stopping by and a big thank you to Paula, Tim and Mario for inviting me to make samples. Check Tim’s blog daily to see the other Halloween Inspiration Series.
I’ll be back on Monday to share my project for Ranger Ink featuring more of the seasonal goodies from Tim Holtz.
Have a great weekend.


Wow! I’ve been looking for some inspiration for my configurations Book Style Shadow box. This is just stunning! I love Halloween and I love this project! Thank you for sharing 🙂
Big Hugs!!
Reeah.
I love it – I love it – I love it!!!! Thanks for the tutorial – I have a lot of the stuff you used so I might be able to make one too!!!! You really have me excited!!
Sandy xx
OMG … another fantastic project… your creativity blows me away … sooooo much inspiration. So love ALL the little details… thanks for sharing I must try some of these details! 🙂
I just got my coffin box die – you’re right it is to die for. I love your configurations box. It is an inspired design. Thank you for sharing.
LOL – the bones collection is an absolut! Loooove that 🙂
WOW. This is great. I absolutely love Halloween and this is a wonderful piece. Thanks for sharing it.
Amazing work! Wow. This looks stunning, well done!
I am loving what you are doing for this season!
Halloween is my favorite time of year, and I am so inspired by your work.
I have got an itch to make something similar for myself. Right now.
Thank you!
And well deserved congrats on being asked to design for Tim.
working on a configuration box for my daughter. gave me lots of inspiration. great ideas for the embellishments in the cubbies. thanks as always for sharing.
Sweet Creativity! I love the garden idea (dying the moss w/ Cracked Pistachio Distress Ink looks super realistic). I never would have thought about hanging the wishbones like that. I just got the coffin die as well and love being able to cut a design in the lid. I love the spider leg bottle with the Clear Distress Crackle paint and the Picket Fence Distress paint. Thanks for sharing your ideas.
Spooky! TFS your awesome creativity Zoe!
SO flippin’ COOL!!! I am in awe of how you got all that ghoulish goodness in there but it doesn’t look overdone or cluttered. Super fab.
oh my soul!!! the detail in this is amazing!!! i have always wondered how to put a hole in my wish bones!!! now i know what to try!!
beautiful project!
This is amazing, I love all the little bottles especially the one with the roses.
Awesome project. Love it.
Magnificent! So many brilliantly spooky ideas… I love the vials all lying on their sides in a pyramid of potions, and the skull lantern and all the fabulous corked domes and hanging wishbones – fantastic to see you over at Tim’s!
Alison xx
Fabulous!!! Absolutely mesmerizing… all of the wonderful ideas and designs. Really just fabulous.
LoVe, LUV, LOVE the Halloween Inspiration….ABOOTACULAR JOB!!!! SWEEEEEEEEEEEET!
This is amazing! As a devoted Halloweenie, I am truly inspired by this configuration! And what a good idea to just use the boxes without the base–even more configurations are possible that way!
I love seeing all of the new ideas shown here. I am wondering what was done to the dome glass that is over the little Frozen Charlotte doll. I do love the effect and want to try it.
Thanks!
So, so SO COOL! I love every single creep detail! Fantastic!!
The details are stunning! Love all the vials and domes! Can’t wait to see your next creation!
This is ridiculously cool. All these Halloween ideas. I gotta get started. Thanks for being so amazing
Oh, this is SO scary and super creative! love the hanging wishbones – bone powder, all the bottles – the spiders on the girl – thanks for the spooky inspiration!! Julia xx
Zoe i’m speechless! Your work is so rich of details… very very beautiful! the vials are absolutely incredible! great piece! BArbarayaya
Awesome project! Thank you so much for sharing all your techniques!
So cool!!! LOVE the coffin in the center, and love all the altered vials!!!
I am looking at this for the second time and I still love it and it still excites me — you have my blood boiling!
Sandy xx
i just came across this through craft gossip, I think it looks awesome ! One of the best Halloween decorations I’ve seen.