Hello friends and Happy 2022. I took some time away over Christmas to relax with my guy who took some much needed vacay days. We watched some good TV, ate like kings, built a 1000 piece jigsaw puzzle, completed some home projects and celebrated with friends over zoom. I enjoyed taking time out to rest and now that the first crazy busy week back to reality is done, I’m ready and excited to have some making time this weekend. I hope you’re taking some making time for yourself and what better day to make than on Tim Holtz’s Birthday!
HAPPY BIRTHDAY TIM!
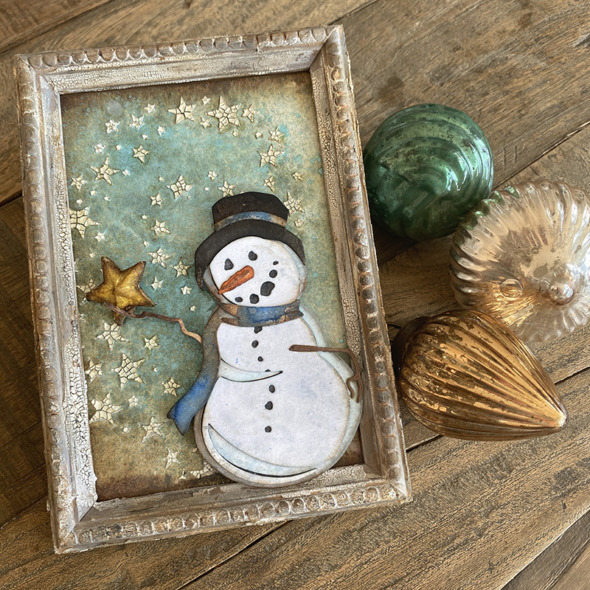
It feels like a long time ago in “maker years” but when I first saw the Tim Holtz Sizzix Christmas dies, I LOVED Mr Frost. He just looks like he’s causing trouble. Like maybe he wouldn’t melt when he was supposed to! Remind you of anyone? LOL
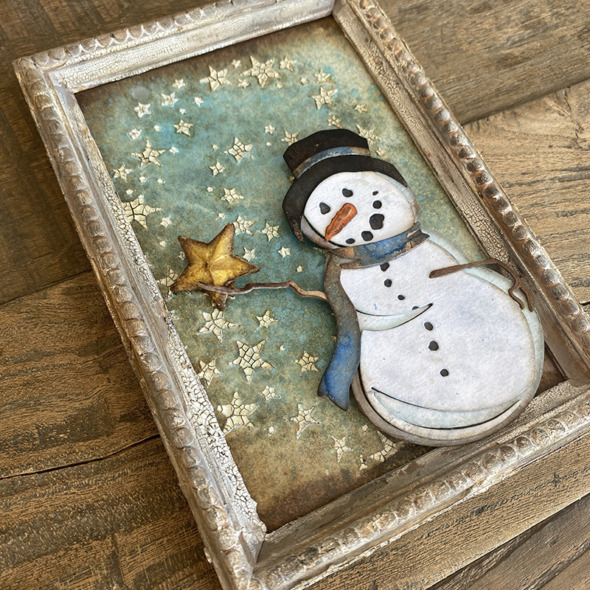
I made this framed panel for the Tim Holtz Sizzix Christmas LIVE launch. You can see the replay and all the makes over on Tim’s Blog. Here’s a few of the details for my make…
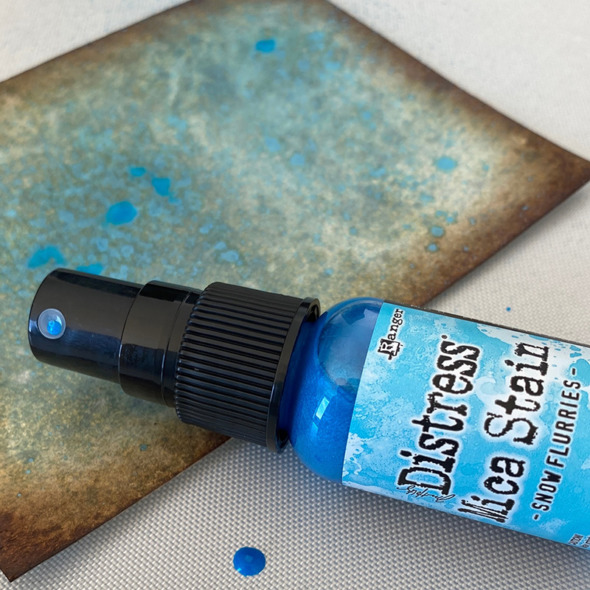
I created a background by spraying antique linen distress spray, edging with walnut stain distress ink and adding drops of snow flurries mica spray.
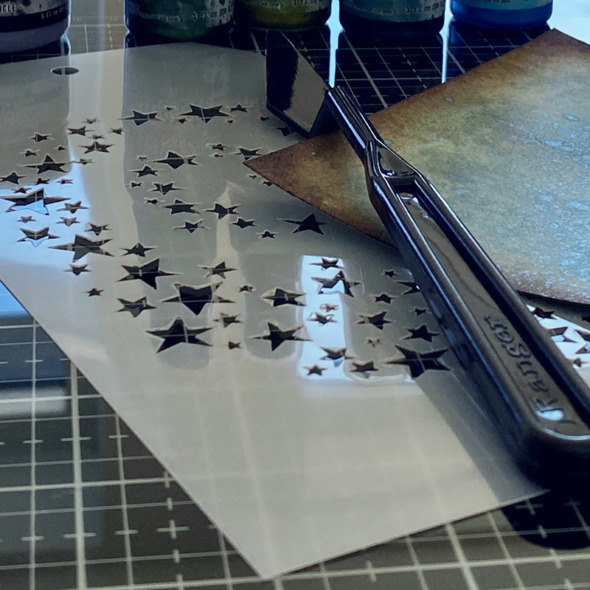
Using a palette knife, spread distress crackle texture paste through a stencil, I used the hocus pocus stencil, one of my faves.
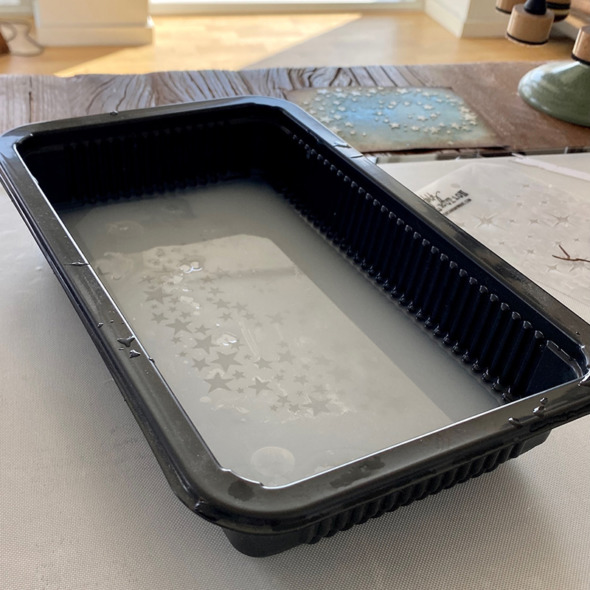
Soak your stencil right away, I use a “lasagna pan” (thanks Mario). Followers of Tim and Mario’s Saturday LIVES will know exactly what I mean! 😉
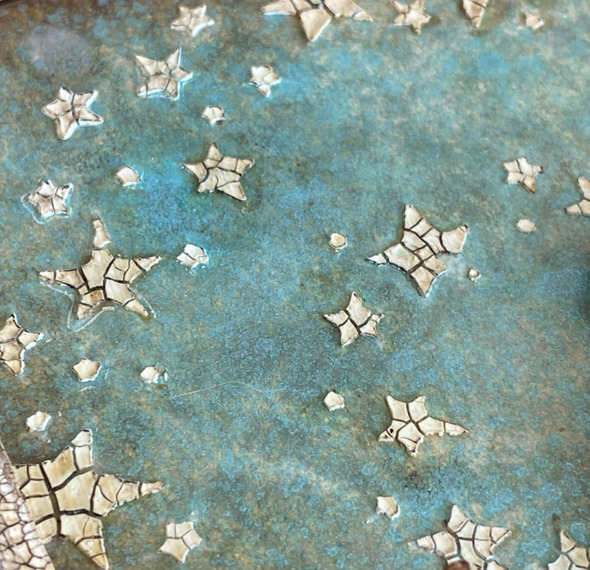
Once dry, place the stencil back over stars and brush a layer of vintage distress collage medium over the top and remove stencil and soak the stencil again. Once the background is dry, place the stencil over once more and rub with distress crayon and blend with your finger. You can do the second and third steps without the stencil but it maybe helpful for beginners and I do this because I find it keeps my background cleaner.
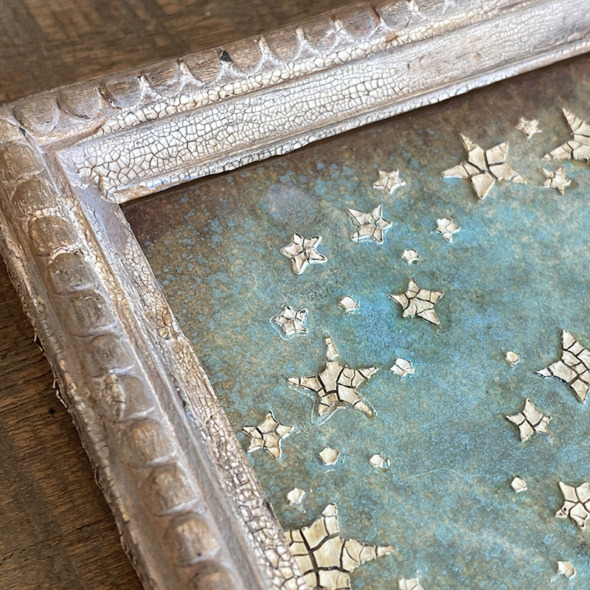
I altered an idea-ology framed panel. Cover the frame with a layer of white gesso. Once dry, dry brush with iced spruce and vintage photo distress paints. Next add distress crackle texture paste and set aside to air dry and crack. Finally rub distress crayon into the cracks and blend with your finger.
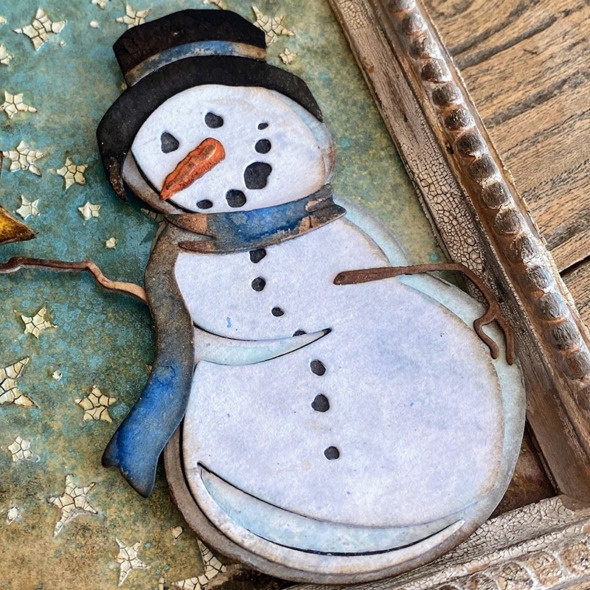
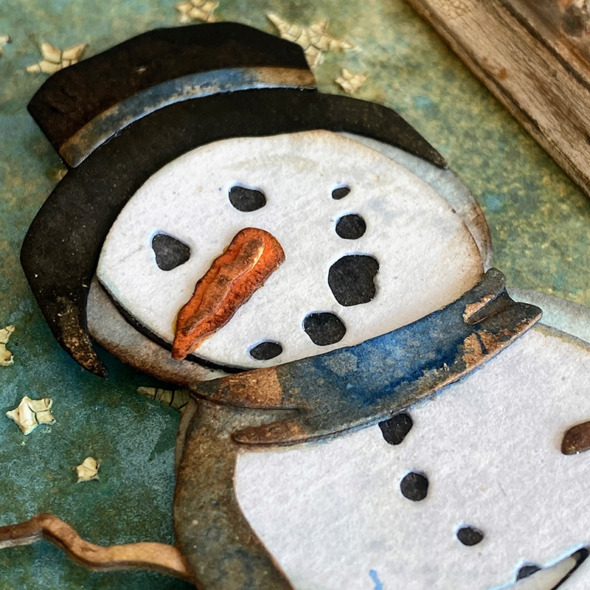
Mr Frost is a mutli-layer die that makes assembly really simple. The black buttons, mouth and nose are simply a layer underneath the top layer which I sprayed with black soot distress spray. It’s much easier than gluing on all those tiny pieces.
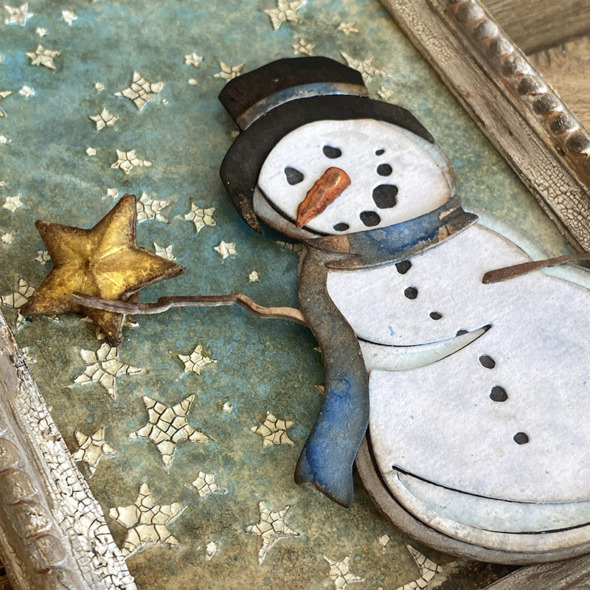
I added Mr Frost with adhesive foam to give some additional dimension and to lift his arm to hold the star…
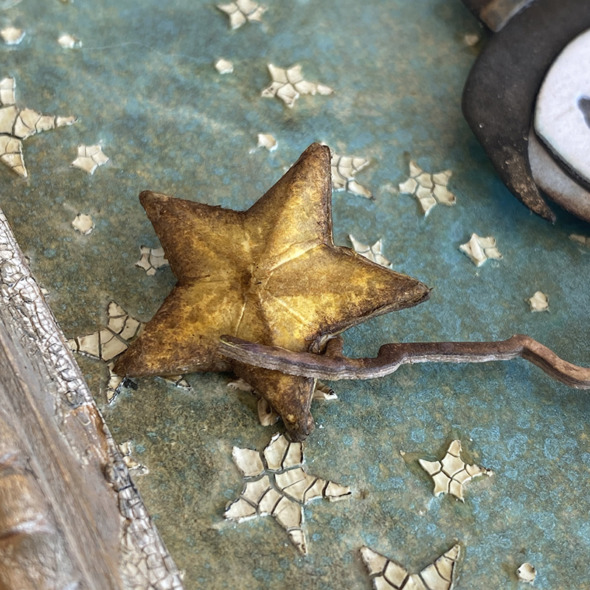
I added a star from the Vault Series Holiday 2021 die set which I glued into Mr Frost’s twig hand! I did try a tiny light inside the star but it didn’t really show up, BUT, you could make one from vellum and add a tiny light or a cluster of tiny lights.
Thanks for stopping by. It’s World Snowman Day on January 18. I hope you’ll join me for a day of fun making and I’ll have some giveaways here on my blog and on instagram.
I wish you a very healthy and happy 2022 and don’t let anyone melt your snowman!
Zoe
…
affiliate links used at no cost to you


Adorable
Great job Zoe, love ur colour combination and He just comes together. Can’t wait to give it a go
Love this project Zoe, thanks for sharing the process steps, I love this little snowman too ☃️
Wow Zoe!!! Thanks for all the details and insperation! Another wonderful project!!
Oh my gosh, he is so cute! I definitely have Mr. Frosty in my list of try this! I do remember the lasagna pan episode! I was just sure that every grocery store in America probably sold out the next day!!! Thank you so much for all of the inspiration!
So much creative talent! Awesome Zoe. Thanks for sharing
This is adorable. Thank you so much for the step-by-step tutorial. These come in handy whenever I find the time to play.
Gorgeous and adorable make Zoe.
Live here is going back to “normal” comming Monday, than vacation time is over, the same as (like the both of you) eating like a king LOL.
Thank you so much for sharing your inspiration and how-to, stay safe and have a wonderful weekend.
Super cute!!! I love the crackled stars!!
A nice wintery scene that goes beyond the holidays. You are indeed very creative. Thank you for sharing these details. I used Frosty in other ways, but love this idea and will(next year) figure out how to put a light in it. This was my first “year ” of crafting and I feel like I was always behind. Thank goodness for you and Tim Holtz and his specials! I look forward to this year very much.
This is too stinkin’ cute, Zoe – I love it, and I love that you so generously share your steps, tips, and ideas! Thanks so much, and Happy New Year!
He is too cute, love your background with him too!
This is really lovely love all of it
LOVE the background ~ and your adorable Mr. Smowman.
You are such an inspiration. Thanks for a great tutorial. Love the idea of spraying the black soot instead of glueing.
Absolutely lovely.
I love your work and writings……your celebration of the holidays was exactly what it was meant to be….hugs
Zoe, I just love, love, this snowman! Your work has such great personality! Thank you for sharing. It makes me feel a great need to try my version of this for someone who need to get into a little trouble. Thank you again!! Love to you and best wishes this new year!
I love Mr Frost! He was a new aquisition for me in October & earned his living from day 1 on my 2021 Christmas cards. All the card recipients loved him too!! So nice to see another idea for using him & I love the background especially! TFS
Love this, Zoe! Your work with crackle medium is the BEST! Happy 2022! So good to hear you took some well deserved R and R.