Hello friends. Happy last day of August. Tomorrow is the first day of my favourite quarter of the year. I’m so excited for pumpkins, chilly mornings, candles, hot chocolate, more pumpkins and lots of seasonal making. If you’ve been watching the weekly LIVES over on Tim Holtz YouTube channel, I’m sure you’re either already way down in Halloween town or planning your visit.
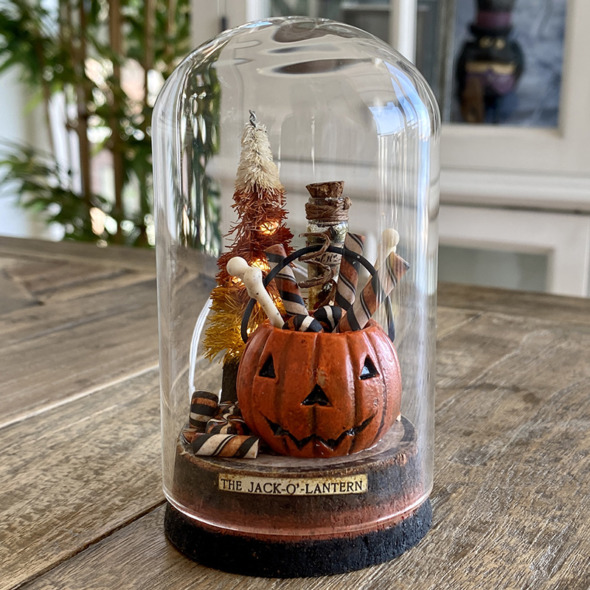
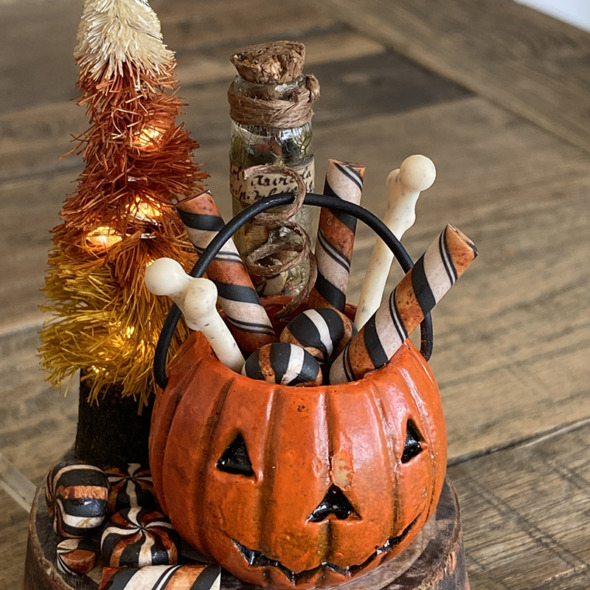
I made this display dome for the Tim Holtz idea-ology Halloween LIVE. It was such a fun party and the products are incredible! This was my favourite ever Halloween idea-ology release and this jack-o-lantern candy bucket is hands down my favourite piece. The colour, the face, the detail, it’s heavy in your hand, you can remove the handle or have it up or down and it’s thick wire so it just stays in place. I LOVE him and I chose the display dome because I wanted to make it all about him. Scroll on for more details…
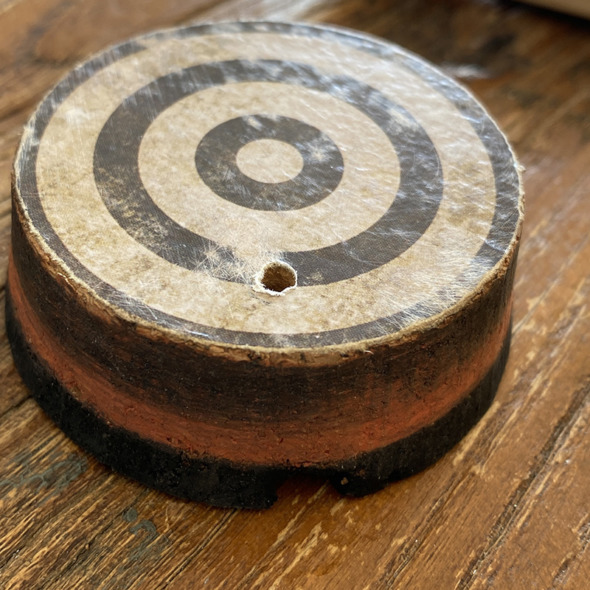
Take a cork base from the idea-ology display dome and paint with black soot and crackling campfire distress paints. I added a piece from the idea-ology halloween baseboards pack, it was a little thicker than I wanted so peeled away a couple of layers of cardboard and stuck down with distress collage medium. Trim and sand the edges and top. Make a hole in the base big enough to thread tiny lights through. I use a dremel micro with the drill attachment.
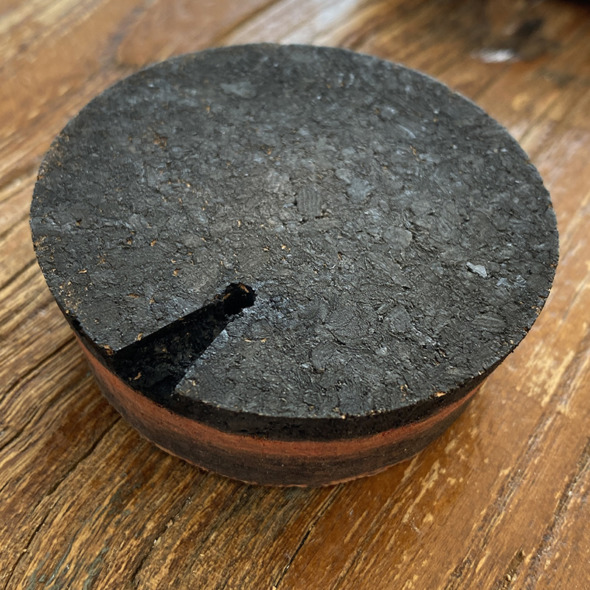
Using the Tim Holtz Tonic craft knife I cut a wedge from the hole to the edge for the tiny lights wire so the dome will stand flat. Add a little hot glue to hold them in place, being careful not to get hot glue on the bulbs as it can short out your lights.
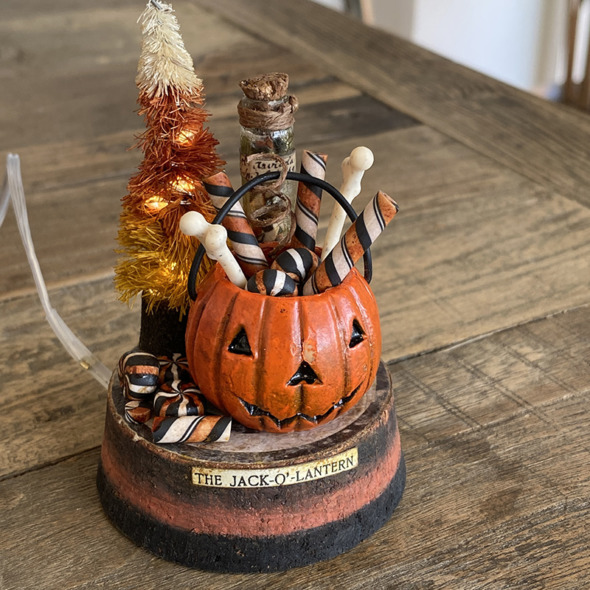
I thread the tiny lights up through the candy corn tree and cut the excess off. When I add tiny lights I always have them switched on as it helps to see where you’re putting them. The candy corn tree is an awesome idea of Tim’s from way back. You can see the step out on Tim’s blog. I used fossilized amber and rusty hinge distress sprays on mine and I skipped the glitter, because NO! My tree looks bedraggled and wonky, which is totally the look I was going for! Honest! LOL
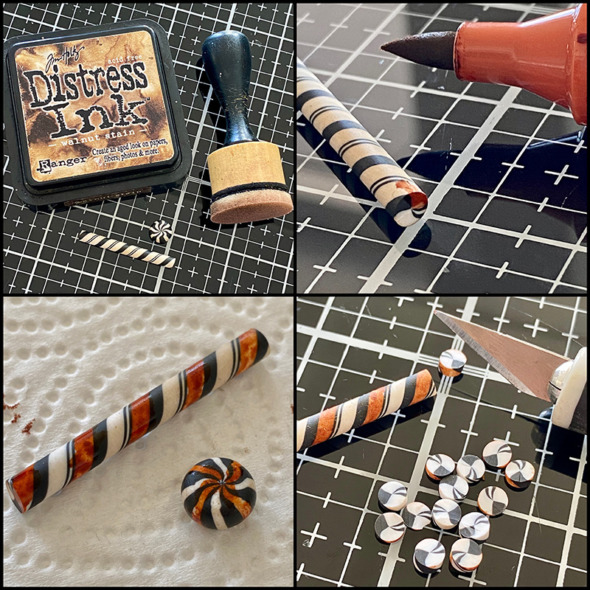
The new idea-ology halloween confections pieces are so cool! I blended in some walnut stain distress ink and used a faber castell pitt pen (sanguine) to colour. I had planned to use alcohol inks with a blending pen but I couldn’t find my pen so I grabbed this and it worked. The ink is quite wet so I rolled it in kitchen paper to blot the excess and then took one of the confections sticks and cut it with my craft knife. It’s very soft and easy to cut. Yes I cut directly onto my glass media mat. Take a deep breath, it’s ok. 😉
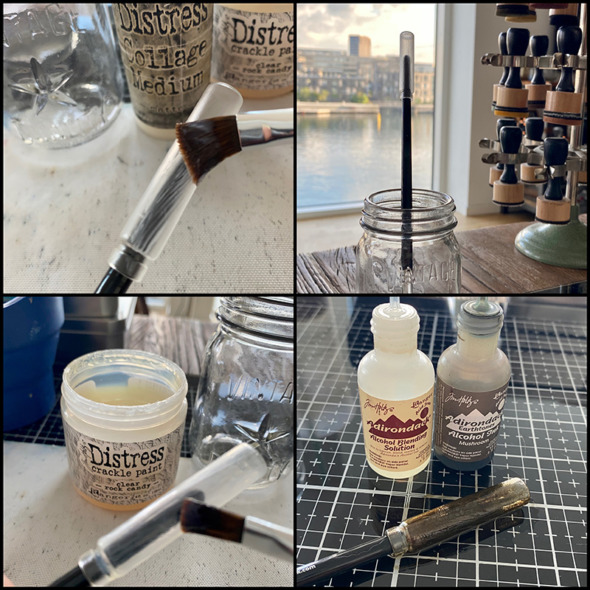
To make the crackle glass vial for your confections slices, take vial from the idea-ology corked vials pack. Put the vial on the end of a paintbrush to hold in place and using another paintbrush cover with a light layer of distress collage medium. I stand mine in a jar to air dry. Once dry, repeat with a layer of distress clear rock candy crackle paint and set aside to dry again. Finally, add a few drops of mushroom alcohol ink and blending solution to your glass media mat to make a wash and roll the vial in it. You only want a light covering so add more blending solution as needed. Please note that alcohol ink will stain the white non stick mat so use the glass part, unless you don’t care and then go wild.
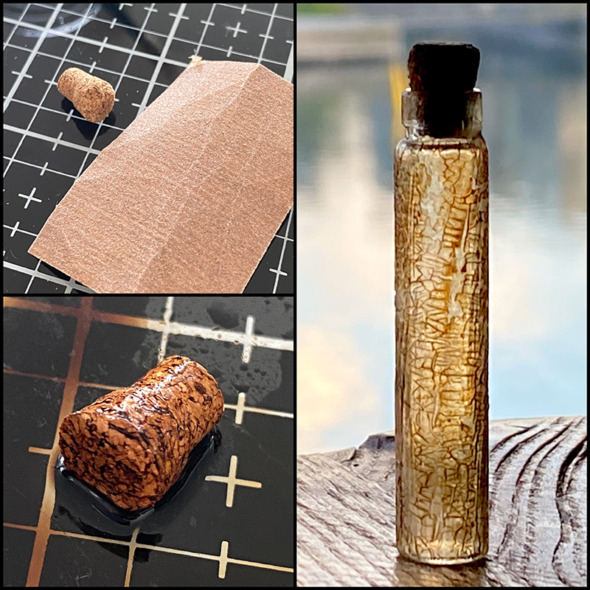
Sand the cork and pull bits off to make it look weathered. Add walnut stain distress ink and water to your glass media mat and roll the cork in it and dry.
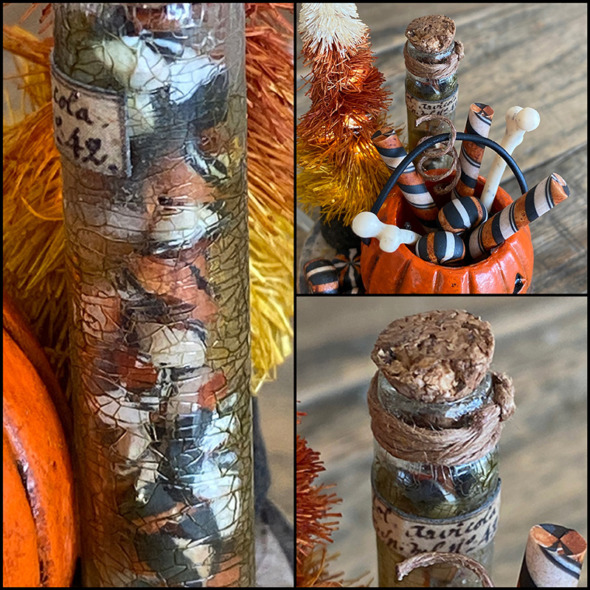
Add the confections slices to a tall glass vial and add twine and a label from the idea-ology halloween snippets pack. Glue onto the display dome base with distress collage medium.
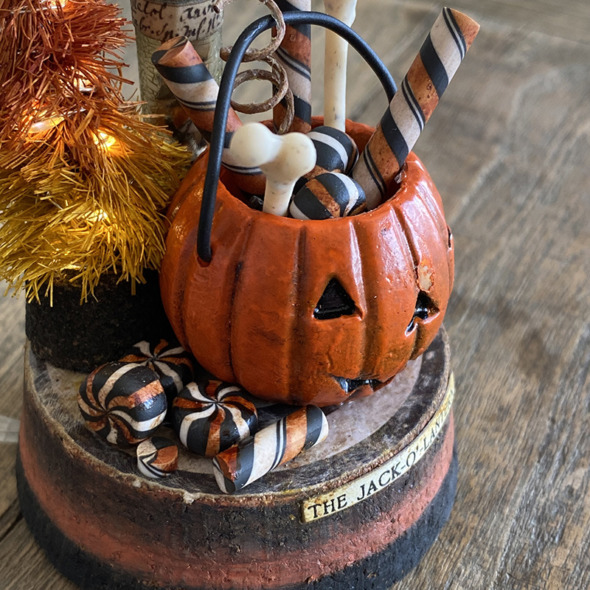
Add a few of the candy pieces on the base of the display dome next to the jack-o-lantern candy bucket.
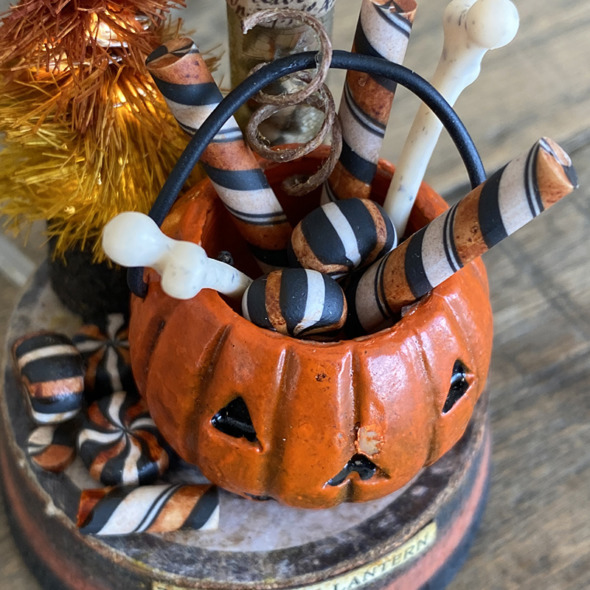
Add idea-ology boneyard bones and confections pieces to the jack-o-lantern candy bucket and glue into place with distress collage medium.
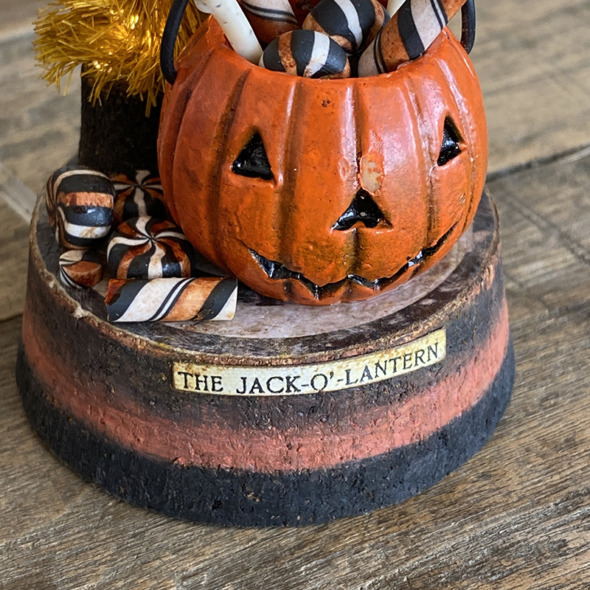
This sticker from the idea-ology curiosities sticker book was perfect.
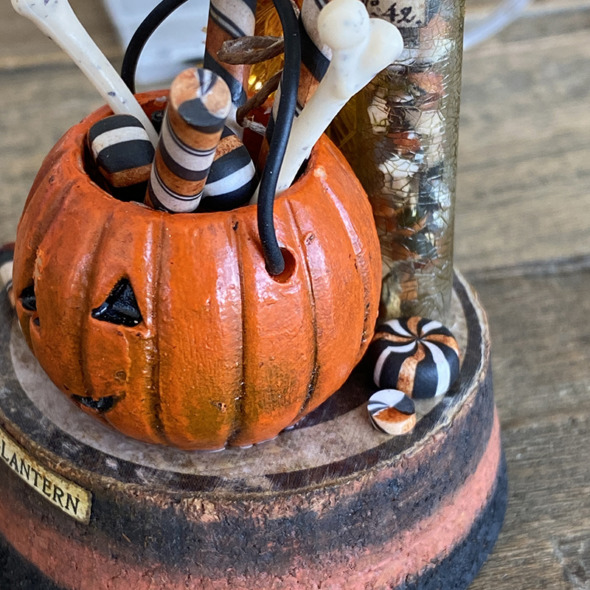
I added a couple more confections pieces to the other side of the jack-o-lantern candy bucket but wanted the baseboard piece to still show.
I want to thank Tim, Mario and Paula for all of their encouragement and support. I really found a lot of joy making for this launch and much of it was thanks to them. You will never have a better cheer squad and I am very thankful for them and for all of you who make this community so jack-o-lantern candy bucket filled awesome!
Thanks for stopping by
Zoe
…
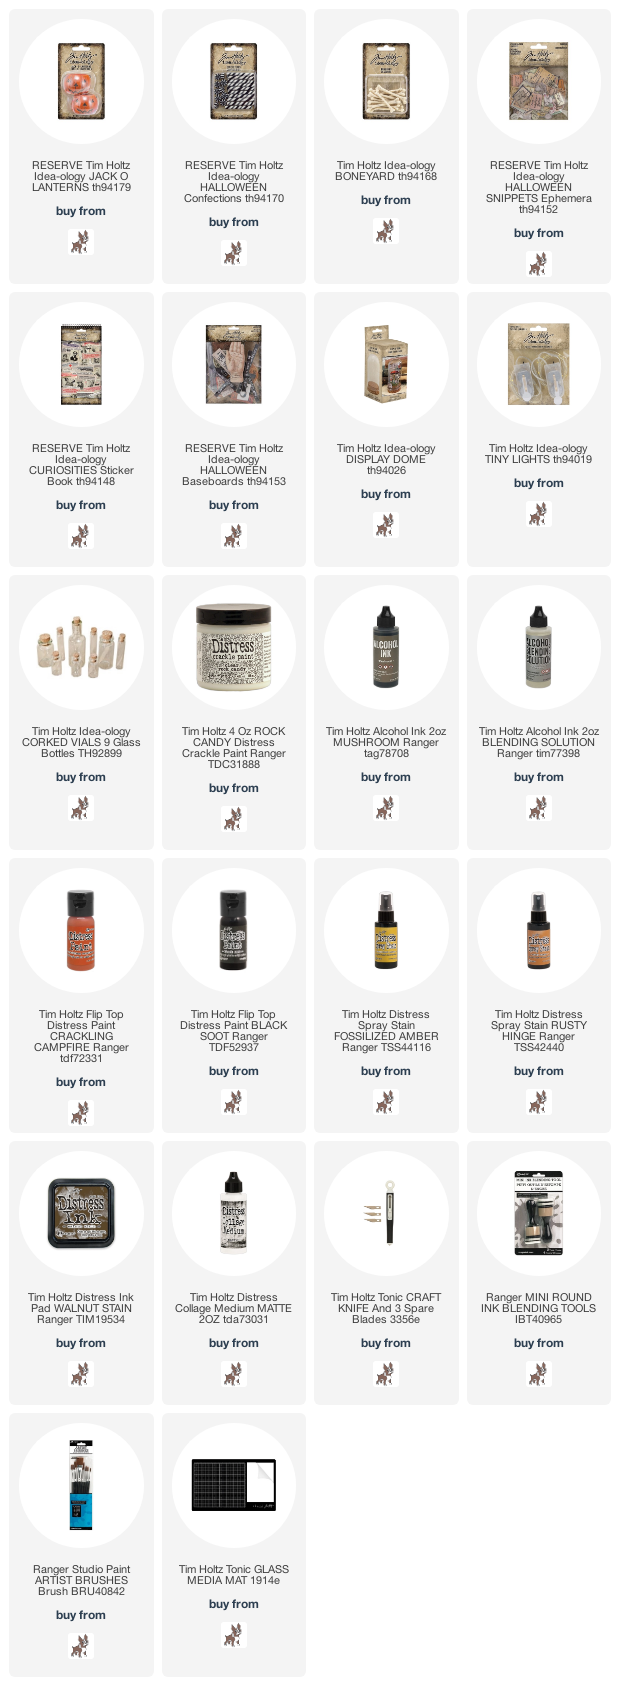
affiliate links used at no cost to you


I just love it!
Love, it IS the best release ever….so much to want, such good, good stuff!!! These Jack-O-Lanterns are just the cutest…fun project….
So cute! Thank you fir sharing And inspiring!!!!
Great make Zoe and I agree with you that this jack-o’-lantern bucket is the absolute cutest!! Along with the cauldron, the candle sticks, the candle stick holders, the tombstones, and all the other products!! Best release ever!! 🎃
just spectacular …i love it !!!
Hmmmm, I love this!! Love the orange on the candy! I never would have thought of that .
Thanks for posting your pictures…gave me sooo many ideas!
Awesome awesome awesome!!!!!
This is gorgeous! I love the way you painted the candies! Love the very clear instructions! Thank you so much for everything that you do! You are amazing!
ZOE THIS IS A WONDERFUL MAKE!!! Thanks for inspiring so many of us, you are so amazing!
I LOVE THIS SO MUCH!!
You say Pumpkin 🎃…I say Peaches 🍑
Same Same Same MFS 💚
What a delightful candy filled pumpkin post! I am in awe of your designs and how instructive your step outs are! Bravo, another winner!
This was the best Halloween Ideaology release and this pumpkin make is my absolute favorite! I’m definitely going to try to make one! The crackle test tube is amazing with the little candies in it! Wonderful make my friend! Happy Halloween!
Zoe, this is the cutest thing! Thanks for the tutorial,too!
Absolutely love this 😀😍
out of all the makes this one is the one that caught my eye first. thanks for shating the steps
I’m sure you were just smiling away as you made this, Zoe! What great Halloween fun! I love everything, but oh, my! the view out your window is killer! I would never leave my seat!
One of my favorite makes! Thanks for such an awesome tutorial. Much appreciated!
Thank you for sharing this amazing project with such a great, clear tutorial! Love your makes 💕
[…] day, another dome! Thank you so much for your kind comments here and on social media about the Jack-O-Lantern dome. I’m so happy that you’re as excited as I am about the new Tim Holtz idea-ology […]
C’est vraiment magnifique, bravo !!!!
Astocheg on instagram
A little late but I had to watch the last Halloween Live later because it was the day after my lung surgery. Sadly still in hospital.
Completely in love with your stunning piece, I love Halloween stuff but in The Netherlands it’s hardly celebrated.
Thank you very much as always for your great
how-to-description and inspiration.
Stay safe and have a wonderful day.
What a treat to find your Jack O’Lantern dome project!!!! Such an ingenious original take on my favorite holiday! Your tutorial was clear and detailed and a joy to watch. Thank you for inspiring me with your awesome talent!
Always so incredible! Thank you so much for taking the time to create this detailed tutorial. Love, love, love this make!
[…] I added some of the idea-ology tiny vials which I crackled. I have a how to on a previous post, see here (I skipped the alcohol ink step). I added idea-ology ephemera and remnant rubs to the bottles and […]